To avoid these ads, REGISTER NOW!

Project Flintstone - '87 Olds Cutlass Rebuild

jmdirk

Well-known member
Joined
May 4, 2015
Messages
711
Been mostly lurking here for quite awhile, posting just occasionally. finally decided to go ahead and post a thread on a major project I've been working on.

I've been working on cars and various automotive projects for years. I've had a '93 Ford Explorer for years now that I've built into a fairly competent off roader. But about 2 years ago, I developed the desire for a bit of a different project. Always had a fondness for classic cars. American muscle, Euro, even Japanese. So I set started keeping an eye out for various project cars on FB Marketplace, Kijiji etc.

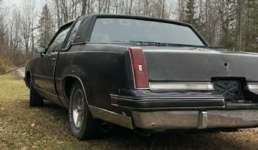
I came across an ad of someone about a hour from here looking to sell a 1987 Olds Cutlass and from the looks of the photos, it appeared to be in pretty good shape. And pretty reasonably priced too. Now for a lot of people, these G-body cars aren't necessarily considered muscle cars with their 170 hp 305s etc. But they are pretty much the last of the v8 RWD cars. And for me, the first real car I had back in university was a 1986 Cutlass - so there's quite a bit of nostalgia for me with that particular car. So I hooked up the trailer and headed over to take a lot. Given the distance, I'd rather drag the trailer there and back empty rather than have to make two trips. And if the car was in as good of shape as it looked in the picture, it was going to be well worth the price.

Got on site to check out the car. Guy selling it was pretty decent, if not a bit strange. He had originally bought the car to fix up for his daughter but had never really got around to it. And apparently his daughter was not all that interested in that particular car anyway. So the car had sat in indoor storage for a number of years, but apparently "fired right up" when they went to load it on a truck to bring it to his place etc. So I checked out the car, and it wasn't without its faults - or red flags:
- No ownership - no a huge deal around here. It's a bit of extra paperwork but not too bad overall.
- No keys - lost apparently. So ignition cylinder was busted out and the trunk lock had been popped as well.
- No battery and the battery cables had been cut. I didn't particularly care about the 305 so wasn't overly concerned whether or not it ran
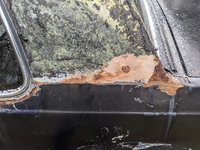
- Some rust showing at the rear drivers fender (and some attempted repair)plus some staining just below the rear opera window. Probably some water ingress through the landau top

Someone had at some point taken steps to mod it a bit. Headers and dual exhaust. a "POLAND" banner across the back, some nice blue Moroso spark plug wires. So somebody enjoyed the car, but didn't seem like anything major had been done to it. Crawled under it best I could to get a look at the floor boards and rear frame rails (which are problematic on these cars). Frame rails looked fine and the floors appeared solid

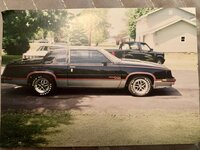
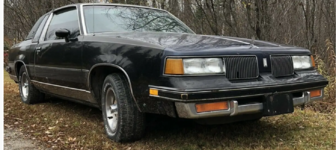
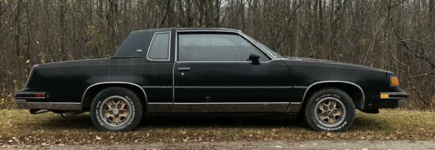
The below pictures are from the original ad. you can see some of the issues I'm talking about right away. But the price was good. $1000 - Canadian. So despite some of the red flags, I paid the gentleman, loaded it up on the trailer and was on my way.
1674833860885.png


1674833883864.png

1674833923673.png
 
To avoid these ads, REGISTER NOW!

Blt2Lst

Well-known member
Joined
Jul 9, 2015
Messages
726
Location
SoCali
I'm a big fan of G bodies, had a 82 monte carlo and loved that car even with the anemic 3.8, lots of modding potential.
One thing about that car, it handled really well in the snow, I think they had really good weight distribution which made it fun to drive in the winter months when I still lived in NJ.
Good luck with your project.
 

zak77

Well-known member
Joined
Sep 18, 2014
Messages
1,356
Location
Monson, MA
Wow, havent seen one of those in decades!! My brother had an '81 Cutlass Supreme for his first car back in the early 90's so i spent a fair amount of time watching him and my dad, mostly my dad, wrench on that thing plus spent a fair amount of time in it commuting to school. My brother beat the living **** out of that car till he spun a bearing and then it got parked. Since i was interested in learning about cars i started tearing it apart so i could rebuild the engine. I removed the engine piece by piece, hey it's all you can do without a engine crane, and proceeded to bring it in the basement for it rebuild. It was the 3.8L so nothing too exciting but i ended up getting a 305 to put in it. Got it installed and fired up but all the small things to get it going took a back seat and it eventually went to the junk yard. I learned a lot about vehicles with that POS!!
 
OP
J

jmdirk

Well-known member
Joined
May 4, 2015
Messages
711
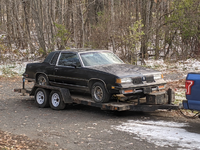
So I managed to get the car home with no real issues, but of course, wanted to engage in some automotive archaeology to figure out exactly what I just just got myself into. The below is the car on the trailer as I got home

1674834366588.png

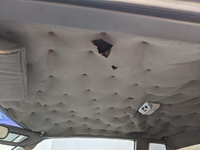
The interior had this sweet 'custom' headliner look.

1674834414171.png

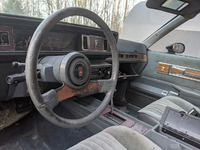
Interior was rough, stained, faded.

1674838371754.png

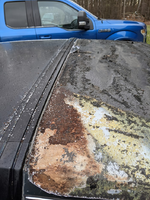
Stripped off the landau top...not a big fan of those anyway. I had suspected some rust issues there and the car did not disappoint
1674838653938.png

1674838675007.png

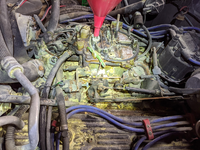
And there's the engine bay. Initial plans were to just kind of get it running, fix up some of it and enjoy it make it a driver/longer term project. The whole top end was covered in yellow fire extinguisher residue - not really a good sign. But nothing appeared melted, burned or stuck.

1674838762337.png

So to see if it would run, first thing was tthrow a battery in it to see if it would turn over. So doing that, and using a flat blade screwdriver - because no key and busted out ignition, I give it a crank to see if it'll even turn over. Good news, starter spins, but that's it. All it does is free wheel. Ok, maybe solenoid is no good. Crawl under there, pull the starter, which is not easy with the headers. Seems ok, solenoid engages, but what wrong is broken teeth on the flexplate. Even the inspection cover on the bell housing is missing and there's a few areas on the flex plate missing teeth. Not sure if someone offroaded it and bounced it off some rocks or what? So, reinstall the starter, turn the crank by hand to see if I can get it the starter to engage. that does work, but it turn over pretty slowly. Little bit more poking around and I see that the battery cable - which had already been hacked up, had melted and was shorting out on the header. So I replaced the battery cable. Gave it another go and finally it turned over with some enthusiasm. Some fresh fuel in the carb bowls and it actually did fire right up. Just enough to back it down off the trailer and get it into the garage where I could really take a close look at things.
That's where the real fun began...
 
OP
J

jmdirk

Well-known member
Joined
May 4, 2015
Messages
711
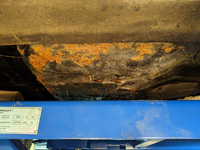
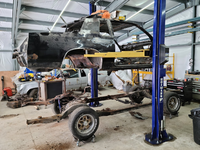
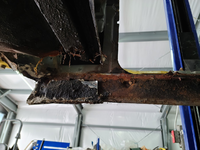
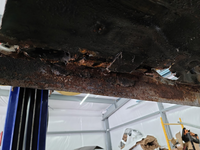
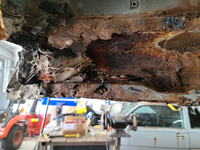
By getting it into the garage, I was able to get it up on my scissor lift to have a bit better look at the underbody. What I saw was not encouraging....

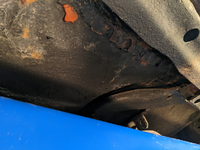
Doesn't look terrible, but that chipping and orange spot was concerning

1674848638565.png

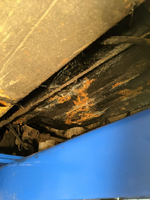
This looked worse...

1674848690933.png

More rust and rot

1674848741267.png

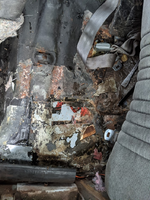
So all that was a bit concerning to say the least. So a tear down of the interior was deemed necessary. Pulling out the rear seat on these is fairly easy. But under that seat...

1674848958034.png

Nearly everything has been fibreglassed. Galvanized sheet metal has been screwed into place using self taping screws in a couple spots. This keeps looking worse and worse.

Rear seat passenger side just coated with fibreglass

1674849073118.png

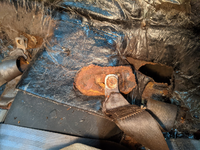
In removing the rear seat belts, one of the bolts and reinforcing plate ripped right out body

1674849141384.png

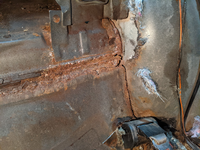
Rust all along the seam between the rear seat pan and the trunk and along the inner wheel wells.

1674849219419.png

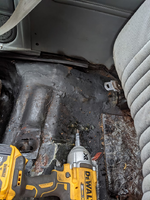
Front seats came out too. Same story there. Fibreglass and galvanized patch panels on both sides. I'm not a perfectionist by any means. but this isn't acceptable to me. I wanted to rip out the fibreglass and patch panels to see just how extensive the rust damage is

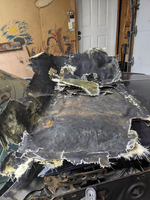
Pile of fibreglass torn out of the floors

1674849371552.png

What's left of passenger side floor pan

1674849430928.png

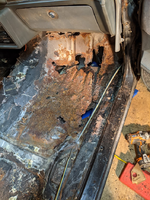
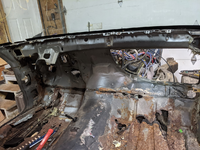
And the whole front floor pan, or what's left of it once the whole dash etc had been ripped out.

1674849515696.png
 
OP
J

jmdirk

Well-known member
Joined
May 4, 2015
Messages
711
So clearly, the price paid, was not nearly as good of a deal as I had originally thought. The frame was in good shape, but the floors were shot. And clearly there was additional work that needed to be done on the roof and drivers rear quarter panel.

So at this point in the project, I'd had it maybe a month or so and regret is starting to set in. It's mid pandemic and a whole bunch of stuff happened over the next few months. Around the Christmas holidays I had some vacation time to burn. My initial intention was to spend a couple weeks in the garage working on this and coming up with a plan. That's when the wife comes up with the great plan that since I have this time off, why don't we renovate the bathroom like we have been discussing? Well...ummm...I guess. Happy wife, happy life right :)

So that put a stop to pretty much any work for several weeks. We had also got a new puppy, that takes up a bunch of time too etc.

Also, I had been dreaming of building a real garage on the property. And a little bit of self justification kicked in. I figured that if I was going to go ahead with this major restoration project, It'll be much easier if I have a proper space to work in. So the car project took a back seat to the shop for nearly a year as I cleared the land and erect a 30 x 40 workshop house my new project. That build probably deserves it's own thread - or at least a separate section

During this whole period, I'm still not fully committed to rebuilding this particular shell. There's a lot of work to be done. I was keeping an eye on classifieds to see if I could source a better candidate. But, as with many other things during the pandemic, prices went a bit crazy. Sellers were now asking almost $2k for parts cars that looked to be in just as bad, if not worse shape. Decent specimens were going almost $10k - Way outside what I had budgeted. I though I did have a line on what looked like a pretty good candidate at a reasonable price. The seller seemed legit, but every time I tried to set a date and time to come see the car, he ghosted me. At the same time, I had located a guy selling floor pans for these. He was a bit of drive away from me, but I had to head out that way anyway to pick up the overhead doors for my garage. I gave the car seller one last chance, but it was the same story - says he's available for me to come look at it, but when I try and set a date and time - no answer. So screw 'em - picked up floor pans en route to getting garage doors.

So at this point, I'm pretty much committed to rebuilding what I have. Acquiring the requisite parts, tools and (hopefully) skill to accomplish what is easily the largest automotive project I've ever tackled.
 
OP
J

jmdirk

Well-known member
Joined
May 4, 2015
Messages
711
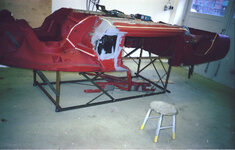
Clearly, the level of repair required here pretty much requires a full tear down of the body. No point in going through the amount of work I need to do if I'm not going to try and take care of every little bit of rust that I can. The body was stripped down to pretty much just the shell and got that separated from the frame itself. You can also see in the background a parts car that I picked up for ~$200. Not a whole lot to it, it's in worse shape, but there's some good bits on it.

1674851106728.png

You can see here the previous 'repair' work. More fibreglass and galvanized metal.

1674851241128.png

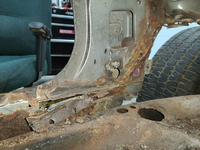
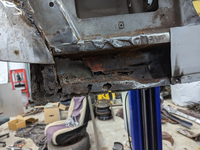
Inner rocker and drivers side sill in pretty rough shape

1674851349734.png

More of the drivers rocker panel just ahead of the rear wheel well. Even had silicon squeezed in here in parts.

1674851383473.png

This is the near the front of the door, where the floor pan body mounts are supposed to be

1674851752541.png

This is what's left of the front drivers body mount.

1674851815170.png

This is not all necessarily in chronological order at this point. The structure of these cars is that there's quite a few different layers and individual pieces that make up the floor pans, sills and rocker panels. While browsing the local U-pick junkyard, I saw that they had a 79 Cutlass Wagon in their inventory. The GM G-body share quite a bit of sheet metal and my research indicated that the floor pan sheet metal would be identical to mine, despite being 9 years older and a wagon. It was just about 10 minutes away from my place do decided to grab a few tools and head over to check it out. At this point, I had already purchased new floor pans. But the areas where the body mounts go, the sills and one of the cross members are in bad shape and in need of replacing. And most of these parts aren't available as reproductions.

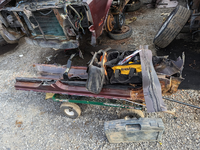
As luck would have it, those parts in this junkyard wagon are actually, not too bad. Not perfect, and in need of some work, but a better starting point than what I had. After a couple hours with the sawzall and a few broken blades later, I had a wagon full of 44 year old sheet metal.

1674852095620.png

With those parts in hand, some actual repair work can begin.

The drivers' inner rocker was not in great shape. And frankly, not too difficult of a piece to reproduce. So that was stripped right down and cleaned up of any surface rust. There was still some minor pitting in there, but the steel was still solid. Again, I'm no perfectionist and I do struggle with walking the line between replacing something and "good enough". In this case, some rust converting primer and a top coat was considered good enough

1674852495842.png

Cut a replacement inner rocker panel out and tested the fit

1674852989401.png

Passenger side is in better shape. It cleaned up to mostly good steel. Again some pitting, but not terrible.

1674853057940.png
 

iagsxr

Well-known member
Joined
Jan 10, 2010
Messages
1,505
Location
Vinton, Iowa
Most of the G-bodies have been used up around me to make circle track cars. The frames are usually junk on any ones that are left.

You finding one that the rear framerails are intact is more of a score that you might think.
 

The Cobbler

Super Moderator
Staff member
Joined
Oct 24, 2013
Messages
25,993
Location
Niagara Region, Ontario, Canada
I had an 83 or 84, I can;t honestly remember. it was a magnet for accidents. in 3 yrs I owned it I was hit a bunch of times. when I got rid of it, the only panels that hadn't been replaced or repaired at least once was the trunk lid & the passenger door. even the roof had had work done on it.
the drivers side front fender was replaced twice ,the front bumper twice , drivers door replaced once & repaired once. you get the picture.
I really liked the car, but it had the crappy v6 so it was a gutlass cutlass
 

AldeanFan

Well-known member
Joined
Sep 9, 2014
Messages
2,589
Location
Niagara on the Lake
Looks like you are doing it right, good job saving this car.

My foxbody was in about the same shape when I got it. Stick with it, you love the finished product even more for the effort you put into it.
 

Ohmthis

Well-known member
Joined
Jan 20, 2013
Messages
3,021
Location
Outside of Louisville KY
Wow, you turned on the way back machine for me. A friend in HS had a cutlass. We had so much “Legal” (yeah right) fun in that car. Good luck on the project!
 

NYBODYMAN

Well-known member
Joined
Sep 10, 2013
Messages
4,901
Location
NY
I have a soft spot for these. My first car was an '85 Olds Delta '88 and I wanted a Cutlass so bad but never had one. I love all of the G Body cars, especially the wagons. I cringed when you said you cut up the '79 wagon lol. Good luck with the project.
 

MBfreak

MEMBER EMERITUS
Joined
Dec 10, 2010
Messages
2,301
Location
Linkoping , Sweden
Keep it up!!!!

I would weld in crossbrazing and make sure that panels and door fits before welding in new structural parts.
230 SL surgery pic enclosed. Took only 8 years! But came out perfect.
Ola
 

Attachments

  • Namnlöst-79.jpg
    Namnlöst-79.jpg
    1.4 MB · Views: 96
OP
J

jmdirk

Well-known member
Joined
May 4, 2015
Messages
711
Most of the G-bodies have been used up around me to make circle track cars. The frames are usually junk on any ones that are left.

You finding one that the rear framerails are intact is more of a score that you might think.

I did end up buying a couple parts cars from another guy for ~$400 total. And that's exactly what he wanted them for originally, but yeah, the rear frame rails on both were shot. Actually, on the one, pretty much the whole frame was shot. I was looking mostly for the front clip, tail lights etc. The one was stuff full of beer bottle, so I immediately got back ~$40, and then scrapped one for another $160.

There's a couple of the body mount holes that will need some remediation, but overall the frame is solid
 
To avoid these ads, REGISTER NOW!
OP
J

jmdirk

Well-known member
Joined
May 4, 2015
Messages
711
I have a soft spot for these. My first car was an '85 Olds Delta '88 and I wanted a Cutlass so bad but never had one. I love all of the G Body cars, especially the wagons. I cringed when you said you cut up the '79 wagon lol. Good luck with the project.

Yeah, kind of a shame, but it was already in the junk yard. I don't think the wagons are generally as sought after. But they're relatively rare, so those that do like them, cherish them.
 
OP
J

jmdirk

Well-known member
Joined
May 4, 2015
Messages
711
yikes, you are in deep


So what the over plan/goal?

Well, it's definitely not going to a factory original restoration. But want to repair as much of the rust as I can. But I struggle with the time/effort/skill required to replace every bit of damaged metal vs just making sure something is 'good enough'.

It's really just going to be a cruiser. Get some decent paint on, probably a mild LS swap, 5.3 or 6.0L. Though there's something that kind of wants to put a blasphemous drivetrain in it. Like a K-series or SR20 or something like. :ROFLMAO: Probably make some people's heads exploder if I do that
 
OP
J

jmdirk

Well-known member
Joined
May 4, 2015
Messages
711
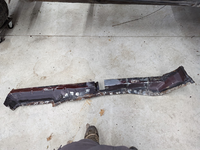
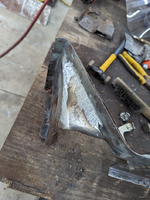
Of the pieces I pulled off the junkyard wagon, the drivers' side sill section was probably in the best shape. I didn't take many pictures of that teardown and work, but it was a few hours of separating the superfluous sheet metal that I didn't need. cutting stuff away, grinding and cutting out spot welds etc. Just to end up with this. There was small section about midway that needed replacing. Just on top of a reinforcing brace, so I was able to get in there with a wire brush on a drill to clean up what I could and spray some rust converting primer in there. Once it's in paint, I intend on getting into every nook a cranny with Fluid film to try and keep corrosion at bay. This is the only picture I have of this section right now. I'll grab more once I get that in primer.

1675089187777.png

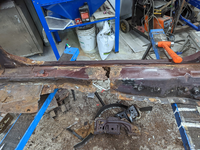
The passenger side was not in as good of condition. The below is the same section, but not yet completely stripped. Same rust through in the same area

1675089456223.png

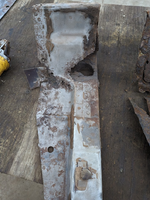
This side required cutting away quite a bit more. I replaced metal in section here to try and keep it straight. Still not quite finished with this piece yetYou can see at the top quite a bit of rust there too. That's up near the body mount, which is not in great shape at all.

1675089663921.png

I ended up separating the body mount from the rest of the sill as it needed quite a bit of rehab. you can see the passenger floor board rotted right through and the bottom part as well where the body mount sits is shot as well.

1675089867684.png

Cut the rot on the floor board part, you can see the extent of the damage on the body mount part.

1675089949960.png

Cut away the rust on the bottom and along the side. Here I had already welded in the replacement section along the side.

1675090008732.png

This part is all 16 ga steel. Tough for me to shape and form single a single piece with my skills and tools. So it got dome in a lot of smaller sections. Everything in red is new. There's another reinforcing plate that goes on the bottom here as well that needs to be made and welded to the bottom. And the top section that I cut away needs to be done as well. But I want to get some primer on it first just so that there some protection on pieces of metal that are sandwiched together or in an inaccessible cavity. Also need to weld in some new cage nuts for the body bolts to attach to

1675090099399.png
 

AldeanFan

Well-known member
Joined
Sep 9, 2014
Messages
2,589
Location
Niagara on the Lake
Good work! There’s always more rust than you can see, in this generation of cars there’s lots of folded over and multiple layers that like to trap rust.
 
OP
J

jmdirk

Well-known member
Joined
May 4, 2015
Messages
711
One more section worth talking about for now. I kind of jump around a bit. I work on a section to the point where it needs primer, and then move to something else. Once I have a reasonable stock of stuff that needs primer, I'll go and do it all at once.

This is another section from the junkyard wagon, just under the rear seats that contain a cross brace. Again, not perfect, rusted out near the ends where it attaches to the rest of the body

1675090678892.png

But more intact than what came out of my car.

1675090748735.png

I separated the cross brace from the floor pan. Cut off the rusty ends and bent up replacements. There were purposefully made long. They'll get trimmed up to fit before being installed.

1675090847124.png

On the outer edges of this brace are another set of body mounts. You can see in my car where these are supposed to be. the rubber mounts are still bolted to the frame, but they divorced themselves from the brace and floor a long time ago

1675091090004.png

So the body mount itself is made up of some cage nuts welded inside the brace. And then a reinforcing plate on the outside of the brace. Since that section was pretty badly damaged and replaces the brace itself, I figured it was just as easy to make a new reinforcing place instead of trying to cut the old one off intact. Sketched out a basic shape for the original one

1675091247728.png

Final piece, less the hole for the body bolt. It's not millimeter accurate, but for something like this it doesn't need to be. Again, want to get some of this stuff in primer now before welding it to the brace.

1675091352019.png
 

vavet

Well-known member
Joined
Mar 6, 2012
Messages
5,330
Location
Ashland, VA
I always thought this model of cars (Cutlass, Grand Prix, Monte Carlo) had a nice sporty shape. My grandparents had a slightly earlier Cutlass (82-ish maybe).
Am I the only one surprised this car has a full frame opposed to a unibody with subframes?
 

humpty

Well-known member
Joined
Dec 4, 2008
Messages
547
Location
Minneapolis, MN
I am impressed with your dedication to the project. I would have just flushed that one down and not looked back.
Good for you!
 

AldeanFan

Well-known member
Joined
Sep 9, 2014
Messages
2,589
Location
Niagara on the Lake
How’s the aftermarket for these cars?
When I first bought my ‘83 foxbody there was not a lot of body parts available, these days you can buy most of the parts that rust out like floors and all the seat bracing.
 

don long

Well-known member
Joined
Mar 31, 2012
Messages
8,857
Location
southern california
This looks like a challenge worth following along. As an old body man I know that nothing is impossible just a lot of work. You look to be qualified so take lots of pic's and share them with us please
 

RyanE

Well-known member
Joined
Feb 4, 2013
Messages
201
Location
Golden, BC
Wow, hats off to you and your committment!

I came home from the hospital in my mom's 1981 Olds Cutlass Supreme "Brougham" (Bro!). It was our family car until we replaced it with a minivan in 1991. 305 V8, sunroof and no AC. No idea what my parents thought with the no AC part. We suffered. I remember a lot of electrical issues (window regulators especially) and a leaking sunroof....

I'm guessing you are up in Canada since you mentioned Kijiji. I still see some of these on the road here out west.

Keep up the good work!
 
OP
J

jmdirk

Well-known member
Joined
May 4, 2015
Messages
711
This looks like a challenge worth following along. As an old body man I know that nothing is impossible just a lot of work. You look to be qualified so take lots of pic's and share them with us please
I think 'qualified' is generous - at best.

Learning as I go. Truly there are times when I look at the thing and wonder what the heck I've gotten myself into.

I look at the work some others do, and it's truly an art form
 

LSU

Well-known member
Joined
Dec 4, 2011
Messages
705
You’ve got a lot of talent that I wish I had.

You’re also braver than me for taking on something like this.

I'm looking forward to your progress.
 

NYBODYMAN

Well-known member
Joined
Sep 10, 2013
Messages
4,901
Location
NY
I think 'qualified' is generous - at best.

Learning as I go. Truly there are times when I look at the thing and wonder what the heck I've gotten myself into.

I look at the work some others do, and it's truly an art form
Sometimes the only way to learn is to give it a try. Feel free to ask questions. There's a few resident body guys including myself on GJ who are more than willing to help.
 
OP
J

jmdirk

Well-known member
Joined
May 4, 2015
Messages
711
Smallish updates. I feel like I've been spending hours and hours on it with making too much progress. But I guess weekend days often get filled up with Honey-Do type things and only seem to get a few hours in the evening to work in it.

Beginning of Feb was COLD. Really happy to have a heated shop to work in now.

Tell me it's cold out with telling me it's cold out:
1677254971374.png


Still working on trying to get the floors in it. Some of that is make sure I've got something decent to attach the floors to, which is the inner rocker panels. From the outside, the lower rocker just behind the drivers door looks like this with the paint removed. This rear quarter section is probably one of the worst sections on the whole car. I've got a whole new quarter panel, but alot of the supporting structure needs to be replaced too.
1677255171321.png

On the inside the floor looked like this:
1677255382250.png

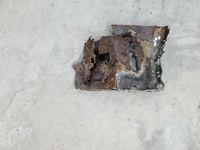
That hole was patched with this. That is a piece of galvanized sheet metal, with what looks like fiberglass drywall tape and silicone. Why buy autobody supplies? You can do just as good of a job with stuff from Home Depot right?
1677255465683.png

Getting that bit of floor out of the way reveals the rest of the inner rocker. This is what the floor needs to attach to. More galvanized patches, and I think the black stuff is an epoxy resin.
1677255577362.png


And without the patch, more fiberglass and other junk stuffed in there,. So the section is made up of the inner rocker, the flat piece, the outer rocker, which has some bends in it and then it is all covered in this section with the rear quarter panel. But in order to weld the floor in, the inner rocker needs to be there. But I just need to peel back layers until I have something to weld to.
1677255701782.png

So this is cleaned up a bit more. At this point, I've replaced the inner rocker up towards the front, but just have to finish up with this rear section
1677255975748.png

All that rot got cut out, a new inner piece was bent up and welded in. I hesitate to post this picture an expose all my booger welds. The other side got cleaned up and this back side get's covered up and this should be the only evidence of this mess. I recognize my errors. **** welding sheet metal I sometimes burn through when tacking. And rather than cutting it out and redoing it, I tend to try and fill the holes. Which often results in more burn through until I end up with a mess like that. Sometimes I do the right thing and start over, but not always. And I fully recognize the hypocrisy of me being critical of someone else's shoddy work when I replace it with some of my own shoddy work. But at least I like to think of it as being less shoddy at least.
1677256030245.png

I've also made up the piece of that inner rocker that covers this and hade primed the inside portion of it. Pretty much ready to be welded in at this point. No pictures of that, or the 'repair' job done on the outer part of the quarter panel, but I'll get to it because that's as interesting repair work done on the inside.
 
To avoid these ads, REGISTER NOW!
Top Bottom