To avoid these ads, REGISTER NOW!

Project - Formula Vee/Formula FV1200 Restoration

OctaneMotorsports

Well-known member
Joined
Feb 28, 2006
Messages
1,033
Location
Caledonia, Ontario, Canada.
Some of you guys might be interested in following this project...I will keep updating with more pictures as I have more work completed. As you may know I have been racing karts for about five years now. In the fall I bought a used Formula Vee race car given that I turned sixteen over the winter (minimum age for the series). This series is pretty big in Ontario, and growing at a fast rate (four more kart racers from my team alone have moved up this season) so it should be a good jump for me and lots of fun.

The car is used and a few years old, and is in good shape overall, it was a front running car even with a driver who was over the minimum weight - but it needs some work before it hits the track. Technically, all it really needs is an engine rebuild, but I have always been a major perfectionist with my racing stuff so the entire car is getting rebuilt before I go on track. Stuff like messy wiring etc. really bothers me. So, let the work begin.

This is what I started with:
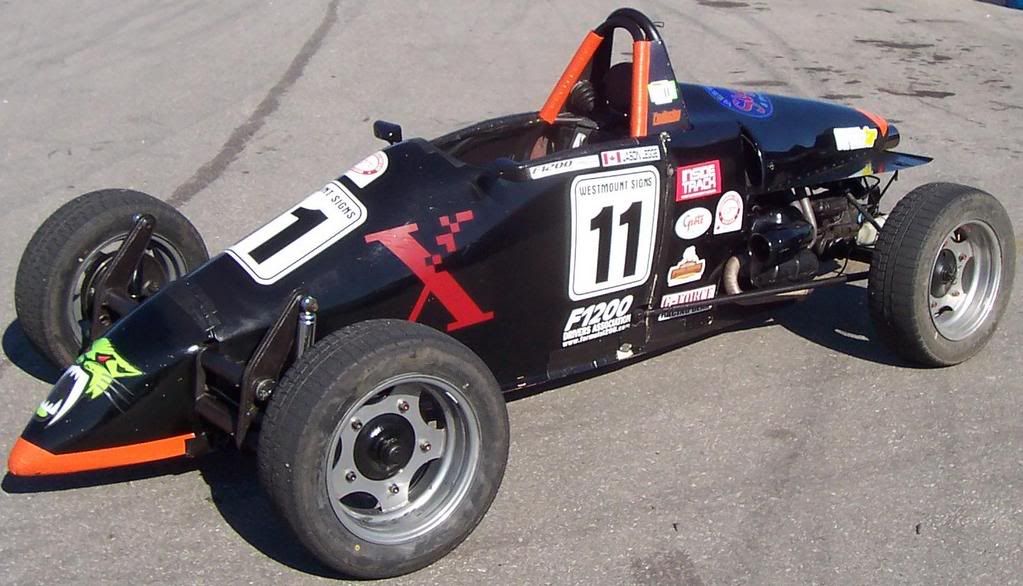
NewerVEEPics012_edited.jpg


Car is home and up on jackstands. Bodywork is removed for refinishing and tires are wrapped to keep them fresh as I won't be using them for a few months.

IMG_2772.jpg


Rims are being powder coated flat black, or maybe being polished?

IMG_2773.jpg


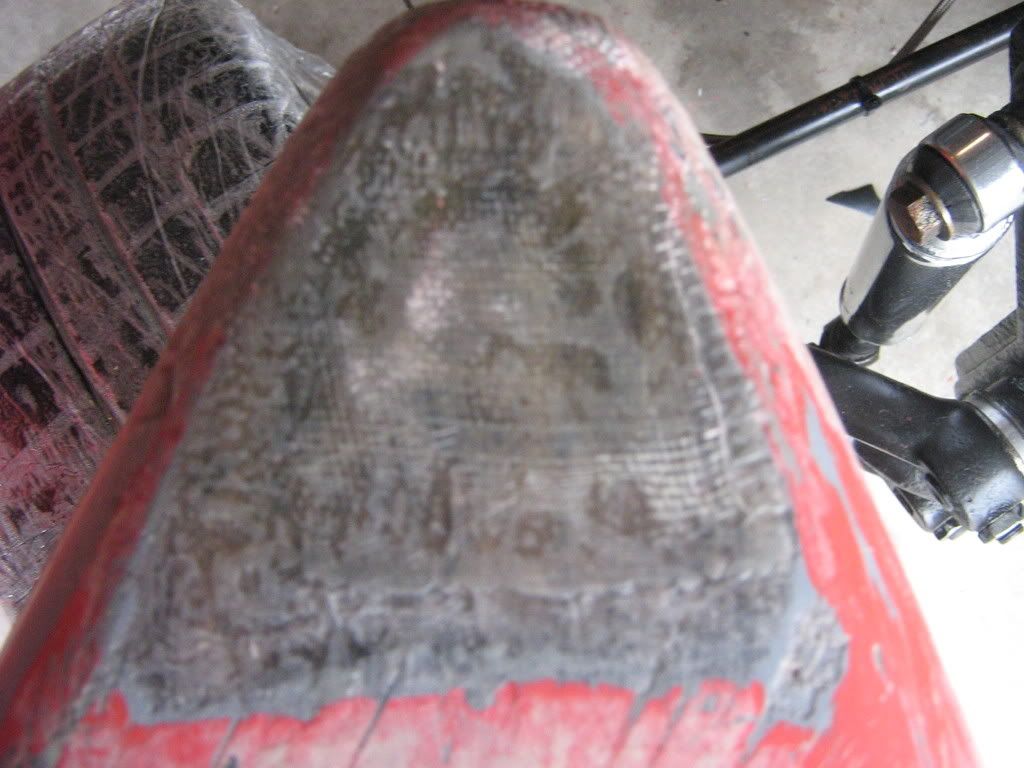
Bodywork removed for refinishing. I am stripping all the old paint off, and I have to repair the fiberglass in a few spots before it gets sprayed gloss black again with new decals of course. The paint on there was done very poorly and is coming off fairly easy. Lots of manual labor stripping the paint, though - but I get to learn a little bit about fiberglass repair and painting so it's okay.

IMG_2776.jpg


Bodywork is getting all new Dzus (quick release, 1/4 turn fasteners) when the bodywork is finished. A lot of them are either stripped or missing altogether.

IMG_2767.jpg


IMG_2777.jpg


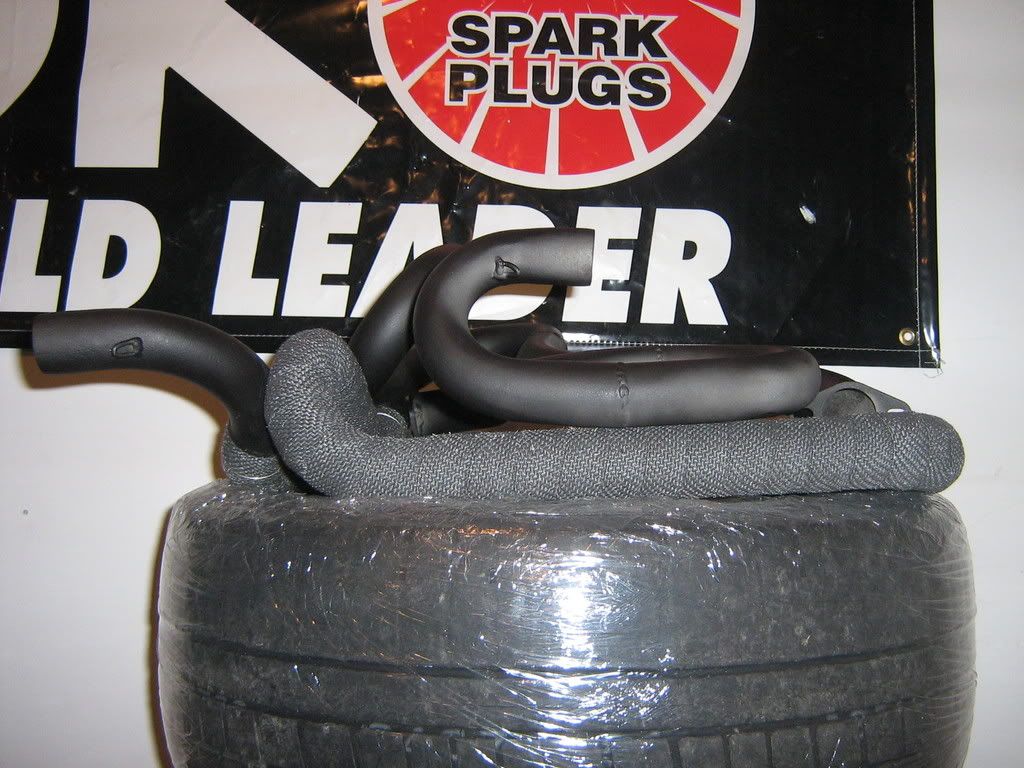
Headers removed, pretty cool exhaust system on these. Headers are being sandblasted, coated, and new header wrap on all pieces. Keeping the temps in the engine compartment low is crucial in these because they are air-cooled.

IMG_2778.jpg


Data acquisition installed...got this for free :thumbup:

IMG_2771.jpg


New fuel and oil vent bottle/overflow installed. It had a steel bottle with hoses running into the opening before, held on with big hose clamps. Not for me... I still need to get bigger hoses and proper clamps for it as the ones on there won't fit properly. Much better now, though.

IMG_2769.jpg


Engine disconnected and ready for removal. As you may have seen in my other thread I had some problems with this but it's out now and all is well. Engine has to be brought to the builder next week. Same guy builds the engines and makes the chassis, pretty incredible.

IMG_2764.jpg


More to come!
 
Last edited:
To avoid these ads, REGISTER NOW!

Freejack

Well-known member
Joined
Aug 8, 2007
Messages
555
Location
St. Peters MO
Nothing like the old VW boxers. I take it the rules require a 1200 single port? Can you do anything else to the engine?

Jake
 

Bubbles

Well-known member
Joined
Jun 23, 2006
Messages
278
You will never win with a Artic Cat logo on the car :)

Put a dragon on it for real power :)
 
OP
O

OctaneMotorsports

Well-known member
Joined
Feb 28, 2006
Messages
1,033
Location
Caledonia, Ontario, Canada.
Everybody runs the same 1200cc single port engine. I'm not 100% sure what is done to the engine, but from the engine builder's website:

"Lightened and balanced internal parts are installed in dual relief universal cases. Cylinder sealing is accomplished with dykes style compression rings and low tension oil scraper rings, giving excellent sealing with the lowest parasitic loss possible. Cylinder head porting and valve seating are all done to flow bench and dyno proven specification. Intake manifolds are acid etched ball sized and worked over to achieve every possible cfm within the rules. Carbs are re-worked and tuned to compliment and complete the engine package in an effort to supply the highest and widest power band obtainable."

Yes drum brakes on all four...a lot of it is very old-school technology (original VW parts) but that's what keeps everyone equal and the costs down. In a car that only weighs 1050 lbs. with driver, I hear they stop as good as anything else.

I have been getting a lot of flak for the Arctic Cat logo, hahaha...that was put on there by the previous owner. Both nose pieces are being stripped and re-painted.
 
OP
O

OctaneMotorsports

Well-known member
Joined
Feb 28, 2006
Messages
1,033
Location
Caledonia, Ontario, Canada.
Got the engine pulled finally...

IMG_2783.jpg


You can see at the bottom of the transmission housing there are two bolts on each side where it mounts to the frame. The top bolt on the right side backed out (you can see that it is missing) and caught the flywheel. No damage done, just one bent bolt and a little chip on one tooth of the flywheel that I was able to fix with my trusty Made-In-USA Nicholson 8" flat file. This is what made the engine seem locked up and so hard to remove. Will be using loctite and safety wire on these in the future...

IMG_2784.jpg


Engine sits perfectly on this dolly I had, all cleaned up and ready to go be fully rebuilt.

IMG_2785.jpg
 
OP
O

OctaneMotorsports

Well-known member
Joined
Feb 28, 2006
Messages
1,033
Location
Caledonia, Ontario, Canada.
More bodywork today - paint should be stripped by next week then the bodywork is going in to get painted "pearl coat" black after I repair the fiberglass in a few spots. Should look really nice when all is said and done.

I removed the two rear aluminum panels that are riveted to the fiberglass. I was originally going to get these painted black with the bodywork but since they are aluminum and in perfect shape I decided to polish them to a mirror finish. Apparently I didn't quite know what I was getting into because it is a LOT of work, but it looks really good so far.

IMG_2790.jpg


IMG_2795.jpg


Paint stripped, but the primer actually adhered to the aluminum.

IMG_2791.jpg


Over an hour to get to this point on ONE panel, getting it down to bare metal. I have yet to do the other panel, what do you guys recommend to remove the primer? I used some alcohol to soften the primer then a utility knife blade that removed it with relative ease, but there has to be a better way...acetone?

IMG_2792.jpg


I used 3M WetOrDry 340, 400, 600, 800 then 1000 grit wet sanding. Will be picking up some 1500 and 2000 grit tomorrow to achieve the mirror finish I am working towards. Once it's all good I will hit it with some Mothers Aluminum Polish. You can see how far it's come already, lots and lots of work.

IMG_2793.jpg


Headers went in today to get sandblasted and phosphate coated.
 

Stanger

Well-known member
Joined
Oct 25, 2006
Messages
1,298
Location
Alton, IL
Can't you use an aircraft stripper on the AL? Very cool build. I wish I would have been into that a few years ago. My college has Formula SAE in my engineering program though and I think I'll get involved in that. Very cool project, I'll be following closely.
 

Hutch

Well-known member
Joined
Sep 8, 2006
Messages
64
Location
Alaska
looking good! I think there is a fellow near me that runs one of these, I see it ripping down the street occasionally. Looks like fun. Are you required to run the swing axle trans axle or can you upgrade to IRS? It probably doesn't matter much on a track/pavement pounder, but I know on Baja's the IRS is more desirable. Keep us updated. Check out chirco.com for parts if you need any, they have been real good to me w/ my baja.
 
OP
O

OctaneMotorsports

Well-known member
Joined
Feb 28, 2006
Messages
1,033
Location
Caledonia, Ontario, Canada.
I honestly don't know what this IRS you are referring to is, but no we can't upgrade it. Rules are pretty strict (not as strict as when I raced karts, though, which is part of why I wanted to upgrade). As I said the main things I am doing here are getting the engine rebuilt and the bodywork re-done. Everything else will be mostly cosmetic or my obsessive compulsive disorder at work making sure everything is 100% perfect, hahaha. But a cool project that will keep me busy for a few months until I can afford to pick up the engine and have all my equipment to hit the track. Until then I am just doing a bunch of little things to get the car exactly how I want it because it's just sitting in my garage anyway.
 

billymade

Well-known member
Joined
Apr 2, 2008
Messages
7,461
Location
New Mexico
IRS is "independent rear suspension" that came in the later model vw beetles (if my memory serves me correctly 1968 and later); they had cv shafts. Your set up only pivots at the transmission (this was referred to as a "swing axle"); the later models pivoted in two different places and handled allot better. I believe formula vee is heavily restricted to keep the competition high and machines all at a very similar level of performance. From what the link below says; the car is based on a 1963 vw beetle; so that would keep it in the swing axle era for sure.
http://en.wikipedia.org/wiki/Formula_Vee
 
Last edited:
OP
O

OctaneMotorsports

Well-known member
Joined
Feb 28, 2006
Messages
1,033
Location
Caledonia, Ontario, Canada.
Quick update...

Bodywork is stripped and ready to go...and I somehow ended up with a dog leash on my parts table.

IMG_2802.jpg


I had to do lots of sanding and a little fiberglass work (my first time fiberglassing, very happy with the results though, spending the time to research and learn how to do stuff pays off) in a few spots , mostly on my one nose cone. The bottom had completely worn through and it was pretty rough at the front where it was previously covered with an arctic cat decal. But it's nice now, smooth as glass and solid :thumbup:

Underneath the nose cone, done fiberglassing and almost done sanding:

IMG_2799.jpg


And the front...was pretty chewed before, now it's perfect:

IMG_2801.jpg


Bodywork goes off to get painted this week, engine goes off to get rebuilt this week...I get my headers back from sandblasting on Wednesday. Car is currently in this state. Not sure what else I can do while everything is gone?

IMG_2803.jpg


IMG_2806.jpg


...and one for Merkava :)

IMG_2805.jpg
 

Stanger

Well-known member
Joined
Oct 25, 2006
Messages
1,298
Location
Alton, IL
Looks good. That pic will give Merkava a heart attack though. There are Channellocks in a Snap-On bag!
 

Fast Orange

Well-known member
Joined
Aug 27, 2005
Messages
861
Location
Hightstown,N.J.
Just a couple of suggestions,based on my experience with a friends racecars-
1) Do a thorough inspection of the entire brake system-check for kinked/damaged lines,old,dry rotted or damaged flex lines-pull the drums-see if you can upgrade the linings with newer,better materials-see if you can improve cooling by drilling additional holes in backing plates and adding intake scoops to the backing plates.Better brakes than the next guy let you drive harder and further into the corner than he can,particularly toward the end of the race,when everyones brakes are heating up and fading.
2)Pay some attention to the wiring-check for chafed/damaged wire,check all terminals/splices.If the terminals are run of the mill crimp-ons,relace with crimp/solder terminations,then insulate the terminations with heat-shrink tubing to both insulate them and reinforce them from vibration.Use loom or spiral wrap to protect wiring from damage.Use straps or tiewraps to locate harnesses in protected areas.
3) Inspect the frame closely for cracked /broken welds,cracked or damaged mounting holes.Since the transaxle is a stressed part of the frame,I'd go over that with a fine toothed comb also.Do a nut and bolt run-through -check every nut and bolt on the car for tightness.Loctite and /or safety wire all critical fasteners.
4)I'd put some effort into the shifter linkage-do what ever you can to stiffen it and make it as smooth and positive as you can.Stock Vdub shifters are about as positive as stirring soup,yours is longer,reversed and has more opportunity to twist/bend under hard use.
5)Inspect/upgrade your safety equipment.That rollbar padding is virtually useless.There are a couple of companies making padding specificallyfor racing-it's slit on one side for easy installation and is thicker and firmer than pipe insulation.Consider padding other areas in the cockpit to protect your body in case of hard impact.If the belts/harness are more than a couple years old,replace them.Consider arm restraints and a HANS or simular device.Get the best helmet and firesuit you can,complete with underwear,shoes and gloves.If you ever get your **** upside down and flaming,you'll be glad you spent the bucks.You might even think about an on-board fire system.
6)Install idiot lights along with your guages-you'll see a red light on the dash alot quicker than a dropping or climbing guage.
These are all things that I've seen my friends go through with used dirt sprint cars and modifieds,but they all appply to your type of racing too.
Just keep in mind the following-
To finish first,you first have to finish.
Good safety equipment costs less than any hospital stay,and doesn't hurt
at all.
Good Luck with the racecar-
George
 

tdkkart

Well-known member
Joined
Jun 17, 2006
Messages
6,887
Location
Eastern Iowa
Looks like a fun project, always liked the V-dub motors, fun to play with.

Good choice with the MyChron, use it to it's fullest ability and it can make a huge difference in your performance.

Another vote for careful planning and lot's of effort put towards the wiring setup.
All the fancy paint and polish in the world will be useless if your day at the track is interupted by electrical issues, been there, done that.

If you don't have experience with wiring, pick up a couple books and do some studying.
There are a couple streetrod wiring books out there that will help. Pay particular attention to the use of relays to handle high current loads, and how they can help you with switch reliability. Find someone that knows how to solder correctly and get them to teach you.
A properly executed electrical system will look impressive and will never cause you troubles.

Remember, before you can finish first you must first finish.............
 
OP
O

OctaneMotorsports

Well-known member
Joined
Feb 28, 2006
Messages
1,033
Location
Caledonia, Ontario, Canada.
Just a couple of suggestions,based on my experience with a friends racecars-

1) Do a thorough inspection of the entire brake system-check for kinked/damaged lines,old,dry rotted or damaged flex lines-pull the drums-see if you can upgrade the linings with newer,better materials-see if you can improve cooling by drilling additional holes in backing plates and adding intake scoops to the backing plates.Better brakes than the next guy let you drive harder and further into the corner than he can,particularly toward the end of the race,when everyones brakes are heating up and fading.
The brakes are coming apart now that I have the wheels off. I will look into what you mentioned, some good ideas, thanks.

2)Pay some attention to the wiring-check for chafed/damaged wire,check all terminals/splices.If the terminals are run of the mill crimp-ons,relace with crimp/solder terminations,then insulate the terminations with heat-shrink tubing to both insulate them and reinforce them from vibration.Use loom or spiral wrap to protect wiring from damage.Use straps or tiewraps to locate harnesses in protected areas.
The wiring was a mess on this car...every wire that ran from the front of the car (gauge cluster/switches/data acquisition) is now run through one piece of wire loom and zip tied under the top roll bar on the right side above the shifter, you can barely see it. I am working my way back and will be checking out all the wires that hook up to the engine (there aren't many) and securing them in the same way.

3) Inspect the frame closely for cracked /broken welds,cracked or damaged mounting holes.Since the transaxle is a stressed part of the frame,I'd go over that with a fine toothed comb also.Do a nut and bolt run-through -check every nut and bolt on the car for tightness.Loctite and /or safety wire all critical fasteners.
That is my main reason for tearing the car down. The previous owner was a businessman who raced a few times a year and didn't pay much attention to the fine details. He would change oil frequently, replace worn/broken parts etc. but not much beyond that. I am replacing a lot of bolts and will be checking all the ones I don't. These cars have a lot of vibration so everything is being secured with loctite and a lot of things are also being safety wired.

4)I'd put some effort into the shifter linkage-do what ever you can to stiffen it and make it as smooth and positive as you can.Stock Vdub shifters are about as positive as stirring soup,yours is longer,reversed and has more opportunity to twist/bend under hard use.
Good idea, not sure what I could do though. I tightened up all the mounting points and lubricated the pivots which helped a little. I was told it feels a lot better when the engine is running or when the car is on track, which makes sense.

5)Inspect/upgrade your safety equipment.That rollbar padding is virtually useless.There are a couple of companies making padding specificallyfor racing-it's slit on one side for easy installation and is thicker and firmer than pipe insulation.Consider padding other areas in the cockpit to protect your body in case of hard impact.If the belts/harness are more than a couple years old,replace them.Consider arm restraints and a HANS or simular device.Get the best helmet and firesuit you can,complete with underwear,shoes and gloves.If you ever get your **** upside down and flaming,you'll be glad you spent the bucks.You might even think about an on-board fire system.
This is #1. I am getting all new equipment. 2-layer Sparco suit + nomex underwear, Bell or Arai helmet, Alpinestars shoes and gloves etc. I also have a HANS device and Sparco arm restraints (although neither are required) on my list. I am picking up an 8' length of rollbar padding in the next week and padding everything in the cockpit. Fire systems are not required in Canada (but are in the USA)...

6)Install idiot lights along with your guages-you'll see a red light on the dash alot quicker than a dropping or climbing guage.
My MyChron has programmable alerts for high temp etc. that will make lights go off, good idea though.

These are all things that I've seen my friends go through with used dirt sprint cars and modifieds,but they all appply to your type of racing too.
Just keep in mind the following-
To finish first,you first have to finish.
Good safety equipment costs less than any hospital stay,and doesn't hurt
at all.
Good Luck with the racecar-
George
I appreciate it, thanks!
 
Last edited:
To avoid these ads, REGISTER NOW!
OP
O

OctaneMotorsports

Well-known member
Joined
Feb 28, 2006
Messages
1,033
Location
Caledonia, Ontario, Canada.
Looks like a fun project, always liked the V-dub motors, fun to play with.

Good choice with the MyChron, use it to it's fullest ability and it can make a huge difference in your performance.

Another vote for careful planning and lot's of effort put towards the wiring setup.
All the fancy paint and polish in the world will be useless if your day at the track is interupted by electrical issues, been there, done that.

If you don't have experience with wiring, pick up a couple books and do some studying.

There are a couple streetrod wiring books out there that will help. Pay particular attention to the use of relays to handle high current loads, and how they can help you with switch reliability. Find someone that knows how to solder correctly and get them to teach you.
A properly executed electrical system will look impressive and will never cause you troubles.

Remember, before you can finish first you must first finish.............
As I said in the post above I am putting a lot of effort into the electrical system. The paint and polish stuff is just me killing time while all the important stuff is being taken care of. Reliability is #1 (well, #2, I said safety was #1 in the last post hahaha)
 
OP
O

OctaneMotorsports

Well-known member
Joined
Feb 28, 2006
Messages
1,033
Location
Caledonia, Ontario, Canada.
I think that s a great project you have going on. Sounds like a great hobby.

Whats with the saran wrap? ...Keeping the tires fresh......:)

I love that sign. Where can I get one here in Canada?

The tires are wrapped because I won't be using them for 2-3 months. It keeps them from drying out apparently, I don't know...for the $2 in plastic wrap and five minutes I figured I might as well. New tires come wrapped so it must be for a reason?

My mom bought me the sign, so I'll ask her where she got it. I haven't actually mounted it anywhere and it's still in the package which is why it's hanging on the pegboard. I'll let you know...if it's somewhere local I can get you one and ship it if you want.

Where in Canada are you located?
 

sam 8

Well-known member
Joined
Jan 6, 2008
Messages
253
Location
Sierra Foothills, Nor. Calif.
Ahh, the old ACVW's.

Got me a 65 beetle on a 70 IRS pan that is my little 1776 plaything.
All the advice you have been given makes sense to me. Let me off the following.
I noticed the degreed pulley on the crank. they are great for dialing in your timing quickly, but they are a real leak problem for VW's unless it is a Berg product, or the case has been machined to accept a press in oil seal. The cheap Brazil sourced ones like ****, et. all sells have a cheezy little seal that sorta glues to the case.
They last about a week in my experience.
I tried three or four different seals and adhesives, and then went back to the stock steel VW pulley. It uses no seal at all, it has a slinger on it that throws the oil back into the case. If it were me, I' put that back on.
Oiling down the track isn't gonna keep you in the race.
Just some thoughts from an old VW geek.
 
OP
O

OctaneMotorsports

Well-known member
Joined
Feb 28, 2006
Messages
1,033
Location
Caledonia, Ontario, Canada.
Good advice guys, thanks.

Updates will be on hold for a week as my sister is on a holiday somewhere with her camera. I also went to pick up my headers today but the sandblasting guy is closed due to a death in the family until next week, so the project is kind of on hold.
 
OP
O

OctaneMotorsports

Well-known member
Joined
Feb 28, 2006
Messages
1,033
Location
Caledonia, Ontario, Canada.
Alright quick update.

Got the headers back from sandblasting - hit them with some VHT header paint and Longacre header wrap...still have to do the other two smaller ones but it looks good so far..I have proper stainless steel header wrap clamps coming for them:

IMG_3101.jpg


Started to prep the cockpit to pour a custom seat next week...removed the belts, taped over any sharp objects and covered the inside with garbage bags. I'll be pouring the seat early next week:

IMG_3097.jpg


IMG_3100.jpg


I did a lot of painting on the car, just flat black touching up where there was some paint rubbed off or surface rust here and there...looks much better. I'm getting some roll bar padding next week...bodywork went in last Tuesday, will be done by the end of next week...engine goes in next week as well, it's all coming together pretty quickly :thumbup:
 
Last edited:

stioc

Well-known member
Joined
May 2, 2005
Messages
1,317
Location
SoCal
Wow, great work. If you haven't already get the 'How to keep your vw alive forever' book. Those look like Kumho VictorRacer 700s - I used to wrap them in black trash bags and store them away from the sunlight. On a car this light they'll last you a long time as long as you don't flat spot them or they dry out.
 

Bib Overalls

Well-known member
Joined
Dec 4, 2006
Messages
3,318
Location
Jonesboro, Arkansas
I was a bit surprised to see the wheels and tires you are using. Way back when (30 years ago) I pit crewed for a friend when he raced his Zink Formula Vee. The rules then required stock VW wheels. But racing tires were permitted. And the tires everyone used were super soft and sticky. Usually a weekend of racing used up a set. Made a notionally inexpensive series quite expensive. Engines were another big expense. You could not win with a stock 1200 cc motor. But the motors had to be "stock." So little things like driving ball bearings through the tubing intakes to open the bends up were mandatory. Along with the fine art of removing flashing without porting. An engine prepped by a top builder cost almost as much as a new VW. Looks like the rules are more flexible concerning wheels and tires now.

There was also a series called Super Vee. Bigger motors, IRS, A-arm front suspension, disc brakes, etc. Similar in many ways to Formula Ford which eventually won out as the entry class for open wheel road racing.
 

Stanger

Well-known member
Joined
Oct 25, 2006
Messages
1,298
Location
Alton, IL
Very cool man. I just joined the Formula SAE team at my University. Unfortunately, the leaders of the team aren't dedicated or very skilled. I can't exactly run the operation right now, but once my foot is in the door I'll have a shot. The program looks like it will be a lot of fun with the right people.
 

e-tek

Well-known member
Joined
Dec 19, 2007
Messages
10,690
Location
Saskatoon, SK
Very cool man. I just joined the Formula SAE team at my University. Unfortunately, the leaders of the team aren't dedicated or very skilled. I can't exactly run the operation right now, but once my foot is in the door I'll have a shot. The program looks like it will be a lot of fun with the right people.

Where you U?
Sounds like the noobie will become the master...:bounce:
 
To avoid these ads, REGISTER NOW!
Top Bottom