To avoid these ads, REGISTER NOW!

Proper method for priming painting with rattle cans?

Heavymetalmechanic

Well-known member
Joined
Apr 4, 2013
Messages
625
Location
Calgary, Alberta, Canada
Sorry if this is the wrong area to post this, feel free to move it.

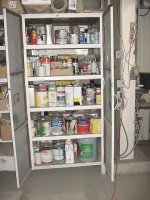
After we finish welding up these great projects we often need to prevent rust with a few coats of paint. After doing a search and chatting with a few friends I have not yet reached a general agreement on the best methods.

Ex: I sandblasted a project on Thursday, blew if off with compressed air and wiped my greasy handprints off with some thinner. Is it ready for paint?

The spray cans are at 15-20*C

I make sure the garage is at least 10*C and try for 15, and I heat the item with a radiant propane heater before and between coats, shutting off the heaters while spraying and airing the space out before turning them back on.

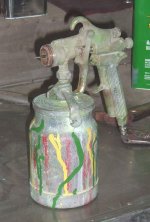
I try to do a light, even coat of primer, just enough so I no longer see bare metal. I use short sweeping sprays, releasing the nozzle each time. After the first coat I aim the heaters at it and let it sit for 45-60 minutes before starting the second coat of primer. I usually only do 2 coats of primer.

I wait 45-60 minutes after the second primer coat before applying paint, using the same procedure.

I have started to notice that some of the projects I have done this way tend to have the paint chip/flake rather then scratch when they are knocked into or have something draged against them. Is this a result of cheap paint/primer or more often caused by the way I apply the paint/primer? Is there such a thing as too much/little primer?
 
To avoid these ads, REGISTER NOW!

DekeT

Well-known member
Joined
Aug 12, 2011
Messages
2,234
Location
USA
Thinner is where you have gone wrong. Use a degreaser that will clean the surface and evaporate very quickly. Lots of autobody forums will have suggestions for the type of degreaser to use. Soap and water is better than thinner.
 

srmofo

Well-known member
Joined
Oct 15, 2009
Messages
6,161
Location
SW ohio
I like to warm my spray cans up in warm/hot water before using. Ideally the cans are in the 75°F to 80°F range.

Check the application coat times on the can. Waiting too long can require you to wait until the next day for all of the solvent to evaporate before applying a second coat
 

don long

Well-known member
Joined
Mar 31, 2012
Messages
8,846
Location
southern california
I use an aerosol can of degreaser and a soft paper towel to wipe my projects down with prior to applying primer. If I am rattle can spraying something I first apply a tin coat of etching primer let it set for 15 minutes then apply the paint
 

sanddan

Well-known member
Joined
Jul 7, 2005
Messages
708
Location
Oregon
I like to use etch prime as a base coat for shop related items. Wait an hour and then top coat. SEM trim black is a good semi gloss black and I've used it a lot on the shop. The higher quality rattle can's have a decent nozzle that puts out a fan spray instead of the spot the cheaper can's do.
 

theoldwizard1

Well-known member
Joined
Feb 22, 2011
Messages
43,174
Location
SE MI
There are special metal prep cleaners. For some paints these are mandatory.

Self etching metal primer (Rustoleum has it in spay cans) is also good.

If you ever move up to a compressor and spray gun, and want a extremely durable finish, use Valspar Tractor and Implement Paint. It is an alkyd enamel and a small amount of enamel hardener will make it almost as strong as epoxy or urethane paint. It does take 24-48 hours to completely cure.
 
Last edited:

MoonRise

Well-known member
Joined
Nov 5, 2010
Messages
4,029
Location
NJ
Step 1 : RTFM (or in this case RTFL, for "label") :D

Different paints (primer, top coats, etc) have different min and max recoat times, different min application temps, etc.

So read the label. :D

But generally, clean the part/piece (paint can't stick to grease or oil, or lint or fuzz, etc :D ), make sure the paint and the part/piece are at the 'right' temperature, apply primer (RTFL for recommended number of coats and dry time between coats and dry time before top coating), and then apply top coat (again RTFL for recommended number of coats and dry time between coats and final dry time).

10C (aka 50F) seems a bit too cold for most of the rattle cans or paints I've dealt with. IIRC, most of the rattle cans I've used usually say for a minimum temperature more like 68F (20C).
 

PCustoms

Well-known member
Joined
Jul 23, 2011
Messages
22,903
Location
VT
Watching for recomendations, as most of my recent projects have large chunks of paint falling off over just a winter. Metal below is shiny and clean until the weather hits it.

Prep has been:

-Grind
-Acetone degrease
-Self etch primer (rustoleaum IIRC)
-Topcoat with truck bed coating (1st time was spraybomb, 2nd was roll on version)

Best luck i had was with rustoleum rusty metal primer and topcoat with a cheap bristle brush, but does not leave the nicest finish for exposed projects (i.e. does not match truck)
-
 

Spudland_Dave

Well-known member
Joined
Mar 12, 2010
Messages
3,025
Location
Maine
Wipe down with Wax & Grease Remover...ONLY. Never Acetone, Lacquer Thinner, etc.... W&G Remover isn't any more expensive, actually cheaper and made for the job.

Secondly, use quality rattle cans...This is ESPECIALLY true with Primers, Brands I use are SEM, Napa TecNique, PPG, DuPont, etc... cost 2x as much but works 2x better. IMHO only thing Rustoleum primers are good for is to paint old wicker furniture your trying to sell on CL. If you HAVE to save a buck, the Rustoleum Automotive Primer isn't as bad as the normal stuff.

Whoever said RTFL is correct. Stick with quality brand products, and read the label, you'll rarely get let down.

If you need to use a whole can of primer or paint to do something, I'd suggest you look into a real coating system....ie paint in a gun. I'd stay away from anything you can get at a box store, visit your DuPont, PPG or Other Paint jobber, most brands have entry level lines which are really not expensive and last a LONG time. I've got a snow-blade I painted JD Yellow back in 2006 with Nason Tractor & Equipment Acrylic Enamel which has stayed outside all its life and it still looks good...no chalking at all.
 

NFT5

Well-known member
Joined
Jul 3, 2011
Messages
136
Location
Canberra, Australia
Hmmm. OP, when the paint chips off, does it chip leaving bare metal or primer still on the piece? This will tell you where the bond problem is. Chipping usually indicates a bond problem or paint that is way too thick.

In my shop (auto paint) we clean bare metal with wax & grease remover and let it flash off well before using an alcohol based cleaner. You shouldn't clean with thinners or acetone.

The following is a bit generic but reading the labels is your best guide:

Etch primer: one light even coat & allow to flash for recommended time at recommended temperature. Longer if it's colder. Etch primer does not usually need sanding if followed by a suitable primer.

Primer: 2 even coats, again observing flash times. There are very few primers that are designed for wet on wet application. Most require some kind of sanding to provide a mechanical bond for the topcoats. Check what is on the can or check online with the manufacturer. P600 wet is what I like for solid colours. After sanding you can clean again with the alcohol based cleaner after wiping off with a damp cloth to remove any sanding sludge. Generally I just use a light spray of clean water and a clean cloth. Use a tack cloth to remove any dust or lint and blow off with clean, compressed air (no inline oil filter). Primer does like to be dry before wet sanding, overnight is best. Don't direct your heaters on to the piece - warm the air, not the job which should just be at air temperature. If you heat the paint on the job it will skin over and won't dry properly underneath. About 15C is generally the lower limit unless you have special paints and/or thinners. 20-25C is ideal. Having cans at the same temperature is a good idea.

Top coats: 2, maybe 3, even coats, again observing the flash times.

Generally, using a system (all one brand) works better than mixing brands and types of paint unless you really know what you're doing.
 
Last edited:

stikman56

Well-known member
Joined
Jun 12, 2014
Messages
3,127
Wipe down with Wax & Grease Remover...ONLY. Never Acetone, Lacquer Thinner, etc.... W&G Remover isn't any more expensive, actually cheaper and made for the job.

Secondly, use quality rattle cans...This is ESPECIALLY true with Primers, Brands I use are SEM, Napa TecNique, PPG, DuPont, etc... cost 2x as much but works 2x better. IMHO only thing Rustoleum primers are good for is to paint old wicker furniture your trying to sell on CL. If you HAVE to save a buck, the Rustoleum Automotive Primer isn't as bad as the normal stuff.

Whoever said RTFL is correct. Stick with quality brand products, and read the label, you'll rarely get let down.

If you need to use a whole can of primer or paint to do something, I'd suggest you look into a real coating system....ie paint in a gun. I'd stay away from anything you can get at a box store, visit your DuPont, PPG or Other Paint jobber, most brands have entry level lines which are really not expensive and last a LONG time. I've got a snow-blade I painted JD Yellow back in 2006 with Nason Tractor & Equipment Acrylic Enamel which has stayed outside all its life and it still looks good...no chalking at all.

This^^^^^^
 
OP
H

Heavymetalmechanic

Well-known member
Joined
Apr 4, 2013
Messages
625
Location
Calgary, Alberta, Canada
Thanks, sounds like my 2 biggest issues are:

Temp in space, not much I can do about that until the weather warms up.

Directing heat at the piece, this sounds like my bigger issue, I think the 'skin' you described is what is flaking off on me.

I do follow the instructions on the cans, and leave extra time between coats when I can not get the garage warm enough.

I am not looking for an auto body grade finish, more like a tractor implement. I buy and use the same John Deere brand paint we use at the shop because I get a great deal on it and it seems to hold up well. But out shop is much warmer then my garage, so that may account for the better finish I get on my projects there.
 

MoonRise

Well-known member
Joined
Nov 5, 2010
Messages
4,029
Location
NJ
Thanks, sounds like my 2 biggest issues are:

Temp in space, not much I can do about that until the weather warms up.

Directing heat at the piece, this sounds like my bigger issue, I think the 'skin' you described is what is flaking off on me.

I do follow the instructions on the cans, and leave extra time between coats when I can not get the garage warm enough.

I am not looking for an auto body grade finish, more like a tractor implement. I buy and use the same John Deere brand paint we use at the shop because I get a great deal on it and it seems to hold up well. But out shop is much warmer then my garage, so that may account for the better finish I get on my projects there.

Not to beat you up too much, but if you don't have the 'right' temperature then you are NOT following the instructions.

If the label says '68-85F', then the maker (distributor, whatever) usually means it.

Paints often have a "minimum film formation temperature", and below that temperature the necessary chemical reactions (not just solvent evaporation) for the liquid paint to successfully turn into a solid paint film just will not happen.

Leaving 'extra' time to 'dry' only applies if the temperature is still within that minimum temperature. At the low end of the listed temperature range, you usually have to leave more drying (curing) time and at the high end of the listed temperature range the drying (and curing) time is shorter.

But you still have to be within the temperature range. :spit:

And a propane heater 'venting' right into the workspace? Even a radiant heater is turning the propane fuel into water vapor (and CO2 and heat energy). Which is raising the relative humidity in the space and possibly further complicating (or flat out messing up) the drying and curing of the paint.

If its too cold, you really can't successfully paint.

As to what is 'too' cold, RTFL. :thumbup:
 

sberry

Banned
Joined
Jun 18, 2005
Messages
35,747
Location
Brethren, Michigan
If I am sandblasting never wipe sheet on it after. I take a purple scotch brite and scuff a quick shot to knock off sand and dust as well as little spikes on the steel that tend to poke thru primer. Blow off and paint. I bought a jug or 2 of prep stuff 20 yrs ago, still got half,, ha
All that stuff is too much work and too messy, causes more problems than it solves.
 
Last edited:

sberry

Banned
Joined
Jun 18, 2005
Messages
35,747
Location
Brethren, Michigan
Ex: I sandblasted a project on Thursday, blew if off with compressed air and wiped my greasy handprints off with some thinner. Is it ready for paint?
How *** you got greasy hand prints on this? I treat it nice and kind of sterile and never have problems.
Soak spray cans in hot water and its about impossible to shake them enuf.
And,,, you never see a dull run,, ha
 

Attachments

  • Paint cabnit.JPG
    Paint cabnit.JPG
    48.4 KB · Views: 62
  • paint cans.JPG
    paint cans.JPG
    38.7 KB · Views: 55
  • old gun.JPG
    old gun.JPG
    29.2 KB · Views: 56
Last edited:
To avoid these ads, REGISTER NOW!

WoodsTruck

Well-known member
Joined
Jan 12, 2013
Messages
1,023
I can't remember where I found this trick.

For shaking up rattle cans I like the 3/4" throw of my Saws-All!

My marker line and the notch in the carpet edge strip marks the bottom of the can so it doesn't hit the saw when in motion.
 

Attachments

  • IMG_0195.jpg
    IMG_0195.jpg
    145.1 KB · Views: 142

Thumper68

Well-known member
Joined
May 16, 2013
Messages
5,134
Location
Duluth MN
I like the sawsall idea, what I have found with rattle cans is to make sure that the item and space are warm enough and to shake the hell out of the can.

If I finish something and the shop isn't warm enough to paint I will hit it with a coat of wd-40 to prevent rust until the space is up to temp, be it a hour, a day, or a month
 

zeke67

Well-known member
Joined
Jun 11, 2010
Messages
272
Location
Houston
Lots of good advice already. I think heating your piece and then waiting too long between prime and top coats are your problem. Paint needs to come out of the can (or gun) ant the right temp and the piece needs to be pretty close to that. Think about a time where you painted something in the full sun and it crinkled or flash dried and that's what you are creating by heating the piece.

For a rattle can (or maybe any single stage enamel) heating the piece afterwards with radiant heat or sun light helps out.

Generally, I don't mix paint and primer brands if I want a quality finish. If I'm doing quickie work, giving a little corrosion proofing or just using up old cans then maybe.

No issues with acetone. I also use the paint degreasers.

I like etching primers. Use a very very thin coat. Like a mist. Within 5-15 minutes cover it with another primer or go straight to a quality top coat. A gray primer for shop work or a sand-able primer if you want to fill scratches and get a smoother finish. I might use a red oxide under a red top coat.

With most spray cans paints you should get the top coat on within an hour or after 24. Read directions, they vary. For the first top color coat, I hit it with a dust coat. Enough to make it tacky, not enough to put significant color on it. I wait 5-10 minutes, regardless of the directions. Then revisit with serious layer of color. Get color on everything. Focus on no runs, even coverage, but don't worry too much about final appearances. Now, walk away (hardest part). Then, according to the instructions on the can, go back and lay on final coat. Work on finished appearance and gloss. Walk away.
 
OP
H

Heavymetalmechanic

Well-known member
Joined
Apr 4, 2013
Messages
625
Location
Calgary, Alberta, Canada
Thanks everyone! Ironically I ended up having to repair a number of gouges on the counterweights of 3 excavators in the days following my initial post. Man did I figure out all the wrong ways to apply body filler! I wish I had a trigger handle for the spray cans, or my own spray gun! The shop gun was not cleaned after it's last use, I soaked it in a tub of gun wash (NASTY stuff!!!) and cleaned it but it was not useable at the time.

Long story short, temp is Very important, as is surface prep and a clean enviroment.

Hats off to you bodywork folks, I can tell you it sure is not how I want to spend my days!

Thanks again for the input everyone! I'm going to be sure to truely mess up my next paint project so I am never asked to do it again! (Just kidding! It never hurts to add another skill to the tool box)
 

TheModelAGuy

Well-known member
Joined
Aug 24, 2014
Messages
108
I'm in the same boat with auto restoration clean, blast, and paint.
sherry nailed it. The special metal cleaners are for auto body and are over kill for what you described.
Some newer primer paints are self etching and will really bite on sandblasted metal.
I use Metal Prep by POR-15 similar to metal conditioner but you must follow the directions or the paint won't bond. This stuff will cost the metal to protect it from rusting. Also cannot apply a urethane over Metal Prep. Found this out the hard way.
Also POR-15 product is designed to go over metal if you are interested in a paint hat doesn't need primer.
 

MP&C

Well-known member
Joined
Oct 21, 2009
Messages
4,403
Location
Leonardtown, MD
What is the harm in acetone?


Acetone may be too strong for some paints that may still be on the panel where it may soften, lift, wrinkle, etc. But more importantly, when you use a solvent to remove a contaminant from the surface the liquid needs to stay on the surface long enough to "float" the contaminant to the surface where it can be wiped off. A solvent that dries quickly may "float" these impurities to the surface, but if the solvent flashes or dries before the impurities can be properly wiped away, then you still have a good possibility of contamination. Spray cans may be another issue, but paint products today cost a pretty penny that trying to save a few dollars by using a hardware store acetone over a product designed to do the job really loses it's luster when fisheye craters come back to bite you in the ***. Most automotive pre-clean products are a slow to evaporate solvent where they provide adequate time to do the job. As with anything else paint related, follow manufacturer's instructions on pre-clean as well. Nothing is fool-proof; anything used incorrectly will be a **** shoot.
 

03protege

Well-known member
Joined
Sep 13, 2012
Messages
3,104
Location
Louisiana
I use to make custom iron curtain rods for a few years in college, I have probably gone through enough spray paint to give me cancer.

Sometimes during the winter I would paint the rods and the temperature would be in the40s, which is less than what you are trying to do now.

In colder times of the year after my wipe down with acetone I would run my blow torch over the rods, not enough to heat them but enough to evaporate any remaining solvents.

Some things I would try:
-Stop worrying about trying to heat the work piece
-Apply Top Coat while primer is still tacky (for me I usually wait 1 beer)
-Use paint from the same brand - you may be experiencing some incompatibility
-I would sand or use a strip and clean disc on my painting surfaces. Is your surface too smooth?

I really like the Rustoleum products and would use their "automotive" primer and then spray on Professional flat black or one of the nicer metallic finishes.

After the spray had time to dry (but not yet fully cured) I would bring it inside the house where it would finish curing relatively quick.
 
Last edited:

PCustoms

Well-known member
Joined
Jul 23, 2011
Messages
22,903
Location
VT
Acetone may be too strong for some paints that may still be on the panel where it may soften, lift, wrinkle, etc. But more importantly, when you use a solvent to remove a contaminant from the surface the liquid needs to stay on the surface long enough to "float" the contaminant to the surface where it can be wiped off. A solvent that dries quickly may "float" these impurities to the surface, but if the solvent flashes or dries before the impurities can be properly wiped away, then you still have a good possibility of contamination. Spray cans may be another issue, but paint products today cost a pretty penny that trying to save a few dollars by using a hardware store acetone over a product designed to do the job really loses it's luster when fisheye craters come back to bite you in the ***. Most automotive pre-clean products are a slow to evaporate solvent where they provide adequate time to do the job. As with anything else paint related, follow manufacturer's instructions on pre-clean as well. Nothing is fool-proof; anything used incorrectly will be a **** shoot.

OK, sounds like it would still be acceptable on a bare metal surface that is not designed to have a class A finish then?
 

69supercj

Well-known member
Joined
Jan 26, 2010
Messages
555
I've been working on restoring an old 50's occilating fan that the body is primarily of cast aluminum and I'm having a hell of a time with the primer and paint. First off, the very first piece I painted I did not use a self etching primer and the piece turned out absolutely awesome. I'm using rustoleum products, their self etching primer, their automotive primer and their automotive enamel gloss black paint. The main body or pedestal of the fan was a fairly rough cast aluminum that was originally painted with a crinkle paint. I am going with a glass smooth finish in gloss black. So after blasting the body clean of the old paint I then sprayed it with etching primer. One thing I'm noticing is that the etching primer takes a long time to harden up. Its still dentable with the finger nail after 24 hrs. which doesn't seem right. Anyway, after I gave the body a couple of good coats of etching primer I sprayed it with the automotive primer and it looked awesome..................untill it started cracking in the crevices. So I let it dry good and blended those areas and hit it with color. It looked good until these little bumps started appearing. So I blasted the whole thing clean and started over. Gave it a couple coats of etching primer and I'm still having issues with these little pimples popping up. Just a few but I cant figure out whats causing it. Any ideas? I've sanded down two already and just noticed that another one has appeared. They're small, about the size of a pin head or smaller but under gloss black they'll look like a baseball.
 

pepi

Well-known member
Joined
Mar 27, 2013
Messages
2,883
Location
Woodstock, GA
If you are painting over millscale, it will need a good coat of primer, paint it like you would the coat. Let cure, should not have any smell when cured, same goes for the top coat.
 

69supercj

Well-known member
Joined
Jan 26, 2010
Messages
555
I put one light coat to begin with then went heavier with the second coat. Its been two days since primed and the latest bubble came up this afternoon. I'm gonna let it set for another day or three and if no more bubbles I'll give it a coat of the automotive primer, sand smooth and then topcoat.
 

pepi

Well-known member
Joined
Mar 27, 2013
Messages
2,883
Location
Woodstock, GA
I've been working on restoring an old 50's occilating fan that the body is primarily of cast aluminum and I'm having a hell of a time with the primer and paint. First off, the very first piece I painted I did not use a self etching primer and the piece turned out absolutely awesome. I'm using rustoleum products, their self etching primer, their automotive primer and their automotive enamel gloss black paint. The main body or pedestal of the fan was a fairly rough cast aluminum that was originally painted with a crinkle paint. I am going with a glass smooth finish in gloss black. So after blasting the body clean of the old paint I then sprayed it with etching primer. One thing I'm noticing is that the etching primer takes a long time to harden up. Its still dentable with the finger nail after 24 hrs. which doesn't seem right. Anyway, after I gave the body a couple of good coats of etching primer I sprayed it with the automotive primer and it looked awesome..................untill it started cracking in the crevices. So I let it dry good and blended those areas and hit it with color. It looked good until these little bumps started appearing. So I blasted the whole thing clean and started over. Gave it a couple coats of etching primer and I'm still having issues with these little pimples popping up. Just a few but I cant figure out whats causing it. Any ideas? I've sanded down two already and just noticed that another one has appeared. They're small, about the size of a pin head or smaller but under gloss black they'll look like a baseball.

Sounds like solvent pop, happens when the primer has not completely cured, and the solvent is gassing out. To check paint or primer to see if it is cured, the nose, nose. If you can smell paint it is not cured.

Not sure why you are using two types of primer, self etching and top coat should be all you need.

Ruff casting, glass smooth finish ........ sounds like a candidate for high build primer and a load of sanding. Every coat will show the ruff casting, the only way around that is to sand in between the coats, smoothing the lumps out. At some point all the craters will be filled with primer and the surface will be smooth. Think low spots on a body panel, only thousands of them.
 

69supercj

Well-known member
Joined
Jan 26, 2010
Messages
555
I'm using two types because the etching primer is not a very high build rate and I need higher build to fill the pores of the casting. So far no more pops other then the one that came out yesterday. I'll let it "cure" for another day or so and then sand out that pop and hit it with a coat of the high build and then sand and hopefully paint.
 

Shadowdog500

Well-known member
Joined
Dec 7, 2009
Messages
9,856
Location
Down the shore
Until I saw this I didn't know that it was best to paint shortly after sand blasting while the surface is still activated.

When I painted my motorcycle tank I scrubbed it down then finished it with windex which I picked up from an online airbrush course. The paint adhered well.

Chris
 

MP&C

Well-known member
Joined
Oct 21, 2009
Messages
4,403
Location
Leonardtown, MD
I've been working on restoring an old 50's occilating fan that the body is primarily of cast aluminum and I'm having a hell of a time with the primer and paint. First off, the very first piece I painted I did not use a self etching primer and the piece turned out absolutely awesome. I'm using rustoleum products, their self etching primer, their automotive primer and their automotive enamel gloss black paint. The main body or pedestal of the fan was a fairly rough cast aluminum that was originally painted with a crinkle paint. I am going with a glass smooth finish in gloss black. So after blasting the body clean of the old paint I then sprayed it with etching primer. One thing I'm noticing is that the etching primer takes a long time to harden up. Its still dentable with the finger nail after 24 hrs. which doesn't seem right. Anyway, after I gave the body a couple of good coats of etching primer I sprayed it with the automotive primer and it looked awesome..................untill it started cracking in the crevices. So I let it dry good and blended those areas and hit it with color. It looked good until these little bumps started appearing. So I blasted the whole thing clean and started over. Gave it a couple coats of etching primer and I'm still having issues with these little pimples popping up. Just a few but I cant figure out whats causing it. Any ideas? I've sanded down two already and just noticed that another one has appeared. They're small, about the size of a pin head or smaller but under gloss black they'll look like a baseball.


For castings, a buddy of mine who powder coats says they are a headache. The porosity apparently holds all kinds of contaminants, so prior to PC'ing he will clean, heat in the oven, then clean again. Additional cleanings based on how much comes out the first time. Then he powders. Not saying this is your issue, but something to consider. Perhaps proper cleaning on items that will be sprayed with an aerosol can is less considered than in the automotive arena, which may also contribute.

Next, etching primer is not intended to be a high build or a tie coat. It's intent is adhesion to bare surface. So one or two coats at most should be all of it being used, and then none afterward. Use high build for building. Too much acid from too many coats/thickness of the etching primer in one application may be problematic. That's not what it's designed for.

When you say you reverted to automotive primer, this is still the Rustoleum spray cans, correct? I would add that regardless of both being the same name brand, compatibility issues do exist between spray can products, likely more prevalently than in using true automotive spray finishes.

To elaborate on solvent pop, this is typically something that is associated with catalyzed urethane paints, where a flash time window was not observed and the subsequent coats "sealed in" solvents before they could outgas. This is not something typically seen with spray paints that I'm aware of, so I'd lean toward this being too much acid from too much etch primer being used, or contaminants from the porous casting..
 

sanddan

Well-known member
Joined
Jul 7, 2005
Messages
708
Location
Oregon
My problem with Rustoleum products in spray cans is the very long dry times. I think you would have better results with a different brand paint. SEM products are often used in professional shops for small spot work, I have had very good results with them. Napa also stocks good brands.

The better spray cans also have much better nozzles than the cheaper ones found in the big box stores. They will give you more of a fan spray vs the spot most nozzles have.
 

sberry

Banned
Joined
Jun 18, 2005
Messages
35,747
Location
Brethren, Michigan
I am going to add this again. With sandblast I treat it surgically, I wash hands first or use clean gloves and almost always scuff with purple scotch brite, blow off and paint. Simple as that, nothing between it, on it, least of all some water and as was mentioned with all these, thinner it needs to be wiped up wet. All a super pain and all with or adds problems.
The scuff is really important with self etch primers. As mentioned, these are thin and actually run off the peaks in a sandblast surface, a simple scuff smooths this and keeps spikes from the surface poke thru primers. You can also see sand come off but test this for oneself. Feel the difference.
 

sberry

Banned
Joined
Jun 18, 2005
Messages
35,747
Location
Brethren, Michigan
Paint is confusing for a lot of people but the painters secret weapon is some purple scuff pad and a little sandpaper. A little laq thinner to wipe up grease. I don't go thru it all everytime I make something look a bit better from a rattle can. Something I am not scared to do it knock the corners off with a sander, on occasion touch up a little with primer and shoot some color on,,, almost painted, wait a little if its not sitting flat and come by for as wet a coat as I can get,, remember, you very rarely see a dull run. Stop just prior to that,,, ha The colder the slower and less paint you can hang.
 
To avoid these ads, REGISTER NOW!
Top Bottom