To avoid these ads, REGISTER NOW!

Pumba's Kiwi Garage

Pumba

Active member
Joined
May 25, 2013
Messages
38
Location
Cambridge, New Zealand
So after lurking around here for a while I figured it was time to throw up a thread on my garage.

Now from the get go I will be honest; (1) I suspect this is going to take a little while to be in the state that I would really like, but hey we all have to start somewhere; (2) I know, use daily, and love the metric system and feet and inches are not normal language for me:dunno:0 000000 I will convert where I remember to, but I make no promises. So on with my story.

So back at Christmas we decided it was time to move out of the big city (for NZ) of Auckland and closer to family in the Waikato. So my shed and all my **** pretty much went into storage at that stage:sad:

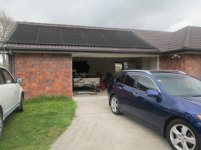
Back in May we moved into our new place.

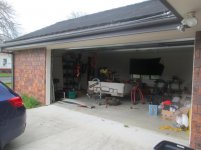
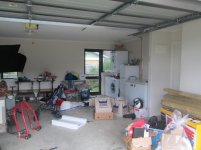
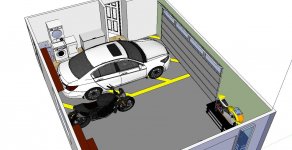
Now I would have preferred something larger but what I ended up with was an 8m x 6m (so about 26 x 20) attached garage with the laundry tucked away in the corner.

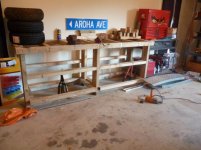
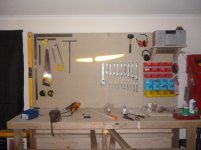
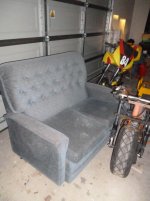
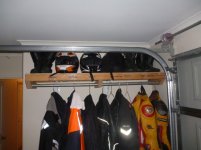
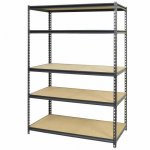
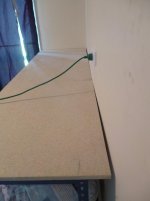
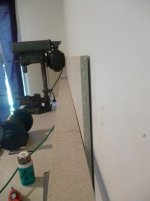
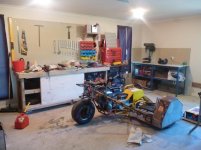
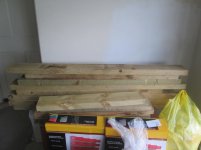
Here is how it looks now after getting all the boxes and other moving **** out.

Looking at the pictures again there still seems to be a **** load of boxes and general **** scattered around the place.
 

Attachments

  • IMG_0047.jpg
    IMG_0047.jpg
    81.2 KB · Views: 225
  • IMG_0048.jpg
    IMG_0048.jpg
    76.7 KB · Views: 226
  • IMG_0040.jpg
    IMG_0040.jpg
    80.1 KB · Views: 225
  • IMG_0041.jpg
    IMG_0041.jpg
    73.9 KB · Views: 192
  • IMG_0045.jpg
    IMG_0045.jpg
    71.7 KB · Views: 253
To avoid these ads, REGISTER NOW!
OP
P

Pumba

Active member
Joined
May 25, 2013
Messages
38
Location
Cambridge, New Zealand
One of the first things i did within a few weeks of moving in was rip out a cupboard that was built into the garage. This gave me somewhere to put the chest freezer that wasn’t taking up floor space. Obviously I still have a bit of finishing to do.
 

Attachments

  • IMG_0044.jpg
    IMG_0044.jpg
    53.7 KB · Views: 80
OP
P

Pumba

Active member
Joined
May 25, 2013
Messages
38
Location
Cambridge, New Zealand
Inspired by some of the other sketch ups I had seen on here and the fact that I was a CAD Technician in an earlier life, I thought I would have a go at it myself.

So to explain the space as I have it laid out, I want to put in a bit of lino to define the laundry area and just make it that bit nicer to use. I then wanted to define a parking bay for our family car. The car won’t live in the shed all the time but I wanted to incorporate the parking bay as we do have a young family and if it is the middle of winter, ******* down with rain, it would be ****** nice to be able to pull into the shed to unload everyone and the shopping. Also handy for when I get home form a race meeting with the trailer I can just back it in and worry about it tomorrow. My theory of butting down some line marking is that it will discourage me from putting **** there when the car is out.

This then leaves me the rest of the space as work space.
 

Attachments

  • 5.JPG
    5.JPG
    127.6 KB · Views: 70
  • 4.JPG
    4.JPG
    141.4 KB · Views: 70
  • 3.jpg
    3.jpg
    108.5 KB · Views: 77
  • 2.jpg
    2.jpg
    108.7 KB · Views: 91
  • 1.JPG
    1.JPG
    80.7 KB · Views: 113
OP
P

Pumba

Active member
Joined
May 25, 2013
Messages
38
Location
Cambridge, New Zealand
Right that is probably it for now. One of the first tasks I need to do is build my work benches.

Went round to a mates place on the weekend and picked up some 6x2 off cuts. I also have another mate who is dropping round some 4x4 lengths. My moto if it is free it can be used and it is all GOOD:thumbup:

I also have some trays that I am just itching to get up on the wall.
 

Attachments

  • IMG_0042.jpg
    IMG_0042.jpg
    55.5 KB · Views: 48
  • IMG_0043.jpg
    IMG_0043.jpg
    70.6 KB · Views: 64
OP
P

Pumba

Active member
Joined
May 25, 2013
Messages
38
Location
Cambridge, New Zealand
Well I said it would be a while between posts.

Got a chance to get into the shed to day and started knocking up the first of the work benches.

I have gone for 900mm high x 700mm wide x about 2.4m long for this bench. It will be my main bench and the next one will be my machine bench.

So far total cost $0.00:rocker:

I went to get some sheets of ply for the top from the local Bunnings, didnt like there prices so went round the corner to M10 Mega and they were not any better (probably a touch worse). I know where I can get it cheaper (read what it actually worth) just need to plan the trip to get there.
 

Attachments

  • P1020031.jpg
    P1020031.jpg
    76.8 KB · Views: 68
  • P1020032.jpg
    P1020032.jpg
    77.4 KB · Views: 65
  • P1020033.jpg
    P1020033.jpg
    73.3 KB · Views: 58

Jagmandave

Well-known member
Joined
Nov 6, 2011
Messages
6,302
Location
Overland Park, Ks.
If you're only buying enough plywood to cover a workbench, is it really worth the extra time, trouble and gas to go somewhere far away vs. buying it close by?

Making the most of your space is what it's all about, you've gotten a good start!
 
OP
P

Pumba

Active member
Joined
May 25, 2013
Messages
38
Location
Cambridge, New Zealand
Yea it really is in this case. Normal hardware stores are 5min away, alternative supplier is 20min away in the closest main centre. I am probably looking at close to half the price of the big hardware stores down the road, so over 3 full size sheets of ply it should be a cumulative saving of $60 to $80.

Will no doubt end up spending the savings on the shed so it is just about making the limited money I have go that bit further.
 

HSpencer

ALLIANCE MEMBER
Joined
Nov 28, 2010
Messages
2,854
Location
South Central US
Best part is the garage is already finished out nicely so you don't have to go through insulation, drywall, etc. Looks like you have a good plan going!!

Best Regards
Herb Spencer
 

Jagmandave

Well-known member
Joined
Nov 6, 2011
Messages
6,302
Location
Overland Park, Ks.
Yea it really is in this case. Normal hardware stores are 5min away, alternative supplier is 20min away in the closest main centre. I am probably looking at close to half the price of the big hardware stores down the road, so over 3 full size sheets of ply it should be a cumulative saving of $60 to $80.

Will no doubt end up spending the savings on the shed so it is just about making the limited money I have go that bit further.

OK, that makes sense, I thought you just needed one small piece to cover that bench......
 

OrneryDuck

Well-known member
Joined
Oct 17, 2012
Messages
120
Location
Gem of the Hills, FL
Looks good, being a SpeedTriple owner, you had me by the second CAD illustration.

Definitely looks like a good use of space without getting too cramped. Where are you planning to stick the trailer once it is all said and done?
 
OP
P

Pumba

Active member
Joined
May 25, 2013
Messages
38
Location
Cambridge, New Zealand
Yes I was quite stoked when I found the speed triple in the model library. There is honestly, in my opinion, not a better all round bike on the market. It also doesn't hurt that they look **** as hell.

Reality is that the trailer will live out side, tucked around the corner of the house, and secured with a chain and or other immovable object (we don't live in a bad area by any extent I just don't like to take chances). Only reason it is inside at the moment is that I am being a but lazy and it is keeping the bikes out of my way while I work on the shed.
 
OP
P

Pumba

Active member
Joined
May 25, 2013
Messages
38
Location
Cambridge, New Zealand
Bit more work over the last week or so.

Bench frame is complete waiting for some sheets of wood. In the mean time I have moved it into position and set about moving a few things off one wall to another and out of the corners so I can start measuring things up for the machine bench I am yet to build.

Need to go get some more "scrap" timber off my mate for that, used a bit more on the first bench than I intended (it is solid though).

Also pulled my vices out and sat them on the bench. I cant wait too get the bigger one mounted as I really have been missing having one. I would prob prefer something a little larger with a swivel base, but I have had this for a number of years now after salvaging it form an old shed on the farm when my parents were moving. I have no proof but I believe it was my grandfathers so holds a bit of sentimental value and I will never be rid of it. The smaller one is one I grabbed off a bench my uncle was dumping:scared: 
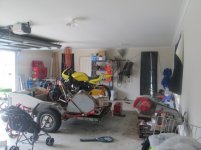
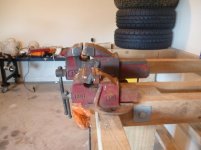
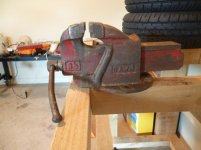
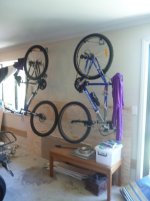
(I should add by marriage) a couple of months back so I haven't actually used (doesnt look like anyone has to be honest. Not sure where it will live yet, maybe something for my sons when they come of age.
 

Attachments

  • P1020048.jpg
    P1020048.jpg
    68.9 KB · Views: 60
  • P1020047.jpg
    P1020047.jpg
    70.6 KB · Views: 49
  • P1020045.jpg
    P1020045.jpg
    69.8 KB · Views: 56
  • P1020044.jpg
    P1020044.jpg
    82.5 KB · Views: 55
  • P1020043.jpg
    P1020043.jpg
    84.3 KB · Views: 61
OP
P

Pumba

Active member
Joined
May 25, 2013
Messages
38
Location
Cambridge, New Zealand
Steal is such a strong word.

Funny story about that, was the road I where my first house was. I had actually sold up and my wife and I had bought a "family" home across town. She was 7 months pregnant at the time. Some one had knocked it the entire pole down, so at 11pm one night convinced my wife that we should go for a walk to pick it up.

Now she was a good girl growing up and had not partaking in such behavior before, so when we got halfway home an a saw a car coming and I just dropped the pole and kept walking along the footpath she didn't quite get the idea and was standing there like a possum in the headlights as the car went past. Well I found it hilarious, her not so much.

Got it home after that. The pole came in handy for a couple of projects as well.

I have a couple of others that will go up once I have gotten things sorted.
 
Last edited:
OP
P

Pumba

Active member
Joined
May 25, 2013
Messages
38
Location
Cambridge, New Zealand
Well a little more progress. Need to get back to my mates place to grab some more scrap timber so I can start on my second bench.

attachment.php


Also picked up this new addition for the garage today as well

attachment.php


Probably the one and only thing that I have let the Mrs put in the garage, but it is for her comfort (she likes to come out and chat while I work). It also only cost $1.50 and was 5km down the road, so no great loss if it doesn't fit
 

Attachments

  • P1030006.jpg
    P1030006.jpg
    66 KB · Views: 899
  • P1030008.jpg
    P1030008.jpg
    83 KB · Views: 898
To avoid these ads, REGISTER NOW!
OP
P

Pumba

Active member
Joined
May 25, 2013
Messages
38
Location
Cambridge, New Zealand
It has just been ****** nice to have a bench again!

We have just had a long weekend (public holiday Monday) here and the simple task of clamping a shovel in the vise to give the leading edge a tickle up with the grinder was just so dam easy.
 
OP
P

Pumba

Active member
Joined
May 25, 2013
Messages
38
Location
Cambridge, New Zealand
Right time for an update.

Not a lot has happened in the shed since my last post as i had this delightfull little arrival turn up 4 weeks ago that has been keeping me busy (and sleep deprived).

attachment.php


However prior to his arrival I did manage to get my shelf up for my bike gear,

attachment.php


This did make the wife happy has it freed up the wardrobe in the baby room that it has been living in. I am first to admit that it could be a bit tidier, but it is functional for the time being.

Also this week managed to pick up a bit of a score off Trade Me (our own local ebay). An engineering shop round the corner from work was shutting down and had up a number of auctions up for grabs. I only managed to pick up one lot as the rest went for more than my pocket money would allow; however for the grand total of $28.10 I picked up these tool boxes (one of the bigger ones actually turned out to be full of assorted nuts, bolts and odds and ends)

attachment.php


Which came with this small custom kero bath which was what I was really after.

attachment.php


No more cleaning part in ice cream containers for me!

With the Christmas break coming up I might get some more done; however the weather has been mint outside and if it continues I doubt I will feel like spending much time inside (plenty of gardening jobs to get done you see :beer:).
 

Attachments

  • P1030035.jpg
    P1030035.jpg
    84.9 KB · Views: 499
  • P1030030.jpg
    P1030030.jpg
    78.6 KB · Views: 500
  • P1030026.jpg
    P1030026.jpg
    69 KB · Views: 497
  • Oliver Colin Smith.jpg
    Oliver Colin Smith.jpg
    41.7 KB · Views: 497
OP
P

Pumba

Active member
Joined
May 25, 2013
Messages
38
Location
Cambridge, New Zealand
Cheers 1/2 Cup:thumbup:

Well it has been a couple of full on days in the shed, and I haven't even started preparing the my bikes (which I know need some work) for the race meeting next weekend:eyecrazy:

Due to a lack of interest on my part in all things shed over the last 6 weeks it had become a bit of a dumping ground for anything that we just didn't want in the house. Add to that the fact that we have purchased several new furniture items that it had resulted in a **** load of cardboard and other packaging, once again dumped in the garage.

Anyway we managed to palm off our 2 year old to his Nana, which meant I had a great chance to get in there and get it clean.

That took a fair amount of yesterday. While I was out there the wife started talking about what "little" bits and pieces she wanted done top of the list being a plinth for the front loader washing machine to save her bending over as often.

So I knocked something together out of some timber I has ling around. TBH it didn't really work out like I wanted due to its rushed nature, but the wife was happy.

Well went to bed as you do and had a dream that was related resulted in a damaged washing machine!

So the 6 week old was up at 5am for a feed, and back asleep at 5.30am. I was wide awake, wife was asleep, didn't really feel like watching TV so I headed out to the shed. I took one look at my plinth and took my dream as a sign and set out rebuilding it. Come 8.30 when 6 week old woke up again I was just putting the finishing touches on the rebuilt plinth:rocker:

This lead to a mammoth day in the shed tidying and organising and finishing some of the outstanding projects on my master plan. Finished up coming back inside at about 7.30pm.

I will throw up some photos of the progress tomorrow. I am really happy with the way it is starting to all come together and the space that has just been created by some efficient organisation in the last couple of days.

Wont get much done tomorrow unfortunately as the 2 year old is back and we have a belated Christmas wit the wife's family. Which is a shame as I love it when I get on a roll.
 
OP
P

Pumba

Active member
Joined
May 25, 2013
Messages
38
Location
Cambridge, New Zealand
So some photos and a bit more of a story.

So a couple of garages ago I bought a (realitivly) cheap pallet shelving system as a bit of storage;

attachment.php


Now I wasn't too sure what I was going to do with them as they didnt really fit the plan I had for this garage, so while cleaning up I thought it be best that I break them down. About then I had a moment of clarity and went you know what that would make a great work bench frame.

So a few bolts to hold the two halves together and piece of wood for the top and bang a work bench in an hour or so.

attachment.php


I thought it would be a bit flimsy to be honest but I have got to say I am surprised at how solid it has become.

Of course nothing is that simple, spot the issue in this photo

attachment.php


****** group house builders. I had to check the measurements on my top a couple of times before I believed that the wall was that far out.

So as a result this is now giving me a few issues with my splashback(?, technical term).

attachment.php


attachment.php


My plan is to put a little shelf along the back for drill bits/cutting fluid/etc. If I screw the splashback hard back to the GIB of course it follows the contour of the wall. If I attach to make it straight then of course I an left with gaps between the wall and splashback and it looks a little ****. Any suggestions on a solution where I get the best of both worlds?
 

Attachments

  • 1111.jpg
    1111.jpg
    36.7 KB · Views: 324
  • P1050013.jpg
    P1050013.jpg
    73.2 KB · Views: 322
  • P1050012.jpg
    P1050012.jpg
    51.9 KB · Views: 324
  • P1050033.jpg
    P1050033.jpg
    50.1 KB · Views: 321
  • P1050034.jpg
    P1050034.jpg
    40 KB · Views: 322
OP
P

Pumba

Active member
Joined
May 25, 2013
Messages
38
Location
Cambridge, New Zealand
I must say I am so happy that the bench is done as I have been able to grab from storage my Drill Press.

It is an old Tanner, which was a locally made item back in its day. It was a hand me down from my father who had it for pretty much as long as I can recall (so that would be 20+ years).

I have really missed having it in my shed. A year to get everything to this point feels far too long.

attachment.php


attachment.php


attachment.php
 

Attachments

  • P1050016.jpg
    P1050016.jpg
    54.5 KB · Views: 318
  • P1050018.jpg
    P1050018.jpg
    53.1 KB · Views: 1,532
  • P1050017.jpg
    P1050017.jpg
    48.6 KB · Views: 326
OP
P

Pumba

Active member
Joined
May 25, 2013
Messages
38
Location
Cambridge, New Zealand
A few other random picks from around the garage, nothing too special.

General garage shots. Still not clean but getting better, and man look at that space!

attachment.php


http://www.garagejournal.com/forum/attachment.php?attachmentid=304894&stc=1&d=1388456295

Push bikes found a home off the floor, and they are doing a good job of holding up the plywood sheets i have left at the moment.

attachment.php


The washing machine plinth for the wife. Didn't quite get it square on the bottom so if the machine gets off balance it tends to walk around a bit. I will fix that.........honest.

attachment.php


Some boards that I have put up on the wall that will allow me to hang a whole heap of stuff. Still a work in progress so mind the mess.

attachment.php


Think that is it for now, time to do some work on the bikes for racing this weekend!
 

Attachments

  • P1050024.jpg
    P1050024.jpg
    63.9 KB · Views: 318
  • P1050022.jpg
    P1050022.jpg
    59.2 KB · Views: 322
  • P1050021.jpg
    P1050021.jpg
    64.7 KB · Views: 322
  • P1050020.jpg
    P1050020.jpg
    81 KB · Views: 11
  • P1050019.jpg
    P1050019.jpg
    85.1 KB · Views: 325

1/2 Cup

Member Emeritus
Joined
Apr 28, 2012
Messages
19,283
Location
Shepparton. Victoria. Australia
The bench has come up well, a great bit of innovation there:thumbup:
Are you putting a top on the bench top and splash back or just sealing it?
I love the drill press, I have never seen one like it before.
They are better built than what you can get today.

Well done.:thumbup:
 
OP
P

Pumba

Active member
Joined
May 25, 2013
Messages
38
Location
Cambridge, New Zealand
Splash backs will prob be painted eventually. The original plan for the bench top was to skin them with hardboard, but I am not even sure I will be do that now. I just cant see anything to be gained. just with a coat of paint.

The tops and backs are all fine chip chip board which I have been impressed with 1) for its price as factory seconds and 2) its density. In one of my old garages I used the older coarse particle board that wasn't sealed, after about 5 years of abuse by me including oil and solvents, although showing the effects was still solid. So I have no concerns about its performance.

If they need replacing in 5 years it is still not a bad way of going about it.
 

1/2 Cup

Member Emeritus
Joined
Apr 28, 2012
Messages
19,283
Location
Shepparton. Victoria. Australia
Splash backs will prob be painted eventually. The original plan for the bench top was to skin them with hardboard, but I am not even sure I will be do that now. I just cant see anything to be gained. just with a coat of paint.

The tops and backs are all fine chip chip board which I have been impressed with 1) for its price as factory seconds and 2) its density. In one of my old garages I used the older coarse particle board that wasn't sealed, after about 5 years of abuse by me including oil and solvents, although showing the effects was still solid. So I have no concerns about its performance.

If they need replacing in 5 years it is still not a bad way of going about it.

Sounds like the way to go:thumbup:
 
OP
P

Pumba

Active member
Joined
May 25, 2013
Messages
38
Location
Cambridge, New Zealand
Sweet as. I will get the wife to take a shot with her big camera ( I am not qualified to drive it) so that should be nice and clear for you.
 

Guster

Well-known member
Joined
Mar 11, 2012
Messages
1,543
Location
Auckland, New Zealand
Sweet as. I will get the wife to take a shot with her big camera ( I am not qualified to drive it) so that should be nice and clear for you.

Much appreciated. I have been hounding Trademe hoping upon a glint of a similar badge with enough detail to get the contrast separation to make an etching mask. Then hopefully I can do a deep enough etch to fill with red acrylic paint and sand it back to reveal the logo. :D
 

Guster

Well-known member
Joined
Mar 11, 2012
Messages
1,543
Location
Auckland, New Zealand
That is brilliant thanks! This is just big enough to get the text detail digitized in Photoshop. Just have to find some thinner brass and see what's easiest for making a etching mask these days.

Sorry I didn't reply sooner. Just came looking as I am in the process of rebuilding the bandsaw in question. You can just make it out in the left of this photo:
12607522553_b033a18b0b.jpg

I've made the new steel base, motor mount and reconditioned a decent replacement motor. Should be a little quieter as it is welded rather than the original bolt together stand. However might still stick a wood base between to help kill the rattle. Also made it big enough to have 4-5 speed pulleys as apposed to the original 1:4 ratio.

Dying to get this machine back in use as I've had need of it a few times now and would like the space to start working on my little horisontal mill.
 

Guster

Well-known member
Joined
Mar 11, 2012
Messages
1,543
Location
Auckland, New Zealand
Thanks again for the pic. I took it into photoshop and retyped the text to get it clearer.

Couldn't get the laser toner to release from the transparency so I tried the glossy magazine page trick instead and it came out good enough.
39352794152_cfb5cee3ae_z.jpg


Trimmed and ready to fit. Small letters could have been done better but you can read them well enough. Ready to rivet to the bandsaw.
39382819731_746c6a7e57.jpg
 
To avoid these ads, REGISTER NOW!
Top Bottom