To avoid these ads, REGISTER NOW!

Real-time LED bathroom ceiling install

quattro_sinko

Well-known member
Joined
Jun 10, 2014
Messages
417
Location
Upstate NY
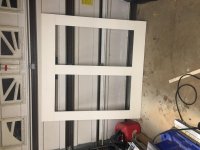
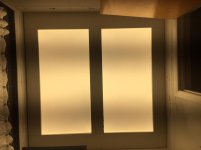
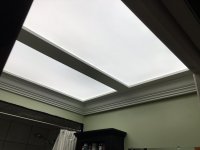
Having lived in our smallish early 70's ranch style home for 3 years, it's deficiencies have been apparent. Our only bathroom had been presumably remodeled in the early 90's (I'm guessing) by the PO. To be fair, his work was competent to say the least. The ceiling featured a site-made black grid with 18"x18" translucent panels to allow light from a variety of fluorescent lights shine through. It had to go. I "un-installed" it a few weeks ago, and today, as an olive branch to my wife, I am going to install a pair of 2'x4' LED troffer lights and trim them out. I am hoping to evoke the feel of a coffered ceiling in a very small space, and I want to be done (but in-painted) before I go to bed.

(At some point, amongst other projects, the rest of the bathroom will get remodeled. Like I tell my SO...baby-steps)

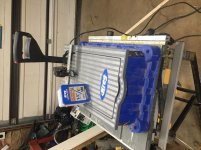
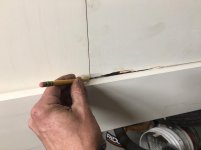
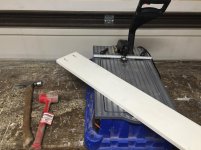
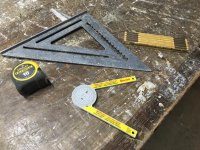
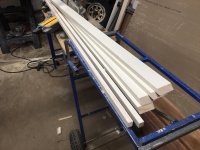
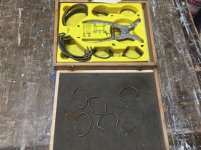
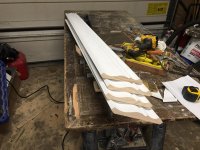
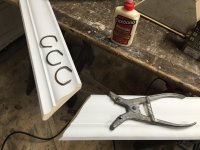
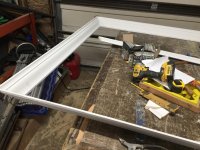
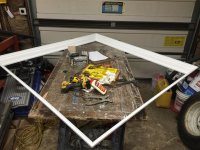
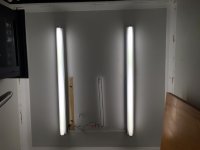
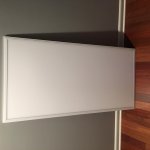
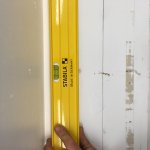
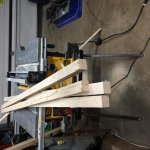
The lights are here, I've got materials in the garage, I've got a rough sketch of my intentions, and the tools are out...here we go.

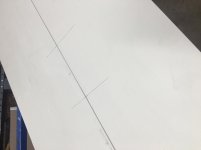
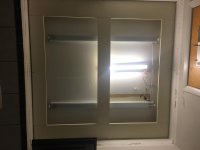
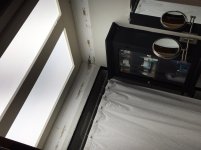
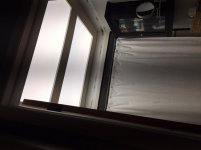
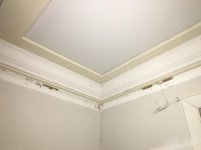
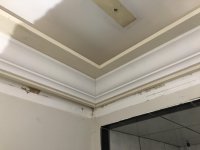
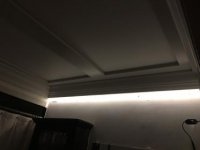
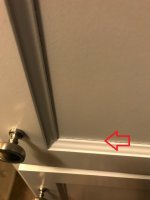
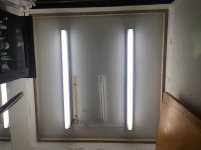
Here's some pictures of the ceiling as it is right now.
 

Attachments

  • ceiling 1.jpg
    ceiling 1.jpg
    119.6 KB · Views: 150
  • ceiling 2.jpg
    ceiling 2.jpg
    121.9 KB · Views: 139
  • ceiling 3.jpg
    ceiling 3.jpg
    117.2 KB · Views: 139
To avoid these ads, REGISTER NOW!
OP
Q

quattro_sinko

Well-known member
Joined
Jun 10, 2014
Messages
417
Location
Upstate NY
If the holy grail of ceiling lighting is to have an entirely luminous ceiling, I hope this comes close. Here are pictures of one of the two (identical) lights I'm going to install:

(apologies for the pictures, I'll try to correct them when I'm finished. Clock is ticking)
 

Attachments

  • led 1.jpg
    led 1.jpg
    122.8 KB · Views: 138
  • led 2.jpg
    led 2.jpg
    95.1 KB · Views: 133
  • led 3.jpg
    led 3.jpg
    122.8 KB · Views: 139
OP
Q

quattro_sinko

Well-known member
Joined
Jun 10, 2014
Messages
417
Location
Upstate NY
I prepped a 2"x6" into 4 1 1/4"x1 1/2" cleat stock. I usually junk cut stock to length, then rip, then cut to size.
Once finished, I checked the ceiling for level (it was closer than I expected, thankfully). I carefully laid out my elevation marks, and drew a level line at my height.
Or so I thought.
So I drew another line, above the original, at the proper height. Thankfully, the trim will cover my error (and most of the other character seen in the photos)
A little drywall repair will be necessary, but not today.

(Have tried to upload the pictures, twice now, I'll get back to them)
 

Attachments

  • level 2.jpg
    level 2.jpg
    122.3 KB · Views: 81
  • level 1.jpg
    level 1.jpg
    121 KB · Views: 87
  • cleat stock.jpg
    cleat stock.jpg
    134.6 KB · Views: 82
OP
Q

quattro_sinko

Well-known member
Joined
Jun 10, 2014
Messages
417
Location
Upstate NY
The cleating is installed (at the proper height) and I'm ready to start machining the material. I decided to use pre-primed, finger-jointed pine for the frame and crown.
It may be a few weeks before this ceiling sees finish paint, and cost wise I don't think I could beat the price with any clear/select/premium hardwood or softwood locally.
 

Attachments

  • cleat 1.jpg
    cleat 1.jpg
    127.6 KB · Views: 93
  • cleat 2.jpg
    cleat 2.jpg
    120.5 KB · Views: 90
  • material.jpg
    material.jpg
    135.8 KB · Views: 93
OP
Q

quattro_sinko

Well-known member
Joined
Jun 10, 2014
Messages
417
Location
Upstate NY
I was checking out those flat panel LEDs a week ago and wondered how they would work out.

I bought a couple of 2'x2' a few months ago to test. I have had one on a non-dimmable switch above my basement washer dryer. Great light, I am interested to see how they do on dimmers.
 
OP
Q

quattro_sinko

Well-known member
Joined
Jun 10, 2014
Messages
417
Location
Upstate NY
When I have to cut multiple pieces, I generally cut them to "junk" length first. The junk length is what I need (in this case 46") plus one half inch. This allows me to cut all three to their finish length at once, hopefully ensuring that they are all as exactly even as I can make them.

Having all of the components cut to length allows me to mark joint locations on opposing pieces at the same time. Measure once, mark twice:)

Once the pieces were cut to finish length, I broke out my little friend, my pocket-hole machine.

Sorry about the photos:dunno:
 

Attachments

  • frame layout.jpg
    frame layout.jpg
    95 KB · Views: 68
  • fiona.jpg
    fiona.jpg
    141.1 KB · Views: 102
  • junk length 2.jpg
    junk length 2.jpg
    137.5 KB · Views: 72
  • junk length.jpg
    junk length.jpg
    131.9 KB · Views: 78
OP
Q

quattro_sinko

Well-known member
Joined
Jun 10, 2014
Messages
417
Location
Upstate NY
I had planned on dry-fitting all of my joints and testing the frame in the ceiling space, then removing it, gluing it, and reinstalling. I had made my frame 1/8" smaller all the way around than the space it was going to occupy. It was still snug. Like, so snug, I may leave it there. Or not.

Next up: removing the old fluorescent fixtures and praying I can shimmy the panels in place. I am not an electrician, btw. Pretty sure I can make them work, and will be installing the dimmer switch, but it might be a bit before my next update.
 

Attachments

  • frame rta.jpg
    frame rta.jpg
    128.3 KB · Views: 78
  • frame assembled.jpg
    frame assembled.jpg
    135.3 KB · Views: 86
  • Frame installed.jpg
    Frame installed.jpg
    130.7 KB · Views: 117
OP
Q

quattro_sinko

Well-known member
Joined
Jun 10, 2014
Messages
417
Location
Upstate NY
Final update for the evening. I got the old fixtures down and out, and the new LED panel lights installed. However, I'm thinking I purchased the incorrect dimmer switch as I was unable to dim them. I'll have to take a closer look at it. I threw the original wall switch back in, and at least we have light.

While sliding the panels in the frame, I chewed up the center mullion on the frame. Looks like the frame will be coming back out to replace the damaged piece. I'm glad it wasn't (yet) glued.:thumbup:

With the lights full on, it's interesting to note how much the lights affect my iphone's camera/lighting sensors.

The first picture was taken in the dark, with flash. The next 3 were taken with the lights on, from slightly different angles.

I am going to form, pin, and pour a generator pad tomorrow for my folks, so I doubt I will be back on this until tomorrow night, earliest. It's a shame, it looks incomplete without trim and crown.
 

Attachments

  • lights 4.jpg
    lights 4.jpg
    98.1 KB · Views: 129
  • lights 3.jpg
    lights 3.jpg
    79.8 KB · Views: 141
  • lights 2.jpg
    lights 2.jpg
    64.9 KB · Views: 129
  • lights 1.jpg
    lights 1.jpg
    54.7 KB · Views: 123

gahrajmahal

Well-known member
Joined
Dec 12, 2008
Messages
2,519
Location
Cincinnati, Ohio
Typically this kind of ceiling looks very 70's so I was surprised when I saw your photos. I like it. What kind of translucent panels are you using? Frosted glass? The crown molding will make it look even better. LED's are very dimmer sensitive. You might have to try several brands.
 

Jim_No_Garage

Well-known member
Joined
Jan 15, 2011
Messages
3,304
Location
Millington NJ
I like your work. Our houses' kitchen had that 70's illuminated ceiling thing going when we bought it. We lived with it and the corresponding 6" drop in ceiling height for 5 years before we redid the kitchen.

Can you post the details of the led's you used? I have a spot in my basement where a 2 x 4 led troffer would work great - though the ones I found online are a little pricey . . .

Cheers

Jim
 
OP
Q

quattro_sinko

Well-known member
Joined
Jun 10, 2014
Messages
417
Location
Upstate NY
Typically this kind of ceiling looks very 70's so I was surprised when I saw your photos. I like it. What kind of translucent panels are you using? Frosted glass? The crown molding will make it look even better. LED's are very dimmer sensitive. You might have to try several brands.

Thanks for taking the time to read this thread and commenting. The LED panels are sold as complete units, I think the "glass" faces are some kind of plastic/poly, and they are frosted. The LED panels are uniformally illuminated when on, there is no indication of a light source behind the glass, they just glow. I appreciate the tip on the dimmers, looks like I'll be trying some more.

As mentioned I'm shooting for the look of a coffered ceiling, I just want the entire recessed ceiling area to illuminate. Here's a picture from Tiltoncofferedceilings.com. (This is not my house, or my work. Credit where credit is due). See the ceiling areas with the can lights? I aim to have that entire area illuminated on my little coffered bathroom ceiling.


attachment.php


I like your work. Our houses' kitchen had that 70's illuminated ceiling thing going when we bought it. We lived with it and the corresponding 6" drop in ceiling height for 5 years before we redid the kitchen.

Can you post the details of the led's you used? I have a spot in my basement where a 2 x 4 led troffer would work great - though the ones I found online are a little pricey . . .

Cheers

Jim

Hello Jim! Thanks for the kind words. Here is the information on the lights:
2ft x 4ft Flat Panel LED - 40 Watts - Dimmable - DLC 4.2 Premium Approved - Replaces 3 Lamp Fluorescent Fixtures - 5000 Lumens

We got them online through Lightup.com. It was roughly $130 shipped for two of them, I think they are rated at 50,000 hours.
The 2'x2' panels I got earlier this year were about $85 shipped for a pair.
It seems like retailers will only sell/ship them in pairs.

These lights are perfect for basements, the panels are only ~ 1/2" thick, the small driver/junction boxes add only 1 1/2" inches to that. The panels I have can be mounted a variety of ways, and have at least 3 D-hooks down each side for mounting/suspending. My basement ceiling is unfinished. I used zipties to temprorarily (for 6 months now, ha!) suspend and draw my 2'x2' LED panel light tight to the bottom of the floor joists above when I was testing one in the laundry area.
 

Attachments

  • tiltoncofferedceilings.jpg
    tiltoncofferedceilings.jpg
    107.3 KB · Views: 932

Jim_No_Garage

Well-known member
Joined
Jan 15, 2011
Messages
3,304
Location
Millington NJ
Hello Jim! Thanks for the kind words. Here is the information on the lights:
2ft x 4ft Flat Panel LED - 40 Watts - Dimmable - DLC 4.2 Premium Approved - Replaces 3 Lamp Fluorescent Fixtures - 5000 Lumens

We got them online through Lightup.com. It was roughly $130 shipped for two of them, I think they are rated at 50,000 hours.
The 2'x2' panels I got earlier this year were about $85 shipped for a pair.
It seems like retailers will only sell/ship them in pairs.

These lights are perfect for basements, the panels are only ~ 1/2" thick, the small driver/junction boxes add only 1 1/2" inches to that. The panels I have can be mounted a variety of ways, and have at least 3 D-hooks down each side for mounting/suspending. My basement ceiling is unfinished. I used zipties to temprorarily (for 6 months now, ha!) suspend and draw my 2'x2' LED panel light tight to the bottom of the floor joists above when I was testing one in the laundry area.

Perfect - thanks for the reference. I need to finish the basement ceiling - it's only been 10 years . . . .

Jim
 
OP
Q

quattro_sinko

Well-known member
Joined
Jun 10, 2014
Messages
417
Location
Upstate NY
Six and a half days after sweeping up last, I am about to dive back in. First order of business, remove lights. Since the frame went in so tight, I'll have to partially disassemble it as it comes down. Side benefit: I'll be a step ahead in replacing the center mullion I bunged up (AND, I can now glue the joints as I'd hoped to). As my "helper" is out, I will be using EZ-Up Expanding poles (for hanging plastic barrier/temp walls) as a third hand. This is definitely an off label use for them, but I think they will work nicely. Wish me luck, pics to follow.
 
OP
Q

quattro_sinko

Well-known member
Joined
Jun 10, 2014
Messages
417
Location
Upstate NY
After getting sidetracked a few times (wife/dog/clients/neighbors) I'm finally making some progress.

Here is the damage I inflicted when sliding the lights in originally:
attachment.php


When "measuring" pieces to cut (like this replacement center mullion) I find that marking a piece in place (instead of measuring/using a ruler or tape) often gives me quicker, more accurate results):
attachment.php


My little friend is back to help:
attachment.php


Damaged section removed, awaiting transplant:
attachment.php


((I am taking pictures with a cell. All pictures were taken vertical. I have no idea why some are rotated during uploading. any thoughts? Anyone??))
 

Attachments

  • frame damage.jpg
    frame damage.jpg
    125.1 KB · Views: 41
  • frame layout 2.jpg
    frame layout 2.jpg
    131.3 KB · Views: 35
  • frame little friend.jpg
    frame little friend.jpg
    142.3 KB · Views: 36
  • frame surgery.jpg
    frame surgery.jpg
    137.2 KB · Views: 40
To avoid these ads, REGISTER NOW!
OP
Q

quattro_sinko

Well-known member
Joined
Jun 10, 2014
Messages
417
Location
Upstate NY
After installing the new center mullion and gluing all of my joints, I decided to rip 1/8" off on all sides of the frame to ease installation. As the edges of the frame will be hidden by the crown, I took the opportunity to save some time. I drew a line on all sides using my finger as a gauge. One of my go-to saws is a worm-drive with a 60T blade. Whenever possible if cutting finish material, I try to cut from the back side. This minimizes tear-out on the face of the material. (I know the cuts will be hidden, but I try to reinforce good habits :) )

Although I may catch heat for it, I securely hold the front of the saw table when ripping to act as a rip fence/gauge. If this cut were to be exposed, I'd use a table saw.

Once cut, the frame is now reinstalled.

As there was originally a second switched fixture, I have spent some time since starting pondering what to do with it. Add a fixture to an adjacent closet? Dead end it and disconnect the switch? New hall-way light? Nope.

Because the room is slightly rectangular, the outside widths of the frame are wider on two opposing ends. This small inconsistency has irritated me since I first measured. I have decided to "pull" the two corresponding pieces of vertical trim (not yet added, up next) off the wall roughly an inch. these will form narrow channels for some LED strip lights on 2 walls of the bath. Hopefully when properly dimmed, these can serve as night-lights of sorts. This should make all of my crown-to-frame reveals closer to even, and the recessed area closer to square

Time will tell, back to it
 

Attachments

  • frame reinstalled.jpg
    frame reinstalled.jpg
    124.2 KB · Views: 34
  • frame rip gauge.jpg
    frame rip gauge.jpg
    134.9 KB · Views: 26
  • frame weapon of choice.jpg
    frame weapon of choice.jpg
    135.8 KB · Views: 31
  • frame trim.jpg
    frame trim.jpg
    127.2 KB · Views: 28
Last edited:
OP
Q

quattro_sinko

Well-known member
Joined
Jun 10, 2014
Messages
417
Location
Upstate NY
Know thine enemy.

These are some of the tools I'll be using to check the wall conditions where I'll put the first layer of vertical trim.

The Starrett Angle gauge has really changed my game for miters. For years I made test blocks for every job, and estimated if I needed to open or close my cut angles. For the first month I used the Starrett, I still made test blocks and double checked. Not anymore. I trust this tool 100%. According to the tool, all corners are less than 1 degree out of square, likely the drywall taping is partially to blame.

I also used a 59" level (walls are 60 1/2"+/-) to check for flatness. No surprises.

Measurements taken, and it's cutting time.
 

Attachments

  • frame tools.jpg
    frame tools.jpg
    152.4 KB · Views: 25
  • frame corner check.jpg
    frame corner check.jpg
    139.2 KB · Views: 32
  • frame wall flat.jpg
    frame wall flat.jpg
    73.5 KB · Views: 25
OP
Q

quattro_sinko

Well-known member
Joined
Jun 10, 2014
Messages
417
Location
Upstate NY
Once again, I'm prepping stock into junk lengths. As the crown will cover up a lot of the area behind it, this first course does not to be full height. And, since I had to replace the center mullion on the frame, I'm trying to conserve materials.

I ripped the first piece slightly less than in half, then immediately spun the off cut around and sent it through. And did it to the second piece. This helps ensure that all of my parts are equal height. Picky? Maybe, but I feel it is an easy way to keep consistency.

Similarly, I cut all of my right-hand miters in one cut. This saved me making 3 additional cuts.

Once that was done, I cut the hidden returns that will be used to build out 2 sides of the vertical trim (for the future LED night-lights).

Material machined for this stage done, next step: assembly
 

Attachments

  • vertical 5.jpg
    vertical 5.jpg
    142.4 KB · Views: 21
  • vertical 4.jpg
    vertical 4.jpg
    142.2 KB · Views: 22
  • vertical 3.jpg
    vertical 3.jpg
    140.3 KB · Views: 22
  • vertical 2.jpg
    vertical 2.jpg
    135.9 KB · Views: 21
  • vertical 1.jpg
    vertical 1.jpg
    139.3 KB · Views: 22
OP
Q

quattro_sinko

Well-known member
Joined
Jun 10, 2014
Messages
417
Location
Upstate NY
Keeping my parts in "batches" makes assembly easier for me. One of my favorite tools for assembling miters are Ulmia Spring Clamps. They are one of the best ways I have found to assemble miters. They pinch miters together, and make positioning while gluing a snap. Mine must be old (I bought a couple of sets longer ago than I'd like to admit. Mine are marked West Germany.
 

Attachments

  • vertical 6.jpg
    vertical 6.jpg
    140.5 KB · Views: 35
  • vertical 7 ulmia 1.jpg
    vertical 7 ulmia 1.jpg
    150.5 KB · Views: 51
  • vertical 8 ulmia 2.jpg
    vertical 8 ulmia 2.jpg
    140.7 KB · Views: 57
OP
Q

quattro_sinko

Well-known member
Joined
Jun 10, 2014
Messages
417
Location
Upstate NY
I pre-drilled and countersunk my hidden returns for easy assembly.

Using the line I scribed with the machinist square, I held my return one inch shy (on two sides) of the corner to run wiring. (I forgot to upload a photo of the corresponding hole in the frame above it.)

Now for my favorite part, the crown moulding. I started out (how else?) by cutting pieces to junk length. Then to finish length. I was able to get all of my measurements off of the finished and assembled vertical wall trim on the assembly table.
 

Attachments

  • vertical 14.jpg
    vertical 14.jpg
    145.9 KB · Views: 33
  • vertical 13.jpg
    vertical 13.jpg
    136.3 KB · Views: 31
  • vertical 12.jpg
    vertical 12.jpg
    132.2 KB · Views: 30
OP
Q

quattro_sinko

Well-known member
Joined
Jun 10, 2014
Messages
417
Location
Upstate NY
After I cut the crown to length, I began to join the pieces. The Ulmia clamps come in handy! Once the crown was glued, I let it set up and went to fetch the nail guns.
 

Attachments

  • vertical 15.jpg
    vertical 15.jpg
    143.7 KB · Views: 27
  • vertical 17.jpg
    vertical 17.jpg
    140.8 KB · Views: 37
  • vertical 18.jpg
    vertical 18.jpg
    145.9 KB · Views: 33
Last edited:
OP
Q

quattro_sinko

Well-known member
Joined
Jun 10, 2014
Messages
417
Location
Upstate NY
Once the crown joints firmed up, I back pinned them, and installed it. I re-wired the lights back in. Sadly, my camera sensors are still getting thrown off by the LED's.

During installation, one of my joints opened up a tad. Hopefully I'll be able to pull it back a little closer to closed.

At this point, I'm done for the day. Got to be up in a few hours for work.

Thanks for reading!

Next installment:
Dimmer switch, drywall repair, tune-up reveals, caulk, putty, paint.
 

Attachments

  • vertical 23.jpg
    vertical 23.jpg
    118.1 KB · Views: 64
  • vertical 22.jpg
    vertical 22.jpg
    126.8 KB · Views: 61
  • vertical 21.jpg
    vertical 21.jpg
    194 KB · Views: 48
  • vertical 20.jpg
    vertical 20.jpg
    126.2 KB · Views: 52
  • vertical 19.jpg
    vertical 19.jpg
    145.1 KB · Views: 46
OP
Q

quattro_sinko

Well-known member
Joined
Jun 10, 2014
Messages
417
Location
Upstate NY
In the light of day, I think I am going to have to finish this sooner rather than later. After all the time I put into it, I want it to be done.

Off to work, lol.
 
OP
Q

quattro_sinko

Well-known member
Joined
Jun 10, 2014
Messages
417
Location
Upstate NY
Quick caulk and first coat of paint. Ordered 2 5' dimmable strip lights for the hidden downright/night-lights
 

Attachments

  • image.jpg
    image.jpg
    11.1 KB · Views: 70
OP
Q

quattro_sinko

Well-known member
Joined
Jun 10, 2014
Messages
417
Location
Upstate NY
Dimmable/cuttable LED strip lights arrived. Temp installed one side for testing and a photo, need permanent outlet above panel lights. They are not as bright as they look.
 

Attachments

  • image.jpg
    image.jpg
    7.9 KB · Views: 55
OP
Q

quattro_sinko

Well-known member
Joined
Jun 10, 2014
Messages
417
Location
Upstate NY
Two months later... had I read closer at the time of order, I would have realized that I needed a 0-10V dimmer. Generally not found on the shelves of my local big-box store, I ordered one online.

The switch uses a separate control wire for dimming to each fixture. Given that the 2x4 LED panels are removable, running the new wire was pretty straightforward. The new dimmer has eliminated the need for sunglasses.

While tiding up the wiring, I was able to install a switched outlet for the strip lights we're using as accent/nightlights. Setting the dimmers at a low level makes the lights all but invisible if the LED panels are on. When the LED panel lights are off, the strips give a small amount of light, perfect for late night pit-stops.

After install, I puttied and final coat painted the ceiling. The walls got a (very) quick blast of paint. At some point in the near future, the walls directly under the strip lights (along with the shower walls) will end up getting floor to ceiling white subway tile.

Thanks for following along.
 

Attachments

  • light 1 23 1.jpg
    light 1 23 1.jpg
    121.1 KB · Views: 49
  • light 1 23 2.jpg
    light 1 23 2.jpg
    121.8 KB · Views: 46

Crossfire05

Well-known member
Joined
Dec 30, 2017
Messages
189
Location
Utah
Two months later... had I read closer at the time of order, I would have realized that I needed a 0-10V dimmer. Generally not found on the shelves of my local big-box store, I ordered one online.

The switch uses a separate control wire for dimming to each fixture. Given that the 2x4 LED panels are removable, running the new wire was pretty straightforward. The new dimmer has eliminated the need for sunglasses.

While tiding up the wiring, I was able to install a switched outlet for the strip lights we're using as accent/nightlights. Setting the dimmers at a low level makes the lights all but invisible if the LED panels are on. When the LED panel lights are off, the strips give a small amount of light, perfect for late night pit-stops.

After install, I puttied and final coat painted the ceiling. The walls got a (very) quick blast of paint. At some point in the near future, the walls directly under the strip lights (along with the shower walls) will end up getting floor to ceiling white subway tile.

Thanks for following along.

Love the look! Wish I had that instead of my stupid fishbowl light fixtures!
 
OP
Q

quattro_sinko

Well-known member
Joined
Jun 10, 2014
Messages
417
Location
Upstate NY
Looks great, do you use a certain brand of caulk prior to painting?

Thank you! I'm not too picky. I usually use DAP/AlexPlus caulk as it's readily available

Love the look! Wish I had that instead of my stupid fishbowl light fixtures!

Thanks for looking. I wasn't sure how these panels would work for residential applications. So far, my wife is happy (and so am I)
 

Uncle Phil

Member
Joined
Dec 14, 2012
Messages
19
Thanks, I'm thinking the next time I make a cabinet door I will caulk around the edge of the panel before I paint it. The expansion and contraction has left a crack in the paint where it expands and contracts. I think I'm just going to caulk it now to hide the crack.
 

Attachments

  • IMG_4247.JPG
    IMG_4247.JPG
    52 KB · Views: 42
To avoid these ads, REGISTER NOW!
Top Bottom