To avoid these ads, REGISTER NOW!

Rear Sway Bar Build

OP
A

astroracer

Well-known member
Joined
Jun 22, 2005
Messages
3,001
Location
Mid_Michigan
Yea, I consider myself pretty fortunate. I haven't really wasted a lot of material on goof ups like this. I have changed my mind on a few things as I am building them but I think this is the first I have ruined anything while making it...
I took another "stab" at it this weekend... (you see what I did there? :) )
MVC003F2-vi.jpg

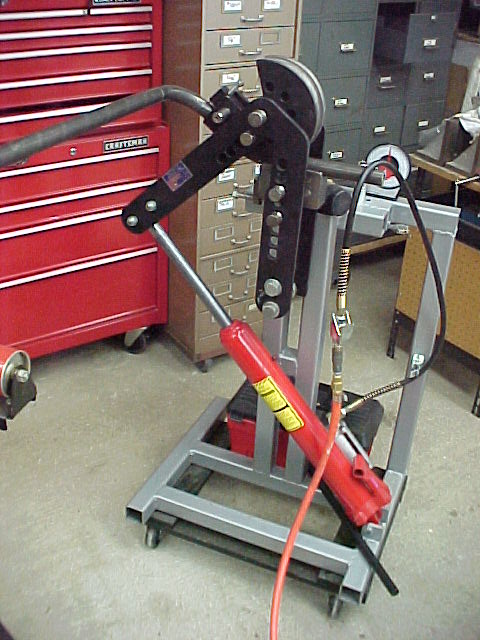
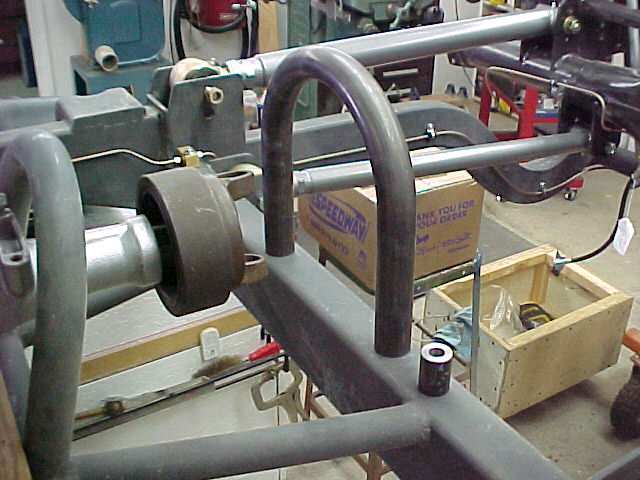
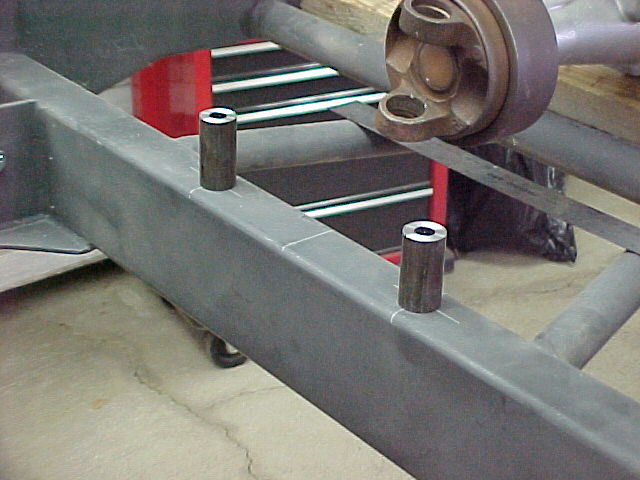
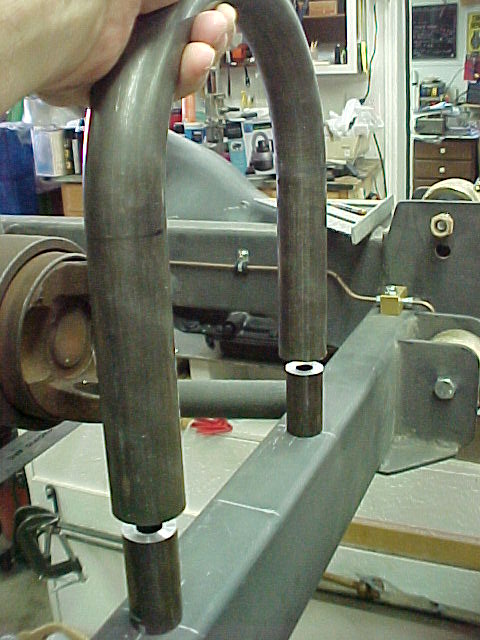
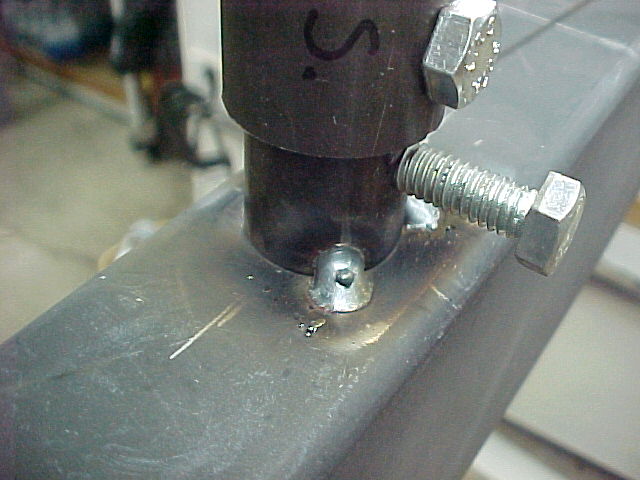
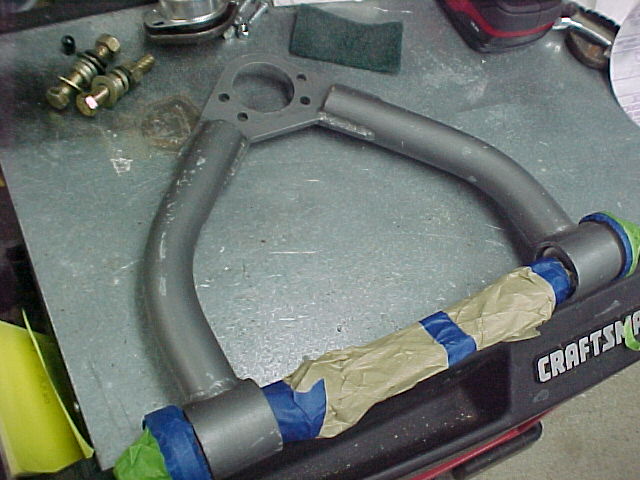
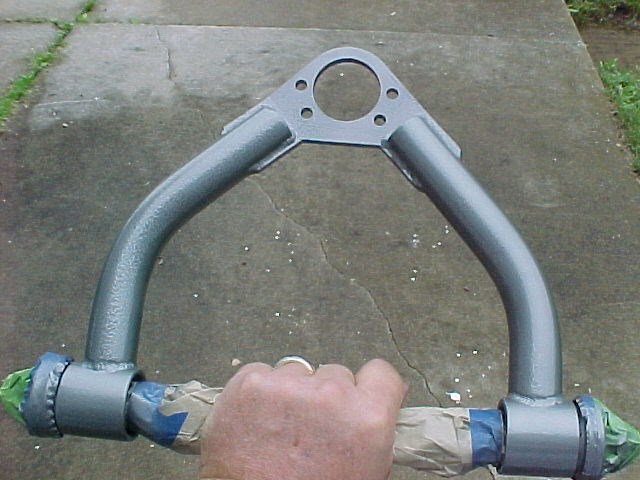
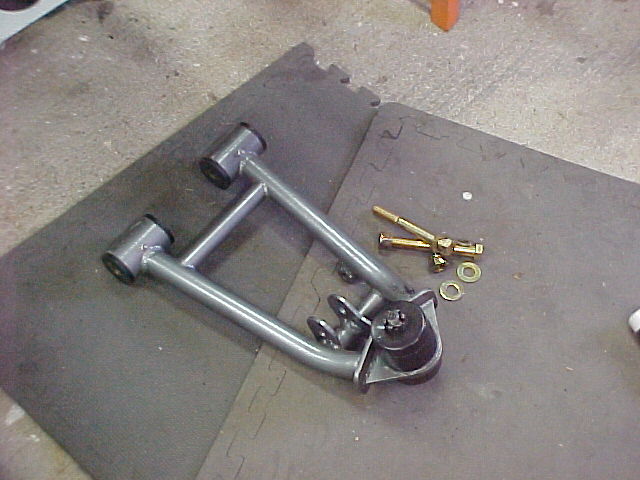
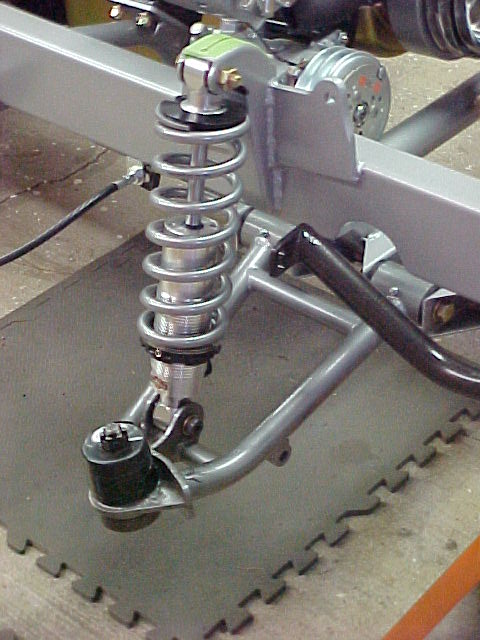
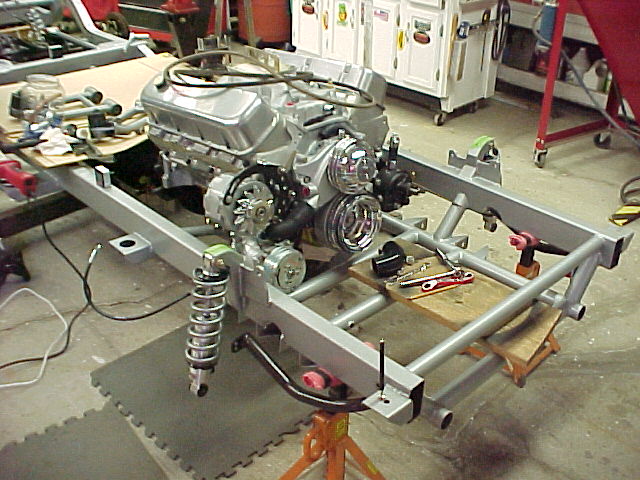
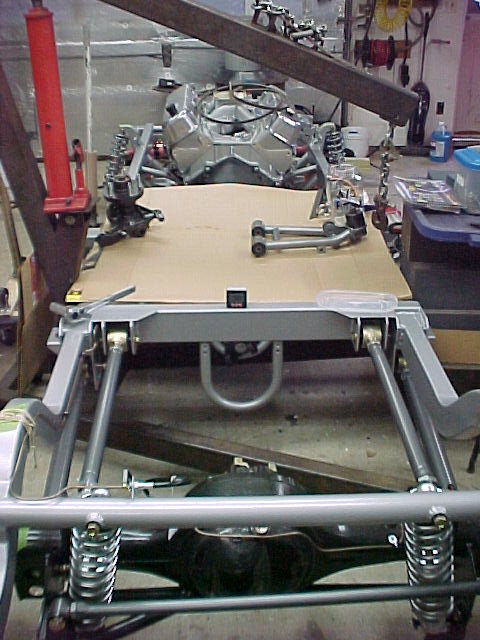
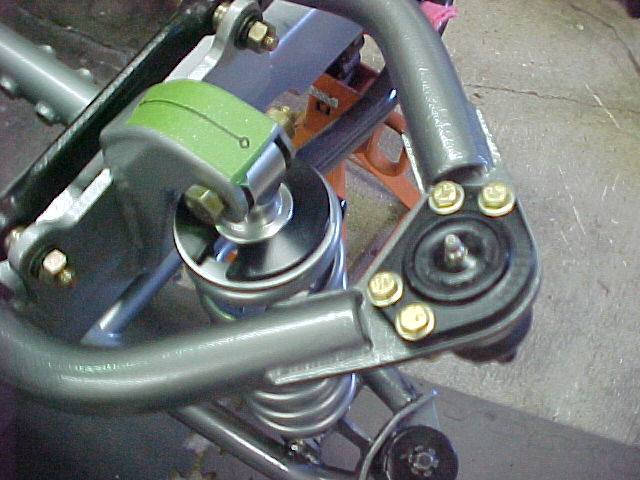
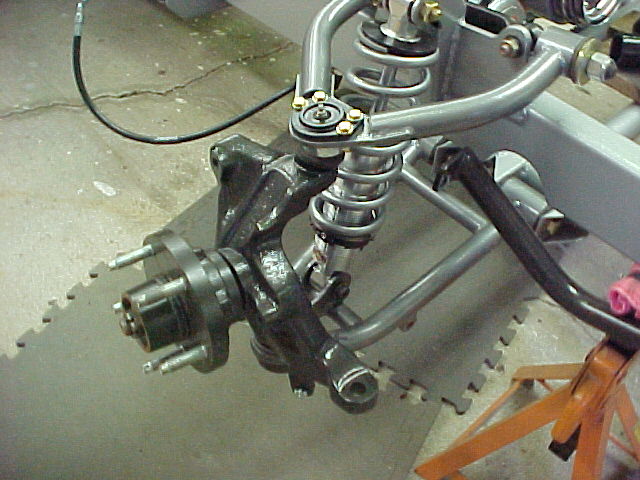
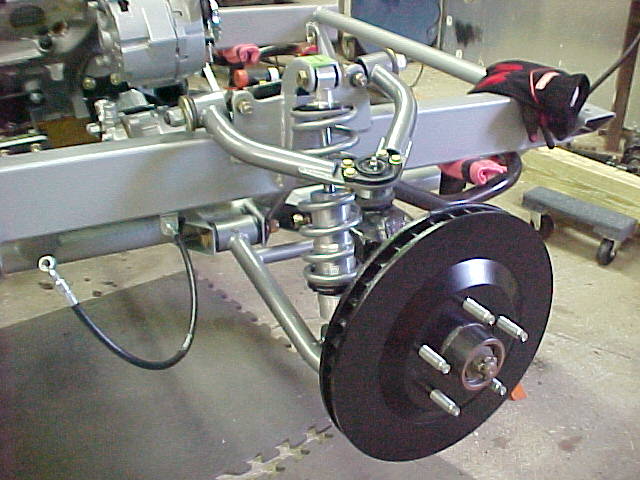
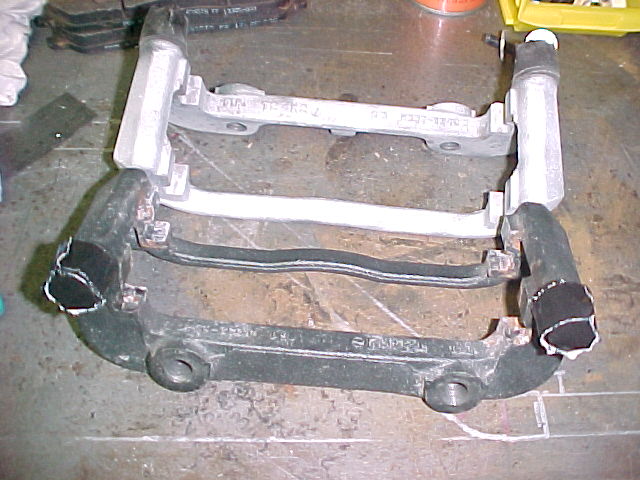
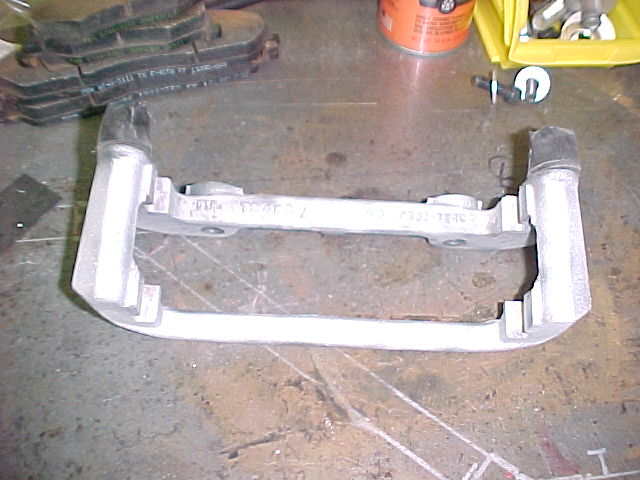
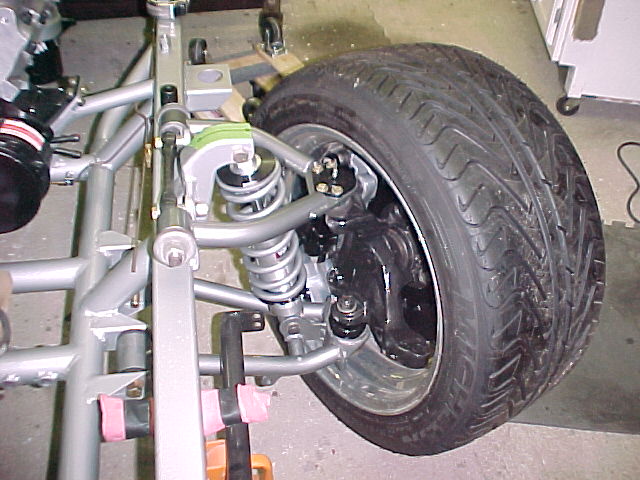
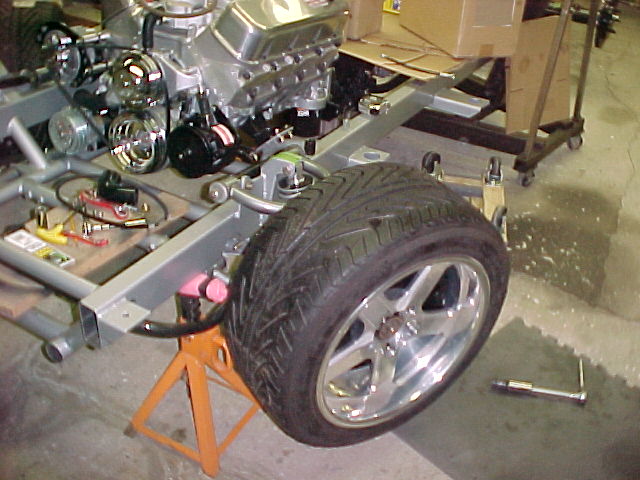
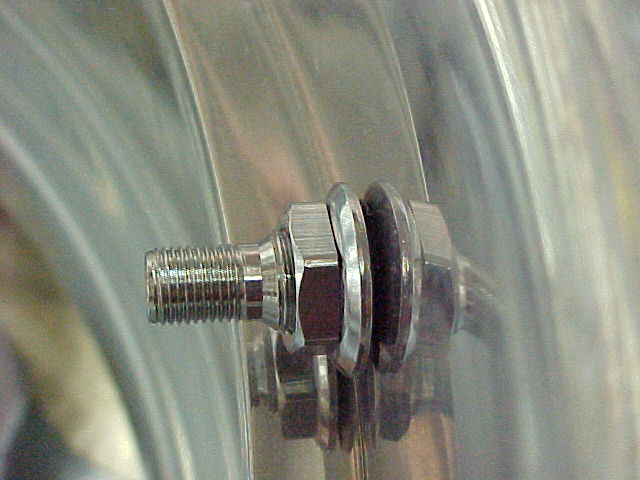
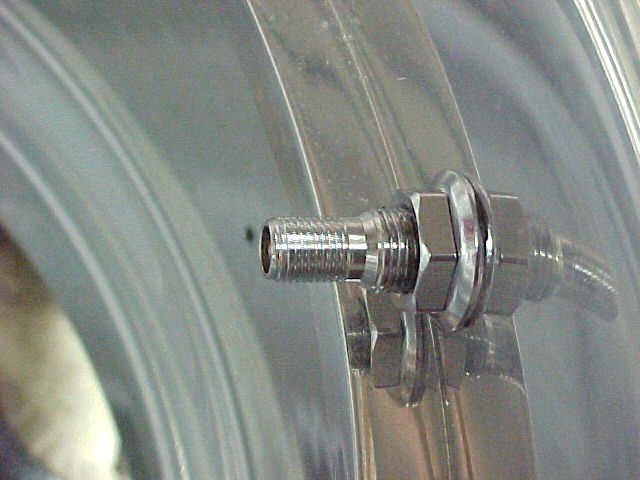
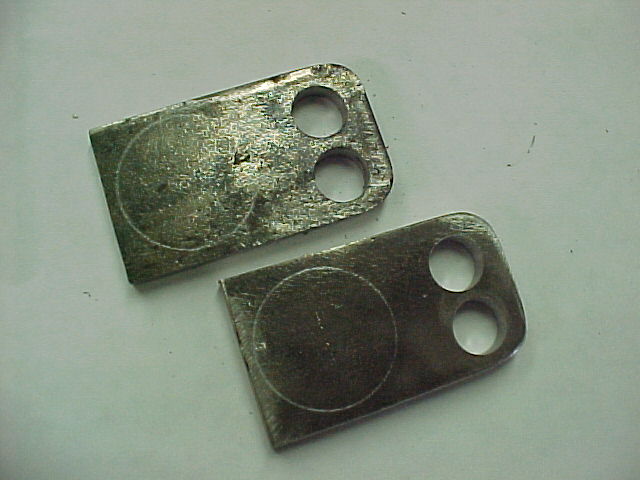
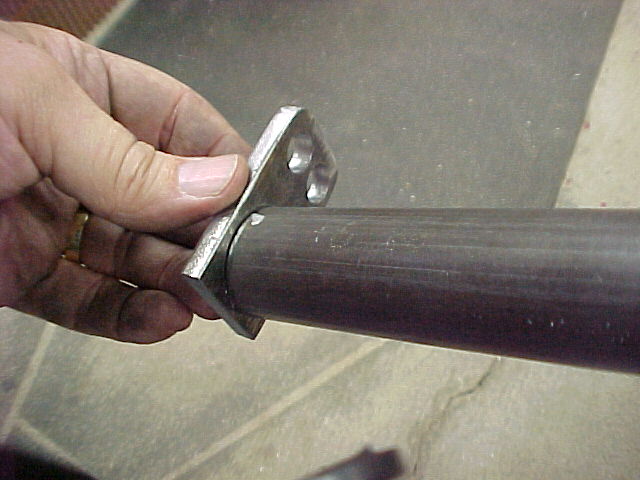
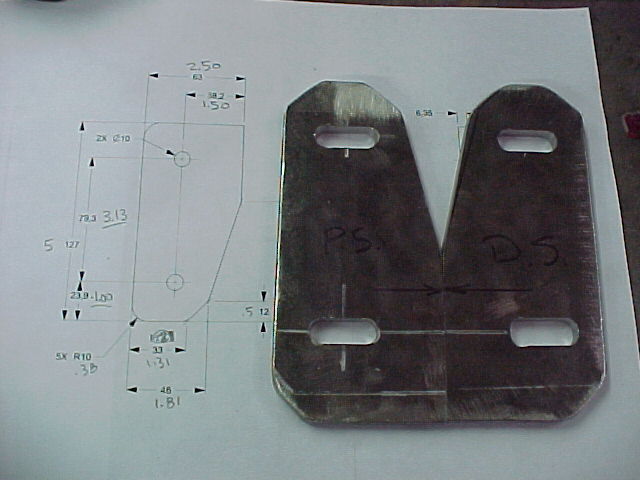
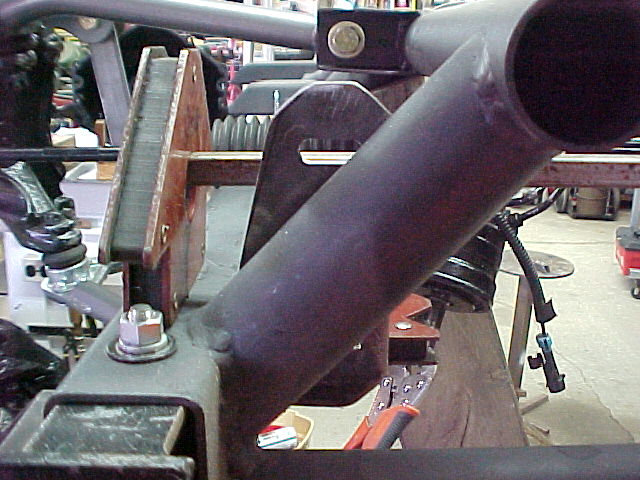
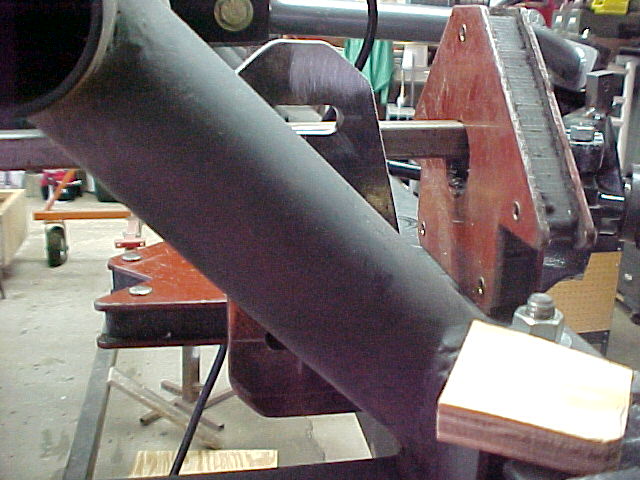
The new bar bent up with no problems from the operator. I got it bent and trimmed. the end link plates made, the bushing brackets finished up and everything is ready to weld up.
MVC013F-vi.jpg


MVC006F2-vi.jpg


MVC007F-vi.jpg


MVC008F-vi.jpg


MVC009F-vi.jpg

I got side tracked before I got any welding done. We had a new freezer delivered this morning so I spent some time building a roller frame for it out of a Harbor Freight furniture dolly. Having it on casters makes it easy to move to clean under it, as with anything else in my shop. :)
Mark
 
To avoid these ads, REGISTER NOW!
OP
A

astroracer

Well-known member
Joined
Jun 22, 2005
Messages
3,001
Location
Mid_Michigan
Okay, a few more steps closer to paint. I've been working on a new drive shaft loop since the one I was planning on using is now just decorative. I used the 24" long drop from the 8' piece of 4130 I used for the front bar. Bent it into a 180 and trimmed to length.
MVC011F-vi.jpg

I cut a couple of pieces of 1" x 1/4 wall DOM to use as mounting points. These will get welded to the cross member and the loop will plug on.
MVC012F-vi.jpg
.

MVC015F-vi.jpg


Drilling the loop for two 5/16 bolts will let me bolt it on for removability. The two mounts will get drilled and tapped for 5/16 x 18.
MVC001F-vi.jpg


MVC002F-vi.jpg


MVC003F-vi.jpg


With the loop made I fired up the welder and did some tacking. Tacked on the loop mounts, the front bar bushing plates, the front lower control arm link mounts and I repositioned and tacked one of the steering stops on the drivers side spindle.
MVC016F-vi.jpg

MVC020F-vi.jpg

MVC018F-vi.jpg

Here is the loop in it's finished positioned.
MVC005F2-vi.jpg

With all of that done I can start pulling the suspensions apart to finish up the component and chassis welding and start prepping the frame for paint.... It is a good feeling to finally see some progress getting all of the little things done and moving forward.
Mark
 
OP
A

astroracer

Well-known member
Joined
Jun 22, 2005
Messages
3,001
Location
Mid_Michigan
Just a catch up post. The frame was painted in June of '17 and sat in the rotisserie for all of '18. I finally pulled it off the rotisserie in Feb of this year and have been plugging away it ever since.
here are some pics from the work I did last weekend. if you have any questions just ask. :) The rear suspension is done and bolted up. I'll post some pics later.
Pulling together the front suspension stuff, I had to repaint the upper arms as they had a hard life during the build stage. Lots of scars and scratches from years of mock up and mock down...
2v2ETG3JMx9EDKg.jpg

Looks better with fresh paint.
2v2ETG3u8x9EDKg.jpg

Painted the upper ball joints as well and I am ordering Grade 8 bolts for the UBJ's instead of the cheap azz hardware that came with them...
2v2ETG2gvx9EDKg.jpg

Brake lines are all ran and terminated. Rear end lines are hooked up to the frame and soft line brackets. Front lines are hooked up and ready to go.
2v2ETGvvjx9EDKg.jpg

2v2ETGv9Mx9EDKg.jpg

2v2ETGvJox9EDKg.jpg

I got one of the lower control arms mounted but have to order more bolts to get everything bolted up right.
2v2ETG9L2x9EDKg.jpg

2v2ETG9yox9EDKg.jpg

I got the frame leveled side to side and back up on jack stands so I can work on the LCA's and the steering rack.
2v2ETG9n9x9EDKg.jpg

2v2ETG9Cox9EDKg.jpg

Thanks for watching!
Mark
 

BFBOB

Well-known member
Joined
Sep 20, 2011
Messages
5,073
Can't quite squiint hard enough to be sure - your avatar; is that a 4-door '56?
 
OP
A

astroracer

Well-known member
Joined
Jun 22, 2005
Messages
3,001
Location
Mid_Michigan
Yes Sir! These were working cars. Most of them were beat to death and thrown away. Mine gets called a "Nomad" nearly every day...
Mark
 
OP
A

astroracer

Well-known member
Joined
Jun 22, 2005
Messages
3,001
Location
Mid_Michigan
I got the upper arms bolted on.. It will be interesting to see just how close the alignment will be to the "as designed" locations you see here.
With the arms bolted down it will be easier to install the ball joints when I don't have to chase the arms all over the build bench...
2v2ETNJtVx9EDKg-1.jpg

2v2ETNJcLx9EDKg-1.jpg

2v2ETNJZGx9EDKg-1.jpg

Thanks for watching!
Mark
 
OP
A

astroracer

Well-known member
Joined
Jun 22, 2005
Messages
3,001
Location
Mid_Michigan
I got motivated after dinner the other night and went back out to the shop and got the front rotors cleaned up. A wire cup brush on a drill motor and a D/A and we're almost ready for paint. I sprayed the rust I couldn't get off, like down in the vents, with rust converter. This turns the rust black and makes a good base for paint.
They weren't in real bad shape to begin with but knocking off the surface rust sure does help.
2v2ETr4SWx9EDKg-1.jpg


2v2ETr4VGx9EDKg-1.jpg

After some time spent with the D/A.
2v2ETr4Tgx9EDKg-1.jpg

After a dousing with the rust converter. The inside face.
2v2ETr4Dhx9EDKg-1.jpg

The outside was clean enough after sanding I will just wipe it down and spray it with the black caliper paint.
2v2ETr48gx9EDKg-1.jpg

These cleaned up very nice and will look "almost" as good as the spendy coated ones once installed. :)
2v2ETr4LFx9EDKg-1.jpg

This is the rust converter I use.
DupliColor Rust Fix
2v2ETr4jLx9EDKg-1.jpg


Thanks for looking!
Mark
 
OP
A

astroracer

Well-known member
Joined
Jun 22, 2005
Messages
3,001
Location
Mid_Michigan
Got a lot done last night. Front rotors painted, rear rotors cleaned up and rust converted, upper ball joints bolted in and the RH steering knuckle hung. I think the rotors look pretty good and I am really leaning toward black calipers as well...
2v2ES3csNx9EDKg-1.jpg


2v2ES3ckGx9EDKg-1.jpg


2v2ES3cDqx9EDKg-1.jpg


2v2ES3fVMx9EDKg-1.jpg


2v2ES3fCdx9EDKg-1.jpg

I also got the v-belt lengths figured out. Both Alternator and A/C belts are 51.5 inches long. The PS belt will be about 32 or so.
2v2ES3cAGx9EDKg-1.jpg


2v2ES3cYdx9EDKg-1.jpg

Mark
 
OP
A

astroracer

Well-known member
Joined
Jun 22, 2005
Messages
3,001
Location
Mid_Michigan
looks amazing. but maybe its the pics, but it looks like you painted the braking parts of the disks. ?

Yea, they were painted. Doesn't hurt a thing and it will keep them from rusting while the build progresses. I've been doing that for years on all of my show vehicles. The little bit of paint will scrub right off as soon as the brakes are used and then the only bare areas will be where the pads actually run.
Mark
 
Last edited:
OP
A

astroracer

Well-known member
Joined
Jun 22, 2005
Messages
3,001
Location
Mid_Michigan
I got the rear rotors painted tonight. It was raining yesterday, not painting when the humidity is stupid high...
Hung in the sun to dry they set up pretty quick.
2v2ES7dvnx9EDKg.jpg

2v2ES7FMyx9EDKg.jpg

2v2ES7dcgx9EDKg.jpg

Waiting for the rotors to dry I started hanging the LH Lower Control Arm. This bolted up easily as well as the shock.
2v2ES7d9Fx9EDKg.jpg


2v2ES7d9Fx9EDKg.jpg

The only snag is I couldn't find the LBJ boot... Looked for a while but no boot. So, off to the auto parts store... I'll find it AFTER I get a new one. :banghead:
2v2ES7dpLx9EDKg.jpg

Thanks for watching.
Mark
 
OP
A

astroracer

Well-known member
Joined
Jun 22, 2005
Messages
3,001
Location
Mid_Michigan
Ordered the LBJ boots through O'Rielly's last week and got the left front suspension together.
2v2EVTd6qx9EDKg.jpg

With the rotor installed.
2v2EVTdYdx9EDKg.jpg

Sunday morning I got out into the shop early, before it got to hot, and blasted the brake abutments and got them painted. I went with the silver caliper paint.
Before and after blasting.
2v2EVS21Lx9EDKg.jpg

2v2EVS2KCx9EDKg.jpg

The silver paint went on great and it baked in the sun all day...
2v2EVS2QVx9EDKg.jpg

2v2EVS2bhx9EDKg.jpg


Here are the "grey" Grand Sport calipers.
2v2EVTdQnx9EDKg.jpg

2v2EVTdTyx9EDKg.jpg


I got these and the Hydro-Boost cyl. painted with the black caliper paint today. I'll post up pics tomorrow. I have all week off for GM Shutdown. I hope to have this chassis rolling around by the end of the week... :)
Thanks for following!
Mark
 
To avoid these ads, REGISTER NOW!
OP
A

astroracer

Well-known member
Joined
Jun 22, 2005
Messages
3,001
Location
Mid_Michigan
Worked on the front brake corners this morning. Everything is bolted up and it looks like they will work. I will still need to blow everything apart for grease and thread locker but it's much easier to work with clean parts if I have to take it apart for any reason. And I still need to throw some more paint on the hubs. :) The van is a still a long way off from drivable. I should have a rolling chassis tonight though. :)
I'll get back out into the shop later when it cools off a bit.
Right front assembly.
2v2EhaQo4x9EDKg.jpg

2v2EhaQUVx9EDKg.jpg

Left front assembly.
2v2EhaehLx9EDKg.jpg

2v2EhaegGx9EDKg.jpg

Thanks for looking!
Mark
 
OP
A

astroracer

Well-known member
Joined
Jun 22, 2005
Messages
3,001
Location
Mid_Michigan
Thank you Sir! Much appreciated!
I assembled the right rear brake corner tonight. Just bolting things together for the umpteenth time...:) I like the black rotor and caliper. I think it will look good behind the polished rims.
2v2EhZanjx9EDKg.jpg

2v2EhZadFx9EDKg.jpg

2v2EhZa5yx9EDKg.jpg

2v2EhZa8jx9EDKg.jpg


Also got the left front tire and rim bolted on... What do you think?
2v2EhZimCx9EDKg.jpg

2v2EhZihGx9EDKg.jpg

2v2EhZiPGx9EDKg.jpg

2v2EhZiiSx9EDKg.jpg

2v2EhZiSgx9EDKg.jpg

Mark
 
Last edited:
OP
A

astroracer

Well-known member
Joined
Jun 22, 2005
Messages
3,001
Location
Mid_Michigan
I've had a few people asking about the aluminum abutment adapters. I got those from someone on the Pro-Touring site back in 2011 or 2012. I have no clue who made them.
With the modified spindles there was no room for a bolt head on the upper adapter mount so I used 1/2-20 x 2" LG socket set screws.
2v2EhaePLx9EDKg-1.jpg

2v2EhaeDmx9EDKg-1.jpg

Adapter brackets mounted to spindles. You can see the clearance between the nut and the caliper. I had to use short lock nuts on the caliper side to clear the caliper bracket.
2v2EhaeRhx9EDKg-1.jpg

2v2EhaesCx9EDKg-1.jpg

All of this was figured out during mock up so it was a simple matter of bolting everything up.

The Corvette abutments take metric bolts and I ordered these flange head bolts (14mm-2.0 x 45 long) and, as with every other part on this van, I had to do some modifying to get them to work.
2v2EhaevDx9EDKg-1.jpg

I had to turn the flanges down by 0.2 inch to get enough clearance between the bolt head and the spindle. I spun them in the lathe and cut 0.2" inches off the OD of the "washer" to let the bolt pass by the spindle as the caliper bracket is bolted on. A stock bolt is at the bottom.
2v2Ehae3ix9EDKg-1.jpg

2v2Ehae9mx9EDKg-1.jpg

The spindles are highly modified 2" drop Astro pieces. Leaving as much material around the bolts as possible I still had to grind out a bunch to get bolts to fit during the mock up phase.
I also ground a full thread off the length to give better clearance to the rotor.
2v2EhacUhx9EDKg-1.jpg

A bit of a trick getting the Corvette stuff to work but it all bolts up and the calipers align with the rotor so I think we are good to go...
Mark
 

Bigblue&Goldie

Well-known member
Joined
Mar 12, 2009
Messages
10,674
Location
AZ
That's nice attention to detail! Most people would hit the bolts with a grinder and moved on.:beer:
 
OP
A

astroracer

Well-known member
Joined
Jun 22, 2005
Messages
3,001
Location
Mid_Michigan
Thank You, I am trying to finish this out nicely. It takes time but I think it will be worth it.
Worked on the rear brakes this morning. The RR was mostly done, bolting up the brake hose was the only thing to do. The LR needed to be assembled but that didn't take long, and with everything put together, mounting tires and wheels was a most do...
To get the front wrapped up I need to take the front tires and wheels to Discount. The valve stems are on the inside of these rims and the stem is too long. It hits the caliper as it rotates, not a good thing. :( I will not set the chassis on the ground until that is done... I may take them in this afternoon.
2v2Eh6gkqx9EDKg.jpg

2v2Eh6gTgx9EDKg.jpg

2v2Eh6gLFx9EDKg.jpg

2v2Eh6gFGx9EDKg.jpg

2v2Eh6gryx9EDKg.jpg

2v2Eh6W3Fx9EDKg.jpg

Thanks for looking!
Mark
 
OP
A

astroracer

Well-known member
Joined
Jun 22, 2005
Messages
3,001
Location
Mid_Michigan
In case anyone was wondering... I did see that, in my rush to get the rear rubber bolted up, I totally missed the directional thing and bolted them on the wrong sides. I fixed that as soon as I saw it! :)
2v2Eh7daLx9EDKg-1.jpg


2v2Eh7dw5x9EDKg-1.jpg
 
OP
A

astroracer

Well-known member
Joined
Jun 22, 2005
Messages
3,001
Location
Mid_Michigan
I thought I had posted something about this...
Anyway, the build came to a screeching halt after I got the front wheels bolted on. After I spun them one time I remembered a bit of a problem. These wheels have "hidden" valve stems, which means the stems are behind the spokes. When you spin the wheel the valve stem is HARD into the brake caliper... Show stopper.
Anyway, to make a long story short I had the "old" Michelins dismounted so I could work with the bare wheels trying to figure out a valve stem that would work. That turned out to be a no go so my only option was to weld up the old valve stem holes and drill new ones...
All of this trial and error and ordering different valves stems and finally coming up with a solution took a bout a month... At which point in time I was driving the '56 to a show in Flint and got hit by a deer...
That has had me busy rebuilding rusty fenders, inner cowls, drain channels and will see me doing the floors and rockers as well.
Which brings me to the point of this post, getting the Astro rims welded up, drilled and the "old" tires remounted. You've seen the "old" thing a couple times now. Being the tires are BRAND NEW, never seen the road or light of day but they are "out of date" so Discount or Belle will not re-mount them... I taking them to a shop in Flint tonight to have them mounted and balanced. All of this so I can roll the BadAst frame out of the heated side and get the wagon in there to finish the rust repairs... Have I been having fun? Yes Sir, you bet'cha!
 
OP
A

astroracer

Well-known member
Joined
Jun 22, 2005
Messages
3,001
Location
Mid_Michigan
Here are a few pics for your enjoyment.
Old hole location, front of wheel is to the left...
2v2EC2Z7hx9EDKg-1.jpg

Old hole location welded up and smoothed a bit.
2v2HoqvMMx9EDKg-1.jpg

New stem location outboard of the spokes (and out of the way of the caliper...)
2v2Hoqvzzx9EDKg-1.jpg

The old stem hole was back and to the left, behind the spoke. I will do some polishing on these to bring the shine back.
These are the stems I am using. They push in from the inside. This keeps the profile low so the tire can slip past it easier.
2v2HoqUb9x9EDKg-1.jpg

I have found the only way to get these things to seal up AND keep a seal is to coat all of the mating surfaces with Permatex Non-Harding Gasket Maker.
I clean all of the surfaces with degreaser and then use a small paint brush to apply the Permatex.
2v2HoqUKux9EDKg-1.jpg

On the outside I coat the stem with Permatex and then slide two O-Rings over it to help seal up the hole.
2v2HoqUwyx9EDKg-1.jpg

The chrome washer goes on next and it compresses the O-Rings enough to plug the hole and seal the threads on the stem. The Permatex really helps get the threads sealed up.
This is the washer just starting to compress the O-Rings.
2v2HoqU6jx9EDKg-1.jpg

Here the nut is tightened up and everything is pretty well compressed.
2v2HoqUYMx9EDKg-1.jpg

The inside gasket compressed.
2v2HoqUt8x9EDKg-1.jpg

The last thing I do is paint the Permatex around the gasket on the inside.
2v2HoqvNvx9EDKg-1.jpg

The good thing is no "clicky-clicky" on the brake calipers!
Mark
 
OP
A

astroracer

Well-known member
Joined
Jun 22, 2005
Messages
3,001
Location
Mid_Michigan
Well, they are holding air! ABC Tire in Flint remounted the "old" tires for me and I got them bolted back on.
2v2HorWuqx9EDKg-1.jpg

2v2HorWHyx9EDKg-1.jpg

2v2HorWZWx9EDKg-1.jpg

Now to get the shop cleaned up and the wagon rolled over here.
 
OP
A

astroracer

Well-known member
Joined
Jun 22, 2005
Messages
3,001
Location
Mid_Michigan
Did a lot of cleaning and vehicle shuffling Saturday. The wagon and Astro chassis have swapped places so I can get to work finishing the cowl on the wagon.
These pics are off my phone, sorry for their largosity...
2v2H21kv2x9EDKg-1.jpg


2v2H21PH9x9EDKg-1.jpg

Thanks for watching!
Mark
 

fiftyv8

Well-known member
Joined
Dec 29, 2018
Messages
237
Location
Perth
Nice work.
I must have lived a sheltered life as I have never come across hollow sway bars before.
How common are they?
 
OP
A

astroracer

Well-known member
Joined
Jun 22, 2005
Messages
3,001
Location
Mid_Michigan
Nice work.
I must have lived a sheltered life as I have never come across hollow sway bars before.
How common are they?

Very common in the OEM world. I've done a lot of suspension design here at GM and every bar I worked on was hollow. Saves mass even though a hollow bar needs to be a bit bigger on the OD to get the same numbers as a solid one. It's still enough of a savings to warrant it.
Mark
 

OutlawDrifter

Well-known member
Joined
Jan 20, 2015
Messages
3,876
Location
KS
Very cool project. My grandparents had a top of the line 1991 or 1992 Astro. White with the "grey" two tone bottom, red pinstripe to separate them, and blue interior. They towed it behind their motorhome when they traveled. I even drove it daily in the early 2000s, while some repairs on my Camaro.

Ran across one at a car show that had the Vector/Turbine wheels, and some altitude adjustment, it looked awesome!

I'll be following along!
 
To avoid these ads, REGISTER NOW!
Top Bottom