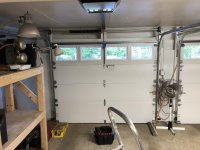
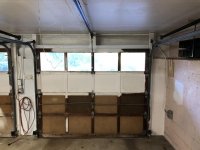
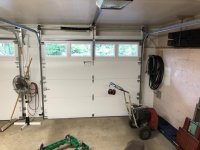
To avoid these ads, REGISTER NOW!

Between 265 & 485 SQ/FT Rearranging Deck Chairs on the Titanic . . .

Workspaces sized between 265 and 485 squarefeet.

Jim_No_Garage

Well-known member
Joined
Jan 15, 2011
Messages
3,342
Location
Millington NJ
Hello:

After spending a while here on the GJ and developing some bad habits I now need to reorganize things. The problem is I have a lot of stuff and not so much room (by comparison to some on here) to store it. I spend some time cleaning/ organizing and there is no real improvement. Hence the thread title.

I live in a 1,500 SF ranch house with a 2 car garage underneath. We park 2 cars in the garage during the winter but during the nice weather the cars stay outside. This garage setup gives me walk in/roll in access to the basement thru a 2-6 door. I wish it was a 3-0 door - but I'll take what I can get. The major problem with the garage and basement is the 7-0 ceiling height. You can go up - but only so far.

The house is on 1.375 acres and I could probably build a shop on the property but I can't justify the expense with 2 kids heading to college.

I'm a hobbyist woodworker with a tablesaw, bandsaw, portable planer and chop saw all stored in the garage. Everything but the chop saw is on wheels and is rolled out for use and rolled away afterwards.

I'm starting with the basement as it is where I spend most of my time. My 1/3 of the basement is on the front side of the main carrying beam along the length of the house. It spans 2/3 rds of the basement and contains the furnace and water heater in one corner. The gas meter is inside in the exact middle of the long wall along with the water softener tank.

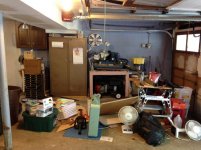
The first picture is looking into the south end of my half of the basement. There are adjustable shelft on the left and rear wall and a workbench with a slatwall back on the right wall.

The second image is a better shot of the workbench and slatwall along with my computer stand.

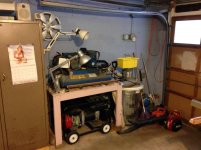
The third image is a better look at what I'm storing on the south wall.

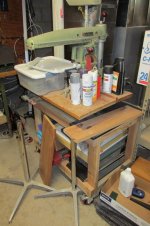
The fourth image is looking into the south-east corner.

In the middle I have a 3-0 x 2-6 rolling desktop that allowed me to sit down - I can't stand for long periods since I dinged my back a few years ago.

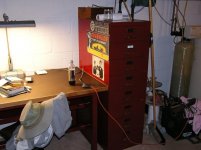
Part of the impetus for this cleanup was picking up a metal framed electonics desk at the curb a few weeks ago. That's pic #5. I had to shuffle everything around if I wanted it to fit. Kind of like those picture pizzles with 16 spots and 15 tiles to move around. That's my basement.

I have more pics to post as I've started on things but lets get post #1 on the way.

Cheers

Jim
 

Attachments

  • Basement Before (1) (Medium).jpg
    Basement Before (1) (Medium).jpg
    139.3 KB · Views: 1,130
  • Basement Before (2) (Medium).jpg
    Basement Before (2) (Medium).jpg
    146.1 KB · Views: 985
  • Basement Before (3) (Medium).jpg
    Basement Before (3) (Medium).jpg
    127.4 KB · Views: 913
  • Basement Before (4) (Medium).jpg
    Basement Before (4) (Medium).jpg
    149.1 KB · Views: 865
  • New Bench (01) (Medium).jpg
    New Bench (01) (Medium).jpg
    117.8 KB · Views: 829
To avoid these ads, REGISTER NOW!
OP
J

Jim_No_Garage

Well-known member
Joined
Jan 15, 2011
Messages
3,342
Location
Millington NJ
So over the last few weeks I pulled everything off the log wall and painted the block white for brightness.

I added a tempered hardboard top with ash edging to the electronics desk and painted the frame red to cover the ugly mustard color. I also painted my 8 drawer storage cabinet the same red and placed them on the long wall. They just fit next to the gas meter.

On the east wall I set my HF 44" and Craftsman stack in place.

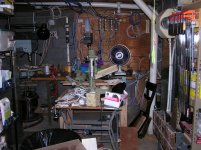
I removed the slatwall from the top of the workbench - I hated it - and moved the workbench to the north side of the basement in front of my "network panel" which looks like a disaster! I couldn't have the slatwall up as it would block access to the network equipment.

The rolling desk is no longer needed and will go to the garage for reuse or be sold. There is a Dewalt RAS in pieces awaiting reassembly of the motor. I don't have room for it in the garage right now - maybe never will.

The north side of my area is a shambles right now but I hope to get it resolved. I do miss the storage of the slatwall and need to figure out how to replace the lost storage for saws and things like that.

Here is how it sits this am - lots of work to do still.

Cheers

Jim
 

Attachments

  • Basement After (8) (Medium).jpg
    Basement After (8) (Medium).jpg
    143.8 KB · Views: 564
  • Basement After (6) (Medium).jpg
    Basement After (6) (Medium).jpg
    86 KB · Views: 513
  • Basement After (5) (Medium).jpg
    Basement After (5) (Medium).jpg
    96.9 KB · Views: 512
  • Basement After (4) (Medium).jpg
    Basement After (4) (Medium).jpg
    89.2 KB · Views: 486
  • Basement After (2) (Medium).jpg
    Basement After (2) (Medium).jpg
    87.7 KB · Views: 504

HSpencer

ALLIANCE MEMBER
Joined
Nov 28, 2010
Messages
2,854
Location
South Central US
I spent 35 years rearranging my deck chairs but it wasn't until I fully retired that I said enough is enough. I downsized and kept only "good" tools and "useful" junk. Woodworking is the worst enemy on space and mess. You gotta move it to all it's own place, even be it outside.

You can do it!! Your shop looks good as it is. Keep us updated!!

Best Regards
Herb Spencer
 
OP
J

Jim_No_Garage

Well-known member
Joined
Jan 15, 2011
Messages
3,342
Location
Millington NJ
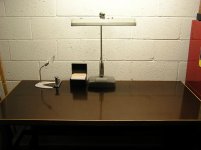
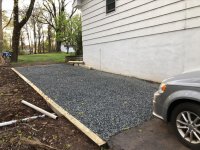
Tiny baby steps here . . . I had put a tempered hardboard skin on a desk I had grabbed at the curb. After using it as a desk and work space I didn't like it. The tempered hard board was "gritty" and dusty. It was a rough surface so you couldn't just brush it clean. Sort of like an old concrete floor.

I put about 10 coats of wipe-on poly to get it glossy enough to use as a desk. After 8 coats it basically looked like raw THB but coats 9 and 10 made all the difference.

I'm still cleaning but having a usable desk work/station makes all the difference.

Cheers

Jim
 

Attachments

  • P8160001 (Medium).jpg
    P8160001 (Medium).jpg
    92.9 KB · Views: 411

fireeqpsrv

Well-known member
Joined
May 8, 2014
Messages
406
Location
Mississippi
Take your time. I am using the reorganization of my garage as a brain calmer from my daily work. pick a spot and just work on that and then move to the next. The best part of the GJ is there are so many shops from all over the world in different sizes that you will always frind good ideas to help you in reorganizing yours.
 

captain14

Well-known member
Joined
Dec 19, 2012
Messages
7,105
Location
Near College Park Maryland 20740
Tiny baby steps here . . . I had put a tempered hardboard skin on a desk I had grabbed at the curb. After using it as a desk and work space I didn't like it. The tempered hard board was "gritty" and dusty. It was a rough surface so you couldn't just brush it clean. Sort of like an old concrete floor.

I put about 10 coats of wipe-on poly to get it glossy enough to use as a desk. After 8 coats it basically looked like raw THB but coats 9 and 10 made all the difference.

I'm still cleaning but having a usable desk work/station makes all the difference.

Cheers

Jim

The new desk looks great, but you have to protect it from the FSD (flat surface disease). It takes constant work to keep all the surfaces clear of debris. A slanted top on surfaces will assist in the disease from spreading to other flat surfaces.

I am following your progress here in the basement shop.
 

southalabama

Well-known member
Joined
Jan 10, 2011
Messages
5,547
Location
Brewton AL
Cool title.

And the band played on.

I often feel like I'm on a sinking ship and just buying time moving stuff around.
 
OP
J

Jim_No_Garage

Well-known member
Joined
Jan 15, 2011
Messages
3,342
Location
Millington NJ
Time to "Raise the Titanic" - so to speak . . .

My garage is used for parking daily drivers in the winter. We had a hard frost last night and I got "the look" from LOML - so I need to get things cleaned up so she can park her car in the garage. It's a typical 2 car garage - 20' wide and 23' deep with 7' ceilings (which ****)! Since the rest of the house is above the garage - going up isn't REALLY an option.

I have a number of WW power tools that are all mobile - Table saw, thickness planer and bandsaw.

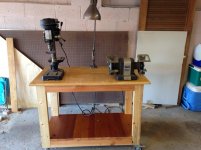
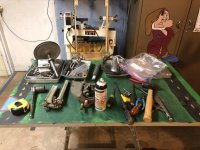
I knocked together a rolling cart to hold my rusty tool cleanup equipment. The top was a maple table top I picked up at the curb and the casters are "double lock" casters I grabbed off of someone homemade workbench also at the curb. Have I mentioned yet that I am an unrepentant scrounger?

The drill press is also a curbside pickup - it keeps me from using my good Delta DP for wire brushing rusty tools.

Anyway - this it 1000% better that the shaky Hirsch Saw Table that I was using to hold up the maple table top.

I need to work out my electrical setup for this cart. Most of my mobile equipment has 25' cords on them so I can roll them into place and plug them directly into an outlet. My plan is to mount a power bar on the back rail and just have an extension cord connected.

Anyway - I need to complete this project today so back to the garage. Thanks for reading.

Cheers

Jim
 

Attachments

  • IMG_0308 (Medium).jpg
    IMG_0308 (Medium).jpg
    97 KB · Views: 750
To avoid these ads, REGISTER NOW!
OP
J

Jim_No_Garage

Well-known member
Joined
Jan 15, 2011
Messages
3,342
Location
Millington NJ
Time to bring this thread back from the dead . . .

My side of the garage has been full of stuff since the spring and I want to get it cleaned up again so my car can rest indoors. It's currently parked next to the garage on a grassy strip. The problem area I want to attack right now is pictured below:

attachment.php


The first thing I want to do is replace the homemade pink shelve with a store bought unit. I'm looking for something 72" tall, 42-48" wide and 24" deep. It must be capable of NOT having a bottom shelf in place as that is where the generator lives.

I made the rounds today looking for shelving at BJ's, Costco and Home Depot and there was nothing worth considering. A lot of the possibles were "split" units with 36" uprights that you "joined" to make the full 72" uprights or used for 2 36" tall units. That joint would be under a lot of stress given my desire to have the lowest shelf 28-30" off the floor to clear the top of the generator.

The Emglo wheelbarrow compressor is going (it has a pinhole leak in the tank) and has been replaced by a 4 gallon portable compressor - that I want to sit on the shelving unit. Any shelving brand suggestions? Here is a better view of that corner . . .

attachment.php


The silver garbage can "thingy" is a dust collector for my wood working - a hobby that has been idle for too long. To shelve around that will require a more custom solution. The corner is my seasonal yard tools area - shovels and rakes and implements of destruction during the summer (until Thanksgiving) and then salt and snow shovels in the winter.

Wow- I really need to paint the inside of the garage doors - just for appearance's sake. They are 50 year old non-insulated wood doors with fibre-board panels. Garage door replacements are on the $$ as available list after a new roof on the house.

More to come.

Cheers

Jim
 

Attachments

  • IMG_0580 (Medium).jpg
    IMG_0580 (Medium).jpg
    103.7 KB · Views: 1,845
  • IMG_0581 (Medium).jpg
    IMG_0581 (Medium).jpg
    90 KB · Views: 1,803
OP
J

Jim_No_Garage

Well-known member
Joined
Jan 15, 2011
Messages
3,342
Location
Millington NJ
My original plan for this thread was to use it to catalog my progress as I improved my garage and made it a cool place to work on things. That's just not going to happen so my new direction is to use this thread as others have done as a running commentary of what I'm doing in and around here.

So a little catch up first.

The motor of the Dewalt MBF RAS seen in the background of earlier pictures was dis-assembled some time ago with the intention of replacing the bearings. I purchased replacement bearings but never got the motor back together. It sits looking sad and forlorn in a portion of the basement. It's in the way and it irritates me whenever I walk past it. Being a horizontal surface it has gathered stuff like a fallen tree in a river.


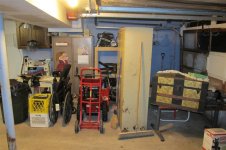
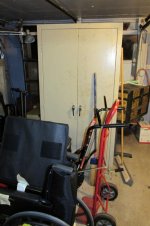
So to confirm the obvious - I'm a scrounger. I go to Estate Sales, Garage Sales and I cruise neighborhoods when it's bulk pickup time. My side of the 2 car garage is currently full of the recent pickups. The other side of the garage is normally occupied with Mrs No_Garage's minivan. I can have both sides of the garage or sleep on the couch - I made my choice.

You can see the following recent picks:

Wheelchair - free from the curb - will give away
Snowblower - free from the curb - will fix and use.
2 door cabinet - free from the curb - will clean up and use
Gaudy trunk - this was my Aunt Charlotte's - will clean up an use as furniture
Adjustable leg Ikea desk/table (holding up the trunk)- free from the curb - will use the legs for another table top

Cheers

Jim
 

Attachments

  • Dewalt RAS (Medium).jpg
    Dewalt RAS (Medium).jpg
    92.6 KB · Views: 221
  • Garage (1) (Medium).jpg
    Garage (1) (Medium).jpg
    110.3 KB · Views: 216
  • Garage (2) (Medium).jpg
    Garage (2) (Medium).jpg
    74.3 KB · Views: 202
OP
J

Jim_No_Garage

Well-known member
Joined
Jan 15, 2011
Messages
3,342
Location
Millington NJ
So I'm off of work this week and the weather has been rainy so my outside projects are on the back burner.

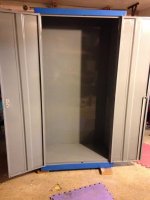
I used some time to repaint the beige cabinet from the last post. The one picture posted didn't do it's condition justice. It was rusty, the doors didn't close properly, the shelves were all banged up and the paint on most of the shelves was flaking off due to a spill of some sorts.

I wire wheeled the bad areas of paint and scuffed the rest with 60 grit sandpaper. The interior of the cabinet and the removable shelves were painted with Rustoleum Smoke Grey and the exterior with Rustoleum Sail Blue. I rolled everything with a smooth roller and the thinned Rustoleum is very unforgiving - no re-rolling like you can do with latex. Maybe it wasn't thinned enough?

As I was rolling the shelve #2 I realized if I could spray I'd be done with all the gray already.

It's definitely a 10 footer but Mrs No_Garage is happy with the result and is chomping at the bit to get it into place so she can fill it. We are playing 3 cabinet monty in her Craft Area. Cabinet 1 is getting given away or donated. Cabinet 2 is being moved into Cabinet 1's spot and Cabinet 3 "Big Blue" is going into Cabinet 2's former home.

Cabinet 1 was a 2 door cabinet with a middle stile so getting larger things inside was a hassle.

Cheers

Jim
 

Attachments

  • Blue Cabinet (02) (Medium).jpg
    Blue Cabinet (02) (Medium).jpg
    72.5 KB · Views: 161
  • Blue Cabinet (01) (Medium).jpg
    Blue Cabinet (01) (Medium).jpg
    71.4 KB · Views: 161
OP
J

Jim_No_Garage

Well-known member
Joined
Jan 15, 2011
Messages
3,342
Location
Millington NJ
I haven't updated this thread in a while . . .

I just started the restoration of "1947" - a Milwaukee/Delta 14" band saw that I picked up from the curb in May of 2019. It dirty, dusty and rusty but it was 99% complete when I found it.

It's been taken apart down to "sub-assemblies". I ordered the Iturra Parts Catalog (which is print only), so once that arrives I can figure out what I need and get parts ordered.

I have a broken trunion and it need new bearings and tires. Beyond that it's a lot of cleaning, painting and polishing to get it looking nice. A new switch, a new motor and/or drive pulley to get the blade speed up from the calculated 2,000 fps we have now.

I will keep posting as things progress around the garage.

Cheers

Jim
 

Attachments

  • Delta Bandsaw (1).jpg
    Delta Bandsaw (1).jpg
    134.4 KB · Views: 186
  • Delta Bandsaw (6).jpg
    Delta Bandsaw (6).jpg
    148.1 KB · Views: 175
  • Delta Bandsaw (5).jpg
    Delta Bandsaw (5).jpg
    137.4 KB · Views: 175
  • Bandsaw Teardown (3).jpg
    Bandsaw Teardown (3).jpg
    148.7 KB · Views: 165
  • Bandsaw Teardown (2).jpg
    Bandsaw Teardown (2).jpg
    151.4 KB · Views: 168
  • Bandsaw Teardown (1).jpg
    Bandsaw Teardown (1).jpg
    110.6 KB · Views: 194

rsanter

Well-known member
Joined
Dec 22, 2007
Messages
18,549
Location
visalia ca
If you can’t build a shop for woodworking, what about getting a single wide or even double wide trailer?
I saw where a few guys bought cheap used single wide trailers and converted them to woodshops and they worked very well
 
OP
J

Jim_No_Garage

Well-known member
Joined
Jan 15, 2011
Messages
3,342
Location
Millington NJ
We are in a holding pattern with regards to future expansion. Our youngest is wrapping up his junior year in college and our oldest has graduated, she's working locally and living at home.

My job is probably safe for the next 18 - 24 months, beyond that it's a long shot that I stay employed where I am now. My wife is working 3 part time jobs and her "primary" job will probably go away in that same time frame. The thought is to sell the current house and move somewhere cheaper to live. We haven't gotten any more specific than that yet.

Down that road we have started doing some delayed maintenance like a new roof, soffits and gutter. Some tree work.

Over the weekend I tackled a project that has been on the honey do list for a while. We have a grass ramp next to the garage that allows us drive up access into the back yard. We also park my van there to keep the driveway clear for the other 3 cars to maneuver around in the turnaround court. The ramps was muddy and a mess so we decided to put down a crushed stone pad.

We borrowed a Kubota B26 TLB and got to work. I scraped out all of the topsoil and grass and took it back to the clay and rock base. I dug a french drain towards the bottom to keep water from running through the gravel and onto the driveway. Everything pitches to this drain and a perforated pvc pipe carries it over to the edge of the embankment.

I built a "box" of 6" x 6" x 8' landscape timbers, lined it with landscape fabric and filled it with 8 yards of 3/4" clean stone. This effort took me all day Saturday and Sunday to complete. We got 3-1/2" of rain on Monday so I got to see the french drain actually draining water - I very proud moment for me.

Pic #1 is at the end of Saturday - the location is scraped, the box has been started and the french drain is roughed out.

Pic #2 and #3 are today - current state. I will probably put a "drain channel" at the top of the box to run any water that gets there to side and over the embankment.

Thanks for reading this far.

Cheers

Jim
 

Attachments

  • Parking_Pad (0).jpg
    Parking_Pad (0).jpg
    153.8 KB · Views: 219
  • Parking_Pad (1).jpg
    Parking_Pad (1).jpg
    156.6 KB · Views: 230
  • Parking_Pad (2).jpg
    Parking_Pad (2).jpg
    156.3 KB · Views: 236
OP
J

Jim_No_Garage

Well-known member
Joined
Jan 15, 2011
Messages
3,342
Location
Millington NJ
So it's been curbside shopping season here in NJ. Witch Covid-19 people are home more and have had time to cleanup all of that "stuff" they no longer need and put it out for "bulk pickup". That is a bonus for scavengers like myself.

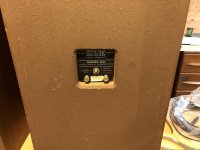
Just last night we struck picking gold. A pair of KLH Model Six speakers in great condition. Their seems to be something wrong with the crossovers but we can fix that pretty easily. Since KLH didn't use foam the woofers are in great shape.

It's been an audio sort of week. We also picked a pair of Elector Voice EVS-16B speakers and a working Apple I-Pod Hi-Fi. You can see the EVS-16B's in the last picture. The woofer on one speaker is a replacement and the second woofer needs to be refoamed/replaced but they put out a lot of bass with a 15" woofer.

I just replaced the fuel lines on an 8HP Giant Vac wheeled leaf blower I picked up from the curb over the weekend. It fired up within 2 pulls and it runs great. That's 2 of these blowers I have picked up in the last 6 months.

Cheers

Jim
 

Attachments

  • IMG_0496.jpg
    IMG_0496.jpg
    93.5 KB · Views: 180
  • IMG_0494.jpg
    IMG_0494.jpg
    146.1 KB · Views: 157
  • IMG_0493.jpg
    IMG_0493.jpg
    149.6 KB · Views: 168
OP
J

Jim_No_Garage

Well-known member
Joined
Jan 15, 2011
Messages
3,342
Location
Millington NJ
So after a 5 year hiatus from this thread it's time to provide some updates.

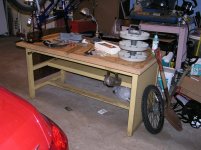
In May I picked up a vintage Craftsman workbench at the curb. It was a little smaller that my existing bench and didn't have a hardwood top so my plan was to sell it for tool money. I had several people interested but they all flaked so it was sitting in the garage taking up space.

My original bench came out of my FIL's house when they sold their NJ house and moved to Florida in the 90's. My nephew in law just bought his first house so I decided to give him Pop Pop's workbench and keep the Craftsman for myself. We delivered the workbench this morning - and had to take the top off to get it into the basement. I'm spoiled as my basement access is thru the garage with no steps. While we had the top off the bench we saw that the bench originally came from the Montgomery Wards store at the Menlo Park Mall - which makes sense because Pop Pop lived for auctions.
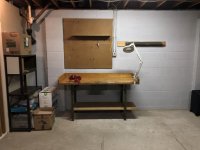
The first picture is the bench in it's new home. The second picture is the Craftsman bench in place with 3 coats of wipe on poly to seal the top. Don't mind the disaster of a network panel in the background - my wiring is a functional mess.

Cheers

Jim
 

Attachments

  • IMG_0656.jpg
    IMG_0656.jpg
    128.7 KB · Views: 189
  • Workbench Tetris (1).jpg
    Workbench Tetris (1).jpg
    152.1 KB · Views: 206
OP
J

Jim_No_Garage

Well-known member
Joined
Jan 15, 2011
Messages
3,342
Location
Millington NJ
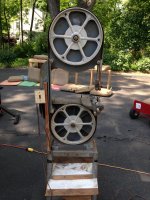
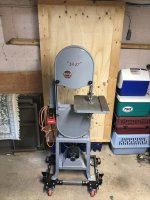
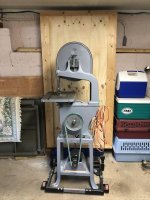
So I am 95% done with the bandsaw cleanup. Repainted all the cast iron and "tins", polished all of the hardware, replaced the bearings, replaced the tires and reassembled.

The switch was a pita. I bought the switch on Amazon and couldn't find a box that fit. Bought the box and backplate from Grizzly and they are not fully compatible so I had to tweak the box to get it together. There was no mounting spot so I made a walnut insert that fit into the cavity in the casting and caulked it in place - it's rock solid and conceivably removable as needed.

I reused the original 1/3 HP motor and pulley for the moment. I can always upgrade later.

I bought a Grizzly mobile base to move it around.

I still need to make a belt cover to cover the link belt but the saw is usable as it sits and cuts fairly well.

Cheers

Jim

PS: The "1947" label was my first project on the Cricut. I should have improved the kerning of the numbers . . .
 

Attachments

  • Bandsaw_Front.jpg
    Bandsaw_Front.jpg
    102 KB · Views: 183
  • Bandsaw_Rear.jpg
    Bandsaw_Rear.jpg
    103.9 KB · Views: 174
OP
J

Jim_No_Garage

Well-known member
Joined
Jan 15, 2011
Messages
3,342
Location
Millington NJ
Nice job on that band saw!

Thank you!

Several years ago I started on the refurb of a Dewalt MBF Radial arm saw and got hung up putting bearings in the motor. To get the motor done outside was more than the entire saw was worth. I passed the saw off down the line to someone who could rebuild it themselves after it sat in my basement for 5+ years. That experience got me "gun shy" on doing equipment refurbs.

This saw sat in the garage for 1 year before I started on it in April and it only took me 4 months to get it back together and working. A lot of that time it sat apart waiting for me to order parts.

Cheers

Jim
 
OP
J

Jim_No_Garage

Well-known member
Joined
Jan 15, 2011
Messages
3,342
Location
Millington NJ
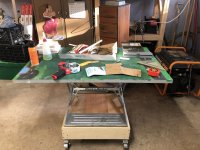
So I thought I would share the rolling bases that I have built to make my B&D Workmate's mobile. With the "fold out" legs they are hard to move once they are setup, even harder to move with stuff already on them.

It's just a simple frame of plywood with blocks in the corners. The casters mount to the blocks and the feet on the Workmate sit on top of the block. I cut up an old "train board" and mounted a 2 x 4 T-Bar to the bottom so the workmate can grab it. A couple of pine scraps below creates more storage on the bottom shelf.

I have 2 of these in the garage and it's great to roll one into the driveway for a project - instead of moving a table. Since the Workmate is just sitting in the base you can separate them and store the pieces when you don't need them.

Nothing earth shattering - but very useful to me.

Cheers

Jim
 

Attachments

  • IMG_0739.jpg
    IMG_0739.jpg
    152.7 KB · Views: 671

captain14

Well-known member
Joined
Dec 19, 2012
Messages
7,105
Location
Near College Park Maryland 20740
I have been reading through your thread and have found it interesting. The rolling platform is a good idea along with the larger work area. I just did that with one I picked up from CL to hold a toolchest.

You should consider posting that project in the Black and Decker Workmate Thread. Just a couple pages from the end some members shared their larger tops they made.

https://www.garagejournal.com/forum/showthread.php?t=92136&highlight=Workmate


By the way, cool thread title.
 
OP
J

Jim_No_Garage

Well-known member
Joined
Jan 15, 2011
Messages
3,342
Location
Millington NJ
I have been reading through your thread and have found it interesting. The rolling platform is a good idea along with the larger work area. I just did that with one I picked up from CL to hold a toolchest.

You should consider posting that project in the Black and Decker Workmate Thread. Just a couple pages from the end some members shared their larger tops they made.

https://www.garagejournal.com/forum/showthread.php?t=92136&highlight=Workmate


By the way, cool thread title.

Thank you for the kind words. I just posted a picture and a description of the Workmate base there.

Cheers

Jim
 
OP
J

Jim_No_Garage

Well-known member
Joined
Jan 15, 2011
Messages
3,342
Location
Millington NJ
A couple weeks ago I posted about swapping workbenches with my nephew. The old workbench had metal braces in the frame that allowed me to insert a piece of pipe front to back and hang a bunch of C-clamps on that pipe.

The new bench didn't have a comparable place to hang clamps so the clamps were sitting in some milk crates for a while. I had found some 5" rubber wheels with bearings at the curb in the spring and this was an opportunity to put them to use in a rolling clamp storage tray.

It was sized to fit under the workbench between the legs with some clearance. The bottom of the tray is 3/4" plywood and the frame is a mix of wood scraps I had sitting around. I added blocks in the corners to give the bolts holding the wheel in place more "twist resistance" given the amount of weight they would be carrying.

It now lives under the workbench and can be rolled out / rolled back quite easily with a foot - even when it is fully loaded with most of my clamps.

Cheers

Jim
 

Attachments

  • Clamp Rolling Storage (1).jpg
    Clamp Rolling Storage (1).jpg
    152.1 KB · Views: 151
  • Clamp Rolling Storage (2).jpg
    Clamp Rolling Storage (2).jpg
    144.1 KB · Views: 140
OP
J

Jim_No_Garage

Well-known member
Joined
Jan 15, 2011
Messages
3,342
Location
Millington NJ
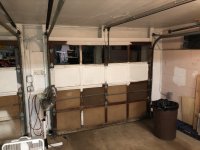
So yesterday was hopefully my last "furlough Wednesday" from work so I worked on a little prep job in the garage. In July we ordered replacement Garage Doors and openers thru Costco. The original lead time was estimated at 5-6 weeks at that time so I wanted to do some pre-install painting before the new doors arrive.

I had installed the openers back in 1996 when we bought the house. They worked fine but my install workmanship was a bit sloppy. The control wires looked like a drunken monkey installed them and they had been painted to the ceiling at some point.

The wood framing over the door openings had never been painted and the new doors will have torsion springs so I wanted to paint that area before the doors are installed. A quart of latex glossy white trim paint mixed with a quart of Kilz latex primer, applied with a brush and a small roller gives me the results below.

I pulled back all of the original control wiring out of the way so I could paint - they will run all new control wiring for the install.

It looks better than it did and I can't wait for the new doors.

We are going with a pair of simple Amarr Heritage 3000 Series doors with top row windows and a pair of Liftmaster 8355 openers.

Since the existing doors are virtually uninsulated (1/4" masonite is what R0.025) the new doors should make the garage should be a little more temperate.

I hope to be posting "after" pictures in the next week or 2.

Cheers

Jim
 

Attachments

  • Garage Door Frames (1).jpg
    Garage Door Frames (1).jpg
    138.4 KB · Views: 137
  • Garage Door Frames (2).jpg
    Garage Door Frames (2).jpg
    148.1 KB · Views: 128
OP
J

Jim_No_Garage

Well-known member
Joined
Jan 15, 2011
Messages
3,342
Location
Millington NJ
Just a quick chuckle this morning. I was talking to my son and saw this on a shelf unit in his room.

attachment.php


My son is channeling @Pelican Pines . . .

Cheers

Jim
 

Attachments

  • Dymo Reels.jpg
    Dymo Reels.jpg
    87.8 KB · Views: 897
OP
J

Jim_No_Garage

Well-known member
Joined
Jan 15, 2011
Messages
3,342
Location
Millington NJ
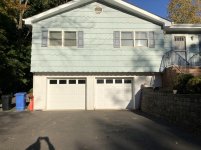
So this covid thing created a huge backlog of demand for replacement Garage Doors and the supply chain was unable to keep up. After a several month delay we were scheduled for installation on Thursday.

The installer hit a few snags along the way:

He needed to shorten the opener bars by about 6 inches to clear a bulkhead in the garage.

He needed to adjust up both of the door frames as they were not plumb/level.

He completed the job and it looks great. The new doors make everything else look shabby - so there is some painting (inside and outside) in the near future.

The deal was made thru Costco. The doors are Amarr "Heritage" 3000 Series and the openers are Liftmaster 8355's.

Very happy with everything and the openers are REALLY quiet compared to the 26 year old Genie screw drive models that were there before.

Cheers

Jim
 

Attachments

  • Garage_Doors_Outside_After.jpg
    Garage_Doors_Outside_After.jpg
    151.9 KB · Views: 142
  • Garage_Doors_Outside_Before.jpg
    Garage_Doors_Outside_Before.jpg
    149.2 KB · Views: 146
  • Garage_Doors_Inside_01_Before.jpg
    Garage_Doors_Inside_01_Before.jpg
    124.5 KB · Views: 144
  • Garage_Doors_Inside_01_After.jpg
    Garage_Doors_Inside_01_After.jpg
    137.8 KB · Views: 147
  • Garage_Doors_Inside_02_Before.jpg
    Garage_Doors_Inside_02_Before.jpg
    131.2 KB · Views: 141
  • Garage_Doors_Inside_02_After.jpg
    Garage_Doors_Inside_02_After.jpg
    137.7 KB · Views: 330
To avoid these ads, REGISTER NOW!
Top Bottom