To avoid these ads, REGISTER NOW!

Rebuilding Takubo floor jack

gummycarbs

Member
Joined
May 17, 2016
Messages
21
Hi,

I'm attempting to rebuild a jack that I inherited from my grandfather. It's an old Takubo, model SGH20, manufactured in 1972. I've only found two examples of Takubo floor jacks online (1, 2). It seems pretty well built.

The jack would raise, but it wouldn't stay up, and it couldn't apply much force. I never saw any fluid leaking from it.

I've read through Hiball's Hydraulic Jack Rebuild Common Questions and Answers thread and Overseas Jack Rebuild Help Tutorial thread, but I didn't spot one that is constructed quite like this one.

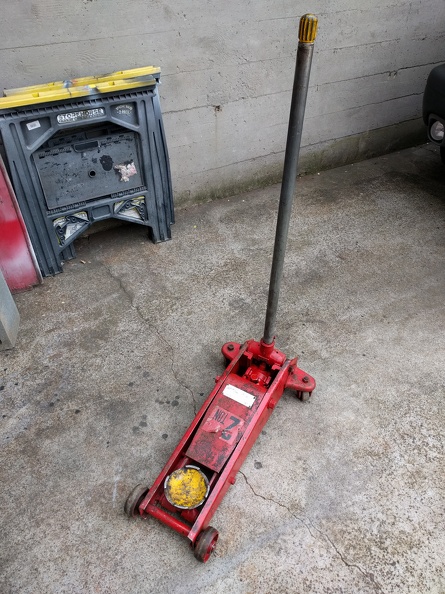
Here's the jack as it came to me (minus the cover plate, which I removed in hopes of topping off the hydraulic fluid and thus fixing it):

20170724223536-0b3d49ac-me.jpg


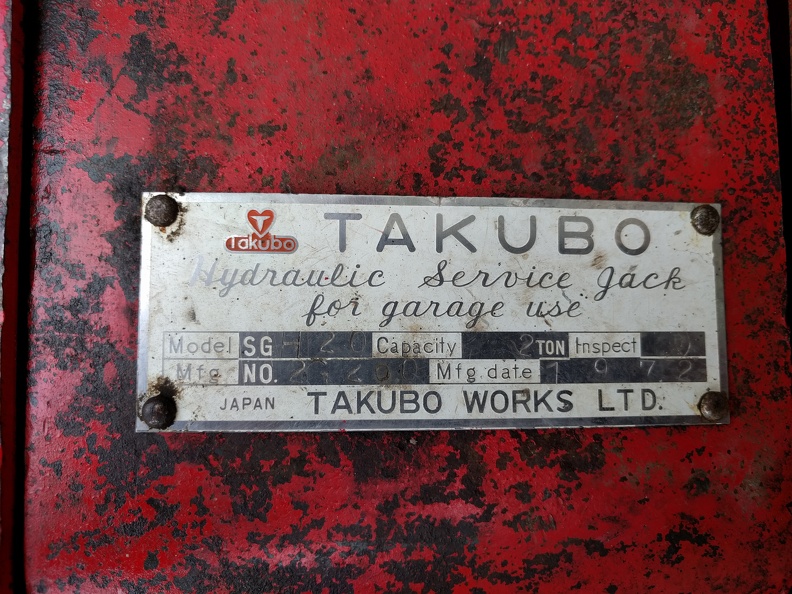
Identification plate:

20170724223544-c4bb48b9-me.jpg


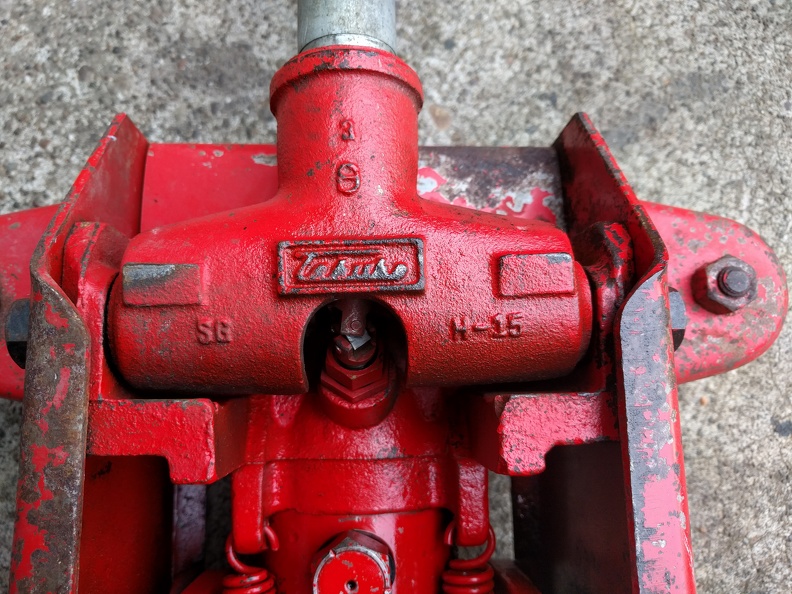
Takubo logo cast into the lever:

20170724223600-0d4ebf4e-me.jpg


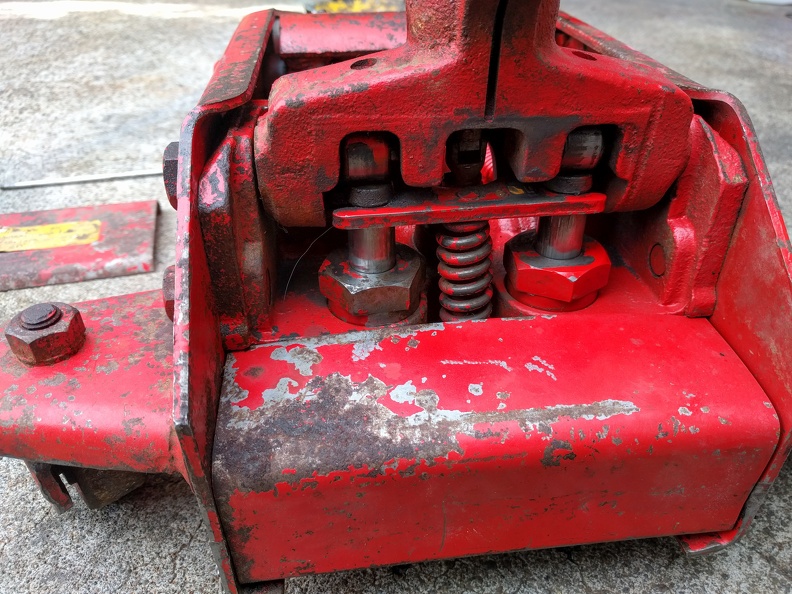
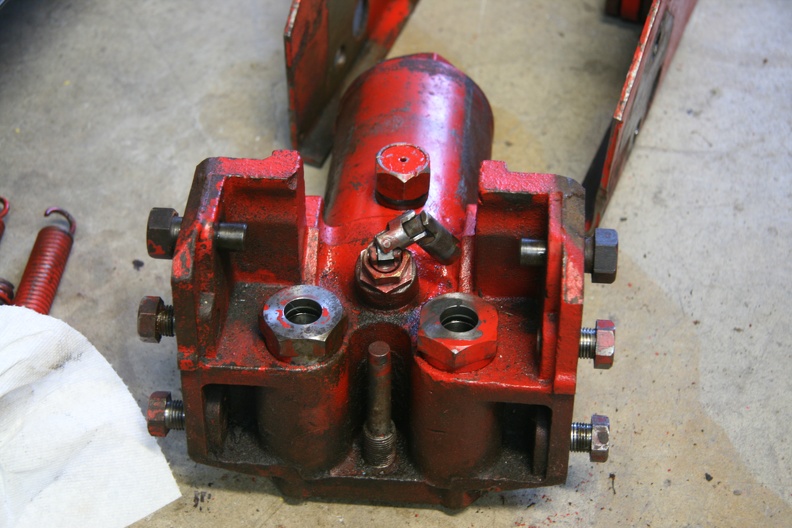
Back side of the pump assembly:

20170724223552-5f77def3-me.jpg


I got the pump body out! I more or less followed the steps in this video.

20170724223608-46a9fffd-me.jpg


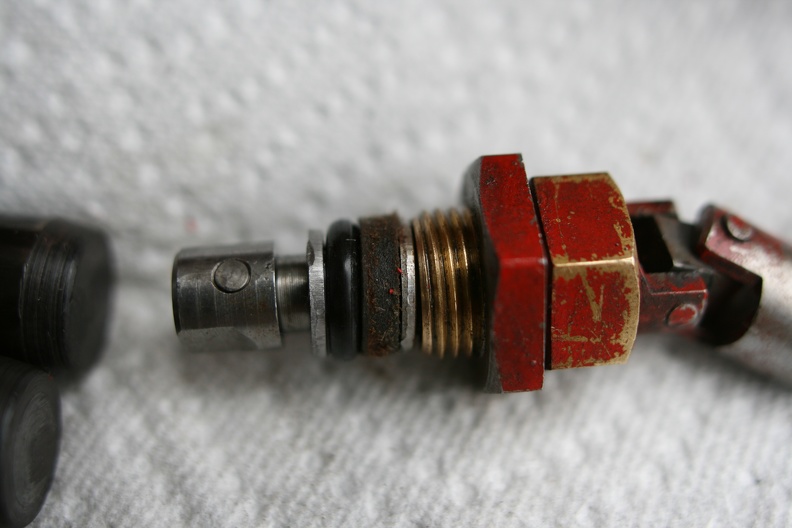
Everything seemed stuck solid. After yanking hard enough on the linkage, it came out. It seems to have an o-ring with some other material (leather?) above it:

20170724223632-2fe3b7c7-me.jpg


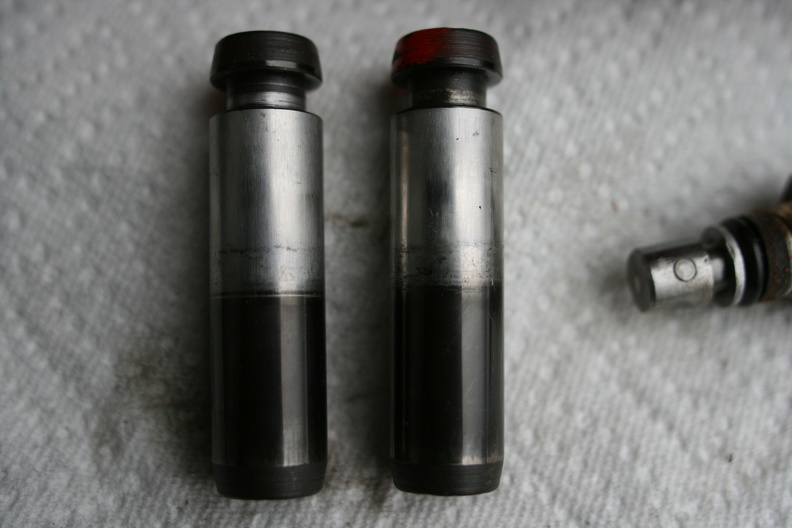
The pistons are blackened at the point they enter the cylinder. I have no idea if this is normal or acceptable:

20170724223630-dc04eceb-me.jpg


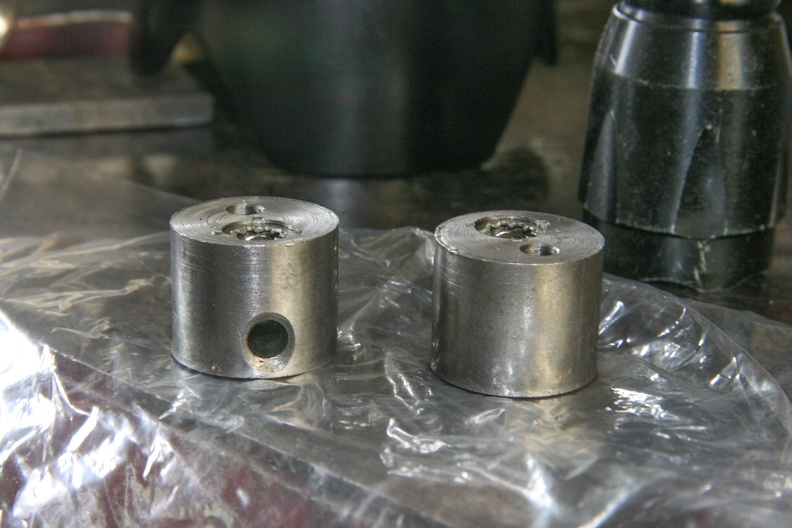
It took quite a lot of force to loosen the... Cylinders? No idea what to call them. After removing them, when I flipped the jack over, these little things fell out. I don't recall seeing any jacks in the import thread that use a design like this:

20170724223657-10c0cf47-me.jpg


Here's the valve (?) thingies in relation to the cylinder (?) thingies:

20170724223711-1f850392-me.jpg


The valve's (?) side hole seems to correspond with a hole in the wall of the outer cylinder (at about the 11-o'clock position in the right cylinder):

20170724223650-0a7a3ecd-me.jpg


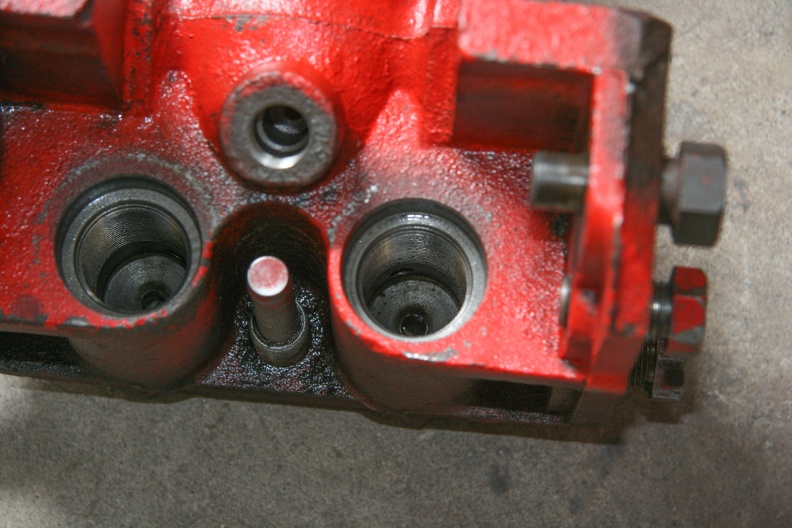
The piston seems to be in okay shape. Not perfect, but no deep scuffs:

20170724223638-d7a2f1e7-me.jpg


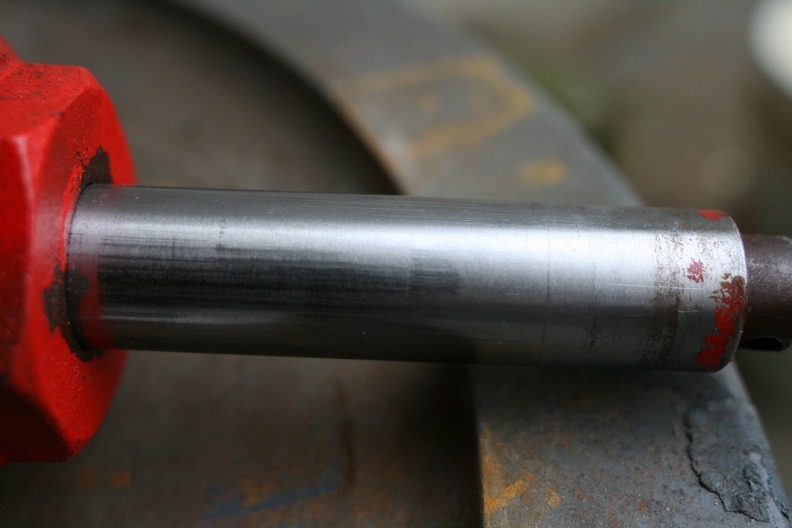
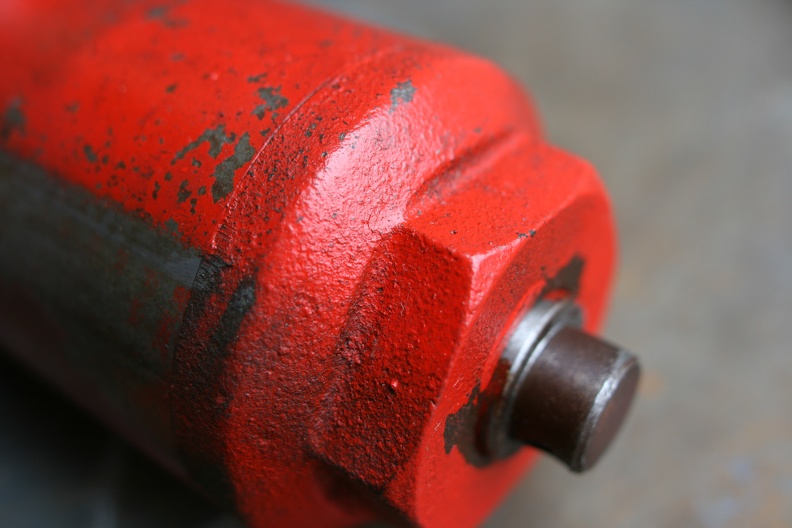
I believe the next step is to unscrew the huge hex nut off the end of the main pump cylinder, but I snapped my old Taiwanese vise when I tried. The nut doesn't appear to have budged:

20170724223707-1c90e3e6-me.jpg


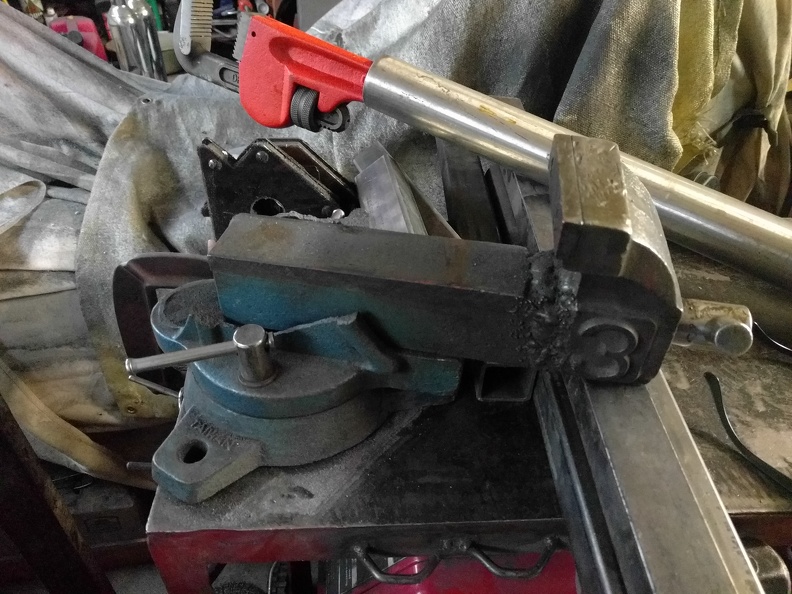
I'm currently waiting on a proper air impact gun and a 60mm (!) deep-wall socket to arrive. I sure hope I'm supposed to unscrew that end cap:

20170724223627-d177e855-me.jpg
 
Last edited:
To avoid these ads, REGISTER NOW!
OP
G

gummycarbs

Member
Joined
May 17, 2016
Messages
21
Some questions, if anyone can help:

1) Is that blackening of the pump pistons okay?

2) Is there any reason I shouldn't be taking an impact gun to the big nut/cap on the end of the cylinder? Are they ever reverse threaded?

3) What is the spongy/leathery looking stuff above the o-ring on the linkage (the 6th picture)? Should I worry about replacing it, or just do the o-ring?
 

matt_i

Well-known member
Joined
Mar 14, 2008
Messages
10,728
Location
SE Michigan
It would seem based on your description that a possibility is the release valve is not sealing.

I wouldn't worry about the blackening, as long as there is no detectable ridge that would catch your fingernail.

I would try to leave the leather backup washer alone and just replace the o-ring. My guess is that it just makes the "squish" on the o-ring more compliant (gradual) than if it just had steel backup washers only and thus lets it leakdown more gradually than normal.

I'm not sure how to advise you on the impact. When a 1/2" impact fails I usually get out the cheater pipes to overcome. A 3/4" impact is a different bird of course but have to be setup with several components (tool, socket, large dia airline) to make that air hog work. I wouldn't think left handed but threadlocker could be used to keep the endcap from unscrewing as its a likely a straight thread and the nut is probably inherently weak due to the seal gland cut into it. A slippery slope is the use of heat which will probably easily release the threadlocker but also destroy the seals within....
 

Hiball

Well-known member
Joined
Apr 30, 2009
Messages
14,029
Location
Missery
Some questions, if anyone can help:

1) Is that blackening of the pump pistons okay?

2) Is there any reason I shouldn't be taking an impact gun to the big nut/cap on the end of the cylinder? Are they ever reverse threaded?

3) What is the spongy/leathery looking stuff above the o-ring on the linkage (the 6th picture)? Should I worry about replacing it, or just do the o-ring?

1. It may be possible to polish up the pistons where they have discolored, Since they seal on outside surface (Rod surface) you need to have a fairly clean working surface to prevent leakage and premature wearing of the seals.

2. Go crazy, Not that I've encountered or can remember. You will need to remove that tank nut to get to the Piston seal on the Main Ram.

3. I have found leather oring backups in different models, generally not that thick. It might be difficult to find a replacement, but one could be made if needed.

The Round cartridges that where held in place by the pump cylinders are called cartridge valve systems. They are used to transfer oil from the reservoir to the cylinder during operation. Warning... they can be Problematic and require some fine tuning to get them to seal up/operate correctly. I would try not to mix up the sides as they have been fitted naturally from being compressed/torqued from the factory. I've had to use lapping compound in the past to get a good seal on problematic cartridges.
 
Last edited:

Hiball

Well-known member
Joined
Apr 30, 2009
Messages
14,029
Location
Missery
Doesn't that big nut look kind of welded on?

There may be some Manufacturing welds, but that Hex portion is connected to the Tank Nut, if you look to up/left about a Inch you can see the seam where it meets the reservoir.
 
To avoid these ads, REGISTER NOW!
OP
G

gummycarbs

Member
Joined
May 17, 2016
Messages
21
It would seem based on your description that a possibility is the release valve is not sealing.

Does that mean it could be as simple as a poor fit in that valve/linkage?

I'll buff the pistons and won't touch the leather backup washer. It seemed to make a tight seal anyway.

but threadlocker could be used to keep the endcap from unscrewing as its a likely a straight thread and the nut is probably inherently weak due to the seal gland cut into it.

I didn't see any thread locking residue when I took the cylinders out, so hopefully there's none in the main nut. But man, those were some of the tightest fasteners I've ever come across! I figure if I can't get the nut off with an impact in reasonable time, I'll just take it to a local hydraulic shop and let the professionals tackle it.

Thanks for the input!
 
OP
G

gummycarbs

Member
Joined
May 17, 2016
Messages
21
The Round cartridges that where held in place by the pump cylinders are called cartridge valve systems. They are used to transfer oil from the reservoir to the cylinder during operation. Warning... they can be Problematic and require some fine tuning to get them to seal up/operate correctly. I would try not to mix up the sides as they have been fitted naturally from being compressed/torqued from the factory. I've had to use lapping compound in the past to get a good seal on problematic cartridges.

Uh oh, too late. I was surprised when they fell out onto my table, I was just trying to get the last of the hydraulic fluid out! By the time I caught them rolling away, I'd already lost track.

Does the orientation of the hole matter? I noticed that the side hole seems to be at about the same height as the hole in the outer cylinder.
 
OP
G

gummycarbs

Member
Joined
May 17, 2016
Messages
21
Doesn't that big nut look kind of welded on?

I don't think so. I thought there might be some rust or something, so I took a wire wheel to it and it seems like a pretty normal seam. The only odd thing is that it doesn't seem perfectly aligned with the cylinder. It's nice and flush on one side, but you can catch a fingernail on the other.

20170724223522-eac00116-me.jpg
 
Last edited:

Danglerb

Well-known member
Joined
Sep 6, 2007
Messages
9,736
Location
SoCal
I see it now. I didn't think about nut being a part of the end instead of just being a nut. Good luck with the impact, sometimes they do what brute force fails to.
 
OP
G

gummycarbs

Member
Joined
May 17, 2016
Messages
21
It's been awhile. I bought a big-*** 60mm socket and had zero luck with disassembly. It ended up sitting in a box on the floor until last week.

I went at the end of the hydraulic cylinder with a propane torch. My IR thermometer read something like 350 degrees. After thoroughly heating the entire perimeter and going at it with a 1/2" air impact gun, I finally saw some movement.

TakuboJack-CylinderDisassembly-1.JPG

I think I found the source of the problem with this jack:

TakuboJack-CylinderDisassembly-5.JPG

TakuboJack-CylinderDisassembly-2.JPG

It looks like the main cylinder was sealed with some kind of yellow adhesive:
TakuboJack-CylinderDisassembly-4.JPG
TakuboJack-CylinderDisassembly-3.JPG
 
OP
G

gummycarbs

Member
Joined
May 17, 2016
Messages
21
Any idea where I can find a suitable replacement seal? It measures 30mm I.D. and 40mm O.D. I don't see any spring, or sign of a channel for a spring. It has a stepped profile. The side profile looks like it flares out a bit, too, but maybe that's just deformation with age.

I have no idea what to even call a seal like that.
 
To avoid these ads, REGISTER NOW!
Top Bottom