To avoid these ads, REGISTER NOW!

Red compressor rebuild

Joined
Nov 4, 2011
Messages
15
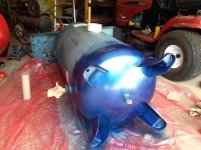
I got this compressor for a deal from a friend ($200), but it needed much of the plumbing, wiring, guages, etc...to make it function. I had a tank, pump, and a motor.
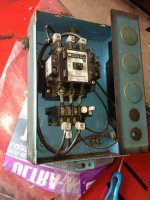
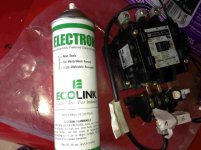
Took it all apart; tank down to base coat and ordered the regulator and switch, guages and enough wiring and plumbing to make it happen.
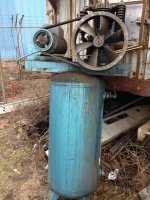
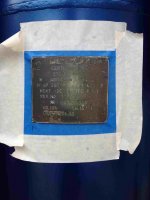
Put it all together and then started chasing the "hissing" gremlins at several connection fittings. After draining the air a half dozen times, and re-tightening/taping/doping what needed attention I heard one last hisssssssssssss. Yes, the tank itself had a leak/crack. Small, but leaking nonetheless. And after reading copious posts on GJ, Modern Machinest, and some hot rod sites I quickly realized that welding on the tank was just postponing a bomb to explode at a later date. Sooooooooooooo......contacted buddy who sold me the tank (and walked me through the restoration) and he vowed to make it right by finding me a new tank. Which he did. A blue vertical 60 gallon. I'm in the process of taking off all of the "workings" from the redone red one, and transfering them to the new blue one now.
 

Attachments

  • mocked 2 before.jpg
    mocked 2 before.jpg
    131.7 KB · Views: 46
  • finished motor to PS.jpg
    finished motor to PS.jpg
    110.6 KB · Views: 41
  • Finished PS to power.jpg
    Finished PS to power.jpg
    107.8 KB · Views: 45
  • IMG_1082.jpg
    IMG_1082.jpg
    135.9 KB · Views: 43
  • IMG_1089.jpg
    IMG_1089.jpg
    135.8 KB · Views: 46
To avoid these ads, REGISTER NOW!
OP
G
Joined
Nov 4, 2011
Messages
15
And this is the new one. My friend needed the 5 HP motor from the new compressor for an application that he is currently working on. He kept the pump too. I got the tank and a magnetic starter. Hope you enjoy the pics because I'm still in the process of making it look "pretty".:rocker:

I now have the feet attached (with isolation pads) and the bottom petcock drain valve installed. I stripped off the paint from the front ID tag (I hate it when they paint over those tags). I then put a couple layers of clear coat over it to protect it against rust, but still kept the metal look of the tag (pics to come).

Hope you like this one too.
 

Attachments

  • painted magnetic switch.jpg
    painted magnetic switch.jpg
    145.9 KB · Views: 47
  • tank painted.jpg
    tank painted.jpg
    141 KB · Views: 57
  • bottom painted.jpg
    bottom painted.jpg
    142.2 KB · Views: 50
  • dirty switch.jpg
    dirty switch.jpg
    140.9 KB · Views: 48
  • IMG_1222.jpg
    IMG_1222.jpg
    142.5 KB · Views: 47
  • dirty at house.jpg
    dirty at house.jpg
    146.3 KB · Views: 46
  • as it sat 1.jpg
    as it sat 1.jpg
    150.8 KB · Views: 51
Last edited:

CNGsaves

Well-known member
Joined
Sep 26, 2012
Messages
13,233
Location
KS and OK
Wow, great restoration work on the compressor.

So you had to SCRAP the red tank due to it leaking?? How many gallons was the old red horizontal tank? Please show pic of the fault in tank that was leaking so we can know what to look for.

Good luck on finishing the "new" blue tank. Keep pics and info coming!
 
OP
G
Joined
Nov 4, 2011
Messages
15
I haven't scrapped it yet. Everything that I read on-line said to NOT weld the tank. So, I'm either going to 1) hold on to the red tank for years until it becomes an eyesore 2) Hold on to it for years until I make a BBQ grill out of it 3) Take it to the scrap yard and get $10 out of it.

Here is the best pic I have so far. As you may know an 80 gal tank sits real low to the ground. Just barely enough room to slip my phone/camera undneath to snap a pic. When tank had air in it (after I had fixed all other leaks) I reached my hand around to the back and felt the air stream. Couldn't see it, so I took a black marker and marked where I felt it coming out. I still want to flip the tank over and get a GOOD straight on picture of where it was leaking. Perhaps I'll do that tonight?
 

Attachments

  • crack 5.jpg
    crack 5.jpg
    62.5 KB · Views: 54
Last edited:
To avoid these ads, REGISTER NOW!

Lurker

Well-known member
Joined
Apr 17, 2010
Messages
55
Location
Central Ohio
... Sooooooooooooo......contacted buddy who sold me the tank (and walked me through the restoration) and he vowed to make it right by finding me a new tank. Which he did. A blue vertical 60 gallon. I'm in the process of taking off all of the "workings" from the redone red one, and transfering them to the new blue one now.

When you said blue tank, I was expecting to see a CH. Any idea who made the new one? Looks "factory", but I'm surprised by all the overhang on the pump/motor flange.
 
OP
G
Joined
Nov 4, 2011
Messages
15
This is the closest picture that I have of the tank tag.
 

Attachments

  • tag plate.jpg
    tag plate.jpg
    141 KB · Views: 48
OP
G
Joined
Nov 4, 2011
Messages
15
I finally got the motor and pump placed on top last night. Since it is not the exact same combo that came off of the tank it (of course) did not exactly fit. Doesn't mean that I couldn't bolt them down, but the pully's didn't line up correctly. So, after trying two seperate pre-drilled bolt patterns for the pump I came to the realization that I'm going to have to drill a new set of holes for the pump. I'll jump on that tonight.
I am also attaching a picture of my newest cool thing. It's a dialectic cleaner used for electrical parts (motors/switches/windings/electrical connections/etc). It is highly non-conductive, biodegradable, and leaves no residue. If the film left from the liquid is still on your parts you just get rid of it with some compressed air. Easy peasy. Worth every penny if you need to clean up some nastyness from anything electrical.
 

Attachments

  • IMG_1271.jpg
    IMG_1271.jpg
    140.7 KB · Views: 26
  • IMG_1243.jpg
    IMG_1243.jpg
    137 KB · Views: 17

jonathan75

Well-known member
Joined
Mar 27, 2013
Messages
1,451
Location
NC
Now you got me worried. I think I may try to pressure test my tank before I go through the trouble of painting it.
 
To avoid these ads, REGISTER NOW!
Top Bottom