To avoid these ads, REGISTER NOW!

Removing drive screws without access to the back side?

BLUE72CAMARO

Well-known member
Joined
Jan 1, 2014
Messages
911
Location
IL
So I purchased a WWII vintage Grob NS-18 bandsaw that I am restoring. It was mechanically functioning when I bought it but the paint looked horrible. It has atleast 3 coats of different colored paint on that I have been stripping off. So time has come to remove all the original tags and plates from the machine which are held on by drive screws. The large tag below I can access from the back side to drive them out. The small tag is in a location that has no access from the backside though any advice on how I can remove this tag without destoying it?

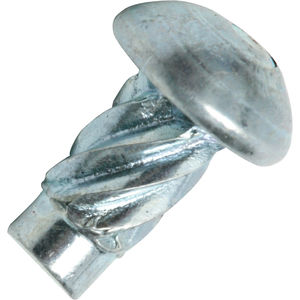
Generic picture of a drive screw for those that dont know what I'm talking about. Also a chance I dont know what I am talking about as I had to use googlefu to come up with what they were called.
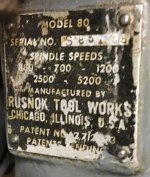
1132228.jpg


Large tag
20210328_155159.jpg

Small tag with no access
20210314_111700.jpg

The saw when I got it home.
20210313_165814.jpg

Also how can I go about cleaning the old paint off of these tags without removing the original black areas? I assume they are paint.
 
Last edited:
To avoid these ads, REGISTER NOW!

ed4banger

Well-known member
Joined
May 28, 2016
Messages
470
Location
Virginia
Same type of pins holding the heritage badges on Craftsman vises. I've had best luck using a wood chisel, tapping on the head of the pin lightly repeatedly on one side, then the opposite side (put tape on the badge so you don't scratch it). After a while (and it can take a while) the pin will slowly begin to work its way out of the hole. At some point it will be out far enough to grab with some nippers.
 

bmwrd0

Well-known member
Joined
Nov 7, 2010
Messages
5,463
Location
Beaver Fever Oregon
You can try a pair of electricians snips that are used for flush cutting. The blades on them might be able to slip under the lowest edges of the drive screw head, giving enough to help pull them out.

As for the paint, try Simple Green to help loosen the smears.
 

tatra

Well-known member
Joined
Dec 2, 2007
Messages
4,785
Location
pirate contest city
Usually soft. Cold chisel the head off , drill out root and try to reapply . Task I had to do was remove number plates and reapply new etc . Usually just drilled new holes and hammered in new ones which is what I would do offset plate about a 1/2” and apply . Old ones just grind to surface and pant over . Only one who will know will be you .
 

catalytic

Well-known member
Joined
Jul 16, 2011
Messages
636
Location
Boston, Los Angeles, Cleveland
I've seen several people on owwm say they use a dremel to cut a slot, then a flat blade screwdriver to 'unscrew' it.

Personally, having restored many machines, I leave them in place. You can protect the machine badge with duct tape or masking tape when blasting/painting, respectively. Removing the badges doesn't really make them easier to clean, and many machine manufacturers installed them before paint and masking taped them during paint anyways.
 

macgee

Well-known member
Joined
Jan 11, 2014
Messages
2,834
Location
Sepulveda Pass, CA
So you decided to paint it like the horizontal saw?

The biggest problem with drive screws and most don't realize is that most of those drive screws are hardened and a complete pain in the A**. It's not like a regular screw, they're much harder material.

There's several ways to tackle them. One way is to make a sacrificial protective metal cover plate with a matching hole pattern of the holes you want removed; the protective plate has holes the same size as the pin heads. cover the cherished plate, Then use a carbide bur in a Dremel or small die grinder and grind out/off the head without hitting/damaging any part of the cherished plate even when done in anger. Another way as described in the earlier posts above but risk scratching or damaging the surrounding area.
Another method is use same protective plate method and use a needle size bur to make a straight line slot to fit a slotted screwdriver to help loosen it and then use screw extractor pliers like Engineer's Japan pliers but this doesn't always work out. Most likely the best case scenario is to grind off the head, remove the plate, cover the existing screws making them flush, add filler before painting making them invisible and slightly relocate the plate and drill new holes for it.

I have a client/friend who restores vintage machinery full time for a living and says this is the best way and they are the Bain of his life, he hates them and hates having to leave old embedded screws in casting and relocate the plate but not much you can do to hardened screws unless your happy to spend a lot of time and use up the tools needed to remove them. He's removing plates daily and says you'll never know it was relocated especially when the orig. plate looks great and undamaged.
 
Last edited:

catalytic

Well-known member
Joined
Jul 16, 2011
Messages
636
Location
Boston, Los Angeles, Cleveland
I have a client/friend who restores vintage machinery full time for a living...he hates them and hates having to leave old embedded screws and relocate them but not much you can do to hardened screws unless your happy to spend a lot of time and use up the tools needed to remove them..

^^Yup---exactly why I always recommend people just leave them alone/in place/don't remove.

For my milling machine, the drive-screw-attached machinery nameplate was in terrible shape. So, I acetone cleaned it in place, which removed all of the ink completely, and then applied a solvent resistant vinyl decal overtop. It looks bone stock and no drive screw removal necessary. Before/After photos:
 

Attachments

  • my rusnok badge little.jpg
    my rusnok badge little.jpg
    94.9 KB · Views: 49
  • IMG_1961.jpg
    IMG_1961.jpg
    104.9 KB · Views: 57

steel 35

Well-known member
Joined
Feb 20, 2011
Messages
2,105
Location
Between the PNW and the Emerald Triangle
Interior of my old truck had something similar; lots of them, trick I learned was ground the back side of one pair of side cutters, quenching as I went until the sharp snipers were flush and then place behind head squeeeze and turn. Still in the xtra cutter draw.
Finished lable may require some pampering:wtf:
 
OP
B

BLUE72CAMARO

Well-known member
Joined
Jan 1, 2014
Messages
911
Location
IL
No they are not in blind holes but there is no access to the backside or lets just say not adequate access for my big boned **** to get to them... I am in the process of stripping the machine down but I havent found anything that makes me think the main frame of the machine is cast thus far. I believe it to be made out of several formed plates welded together. Guess I am going to get a crash course in body filler on this one to.

macgee,
Yeah the plan is to paint it up to match the kalamazoo and my weld table for that matter. Guessing this is going to be the color scheme for my restorations and creations in my shop. For those that havent seen either of them.

20200305_180816.jpg
20200305_180845.jpg
20210206_155504.jpg
 
OP
B

BLUE72CAMARO

Well-known member
Joined
Jan 1, 2014
Messages
911
Location
IL
Just for size reference the tag that is the issue with no access to back is the 2nd picture in the original post. It is the tag right under the blade welder in the third picture maybe 3" x 1". The heads on these things are probably close to 1/8" big around.
 
Last edited:
To avoid these ads, REGISTER NOW!

thehorse13

Well-known member
Joined
Mar 15, 2015
Messages
3,478
Location
Jefferson County, WV
I've had the pleasure of removing dozens of these plates during restorations. Because I am a maniac, I sit there for as long as it takes to gently pry them out. I take a cheap drywall knife and grind the edge to the sharpness of a dull pocket knife. I then tape the badge up to protect it and get to the slow methodical process of slowly prying them out.
 

FrankLee

Well-known member
Joined
Sep 13, 2010
Messages
3,594
Location
seMI, 48317
Are the drive screws in blind holes? Please post a picture of the inside where the badge is..

This is where I was going....

Drive Screw/Panel Screw Remover Tool

On most of these vintage machines, there are badges attached to cast iron components with drive screws/panel screws. When refurbishing machines, I want to remove the badges. Many times, these panel screws are in locations that are inaccessible.

Here is another simple tool I made to quickly and safely remove panel screws from otherwise inaccessible locations inside cast iron pieces. Obviously it will not work when panel screws are in blind holes.

It was assembled from bits and pieces I had on hand. I drilled a couple holes near the end of a 16" length of 5/8" x 1" bar steel and secured a small tip from a snap-ring pliers with a set screw.


To use it, line up the tip with the panel screw on the outside using your finger to hold the bar at the approximate distance from the edge. Then feed the bar inside and fish around for the panel screw hole. If the panel screw protrudes through the inside, you'll need to visually line up the point.


Next, strike the bar with a hammer until the panel screw backs out. Use tape or a magnet to prevent the panel screw from flying across the shop.


This tool works extremely well and is ridiculously easy to use. It eliminates the risk of damaging the badge by grinding off, grinding a slot in, prying up, or drilling out the panel screw head from the face of the badge.

 
OP
B

BLUE72CAMARO

Well-known member
Joined
Jan 1, 2014
Messages
911
Location
IL
That is a really smart idea franklee, Im just not sure that I have anywhere that I can access that area with both hands at one time but I am sure going to try!
 

RTM

Well-known member
Joined
May 13, 2019
Messages
13,164
Location
SF Bay Area
Wow, another great idea from a GJ member! Thanks FrankLee. I will need to remember that later.
 

bmwrd0

Well-known member
Joined
Nov 7, 2010
Messages
5,463
Location
Beaver Fever Oregon
Ha! When I did my Walker Turner I ended up taping over that same badge, as I didn't come up with that ingenious tool FrankLee!
 

macgee

Well-known member
Joined
Jan 11, 2014
Messages
2,834
Location
Sepulveda Pass, CA
If the welder is not working, then maybe you can remove it and get back access for the plate you need and also make it easier to see what maybe wrong with the welder?
 
OP
B

BLUE72CAMARO

Well-known member
Joined
Jan 1, 2014
Messages
911
Location
IL
Yeah Macgee the welder came out after it failed testing as it was the last thing I tried before disconnecting power from it for the teardown.

But unfortunately access to the backside on the little tag is a no go still.

Current state before more stripping last night
20210408_200559.jpg

From the left side. No way my tubby *** gets thru that little door to reach up there.
20210408_201444.jpg

Close up of welder opening and plate across the bottom with another plate below.
20210408_201409.jpg

Also destroyed a pair of flush cut snips last night attempting that method... Looks like I am going to have to try the dremel method.
 

Jwallace1

Well-known member
Joined
Oct 25, 2018
Messages
141
Location
spokane wa
i have done this on my south bend lathe, delta belt disk sander and walker turner 20" drill press in the last year or two, i cut a slot in every one of them with a Dremel and used a screwdriver to back them out, my local Fastenal had the correct ones in stock and i used the same size on all three machines. they call the replacement a #4-7x3/16" U Drive Screw, go to their website and type in SKU 1132222, $5 for a pack of 100, i was able to buy them individually in the store.

thanks
 
OP
B

BLUE72CAMARO

Well-known member
Joined
Jan 1, 2014
Messages
911
Location
IL
So I finally was able to claim victory on this issue. The large tag on the upper door removed with out issue by tapping out with a center punch from the back side. I then was able to contort my hand around thru the welder opening to feel the back side of the small tag on the main frame. To my surprise the drive screws used on it were much longer than the plate thickness it is mounted to. So I then took a chunk of brass i have thats about 1" dia. and 5" long and blindly tapped around until i would hit the back side of the screws and push them partially out. I could then grab them with pliers and remove them the rest of the way with ease.

20210410_172011.jpg
 

APEowner

Well-known member
Joined
Oct 2, 2009
Messages
4,164
Location
Sunny, New Mexico
I'm glad you were successful! I use a slow escalation approach.

Try and push then out from the inside
Try and grip the head with a sharp pair of side cutters and turn them out
Cut the heads off and drive them in till they fall out inside
 
To avoid these ads, REGISTER NOW!
Top Bottom