Provincial
Well-known member
If you work on old cars, you have probably run into a failed switch that is held together by tabs that are bent over to clamp the insulated parts in place. Bending these tabs out straight to disassemble the switch often results in breaking off the tab, usually during the reassembly process.
The problem is one of metal fatigue or stress, since it is really hard to keep from concentrating the bend in a small area. The metal is already stressed from the original bend, so it is important to spread the unbending process over the largest possible area.
I decided to try to work on an old switch using a set of Harbor Freight push pin pliers to unbend the tabs. I started by prying up the very end of the tab, then gradually working my way back toward the base. I didn't pry it completely straight, just enough to work the insulated parts out of engagement. After cleaning up the contacts and testing the switch, I rolled the tabs back together with a pair of Channellock pliers. Again, I worked the tab back into position gradually. I used a small C-clamp to hold the switch together while I re-bent the tabs.
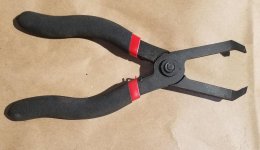
Photo #1 shows the Harbor Freight push pin pliers.
Photo #2 shows the HF pliers in action.
Photo #3 is the disassembled switch. Note the four tabs on the corners.
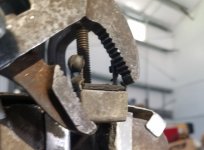
Photo #4 is starting to bend the tab back down
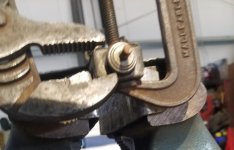
Photo #5 is the second stage of bending the tab back down
Photo #6 is the finished bend
Remember, take is slow and easy. "Coax" the bend out straighter, just enough to get things apart, and then reverse the process to get the tab back into position. Be sure to hold the switch parts together properly while re-bending the tabs.
The problem is one of metal fatigue or stress, since it is really hard to keep from concentrating the bend in a small area. The metal is already stressed from the original bend, so it is important to spread the unbending process over the largest possible area.
I decided to try to work on an old switch using a set of Harbor Freight push pin pliers to unbend the tabs. I started by prying up the very end of the tab, then gradually working my way back toward the base. I didn't pry it completely straight, just enough to work the insulated parts out of engagement. After cleaning up the contacts and testing the switch, I rolled the tabs back together with a pair of Channellock pliers. Again, I worked the tab back into position gradually. I used a small C-clamp to hold the switch together while I re-bent the tabs.
Photo #1 shows the Harbor Freight push pin pliers.
Photo #2 shows the HF pliers in action.
Photo #3 is the disassembled switch. Note the four tabs on the corners.
Photo #4 is starting to bend the tab back down
Photo #5 is the second stage of bending the tab back down
Photo #6 is the finished bend
Remember, take is slow and easy. "Coax" the bend out straighter, just enough to get things apart, and then reverse the process to get the tab back into position. Be sure to hold the switch parts together properly while re-bending the tabs.