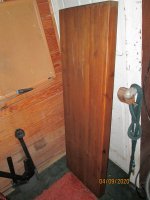
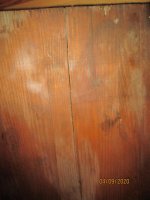
How deep is that separation. It does not appear to be a crack as much as a separation of the wood joint.
1). Put it on a table saw and cut all the way through. Reglue that joint.
2) put it on a table saw and cut a slot the depth of the separation. If still stable then make a wood insert for that slot and glue or wood epoxy in place.
3) don't want to do the above? Then dig all the **** out and get it as clean as you can. Mix up some wood epoxy with some sawdust in it and shove it in.
4) still too much work? Fill with basic wood filler
This ^^^
The only thing I'd add to this would be
Bondo body filler.
If it's going to be a purely utilitarian work surface, decide which side is going to be the top and identify which cracks/voids
need to be filled/repaired, perform the necessaries (outlined above).
The nice parts about cutting/grooving/routing out voids are:
1- Epoxy, glue, Bondo, putty, etc work best when they have a clean and fresh surface to bond to
2- The grooves you create will consequently create dams along the sides for the epoxy (should you decide to go that route) and minimize the eventual leveling you will have to do.
My HS woodshop was outfitted with six 8' x 8' maple butcher block work tables which had been in service for ~20+ years. Being in a HS shop, they took quite a constant beating. Once a semester my teacher would level out the drill holes, saw marks, dents, and anything else out with Bondo body filler. It's quick, cheap, sands/levels easily, durable enough for woodwork, and about as easy as it gets to apply and reapply. All the benches had a really cool scattering of varied size and shape pink features that couldn't even be felt if you closed your eyes.