To avoid these ads, REGISTER NOW!

Restoring a 70 year old Snap On tool box

FJ 432

Well-known member
Joined
Aug 2, 2010
Messages
3,730
Location
Littleton Colorado
I thought I would start a thread about my tool box journey that I started about a year ago. The thread that started it all:

http://www.garagejournal.com/forum/showthread.php?t=219110

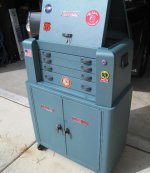
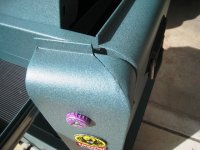
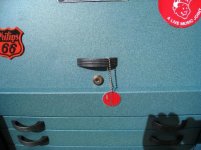
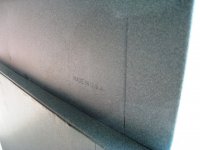
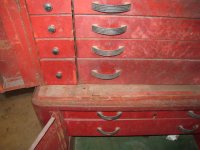
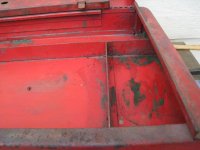
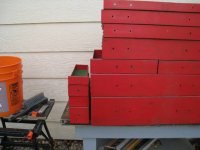
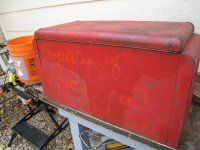
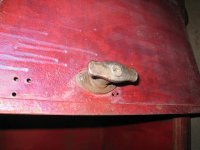
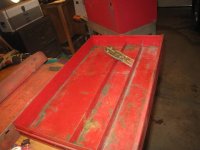
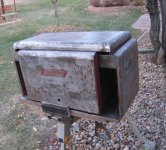
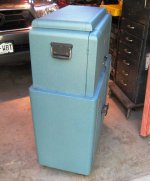
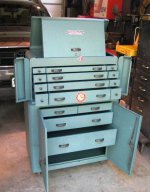
Brad54 helped me find this set that ended a 4 year search. The pictures below were taken the first night in my garage.
 

Attachments

  • arr1.JPG
    arr1.JPG
    45.8 KB · Views: 337
  • arr2.jpg
    arr2.jpg
    55.7 KB · Views: 277
  • arr3.jpg
    arr3.jpg
    50 KB · Views: 245
  • arr4.jpg
    arr4.jpg
    48.7 KB · Views: 242
  • arr5.jpg
    arr5.jpg
    50.8 KB · Views: 231
  • arr6.jpg
    arr6.jpg
    51.3 KB · Views: 238
To avoid these ads, REGISTER NOW!
OP
F

FJ 432

Well-known member
Joined
Aug 2, 2010
Messages
3,730
Location
Littleton Colorado
Some of my observations and the notes I took that first evening includes:

1. All of the hardware was there except the rods that slide to lock the k60 (upper box).
2. The previous owner had drilled holes in the front covers of the k60 and the k200 so that they could use a padlock latch to secure the boxes.
3. The slides on all of the drawers operated fine with just a little convincing. One drawer on the k60 and the big drawer on the k200 needed quite a bit of convincing.
4. The back right caster had crushed the corner a bit causing the box to rock. It was if someone had set something very heavy on that rear corner.
5. Green felt lined all the inner surfaces including the very bottom of the k200. Yuck.
6. The entire exterior was sprayed with a milky lacquer substance and there was drips frozen in place.
7. The back of both boxes had been spray painted "Property of" and "Kustom Graphics".
8. Surface rust and remainders of stickers on both boxes.
 
OP
F

FJ 432

Well-known member
Joined
Aug 2, 2010
Messages
3,730
Location
Littleton Colorado
These next pictures are from the first weekend where I had a chance to tear down and clean the boxes.
 

Attachments

  • Cle6.jpg
    Cle6.jpg
    48.7 KB · Views: 200
  • Cle5.jpg
    Cle5.jpg
    44 KB · Views: 186
  • Cle4.jpg
    Cle4.jpg
    43.7 KB · Views: 190
  • Cle3.jpg
    Cle3.jpg
    49 KB · Views: 204
  • Cle2.jpg
    Cle2.jpg
    54 KB · Views: 203
  • Cle1.jpg
    Cle1.jpg
    50.7 KB · Views: 206

Zrexxer

Well-known member
Joined
Jan 23, 2007
Messages
5,058
Location
Pflugerville, TX
If that's an example of "Kustom Graphics" graphics work, they must have sucked.

Cool box, anxious to see how it turns out!
 

don long

Well-known member
Joined
Mar 31, 2012
Messages
8,845
Location
southern california
That is one sweet tool box
I saw one sell on Ebay last week i think
That is the first one I've ever seen

I was soo tempted to bid on it but it was a pick up only item and it was in Missouri and I'm in Calif
And I just got home from a road trip to Wyoming picking up a treasure


I will be watching this resto with great interest
Thanks for posting it up

Don
 
OP
F

FJ 432

Well-known member
Joined
Aug 2, 2010
Messages
3,730
Location
Littleton Colorado
It was pretty clear that the box needed a lot of help. I was sure at this point that I needed to restore this to become useable and I started by saving all of the parts and keeping the pieces together.

In boxes that I've done in the past I used a variety of methods to strip the paint off. I was fortunate enough that my BIL loaned me his HF sand blasting cabinet. The cabinet couldn't obviously fit the larger pieces but I was able to do the handles and the small drawers of the k60.

The big pieces I used my old standbys; Orbital sander, paint stripper and wire wheels. After many brain damaged hours I realized that I was over my head. The paint laughed at the stripper (never seen this before) and using a sand blaster with a small compressor is a fool's errand. In the end I paid to have it sand blasted by a professional and regretted not doing sooner.

This was my "What the fu*k was I thinking" phase.
 
Last edited:
OP
F

FJ 432

Well-known member
Joined
Aug 2, 2010
Messages
3,730
Location
Littleton Colorado
Pictures of a semi naked box.
 

Attachments

  • Str6.jpg
    Str6.jpg
    47.4 KB · Views: 199
  • Str5.jpg
    Str5.jpg
    49 KB · Views: 199
  • Str4.jpg
    Str4.jpg
    43.4 KB · Views: 203
  • Str3.jpg
    Str3.jpg
    54.1 KB · Views: 217
  • Str2.jpg
    Str2.jpg
    60.8 KB · Views: 221
  • Str1.jpg
    Str1.jpg
    63.7 KB · Views: 274

BRIANBB

Well-known member
Joined
Aug 27, 2010
Messages
394
Location
Katy Texas
Very Cool. I wonder if Snap On would ever consider reproducing something like that but with modern slides. Retro is still in!
 
OP
F

FJ 432

Well-known member
Joined
Aug 2, 2010
Messages
3,730
Location
Littleton Colorado
I got back the box from the sand blaster and a few things I needed to correct and decide.

1. The holes drilled out for the padlocks on both boxes. I read a lot about ways to make corrections and I decided on Lab-Metal. I needed a product that could go through the powder coater's oven and I read a lot of articles on JB Weld and others. Welding was also considered to fill in the holes but the sheet metal on the cover of the k200 was a bit flimsy.
2. The top cover of the k60 is a beast. The piano hinge where it is attached to the back of the box was pulling away on one side. In the end I decided that I would do nothing and take a watch and see approach. It isn't bad but I had my concerns.
3. The piano hinges on the doors for the k200 were pulling apart and I used blind and semi tubular rivets to secure these.
4. Color choice. I may have looked up every example of these boxes on google and zkling helped by showing me restored boxes for sale on CL. My color choice was decided on a couple of strong opinions. First I wanted my box to look, although restored, kind of period correct. The bright red powder choices just didn't feel right to me. Second, the box had a lot of pitting over it's entire surface. I leaned away from a high gloss color and one with texture to "hide" some of this pitting.
5. Casters were in good shape. I needed to bang out the bottom so the rocking went away.
6. Slides needed to be straightened, cleaned and a couple of the stops needed to be re-rivoted.
 

Zeke

Well-known member
Joined
Aug 13, 2009
Messages
17,176
Location
Long Beach CA, the sewer by the sea.
That is one sweet tool box
I saw one sell on Ebay last week i think
That is the first one I've ever seen

I was soo tempted to bid on it but it was a pick up only item and it was in Missouri and I'm in Calif
And I just got home from a road trip to Wyoming picking up a treasure


I will be watching this resto with great interest
Thanks for posting it up

Don
Aw, Don, you need another road trip. ;) I'm sure someone here would pick that up for you and hold it for shipping.

AFA the box in this thread that's about the coolest garage item I've ever seen.
 

zkling

Well-known member
Joined
Jan 23, 2007
Messages
16,939
I think you made the right decision to restore and not leave it original. To me you definitely increased the value and preserved the box for many a years over what it would have had un restored. Were any of the slide channels worn thin after all that time? If so how did you fix that? I've done a few and they absolutely blow. Curious what your approach would have been? Weld in replacements?

Very Cool. I wonder if Snap On would ever consider reproducing something like that but with modern slides. Retro is still in!

I highly doubt they would and even if they did the cost would be astronomical and the market not very wide. Look at all those complex curves in this day and age it would be a labor of love to make one. They produced a few mini repro boxes but nothing full scale.... to my knowledge.
 

Todd.Brock

Well-known member
Joined
Jul 15, 2008
Messages
4,250
Location
Cincinnati
Didn't see that color choice coming!!! Looks awesome. I know a guy who knew a guy with an old Matco boxe. Those old boxes , while not huge , are pretty damn stout!!
 
OP
F

FJ 432

Well-known member
Joined
Aug 2, 2010
Messages
3,730
Location
Littleton Colorado
Some more pictures taken in sunlight.
 

Attachments

  • k2606.jpg
    k2606.jpg
    79.2 KB · Views: 376
  • k2607.jpg
    k2607.jpg
    58.5 KB · Views: 325
  • k2608.jpg
    k2608.jpg
    119.1 KB · Views: 323
  • k2609.jpg
    k2609.jpg
    56.2 KB · Views: 305
  • k26010.jpg
    k26010.jpg
    99.2 KB · Views: 284
  • k26011.jpg
    k26011.jpg
    117.8 KB · Views: 346
OP
F

FJ 432

Well-known member
Joined
Aug 2, 2010
Messages
3,730
Location
Littleton Colorado
The photos above are some close ups.
Pic 1 is the cabinet in direct sunlight. I added the magnets to give you an idea the color.
Pic 2 is how I finished the handles. After sand blasting these I sprayed them with flat black enamel and sanded off the high spots, for a bit of wear effect.
Pic 3 shows what happens when you give an idiot a wire wheel in bad lighting. Operator error.
Pic 4 is a poor attempt to show a slight discoloration that the Lab-metal product gave to the powder coat.
Pic 5 is why I choose powder coating. The Made in the USA stamp on both of these boxes would get lost in a heavily painted box.
Pic 6 is showing the box next to a gray wall where the color starts to look more green.
 
To avoid these ads, REGISTER NOW!

don long

Well-known member
Joined
Mar 31, 2012
Messages
8,845
Location
southern california
Aw, Don, you need another road trip. ;) I'm sure someone here would pick that up for you and hold it for shipping.

AFA the box in this thread that's about the coolest garage item I've ever seen.

Ya Zeke
I thought about it long and hard. The one I saw was in Missouri right where I picked up my sinclair sign

I agree That is the finest garage art I have run across yet

The box is stunning FJ432
Enjoy it for a long time
Don
 

bwild408

Member
Joined
Nov 10, 2013
Messages
5
Location
dallas,tx
That box looks brand new! It's amazing how a little elbow grease and love can make things look! Awesome job.
 

gipp

Active member
Joined
Oct 3, 2011
Messages
39
Location
Sterling Heights, Mich
Love that Art Deco design. Too bad things today seem to be made so Cheaply (poorly).
I have a couple C'man boxes awaiting me. There aren't as cool as yours but they're different enough for me.

I've you've got more pics working on drawer slides, etc. I'd like to see them.
 

saceone

Well-known member
Joined
Dec 31, 2011
Messages
388
Location
Montreal Canada
At first I was thinking to myself, I would dust it up and just clear coat it. Then I saw your finished product... It's safe to say that your idea was the better one. Wow!
 

gbh

Well-known member
Joined
May 2, 2012
Messages
611
My first thought was that you should leave it and use it as found.
Then I scrolled down and saw the result of your work... you did it justice, beautiful!
 

Tronyadorable

Banned
Joined
Sep 25, 2014
Messages
1,170
That's so much more classy than anything made today. Like a 57 Chevy. There has never been a car made since it with that much class.
Beautiful piece.
 

LXCam

ALLIANCE MEMBER
Joined
Apr 23, 2013
Messages
19,109
Location
AZ
Fantastic job fj, certainly something to be very proud of.
 

Spareparts

Well-known member
Joined
Mar 12, 2010
Messages
2,042
Location
Lansing Ks.
I just rebuilt my son SO Box that was at least 45 yrs old, paint was good along as all the hardware, the previos owner owned a boat dealership and used the box in his parts room. The drawer guides were worn badly. I talked to my SO dealer and he said the boxes was like the tools Guarenteed, he got me all new guides for free.
 
To avoid these ads, REGISTER NOW!
Top Bottom