Oldtuleguy
Well-known member
- Joined
- Nov 4, 2017
- Messages
- 10,459
I always thought those were for beer cans....


y'sguy, those are coming along nicely.

Great work and I can't wait to see the final product.
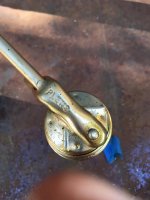
BTW your oiler holder was made by Plews and the cans are in my pictures. I'm in the process of reverse engineering the holder so that it's larger and can accept the additional diameter of a Eagle 66.

Great work and I can't wait to see the final product.
BTW your oiler holder was made by Plews and the cans are in my pictures. I'm in the process of reverse engineering the holder so that it's larger and can accept the additional diameter of a Eagle 66.
Got a couple hours of sanding prep done this morning. Worked outside in the shade, perfect breeze for this kind of job! It took me awhile to get all set up and get in the groove with my friends equipment. All is moving forward.
Oh, Did I mention I hate sanding! Love the results though.
I'm really enjoying watching the progress of your project y'sguy. Great boxes!

Y'sguy,
Great thread and maybe I missed it but how did you end up stripping the paint off? Did you sand, blast or chem strip it?
Thanks,
Mike

Sanding looks good, and as folk always say "the key to a good finish is in the preparation".
What method are you using? I decided the best way to get this tedious process done is to wet sand using my 1970's B+D orbital sander, and wear those modern gel gloves to isolate the vibration!

If you are planning to prime and then paint these boxes , get some 80 grit paper on that D A and get that paint off those boxes Your painter will know how to get rid of the scratches.
I hate the mess of paint removal but enjoy seeing the flaws disappear while wet sanding the primer.
If you are planning to prime and then paint these boxes , get some 80 grit paper on that D A and get that paint off those boxes Your painter will know how to get rid of the scratches.
I hate the mess of paint removal but enjoy seeing the flaws disappear while wet sanding the primer.
If you are planning to prime and then paint these boxes , get some 80 grit paper on that D A and get that paint off those boxes Your painter will know how to get rid of the scratches.
I hate the mess of paint removal but enjoy seeing the flaws disappear while wet sanding the primer.
Thanks for the honorable mention too
This. Make sure you do this.
Nothing ***** more than realizing that the prep work was not done properly after you lay down your new paint.
95% of the work rests in proper prep.
Yes. Heed these wise words from the guru of automemorobilia restoration.. True this!
It's handy you have a local paint guy who can do a fair priced job for you, the only one local to me does a lovely perfect job but of course needs to charge a fortune for doing it.
It's kind of nice being at the stage of life when you won't be needing to work under pressure, I do enjoy letting the younger ones take the strain!
I got my excellent gel filled anti vibration gloves from the Snap On truck guy no doubt they could be cheaper elsewhere but he gave me a massive discount, and wearing them when using power tools truly improves my quality of life.
Trim looks fantastic!
Looking good.
Wow. That trim looks incredible. Glad that you're taking your time and doing it right. The results will be worth it!
 What I did do is gather up all my toolbox sheetmetal and had it blasted with water and glass slurry. It turned out great and I will post up pics ASAP. It provided a real nice finish to apply primer to and got rid of all the stubborn aircraft primer & paint. A rust inhibitor was then applied. The process is good for these kinds of things to prevent metal heating up and warping. In the mean time the stuff is just sitting there waiting for me to get around to working on it!
 Jealously checking in and watching with interest. Nice job so far!
WOW! That's a ton of work! But that sucker is gonna look brand spanking new when you're done! Very cool!
I have another house project in the way and that takes priority so hopefully I will get my priorities straight and get back on these soon.
Thanks for bearing with me guys, I appreciate you looking in on me even though I continue to get interrupted and pulled away from this project.
 Acrylic enamel with two coats of clear. Looks like my pics are not too clear so you'll just have to trust me to do better when I get to reassembling this setup.
 That is cool never thought about an acrylic table saw sled.
Bret
Looking good.