To avoid these ads, REGISTER NOW!

Ridgid Super Eight pipe wrench restoration

BreeStephany

ALLIANCE MEMBER
Joined
May 19, 2012
Messages
870
Location
Oregon
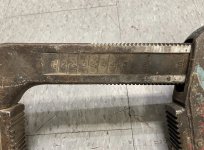
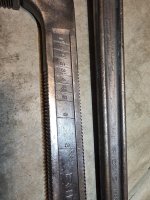
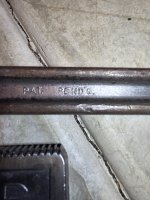
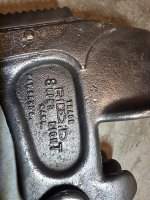
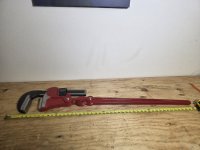
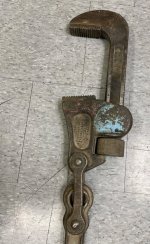
I have a friend who has been looking for large compound pipe wrenches for some time and I finally got a good deal on a somewhat complete Ridgid Super Eight compound wrench.

Its not in bad shape and the price was right, but I do have a feeling that sourcing trunion vise for it will be its own challenge for a reasonable price.

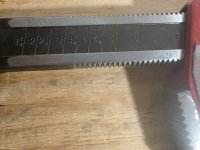
I have sourced an inexpensive NOS replacement jaw spring and replacement jaw pins. The heel jaws dont seem to be in too rough of shape, so I can likely resharpen them.
1000013295.jpg
1000013293.jpg
1000013303.jpg
1000013299.jpg
Going to get it disassembled, soak it in evaporust, let it soak overnight in paint stripper and the wire brush it to bare metal and get it prepped for primer and paint.
 
To avoid these ads, REGISTER NOW!
OP
B

BreeStephany

ALLIANCE MEMBER
Joined
May 19, 2012
Messages
870
Location
Oregon
I've done quite a few Ridgid wrenches at this point and am pretty confident in the general process, so its a pretty straightforward resto, its just going to be sourcing the chain vise trunion, which gives the Super-Eight the power and ability, that is proving to be a bit more difficult.

The trunion is still sourcable through Ridgid... just dont want to pay 'new' prices and hope I dont end up having to.
 

Farmer J.

Well-known member
Joined
Sep 18, 2016
Messages
1,997
Location
UK, Cornwall/Hertfordshire.
Also looking forward to seeing the restoration. I didn't know that design of pipe wrench existed, so had to look it up when i awoke at 3am! Luckily there's a good video of them in action on the Rigid website.
Good luck finding the trunion part of it.
 

Private Lugnutz

Well-known member
Joined
Mar 30, 2012
Messages
30,979
Location
The Authentic Jersey Shore
I've done quite a few Ridgid wrenches at this point...
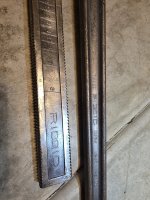
Including a Great Northern Railway 24-incher! :) For those unfamiliar with Bree's prior projects...
 
OP
B

BreeStephany

ALLIANCE MEMBER
Joined
May 19, 2012
Messages
870
Location
Oregon
Day 1 on the bench
1000013491.jpg1000013492.jpg1000013494.jpg1000013495.jpg1000013496.jpg1000013497.jpg1000013498.jpg1000013502.jpg

Spent about an hour in the shop disassembling it and getting the initial filth and rust off it. I still need to pull the jaws, finish wire brushing it, file the jaws, 'polish' the hook, jaws and adjustment nut. then chemically strip it and get it prepped for paint.

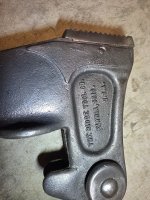
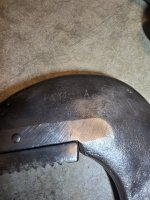
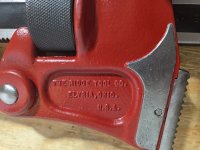
Once I got the rust off, I did end up finding a previous owner's engraving and also found some more pronounced markings which I am assuming are the factory's 'maker mark'. Love finding these things during restos.

I plan on doing my usual coat of high heat 2k engine primer and 2 coats of high heat 2k Chevy Red engine paint. Its not an exact match to the original Ridgid red or more modern Ridgid red/orange, but it is a damn durable coating and looks pretty good overall.
 

Attachments

  • 1000013493.jpg
    1000013493.jpg
    763.3 KB · Views: 11
OP
B

BreeStephany

ALLIANCE MEMBER
Joined
May 19, 2012
Messages
870
Location
Oregon
Day 2 Progress - Hook jaw restoration

Had a little freetime to spend some time in the garage working on the hook jaw. I finished stripping it, cleaning it, gave it a little bath in solvent to strip any remaining oil from the metal and then cold-blued all of the non-polished surfaces.

I got the hook jaw, hook jaw spring and adjustment nut cleaned, blued and oiled.

The wrench itself is 90% prepped. I need to pull the lower jaw and then am going to chemically strip the main wrench body to remove any remaining factory paint and then am going to spray a coat of 2k high heat engine primer and then painting it in 2k high head Chevy red engine paint and reassemble what I have so far.
20260110_195941.jpg1000013591.jpg
 
Last edited:
OP
B

BreeStephany

ALLIANCE MEMBER
Joined
May 19, 2012
Messages
870
Location
Oregon
To re-rivet or not to re-rivet... that is the question.

I have been looking at this wrench the last couple of days and I know to do it right, I need to remove the large side bar rivets (Ridgid P/N 32220) and completely disassemble and paint the individual pieces. This is an easy enough task, but I admittedly have not cold pressed steel rivets of this size and I worry that hot-riveting them would likely damage the paint, even with it being high-heat engine paint.

The steel rivets in question look like this and are roughly 3/8" diameter with a 5/8~3/4" head.
1000013677.jpg

I imagine the best solution would be to from a set of dies to fit the factory rivet heads, slightly head and then use a hydraulic press to press and form the rivet head on the other side until they reach desired tension as I dont want to press them tight and make the bars immovable.
 
Last edited:
OP
B

BreeStephany

ALLIANCE MEMBER
Joined
May 19, 2012
Messages
870
Location
Oregon
Finally finished up the first potion of the resto on my 'vintage' / first generation Ridgid Super-Eight compound wrench.
20260115_190817.jpg

This thing is absolutely massive and probably one of my largest Ridgid restorations to date, at 48" in length with the jaw set at 2-1/2" capacity.

The hook jaw and hook jaw adjustment nut on it are the same as those use on Ridgid's 60" / 8" capacity wrenches are are absolutely massive in comparison to previous restorations I have done.
20260115_191810.jpg20260115_191209.jpg20260115_191239.jpg20260115_191526.jpg20260115_191548.jpg


After completely stripping the wrench, I used Eastwood 2k high heat engine primer and 2k high heat engine gloss red top coat.
It isn't 'perfect' by any means, as the head had a lot of deep pits from rust and and from casting, but overall, it turned out really well. I actually appreciate that it shows signs of it's previous life.

I blued the hook jaw, hook jaw spring assembly and hook jaw adjustment nut, sprayed the wrench body and reassembled.
 
OP
B

BreeStephany

ALLIANCE MEMBER
Joined
May 19, 2012
Messages
870
Location
Oregon
amazing restoration. Nice work Bree!
Thanks!

Trying to take advantage of some unforeseen time off after the holiday! Now on to the next project, restoring a 1940's Skil 107 blue-label and then hopefully sourcing and restoring a trunion clamp for the Super-Eight.
 
To avoid these ads, REGISTER NOW!

Farmer J.

Well-known member
Joined
Sep 18, 2016
Messages
1,997
Location
UK, Cornwall/Hertfordshire.
Well, that is a pretty nice result! :rocker:
Whatever you used to pein those new rivets over worked a treat, very neat finish.
Thanks for sharing your restoration process it's interesting to follow along.
Good luck finding the trunnion clamp, and keep us posted with update when you do:)
 

senlow

Well-known member
Joined
Apr 26, 2008
Messages
2,276
Location
Wheat Ridge, Colorado
Well done Bree! I really like your attention to detail. The blued steel surfaces look great, along with the naked steel in all the right places. They provide perfect contrast to the red paint. Keep up the good work.
 
OP
B

BreeStephany

ALLIANCE MEMBER
Joined
May 19, 2012
Messages
870
Location
Oregon
Great job and I think the blueing takes it to another level. 👌
I have done minimal blueing on previous restos, mostly on the jaw springs, but given the massive size of the hook jaw and adjustment nut, I figured I would give it a try and was VERY pleased with how it all turned out.
 
  • Like
Reactions: RTM

willf650

Well-known member
Joined
Mar 10, 2010
Messages
1,017
Do you have the clamp/stationary piece to go with it?

Either way it would make a nice display piece.

My father used to use stuff that regularly. Old buildings you'll see 6" screw pipe sprinkler mains where today everything is held together with super glue and rubber bands.
 

senlow

Well-known member
Joined
Apr 26, 2008
Messages
2,276
Location
Wheat Ridge, Colorado
I have done minimal blueing on previous restos, mostly on the jaw springs, but given the massive size of the hook jaw and adjustment nut, I figured I would give it a try and was VERY pleased with how it all turned out.
I've blued quite a few tools that I've refurbished. I think that it's an underutilized finish. I typically do slow rust blue rather than cold blue. Slow rust blue is inexpensive and durable but the name fits. It is slow.

I've redone several of my pipe wrenches. I like to have the bodies either powder coated or electroless nickel plated. Hook jaws get blued with the proper areas polished. Adjusting nuts get blued or e-nickel. Unfortunately, I no longer have access to economical plating and powder coating services, so it's mostly back to paint and blue.
 
OP
B

BreeStephany

ALLIANCE MEMBER
Joined
May 19, 2012
Messages
870
Location
Oregon
Unfortunately, I no longer have access to economical plating and powder coating services, so it's mostly back to paint and blue.
Yeah, kind of same here, I no longer have access to friend with a commercial powder coating shop, so I just paint mine. Small batch powder coating is far too cost prohibitive to justify doing it on most of my tools restos.
 
OP
B

BreeStephany

ALLIANCE MEMBER
Joined
May 19, 2012
Messages
870
Location
Oregon
Do you have the clamp/stationary piece to go with it?

Either way it would make a nice display piece.

My father used to use stuff that regularly. Old buildings you'll see 6" screw pipe sprinkler mains where today everything is held together with super glue and rubber bands.
I am still on the hunt for the chain vise trunion. I will probably end up just spending the $1K later this year for it and get a new one direct from Ridgid.

I fortunately/unfortunately had all the time in the world for restorations this month as my previous employer sent out an email at 5pm on December 23rd that all 750 employees were terminated at the end of day and that the company was going into immediate Chapter 7 liquidation, so I am trying to not go too crazy on 'unnecessary' purchases until the checks start rolling in from my new job in February.
 
To avoid these ads, REGISTER NOW!
Top Bottom