Well... I haven't had anything to update this thread with in some time. You guys were all right...once the baby came along, free time was reduced to zero! That's OK, though, she is an absolute joy. She is 1 year old now.... how time flies.
I mentioned it a while back, but I am about to begin a house project that I'll probably try and document here as time permits. Can't put this one off for any longer. I have a set of those ugly precast steps on the front of my house. I've known there is an issue with the rim joist rotting out behind them, but I've just been putting it off because to repair it, I need to pull the steps away from the house. Well, I threw the set of stairs up on Craigslist for free, with the caveat that you're responsible for their removal. Sure enough, I had a bunch of people reach out, and chose what sounded like the most qualified person to remove them.
Here are the old steps:
And ****.... gone! I was so relieved the Craigslist guy worked out. Getting rid of those heavy suckers was a big hurdle.
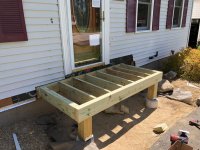
Next up I started to remove the sheathing to see how bad the damage was. Here is what I was initially greeted with.
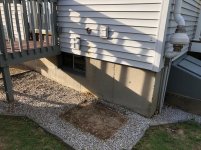
And here is the extent of the damage:
*****, seeing a hole like that in the side of your house, but it is what it is.
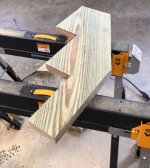
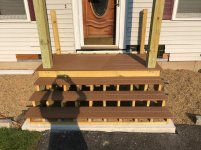
I'll be replacing that section of the rim joist, and building a covered porch on the font. Here is a very crude paint mark up of what it will hopefully look like.


 Great work! Keep it up...can't wait to see the finished porch.

 over all of the pictures. I have to say what a wonderful job you have done with your garage space. I know that it took a long time to complete, but it is very refreshing to see one do it own their own. I only have a 2 car garage, and I do make the best of it, but in the future, you have made it possible for me to see what a bigger garage could become. I thank you for your thread!