Well, this project kind of came about suddenly.... My wife has been asking me to redo the downstairs 1/2 bath + laundry room forever. It's been taking a backburner to other stuff because it's been functional, but she finally convinced me to get it going. So, we ordered everything a few weeks ago. It's all in now, so I guess I have to get to work

As usual, I wasn't great about taking photos. Here is the only before pic I have.
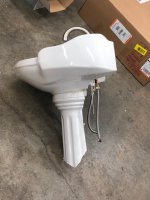
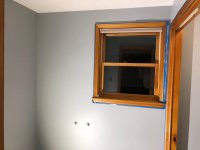
I hastily picked the color out 8 years ago when I was moving in and was painting every room in the house, before I really had developed any sense of what my style was. Now, it's just way too bold for me. Also the pedestal sink the previous owners put in stinks because it has no storage or counter space. The medicine cabinet is falling apart, the toilet has it's own flushing issues, and the floor is outdated. So yeah, it's all going. Demo revealed several issues.
First, they glued the base of the sink to the floor. And when I say glued, I mean REALLY glued it. Here is the aftermath:
This resulted in chipping away at what was left of the base stuck to the floor with a sledge and chisel. But, it's all out now.
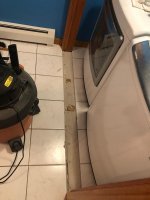
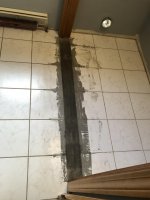
The CoreTec LVP we picked can go right over the existing tile. There was a huge marble threshold in between the bathroom and laundry room for no reason, so I ripped it up, which was also a challenge. I'll need to fill this gap now before laying the new floor. Ideally I'd rip a board to the exact thickness, but I do not own a thickness planer. I will either get creative installing something that's close and then planning it down, or I'm also considering laying a thin sheet of melamine to take up the majority of the gap and then pouring self leveler over it. we'll see...
Next up, out came the toilet. Surprise surprise, the toilet flange is rotten. It's also way too low, which will be further exacerbated by the fact I'll be adding more floor thickness when laying the new floor. So, some combination of all of this should work to fix the issue when I get around to that.

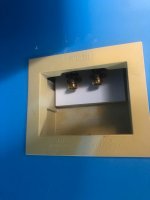
Next up, remove the washer and drier. Sounds easy enough, until you realize that the shut off for the hot water does not work. After some cursing and a big puddle, I got to work replacing it. I had to rig the repair a little bit by cutting out the top of the box, but I got the job done. 2 new ball valves installed (I am no plumber by any means)
Finally, I primed the walls and did 2 coats of all the edging. I still need to roll all of the walls, but here is the color that we picked:
So, not bad progress for a few days this weekend, but still a ways to go. I've been very un-motivated for projects lately, but posting here keeps me motivated sometimes, so I will continue to update. Thanks as always for following along.


")