Andrew Drizmo
Member
Nice progress!

Nice progress dude....
I’ve been following, makes me miss my XJ a little honestly...lol
Sent from my iPhone using Tapatalk
Nice progress!
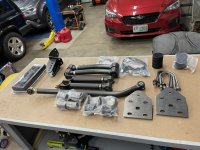
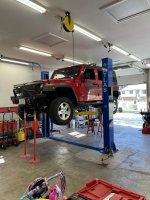
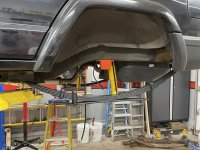
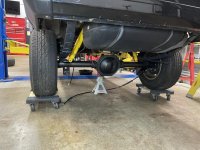
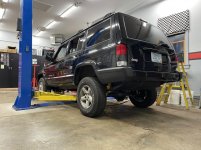
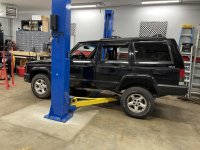
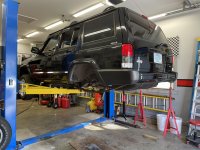
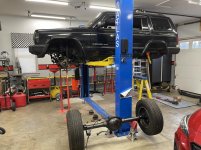
 Now the real fun can begin! It could take as long as 8 weeks to get all of the components in, but it is what it is. I was really concerned with not sacrificing any on road performance, and I think this will be the ticket for that.
That’s a solid sounding kit. You’ll be up quite a bit with a 3.5” kit, especially after you factor in the tired old OEM stuff under there now.
I’m sure you’re already soaking every fastener you can find with penetrant daily....lol. I did, and it was still a super fun job[emoji1787][emoji1787][emoji1787]
Sent from my iPhone using Tapatalk
Awesome!!! Can’t wait to see that project start!
Sent from my iPhone using Tapatalk
Are the smoked lights equipped with amber bulbs inside ? Do they turn out amber when in operation ?
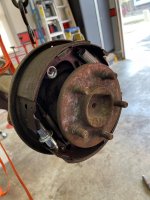
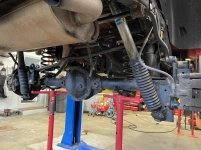
I am absolutely dreading the leaf spring hanger bolts in the front of the leaf springs. They were brutal on my last Jeep, and I don't expect this one to be any different. I have been hitting everything with PB in preparation.
Also, I've been going down the rabbit hole of control arm lengths, caster angle, pinion angle ect really overthinking things as I tend to do. I'm hoping to find a good shop that can really dial in all of the alignment stuff for me so I don't need to worry about it. You happen to know anyone in the area? I found these guys in Manchester so far https://banditoffroad.com/
I used Mike’s Jeep Country in Epsom. Keeps are their thing, good guys that know Jeeps.
Ironically, I’m taking my new Toyota build up to them on Tuesday for the alignment. They work on lifted trucks all the time, even Toyota’s...lol.
Sent from my iPhone using Tapatalk
You were right up the road dude!!
Love following the XJ build, I did enjoy the process on mine. I’ll say this, the XJ was easy to work on!
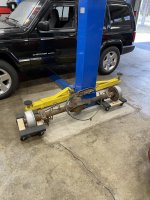
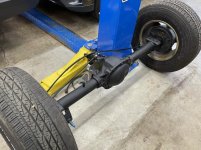
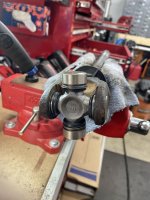
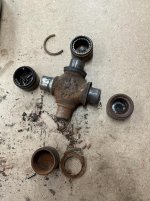
That axle swap should be easy. I used the lift and a set of jack stands to do it, worked out pretty well. Did you verify the ratio in that C8.25?
Sent from my iPhone using Tapatalk
 but I'll explore doing that upgrade later on, as changing those components won't mess with alignment.
Ah yeah that's right, you are near the seacoast, I forget what town exactly. We made a trip over to get some Lunch at Brown's and ate it on the beach for my Wife's birthday. Will have to check out the BigNuge compound one day!
Yeah, that's the plan for me too. Tall jack stands, disconnect it all, and lift the jeep up off of it. The XJs are indeed easy to work on, until you snap a bolt somewhere, which happens all too often haha.
Yes, the new 8.25 has the 3.55 gears in it that I need. One more update I forgot to mention, I am doing the ZJ Grand Cherokee HD front steering upgrade while I am at it as well. All the components are the same as the XJ, but the tie rods are all solid instead of hollow. Just ordered all the Moog components for that. So, all the steering linkages will be new as well. I want to do those before my alignment. Did you do a drop pitman arm in yours?
I also need to inspect the steering box, from what I have read there is a weak frame spacer used to mount it, and potentially look at a steering brace. I really don't need to do half of this stuff for the measly 31" tires I'll be running, but what can I say, I think you all know by now I like to overbuild and over complicate things
Sweeeeet! Can’t wait to see all this come together!
Sent from my iPhone using Tapatalk

Nice....
Where’d you go on that outing? I made it out Thursday. I was up in Bow/Dunbarton. Had to snug up the passenger side away link post-crawl, but all else went well.
Sent from my iPhone using Tapatalk
I took my boy to a local car show and at first he was so upset that he couldn’t get in each one, but still ended up having a great time. I’m sure your daughter had a blast!
Nice dude, so awesome that she’s into the Jeep so much!! Get a wrench in her hand as soon as she’s able!
Got my boys in the shop turning wrenches from time to time. Not sure older boy is that into it, but he like wheeling...lol. My younger son (just turned 4) loves being in/around/watching me wrench anything, all the time!
Sent from my iPhone using Tapatalk
Nice!
In the compressor, worst case you should be able to source a nice new pump for it. Having the tank and the motor are most of the battle! Still, it’s unfortunate that it died this quickly...
If you need a stand-in I have a mobile vertical Husky (high speed oiless (read:noisy), you’re welcome to use it if you need it.
Sent from my iPhone using Tapatalk
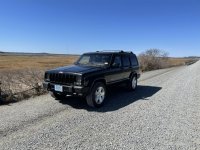
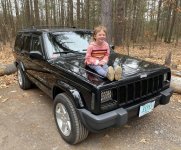
My daughter obsessed with going "out Jeepin" every weekend, so we've been having fun driving around in it on the weekends.
")

That is awesome. It's so fun seeing what lights them up. This could leave a lasting impression, who knows when she is older maybe you can build up a jeep together as a first car.
There are a few pretty big monthly summer car shows where I'm at (including massive local Cars + Coffee), and I was super bummed it got canceled all last summer from covid. Maybe this summer too, not sure. Obviously safety first, but I've been dying to take my daughter to a car show I know she would love it.
Mine's just starting to get old enough where I want to let her come in the garage with me. She's only 2.5 yrs, but very interested in the "ta-dogde" (garage).
Cheers to little girls who are interested in cars and shop time!!
The nickel copper lines are the best, I’ve used them exclusively for 5 years or so....much easier to work with!
Are you going to use LubeLockers on the diff cover? I did, they worked great on my XJ! No need to use messy RTV!
Sent from my iPhone using Tapatalk
I am enjoying following. My 3 year old daughter likes to "help" so I hope that continues, despite the fact I don't get anything done when she is "helping."
I acquired a 60 gallon compressor from a friend's dad who was moving on the cheap (and a HF shop press) that is pretty far down on my list. If your isn't salvageable, I will let her go what I paid for it. I can get you pics/info if you want, just let me know. I even drive through NH twice a week...


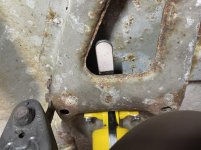

Nice progress dude....I see those hi-vis bump stops!
I’m headed to Bow/Concord tomorrow for some wheeling with the kids....hoping it isn’t straight rain the whole time so we can do some hiking/exploring on foot.
Sent from my iPhone using Tapatalk
Have fun today! Hope the weather holds out for you. Nice progress!!
Sent from my iPhone using Tapatalk