I don't think dark colors are bad necessarily, but it's true they don't reflect as much light and will make any space darker if it doesn't have the windows or lighting to compensate. Not always a bad thing -- like at night it might be cozier. I've always hated how my white walls look at night under artificial light, they are almost too luminous and really pick up on any "color cast" from LEDs. A lot of this stuff is personal taste, anyways. The current green in your living room actually goes with the mid-toned millwork and flooring pretty well I think. While it takes some work, the nice thing about paint is if you do try something else and don't like it, you can always paint it back!
I 100% feel the same way about when we bought our house. I did not really consider anything, or have any idea what I wanted. I was just happy to have more space and something that was entirely mine. Now after being there for 5 yrs, the list of things I would change is exponential, but I guess that comes with experience and developing personal taste.
Totally, haha. It's exhausting, but I mostly do work at night after bedtime with the occasional weekend hours, too. I suspect you might be the same way -- my daughter and I are more or less attached at the hip, she doesn't give me much of a break.

And I like it like that. It was an adjustment in the beginning for sure, but I quickly realized how fast they grow up.
Btw the steps turned out great, and they match the desk nicely, too!


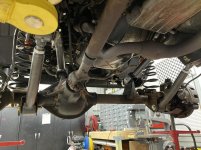


") can’t wait to get the new tires picked out and on there! Have an alignment coming up soon too.
can’t wait to get the new tires picked out and on there! Have an alignment coming up soon too. 


.JPEG")
.JPEG")


 I'm sure your treads will overhang and no one is going to be on their hands and knees inspecting the sides anyways. The plywood looks nice, it will come out looking great!


