To avoid these ads, REGISTER NOW!

Rockwell Drill Press Restoration

Edward Ramirez

Well-known member
Joined
May 1, 2013
Messages
66
Location
Texas
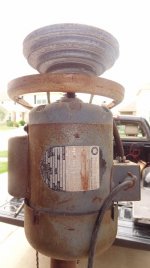
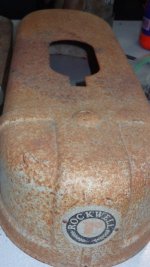
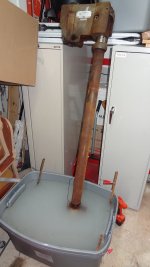
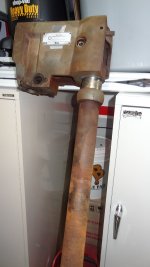
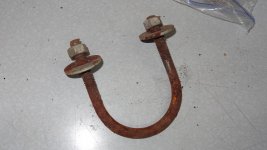
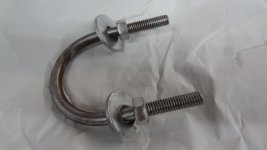
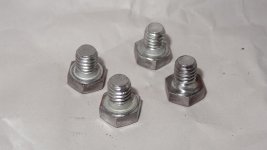
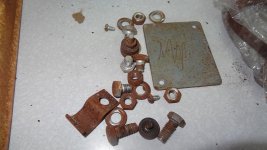
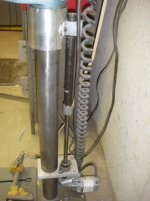
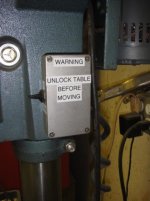
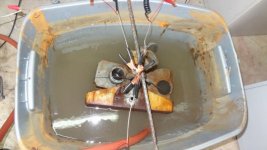
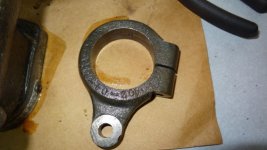
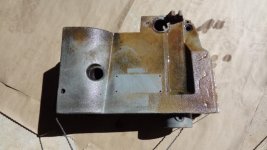
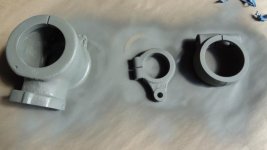
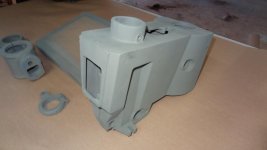
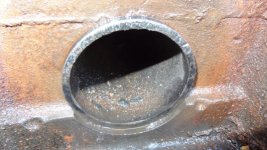
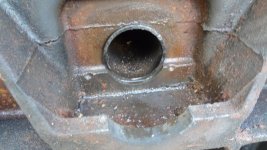
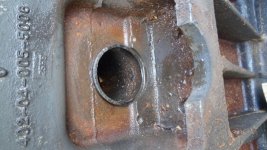
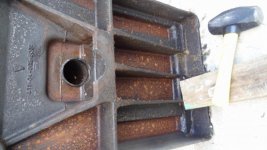
I just bought this Rockwell Drill Press for $150.00 from a local scrapyard. $50 more than I wanted to pay for it. Other than the surface rust, it's in good shape and runs pretty smooth. I plan to rewire it and wire brush the entire thing and repaint it. I plan on painting it the typical machine grey. I may throw some red in there somewhere.

This is my first attempt in restoration so I may not go all the way and take the whole thing apart but I'll do my best.
 

Attachments

  • !Front.jpg
    !Front.jpg
    52.7 KB · Views: 130
  • !-Side.jpg
    !-Side.jpg
    61 KB · Views: 127
  • !Motor-Back.jpg
    !Motor-Back.jpg
    85.1 KB · Views: 100
  • !-Base.jpg
    !-Base.jpg
    49.1 KB · Views: 86
  • !Base-Back.jpg
    !Base-Back.jpg
    45.8 KB · Views: 76
  • !-Table.jpg
    !-Table.jpg
    48 KB · Views: 72
  • !Cover.jpg
    !Cover.jpg
    50.3 KB · Views: 72
To avoid these ads, REGISTER NOW!

Outlawmws

Well-known member
Joined
Aug 9, 2011
Messages
39,277
Location
The Badlands
That one appears to have the low speed set of pulleys, and the table looks to be in good shape with minimal divots, so if he spindle and quill are in good shape you should have a nice press when done!
 

WWIIjeep

Well-known member
Joined
May 30, 2012
Messages
1,240
Location
Arizona
That's a 1960s to early 1970s Delta/Rockwell "6 Plus 6" model 15" drill press, one of the best 15" drill presses ever made by anybody anywhere.

6 speeds and 6 inch quill travel (hence the 6 Plus 6 name).

Delta was still selling that model up until a few years ago (discontinued now) with a sticker price over $2000.00, so for $150.00, you got a screaming deal.
 
OP
E

Edward Ramirez

Well-known member
Joined
May 1, 2013
Messages
66
Location
Texas
That's a 1960s to early 1970s Delta/Rockwell "6 Plus 6" model 15" drill press, one of the best 15" drill presses ever made by anybody anywhere.

6 speeds and 6 inch quill travel (hence the 6 Plus 6 name).

Delta was still selling that model up until a few years ago (discontinued now) with a sticker price over $2000.00, so for $150.00, you got a screaming deal.

Nice find. I also think the 6+6 drill press is one of the best small drill presses out these. With the rust removed it will serve you quite well.

Thanks guys! I honestly did not know exactly what I was buying. I just bought it because it was fairly complete and running well. The only thing I looked at carefully before buying were the pulleys. I just made sure they weren't warped, chipped or broken. When I saw it turned on I knew I had to have it. He started at $200 but he was okay with $150 if I loaded it my self.
 
OP
E

Edward Ramirez

Well-known member
Joined
May 1, 2013
Messages
66
Location
Texas
I have most of the machine broken down. The head and the base are seized to the column. I currently have the base and partial column submerged in my electrolysis tank. Hopefully it'll free the rust holding it together loose. I'm open to any suggestions. I tried WD-40 Rust Penetrant and let it sit for at least 4 hours with additional sprayings every 1/2 hour but nothing came of it.
 

Attachments

  • !-Electrolysis3.jpg
    !-Electrolysis3.jpg
    98.6 KB · Views: 44
  • !-Electrolysis2.jpg
    !-Electrolysis2.jpg
    111.4 KB · Views: 51
  • !-Electrolysis1.jpg
    !-Electrolysis1.jpg
    101.1 KB · Views: 58

nine4gmc

Well-known member
Joined
Mar 24, 2012
Messages
14,357
Location
Dallas
That looks just like my 15-665, check the tag on the side by the handle. You can also date the machine by the serial number, I'll try and find the link. I agree, you got a screaming deal, mine was $80 and came with the production crank table BUT, my machine was in way worse condition with the chuck being booger welded on the spindle....

Good score!
 
OP
E

Edward Ramirez

Well-known member
Joined
May 1, 2013
Messages
66
Location
Texas
That looks just like my 15-665, check the tag on the side by the handle. You can also date the machine by the serial number, I'll try and find the link. I agree, you got a screaming deal, mine was $80 and came with the production crank table BUT, my machine was in way worse condition with the chuck being booger welded on the spindle....

Good score!

Thanks 94, the serial# is 1491714.
 

schor

Well-known member
Joined
Apr 16, 2013
Messages
531
Location
Ajax, Ontario
The electrolysis should work. I've been successful with just 3in1 penetrant (I like it better than wd40) and rotating the base on the column.

BTW, nice press, you will really like it once your done. And then onto the mods like a table lift. Here's one I am still in the process of refining. It will eventually be mounted in a yet to be designed table.

Quick vid here

 
Last edited:
OP
E

Edward Ramirez

Well-known member
Joined
May 1, 2013
Messages
66
Location
Texas
While waiting for the electrolysis to do it's job I went ahead and polished some hardware on the wire wheel. Here are a couple of before and afters.
 

Attachments

  • !-Base U-Clamp.jpg
    !-Base U-Clamp.jpg
    127.3 KB · Views: 47
  • !-Base U-Clamp-Polished.jpg
    !-Base U-Clamp-Polished.jpg
    80.3 KB · Views: 44
  • !-Depth Stop.jpg
    !-Depth Stop.jpg
    114.7 KB · Views: 42
  • !-Depth Stop-polished.jpg
    !-Depth Stop-polished.jpg
    80.6 KB · Views: 47
OP
E

Edward Ramirez

Well-known member
Joined
May 1, 2013
Messages
66
Location
Texas
And some more little bits...
 

Attachments

  • !-Head Cover Screw-Polished.jpg
    !-Head Cover Screw-Polished.jpg
    81.5 KB · Views: 24
  • !-Head Cover Nuts and Bolts-Polished4 - Motor bump.jpg
    !-Head Cover Nuts and Bolts-Polished4 - Motor bump.jpg
    72.2 KB · Views: 24
  • !-Head Cover Nuts and Bolts-Polished3.jpg
    !-Head Cover Nuts and Bolts-Polished3.jpg
    98.5 KB · Views: 25
  • !-Head Cover Nuts and Bolts-Polished2.jpg
    !-Head Cover Nuts and Bolts-Polished2.jpg
    89.4 KB · Views: 29
  • !-Head Cover Nuts and Bolts-Polished1.jpg
    !-Head Cover Nuts and Bolts-Polished1.jpg
    82.6 KB · Views: 31
  • !-Electrical Cover Screws.jpg
    !-Electrical Cover Screws.jpg
    82.5 KB · Views: 31
  • !-Electrical Cover and Screws and Head Cover Nuts and Bolts.jpg
    !-Electrical Cover and Screws and Head Cover Nuts and Bolts.jpg
    146 KB · Views: 33

nine4gmc

Well-known member
Joined
Mar 24, 2012
Messages
14,357
Location
Dallas
My bench model 15-017 was made in 1968 and has the old style front pulley guard but my floor model 15-665 was made in 1980 and has the same full belt guard as yours. :beer:
 
OP
E

Edward Ramirez

Well-known member
Joined
May 1, 2013
Messages
66
Location
Texas
The electrolysis should work. I've been successful with just 3in1 penetrant (I like it better than wd40) and rotating the base on the column.

BTW, nice press, you will really like it once your done. And then onto the mods like a table lift. Here's one I am still in the process of refining. It will eventually be mounted in a yet to be designed table.

Quick vid here


That is some nice ingenuity. I may have to copy that for my Delta 17"
 
To avoid these ads, REGISTER NOW!

67carl

Well-known member
Joined
Dec 10, 2013
Messages
3,903
Location
California
Did you get all those parts that clean with just a wire wheel? Was the wheel on a grinder or...?
 

Outlawmws

Well-known member
Joined
Aug 9, 2011
Messages
39,277
Location
The Badlands
What does the underside of the column look like where the post seats? I'd guess there is a bolt or two on a clamp gripping the post.

Were there gall marks on the post near the head?
 

nine4gmc

Well-known member
Joined
Mar 24, 2012
Messages
14,357
Location
Dallas
I have most of the machine broken down. The head and the base are seized to the column. I currently have the base and partial column submerged in my electrolysis tank. Hopefully it'll free the rust holding it together loose. I'm open to any suggestions. I tried WD-40 Rust Penetrant and let it sit for at least 4 hours with additional sprayings every 1/2 hour but nothing came of it.

Oh yeah, as far as breaking the parts down, this dp kicked my *** like no other. I soaked the head and base in everything I had in a spray can for a whole day, nothing loose, soaked it in transmission fluid and acetone a whole day then I finally got them to come apart by locking the head and standing on the base sideways, back and forth from the head to the base for literally hours, I was beat by the time I got it broke down... :mad:
 
OP
E

Edward Ramirez

Well-known member
Joined
May 1, 2013
Messages
66
Location
Texas
Did you get all those parts that clean with just a wire wheel? Was the wheel on a grinder or...?

67carl, I used a bench grinder with a wire wheel. I soaked all the small parts in mineral spirits the night before. I usually soak any metal in mineral spirits in an effort to keep dust levels down as much as possible.
 
OP
E

Edward Ramirez

Well-known member
Joined
May 1, 2013
Messages
66
Location
Texas
What does the underside of the column look like where the post seats? I'd guess there is a bolt or two on a clamp gripping the post.

Were there gall marks on the post near the head?

Outlaw, The underside of the base is really pitted with rust. There isn't gall marks anywhere on the column that I could see. The u-clamp has been removed and polished up. The column is really seized to the head and the base. This drill press was used near the bay area where I'm sure a lot of salt air/water got to it over time. There's a badge on it near the Rockwell logo that it came from a small town called Texas City which is an industrial town near the bay of Galveston.
 

exmaxima1

Well-known member
Joined
Jun 25, 2011
Messages
6,343
Location
Midwest
BTW, nice press, you will really like it once your done. And then onto the mods like a table lift. Here's one I am still in the process of refining. It will eventually be mounted in a yet to be designed table.

It's very similar to the lift I put on my Wilton drill press several years ago. It looks like you need to include a way to swing the table, but other than that you are good to go. Good Luck!
 

Attachments

  • wiltonlift1.jpg
    wiltonlift1.jpg
    39.5 KB · Views: 55
  • wiltonlift2.jpg
    wiltonlift2.jpg
    38.7 KB · Views: 44
Last edited:

Alexbn921

Well-known member
Joined
Aug 22, 2013
Messages
579
Location
East Bay Nor Cal
Good luck with the restore. Did you loosen the two Allen bolts on the base? It's a big project to tear one of these old boys apart. On mine the head unit was pretty well stuck. I used PB blaster and a 2lb soft sand hammer.
 
OP
E

Edward Ramirez

Well-known member
Joined
May 1, 2013
Messages
66
Location
Texas
I'm a little behind since I've been working in Salt Lake City over the past 3 weeks and trying to catch up on the weekends. While I was out of town I left some pieces in the e-tank.

The first batch was the head, the work table, the column clamp that holds the head up and the column clamp that holds the work table:

Before:
 

Attachments

  • DSC03969 (800x450).jpg
    DSC03969 (800x450).jpg
    50.4 KB · Views: 36
  • DSC03968 (800x450).jpg
    DSC03968 (800x450).jpg
    44.3 KB · Views: 35
OP
E

Edward Ramirez

Well-known member
Joined
May 1, 2013
Messages
66
Location
Texas
Here are the same parts after a week in the e-tank:

After:
 

Attachments

  • DSC04037 (800x450).jpg
    DSC04037 (800x450).jpg
    50.9 KB · Views: 35
  • DSC04027 (800x450).jpg
    DSC04027 (800x450).jpg
    49.3 KB · Views: 30
  • DSC04028 (800x450).jpg
    DSC04028 (800x450).jpg
    43.1 KB · Views: 30
  • DSC04032 (800x450).jpg
    DSC04032 (800x450).jpg
    56.4 KB · Views: 29
  • DSC04030 (800x450).jpg
    DSC04030 (800x450).jpg
    45.9 KB · Views: 31
  • DSC04036 (800x450).jpg
    DSC04036 (800x450).jpg
    44.4 KB · Views: 31
  • DSC04035 (800x450).jpg
    DSC04035 (800x450).jpg
    43.7 KB · Views: 30
OP
E

Edward Ramirez

Well-known member
Joined
May 1, 2013
Messages
66
Location
Texas
*The work table picture has had a little wire wheel/cup work on it. It doesn't come out of the e-tank that clean.
 
OP
E

Edward Ramirez

Well-known member
Joined
May 1, 2013
Messages
66
Location
Texas
Here they are after a little wire wheel attention then they were etched primed:
 

Attachments

  • DSC04033 (800x450) (2).jpg
    DSC04033 (800x450) (2).jpg
    31.7 KB · Views: 28
  • DSC04034 (800x450) (2).jpg
    DSC04034 (800x450) (2).jpg
    28.3 KB · Views: 27
  • DSC04040 (800x450).jpg
    DSC04040 (800x450).jpg
    24.5 KB · Views: 27
  • DSC04043 (800x450).jpg
    DSC04043 (800x450).jpg
    137.5 KB · Views: 24
OP
E

Edward Ramirez

Well-known member
Joined
May 1, 2013
Messages
66
Location
Texas
As for the base and the column...I left them soaking for 2 weeks straight.
Here's the base right out of the e-tank, no rinsing, brushing, nothing...

Please note, I had to persuade the column to come out with a piece of 2x4 and a bfh (4lbs).

The rust that's still on the bottom is due to air gaps. I re-dunk the base on it's side for another week.
 

Attachments

  • DSC03964 (800x450).jpg
    DSC03964 (800x450).jpg
    70.4 KB · Views: 19
  • DSC03962 (800x450).jpg
    DSC03962 (800x450).jpg
    56.8 KB · Views: 21
  • DSC03961 (800x450).jpg
    DSC03961 (800x450).jpg
    65.8 KB · Views: 21
  • DSC03959 (800x450).jpg
    DSC03959 (800x450).jpg
    53.3 KB · Views: 21
  • DSC03958 (800x450).jpg
    DSC03958 (800x450).jpg
    51.9 KB · Views: 24
OP
E

Edward Ramirez

Well-known member
Joined
May 1, 2013
Messages
66
Location
Texas
While the base was soaking I began work on the column. I put together a little roller contraption and attached the heavy duty drill to the end.
 

Attachments

  • DSC03979 (800x450).jpg
    DSC03979 (800x450).jpg
    145.4 KB · Views: 28
  • DSC03977 (800x450).jpg
    DSC03977 (800x450).jpg
    139.5 KB · Views: 27
  • DSC03974 (800x450).jpg
    DSC03974 (800x450).jpg
    43.6 KB · Views: 28
  • DSC03973 (800x450).jpg
    DSC03973 (800x450).jpg
    46.5 KB · Views: 33
  • DSC03970 (800x450).jpg
    DSC03970 (800x450).jpg
    39.1 KB · Views: 34
  • DSC03967 (800x450).jpg
    DSC03967 (800x450).jpg
    40.3 KB · Views: 26
  • DSC03966 (800x450).jpg
    DSC03966 (800x450).jpg
    42.3 KB · Views: 29
OP
E

Edward Ramirez

Well-known member
Joined
May 1, 2013
Messages
66
Location
Texas
Finally, here's the base out of the tank. Not how only 3/4 of the base was submerged in water. Instead of flipping it over and waiting a week I just put a the wire cup to the rust so that I could get to prime it and set it aside.
 

Attachments

  • DSC04044 (800x450).jpg
    DSC04044 (800x450).jpg
    61.6 KB · Views: 26
  • DSC04045 (800x450).jpg
    DSC04045 (800x450).jpg
    50.6 KB · Views: 28
  • DSC04046 (800x450).jpg
    DSC04046 (800x450).jpg
    31.5 KB · Views: 22
  • DSC04047 (800x450).jpg
    DSC04047 (800x450).jpg
    30.4 KB · Views: 33
To avoid these ads, REGISTER NOW!
Top Bottom