To avoid these ads, REGISTER NOW!

Rosseau Tooling Cabinet Restoration

Dustoff 35

Well-known member
Joined
Nov 16, 2007
Messages
160
Location
Northern Kentucky
About two years ago, I purchased a couple of tooling cabinets off of craigslist. They were in rough shape, a little surface rust, some dents and the drawers did not roll out smoothly. They were well built, similar in quality to Lista or Stanley Vidmar. The price was right, $100 for the pair. Here are the restoration pictures:
 

Attachments

  • Photo764.jpg
    Photo764.jpg
    103.1 KB · Views: 149
  • Photo765.jpg
    Photo765.jpg
    77 KB · Views: 135
  • Photo768.jpg
    Photo768.jpg
    51.2 KB · Views: 127
To avoid these ads, REGISTER NOW!
OP
D

Dustoff 35

Well-known member
Joined
Nov 16, 2007
Messages
160
Location
Northern Kentucky
After sanding and priming, both cabinets received two coats of rattle-can gray enamel.
 

Attachments

  • Photo767.jpg
    Photo767.jpg
    71 KB · Views: 128
  • Photo769.jpg
    Photo769.jpg
    55.8 KB · Views: 124
OP
D

Dustoff 35

Well-known member
Joined
Nov 16, 2007
Messages
160
Location
Northern Kentucky
Here are the drawer fronts being sanded and painted with Hammerite silver-gray.


The drawers now installed back in the cabinet after cleaning and lubricating the drawer slides:


OP
D

Dustoff 35

Well-known member
Joined
Nov 16, 2007
Messages
160
Location
Northern Kentucky
Here are the restored cabinets. The drawers now roll-out smoothly and are anchored to the wall.


I am presently building a 14 foot workbench to the left of the cabinets
 
OP
D

Dustoff 35

Well-known member
Joined
Nov 16, 2007
Messages
160
Location
Northern Kentucky
Very nice job. Did it have many dents and extra holes?

No extra holes to deal with and the cabinets themselves were dent-free. Several of the drawer faces were dented but were easy to flatten with a hammer and dolly. The hammerite paint on the drawer faces is thick enough to mask any slight ripple on the surface.
 

Storage Guy

New member
Joined
May 6, 2013
Messages
4
Location
New England
First Class Restoration! These are the second generation Rousseau Metal OT series drawer cabinets. Dividers and partitions are currently still available, but maybe not for long. Carriage assemblies still available.

Look better than when the left St. John Port Joli, Quebec.
 
To avoid these ads, REGISTER NOW!

Jim Johnstone

Well-known member
Joined
Apr 11, 2011
Messages
1,841
Location
Brantford, Ontario
Awesome work. Those cabinets are the best if you ask me. I worked in a machine shop with those cabs fully loaded with end mills and other tooling and I have never since seen a cabinet drawer roll so smoothly.

Sent from my SGH-I727R using Tapatalk 2
 
OP
D

Dustoff 35

Well-known member
Joined
Nov 16, 2007
Messages
160
Location
Northern Kentucky
Thanks, everyone, for the nice comments.

I have the dividers for the drawers but haven't installed them yet. I'll have to set up a drawer with the dividers and post a picture so that everyone can see just how customize-able these cabinets / drawers are. I have a 5 foot tall Stanley-Vidmar cabinet in my basement woodshop that I store all my nuts & bolts and assorted hardware in. Handy and heavy duty to be sure.

Anyway, after I wrapped up the cabinets, I began on the workbench that starts at the cabinets and continues on along the back wall for about 14 feet.

I lag-bolted PT 2x4 material to the back wall to start. Boring the holes, even with a hammer drill and new carbide tipped masonry bits, took a while...


after building and leveling the frame for the bench top, it was time to fabricate some legs:
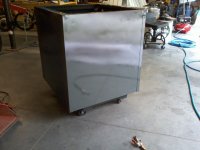


Fits just right!


Had I planned the bench-top framing a little better, I would have been able to avoid this double-rabbet joint fiasco...


It worked out just fine.


Bench framing and legs complete:


I used Tap-Con fasteners for the PT shelf ledgers:


The shelves, anchored to the wall, stabilize the legs.

 
OP
D

Dustoff 35

Well-known member
Joined
Nov 16, 2007
Messages
160
Location
Northern Kentucky
Next step was to measure up and fabricate some doors for the front of the workbench. I used 3/4 inch flooring underlayment (particle board) for the doors. This material is dead flat and will not move or warp. Once it is coated on all sides and edges, it will not absorb moisture. It is also inexpensive.


Instead of knobs, I drilled 2 inch holes and hit all edges, front and back with a round-over bit in the router. If you look closely, you can make out the 35mm holes bored for the european style cup-hinges.


Primer on the bench legs and shelves...


Primer on the doors...


Gloss porch paint on the bench legs to match the cabinets...


Hammerite silver on the doors to match the cabinet drawer-faces...


Test-fit.

 
To avoid these ads, REGISTER NOW!
Top Bottom