To avoid these ads, REGISTER NOW!

Rustic Basement Thread

To avoid these ads, REGISTER NOW!

Stuart in MN

Well-known member
Joined
Sep 8, 2005
Messages
22,992
Location
Minneapolis
I made another lamp for the basement using an early '50's Briggs & Stratton engine that belonged to my wife's granddad.


That's a pretty neat lamp. :) When I was a kid we had an Eclipse lawn mower and I'm pretty sure it used the same model Briggs engine.


I see you ran the power cord into the crankcase through the oil fill, and then I assume it goes up through the engine, out the exhaust valve, and out the exhaust pipe to the light bulb. Were you able to utilize some part of the engine for the light switch as well?
 
OP
3

383

Well-known member
Joined
Aug 14, 2011
Messages
1,230
Location
Harrisonburg, VA
I see you ran the power cord into the crankcase through the oil fill, and then I assume it goes up through the engine, out the exhaust valve, and out the exhaust pipe to the light bulb. Were you able to utilize some part of the engine for the light switch as well?

No, nothing fancy on the switch, I thought about it, but couldn't think of an easy way to do it. It would have been cool to pull the choke to turn on the light. I have this lamp plugged into a remote control device along with some of the other lights. https://www.amazon.com/gp/product/B00DQ2KGNK/?tag=atomicindus08-20
 
Last edited:

cybrdyke

Well-known member
Joined
Sep 9, 2014
Messages
3,442
Location
USA
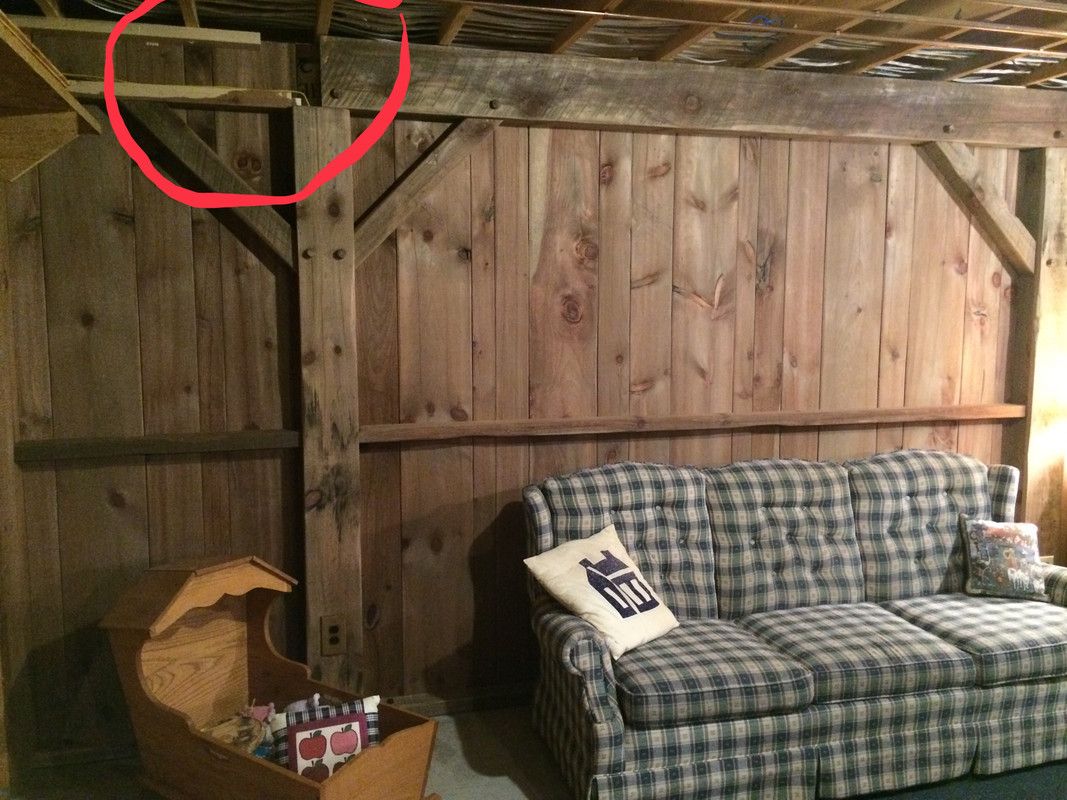
I had to take one section of the beam cover down to pull a wire, so I took a couple of pics that show how the wall section is fastened.

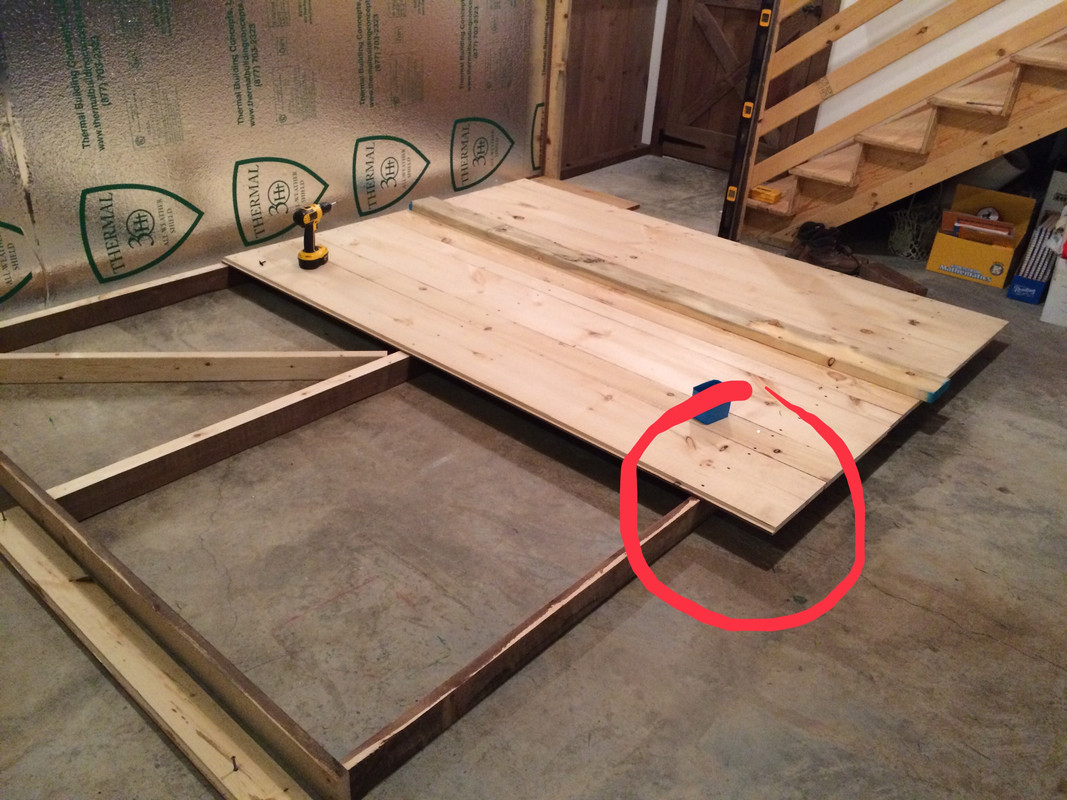
In this picture of a wall section on the floor you can see that the siding boards extend about 10 inches above the horizontal 1x4. The 1x4 will be the bottom of the beam.

200_zpsxor3upt5.jpg


This picture is after the wall section is in place. The 2x4 sandwiches the siding boards against the insulation, and is fastened to the bottom of the floor joists. It also creates a nailer for the top of the beam.

156_zpsorkdrbdg.jpg


155_zpsgtwuskpn.jpg


The 1x10 beam facer is then fastened to the 1x4 at the bottom, and the 2x4 at the top. The hollow beam and posts create a cavity for wiring since there isn't a stud cavity.

211_zpsivt6dvfa.jpg

Any chance you can repost these pictures? Would like to see how you did this!
CD
 

cybrdyke

Well-known member
Joined
Sep 9, 2014
Messages
3,442
Location
USA
Most of the pictures are on a computer at work, I'll try to post them tomorrow. Once again, thanks to Photobucket for ruining the internet.
That would be great! Thank you.
I thought the Kardashians broke the internet...
CD
 
OP
3

383

Well-known member
Joined
Aug 14, 2011
Messages
1,230
Location
Harrisonburg, VA
I used Postimage for pictures after Photobucket, now I see those pictures are gone also. I need to find a new host site.
 
To avoid these ads, REGISTER NOW!
OP
3

383

Well-known member
Joined
Aug 14, 2011
Messages
1,230
Location
Harrisonburg, VA
Sorry I didn't get this Friday, I apparently lost some pictures in the shuffle. This pic shows the wall section laying on the floor with the siding boards extending above the piece that will be the bottom of the beam.


This picture is after the wall section is in place. The 2x4 sandwiches the siding boards against the insulation, and is fastened to the bottom of the floor joists. It also creates a nailer for the top of the beam.


When I get a chance I need to replace all of the pictures, but I dont know what host site to use. It looks like the postimage pics I posted have disappeared.
 

Mikkeli

Well-known member
Joined
Apr 12, 2018
Messages
192
Location
Central Finland
I like better when you can see the pictures without clicking on the small thumbnail, but that might be a better long term option.

You can add pictures in full size to forum posts, no need to use thumbnails. For example, check my thread (all photos hosted at The Garage Journal).
 

b-boy

Well-known member
Joined
Oct 2, 2013
Messages
2,155
Location
Buffalo NY
Wow - Beautiful work.

I'm reluctantly tearing down a 100 yr old barn on my property this Fall. This gives me some great ideas on what to do with all the wood I'll have leftover.
 
OP
3

383

Well-known member
Joined
Aug 14, 2011
Messages
1,230
Location
Harrisonburg, VA
You can add pictures in full size to forum posts, no need to use thumbnails. For example, check my thread (all photos hosted at The Garage Journal).

I'll have to check on that, it's always added the thumbnails when I try to post the pictures directly. Nice pictures if your garage, looks like a great space.
 

cybrdyke

Well-known member
Joined
Sep 9, 2014
Messages
3,442
Location
USA
When I get a chance I need to replace all of the pictures, but I dont know what host site to use. It looks like the postimage pics I posted have disappeared.

Thank you for re-posting these.
CD
 
To avoid these ads, REGISTER NOW!
Top Bottom