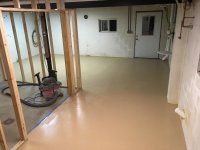
I am currently in the middle of applying Rustoleum Professional Series Epoxy to my basement floor. I figured I should share my experiences as I have gotten lots of insight from this forum.
I just started finishing a portion of my basement that is approximately 22'x26'. I have framed up walls to enclose a laundry/shower room and the remaining space will be turned into a bar area. I decided epoxy flooring would be a good choice for the concrete slab in the bar area. I liked the idea of having a nice looking floor but to maintain the utility of concrete with floor drains. I also thought it would be quick and cost effective (boy was I wrong...).
I decided on using the Rustoleum Professional series after a little research. It seemed to have good reviews and was a little more durable than the water based kits but still an economic DIY kit. I know it’s not recommended for basements because it is solvent based but I took precautions to mitigate concerns (windows with exhaust fan/no pilot light/paint respirators).
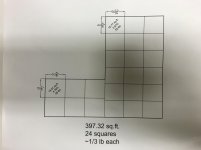
The area I am applying epoxy is 397 square feet so I initially thought one kit would be perfect (300-400 square feet of coverage). I then became nervous that I would run out when 90% done so I ordered a second kit. Wasn't sure whether to mix up 1 1/2 kits and be done in one coat or do 2 kits. I eventually decided on 2 coats and glad I did. I am using the dunes sand with color flakes. I am using the 4 lbs or flakes that came with the 2 kits and purchased an additional 4 lbs of flakes for a total of 8 lbs, or 1 lb/50 sq.ft. which will be a pretty heavy broadcast.
I thought the prep would be nothing more than a good scrub down. I quickly realized an acid etch would be required. I knew all the rinsing and scrubbing would be a little cumbersome in the basement vs. a garage, but I have 2 floor drains and decided it would be fine. I had initially purchased muriatic acid for the etch but later decided the Rustoleum citrus etch would be a safer choice for my indoor conditions.
I performed the moisture test and didn’t have any issues. I had read that if the concrete was sealed, epoxy could not be applied over it. I somehow had deduced that my floor was not sealed but decided I better test with a cup of water just before my weekend of prep began. I watched the water bead up and do everything but soak into the slab much to my dismay. I then knew grinding was my only option.
I spent a few hours researching my options for grinding and found our my options were:
1)Rent Edco single head grinder for $95/day plus diamond wheel from local rental place for $75/day ($170/day)
2)Rent Home Depot floor buffer for $40/day and diamabrush prep tool for $70/day ($110/day)
3)Buy 7” angle grinder and diamabrush wheel/diamond turbo cup
I never like the idea of renting and don’t like being rushed. I was also concerned about getting worn out diamonds. Additionally, the closest Home Depot was 1.5 hours away and dust containment would be an issue with the floor buffer. Both of the larger machines would not be able to reach edges and tight areas.
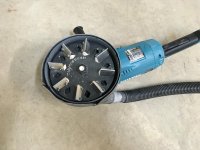
I ultimately decided to purchase a 7” Makita angle grinder (I had wanted a 7” grinder and this was a good excuse to buy one). I also bought the diamabrush wheel and diamabrush shoud (which is actually designed for the Makita grinder).
The next hurdle was dust containment. I read about the dust deputy and was very close to purchasing a dustless shop vac but ultimately decided to borrow a shop vac and used the dustless vacuum bags.
Now, onto pictures….
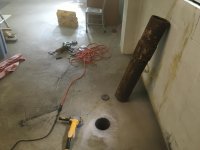
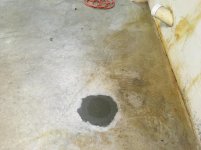
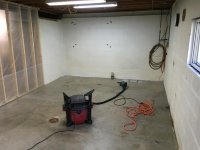
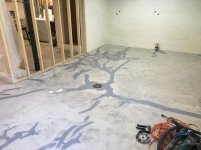
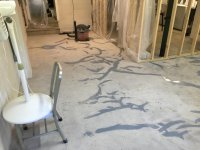
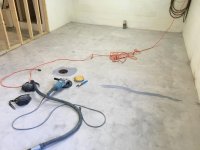
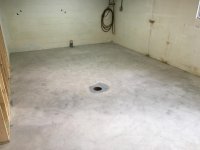
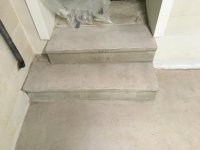
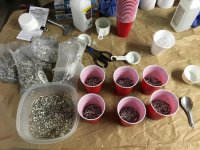
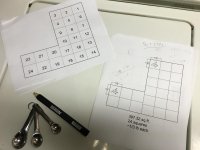
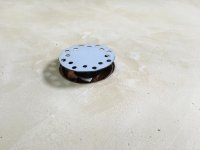
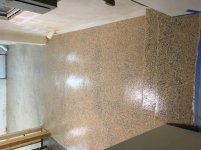
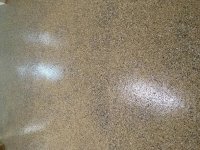
Pictures show a couple rough Sketchup drawings of what the basement may look like when finished, removing and plugging an old water well, the basement before starting the grinding, and grinder setup.
More to follow.
I just started finishing a portion of my basement that is approximately 22'x26'. I have framed up walls to enclose a laundry/shower room and the remaining space will be turned into a bar area. I decided epoxy flooring would be a good choice for the concrete slab in the bar area. I liked the idea of having a nice looking floor but to maintain the utility of concrete with floor drains. I also thought it would be quick and cost effective (boy was I wrong...).
I decided on using the Rustoleum Professional series after a little research. It seemed to have good reviews and was a little more durable than the water based kits but still an economic DIY kit. I know it’s not recommended for basements because it is solvent based but I took precautions to mitigate concerns (windows with exhaust fan/no pilot light/paint respirators).
The area I am applying epoxy is 397 square feet so I initially thought one kit would be perfect (300-400 square feet of coverage). I then became nervous that I would run out when 90% done so I ordered a second kit. Wasn't sure whether to mix up 1 1/2 kits and be done in one coat or do 2 kits. I eventually decided on 2 coats and glad I did. I am using the dunes sand with color flakes. I am using the 4 lbs or flakes that came with the 2 kits and purchased an additional 4 lbs of flakes for a total of 8 lbs, or 1 lb/50 sq.ft. which will be a pretty heavy broadcast.
I thought the prep would be nothing more than a good scrub down. I quickly realized an acid etch would be required. I knew all the rinsing and scrubbing would be a little cumbersome in the basement vs. a garage, but I have 2 floor drains and decided it would be fine. I had initially purchased muriatic acid for the etch but later decided the Rustoleum citrus etch would be a safer choice for my indoor conditions.
I performed the moisture test and didn’t have any issues. I had read that if the concrete was sealed, epoxy could not be applied over it. I somehow had deduced that my floor was not sealed but decided I better test with a cup of water just before my weekend of prep began. I watched the water bead up and do everything but soak into the slab much to my dismay. I then knew grinding was my only option.
I spent a few hours researching my options for grinding and found our my options were:
1)Rent Edco single head grinder for $95/day plus diamond wheel from local rental place for $75/day ($170/day)
2)Rent Home Depot floor buffer for $40/day and diamabrush prep tool for $70/day ($110/day)
3)Buy 7” angle grinder and diamabrush wheel/diamond turbo cup
I never like the idea of renting and don’t like being rushed. I was also concerned about getting worn out diamonds. Additionally, the closest Home Depot was 1.5 hours away and dust containment would be an issue with the floor buffer. Both of the larger machines would not be able to reach edges and tight areas.
I ultimately decided to purchase a 7” Makita angle grinder (I had wanted a 7” grinder and this was a good excuse to buy one). I also bought the diamabrush wheel and diamabrush shoud (which is actually designed for the Makita grinder).
The next hurdle was dust containment. I read about the dust deputy and was very close to purchasing a dustless shop vac but ultimately decided to borrow a shop vac and used the dustless vacuum bags.
Now, onto pictures….
Pictures show a couple rough Sketchup drawings of what the basement may look like when finished, removing and plugging an old water well, the basement before starting the grinding, and grinder setup.
More to follow.