To avoid these ads, REGISTER NOW!

Saturday 10/5 Finally a Floor.

dieselgarage

Well-known member
Joined
Dec 18, 2012
Messages
277
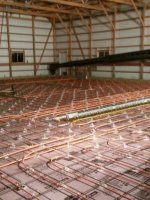
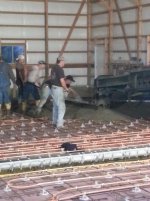
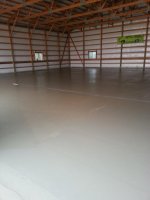
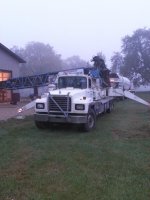
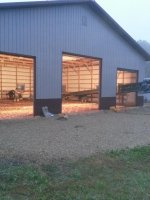
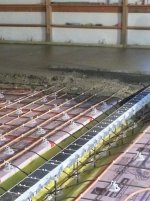
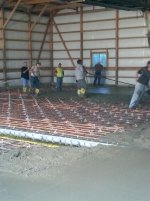
Finally after working all summer on putting down foam, re-bar and Pex my floor has arrived. 87 yards of straight 6 bag mix, 4000 PSI, with micro fiber. Started to pour at 6:15AM and last of the finishers left about 4:00PM. Few pictures.
 

Attachments

  • 20131005_063043_1.jpg
    20131005_063043_1.jpg
    140.7 KB · Views: 74
  • 20131005_065817.jpg
    20131005_065817.jpg
    133 KB · Views: 62
  • 20131005_084554.jpg
    20131005_084554.jpg
    131.4 KB · Views: 62
  • 20131005_065711.jpg
    20131005_065711.jpg
    137 KB · Views: 56
  • 20131005_065655 (2).jpg
    20131005_065655 (2).jpg
    140.4 KB · Views: 56
  • 20131005_071521.jpg
    20131005_071521.jpg
    138.4 KB · Views: 71
  • 20131005_073902 (2).jpg
    20131005_073902 (2).jpg
    141.1 KB · Views: 60
To avoid these ads, REGISTER NOW!

Chris705

Well-known member
Joined
Nov 1, 2012
Messages
834
Location
The Finger Lakes of NY
Dieselgarage
Pics of your floor pour are fabulous! By looking at them I can tell it did indeed take a long time to get ready for the concrete! What a maticulous job it must have been to prep the subgrade, lay that supertough vapor barrier, trench drain, insulation board, rebar and pex tubing! All look top notch and installed straight and true. I have a couple questions from looking......your pex layout seems to not cover 100% of your floor, can you describe what you plan for the heating zones? Does some tubing apear larger in dia. than others? Also what brand trench drain did you use? Did you end up w/ any concrete in the trench? (A tip for those who install trench in the future is to cut strips of plywood to substitute for the grates just for the floor pour. Keeps the drains/grate free from splatter/spills) I am in the finishing stages of framing my garage and plan on getting to the rough plumbing this fall/winter and need small sections of trench drain. Last question....did your concrete contractor apply a curing compound?
 
OP
D

dieselgarage

Well-known member
Joined
Dec 18, 2012
Messages
277
Dieselgarage
Pics of your floor pour are fabulous! By looking at them I can tell it did indeed take a long time to get ready for the concrete! What a maticulous job it must have been to prep the subgrade, lay that supertough vapor barrier, trench drain, insulation board, rebar and pex tubing! All look top notch and installed straight and true. I have a couple questions from looking......your pex layout seems to not cover 100% of your floor, can you describe what you plan for the heating zones?

Pex covers the entire floor with the exception of the area where the two post lift will go. I left the tube out of that area. It does look a little bit weird because the tube layout was done to minimize the number of times it crosses the saw cuts. But it is all on 16" centers same as the re-bar.

Does some tubing apear larger in dia. than others?

All the tube is the same size 5/8. I ended up with 8 loops for a total of 3000 feet of tube.


Also what brand trench drain did you use?

I used Zurn trench drain. To be honest I would not use it again. I had it all set and to grade and level. A few days later I went in the shop and it was all twisted and jacked out of shape. Almost all the clamps that hold the drain to the re-bar had broke off. So I had to reset the entire thing and use hose clamps to secure it to the re-bar. It was mess but ended up working fine.

Did you end up w/ any concrete in the trench?

Yes but it cleaned out easy. The worst part was the grates. But mine were used so I planed on having them sand blasted and powder coated. They are now a nice dark textured red.


(A tip for those who install trench in the future is to cut strips of plywood to substitute for the grates just for the floor pour. Keeps the drains/grate free from splatter/spills)

I did this with my first attempt. It did help to keep the joints straight. But I also had issues with the trough being spread out and the grates not fitting tight on the sides. So I put the grates in and then took wire ties around the trough to pull the sides tight to the grates. Then once it was poured around the trench drain I cut and pulled the wire ties out. It seemed to work pretty well. If I were to do it again I would form and pour the drain and skip the pre-made stuff.

I am in the finishing stages of framing my garage and plan on getting to the rough plumbing this fall/winter and need small sections of trench drain. Last question....did your concrete contractor apply a curing compound?

No I requested no curing compound. I kept it wet for the first 6-7 days. I did not want the hassle of removing the curing compound prior to installing the sealer on the floor. That is the next step once it has cured for the 28 days.

Thanks for your comments. They guys that did the pour were also amazed at the amount of work/time I had put into the prep work. I could not be happier with the end result.

On edit: I see in the pictures why some for the tube looks like it is missing. I did run some of it on the bottom of the re-bar. Also I'm running it all on just one zone.
 
Last edited:
To avoid these ads, REGISTER NOW!
Top Bottom