To avoid these ads, REGISTER NOW!

Saylor-Beall Rebuild

OP
J

jonathan75

Well-known member
Joined
Mar 27, 2013
Messages
1,451
Location
NC
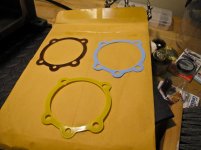
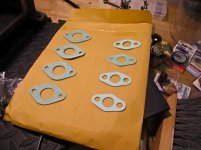
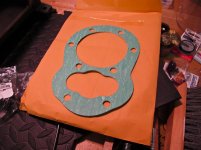
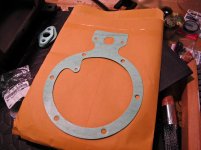
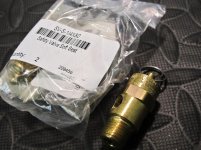
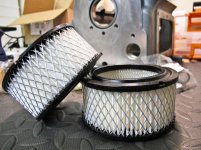
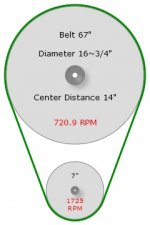
I am back in town now. This week I decided to drive and not fly so after 8 hours of driving back home I am too sore and tired to work on the compressor tonight. So I will just post some pictures of parts I got in. Here is the 135 pound part waiting for me when I got back home. Just moving the motor was enough work for today, that thing is like concentrated dark matter or something.

Thank you metal4130 for helping me get a good deal on the motor.

I really like Williamson Electric, the customer service and responsiveness is top notch! They make you feel like a rock star or someone special because the service is so good. Good people and good prices! Thanks Amy.

Williamson New England Electric Motor Service Corp :thumbup:
25 Griffin Way, Chelsea MA 02150
Phone: 617.884.9200
http://williamsonneelectric.com/
Email: [email protected]
 

Attachments

  • DSC_1755-1.jpg
    DSC_1755-1.jpg
    104.5 KB · Views: 50
To avoid these ads, REGISTER NOW!
OP
J

jonathan75

Well-known member
Joined
Mar 27, 2013
Messages
1,451
Location
NC
Here are some pictures of the Zenport Zen-Tek Glycerin Liquid Filled Pressure Gauge I got from Amazon. The thing I like the most about this model is the large and clear font.

http://amzn.com/B0080IG2JW

Also here is the rebuild kit from Air-Flo with oversized bearings. I will break the kit down and show more pictures of the kit parts and other parts I ordered from Air-Flo.

http://www.airfloinc.com/item/1033
 

Attachments

  • IMG_7665-1.jpg
    IMG_7665-1.jpg
    82.4 KB · Views: 62
  • IMG_7663-1.jpg
    IMG_7663-1.jpg
    96.1 KB · Views: 67
  • IMG_7660-1.jpg
    IMG_7660-1.jpg
    105 KB · Views: 69
  • IMG_7657-1.jpg
    IMG_7657-1.jpg
    61.2 KB · Views: 65
  • IMG_7656-1.jpg
    IMG_7656-1.jpg
    68 KB · Views: 59
  • IMG_7655-1.jpg
    IMG_7655-1.jpg
    87.3 KB · Views: 63
  • IMG_7654-1.jpg
    IMG_7654-1.jpg
    102.5 KB · Views: 61
OP
J

jonathan75

Well-known member
Joined
Mar 27, 2013
Messages
1,451
Location
NC
More kit pictures with some Old Part vs. New Part.
 

Attachments

  • IMG_7679-1.jpg
    IMG_7679-1.jpg
    83.7 KB · Views: 34
  • IMG_7677-1.jpg
    IMG_7677-1.jpg
    84.7 KB · Views: 38
  • IMG_7670-1.jpg
    IMG_7670-1.jpg
    84.3 KB · Views: 39
  • IMG_7669-1.jpg
    IMG_7669-1.jpg
    104.8 KB · Views: 44
  • IMG_7668-1.jpg
    IMG_7668-1.jpg
    111.8 KB · Views: 50
  • IMG_7666-1.jpg
    IMG_7666-1.jpg
    125.3 KB · Views: 42
OP
J

jonathan75

Well-known member
Joined
Mar 27, 2013
Messages
1,451
Location
NC
You can see the oversized bearings are bigger. Before you take the crankshaft to the machine shop wait for your bearings to come in. Don't do what I did and have to go back twice because they are too tight. You can do everything by the book but it still may not fit right.
 

Attachments

  • IMG_7697-1.jpg
    IMG_7697-1.jpg
    143.7 KB · Views: 29
  • IMG_7695-1.jpg
    IMG_7695-1.jpg
    63.7 KB · Views: 33
  • IMG_7692-1.jpg
    IMG_7692-1.jpg
    92.9 KB · Views: 29
  • IMG_7690-1.jpg
    IMG_7690-1.jpg
    98.5 KB · Views: 28
  • IMG_7684-1.jpg
    IMG_7684-1.jpg
    94.5 KB · Views: 31
  • IMG_7681-1.jpg
    IMG_7681-1.jpg
    103.5 KB · Views: 34
  • IMG_7680-1.jpg
    IMG_7680-1.jpg
    107.1 KB · Views: 37

9GUY9

Well-known member
Joined
Oct 12, 2009
Messages
248
Location
Mankato, MN
Heres a little inspiration for you. I finished mine up and got it running this week. The pump was totally disassembled, cleaned, powder coated and rebuilt with necessary new parts. It went from a 10hp 3 phase to a 7.5hp single. Both the starter and motor pulley stayed the same and it is working well.


Compared to its predecessor it looks huge.

 
OP
J

jonathan75

Well-known member
Joined
Mar 27, 2013
Messages
1,451
Location
NC
Here is the ring kit, drain ****, sight glass, shaft oil seal, valve tune up kit, check valve and safety valve.

I like the new sight glass. The OEM sight glass was cracked inside. I really don't understand why they use plastic. That is like putting cheap tires on a sports car.
 

Attachments

  • IMG_7706-1.jpg
    IMG_7706-1.jpg
    90.8 KB · Views: 54
  • IMG_7704-1.jpg
    IMG_7704-1.jpg
    102.9 KB · Views: 42
  • IMG_7703-1.jpg
    IMG_7703-1.jpg
    80.5 KB · Views: 44
  • IMG_7702-1.jpg
    IMG_7702-1.jpg
    125 KB · Views: 42
  • IMG_7701-1.jpg
    IMG_7701-1.jpg
    101.2 KB · Views: 41
  • IMG_7700-1.jpg
    IMG_7700-1.jpg
    92.6 KB · Views: 44
  • IMG_7699-1.jpg
    IMG_7699-1.jpg
    82 KB · Views: 42
OP
J

jonathan75

Well-known member
Joined
Mar 27, 2013
Messages
1,451
Location
NC
Heres a little inspiration for you. I finished mine up and got it running this week. The pump was totally disassembled, cleaned, powder coated and rebuilt with necessary new parts. It went from a 10hp 3 phase to a 7.5hp single. Both the starter and motor pulley stayed the same and it is working well.
Compared to its predecessor it looks huge.

Oh sweet! Great job. Wow I have so many questions for you.

Where did you get the oil drain valve? I got a large handle ball valve but I like yours better.

Your exhaust is facing the front. Was it originally like that? Did you make new copper lines?

Did you do the powder coat yourself? Can you color match powder coat?

What is your crankcase breather T going to?

Do you have a closeup picture of your sight glass? It looks nice!

Is that a A.O. Smith motor or Leeson?
 
OP
J

jonathan75

Well-known member
Joined
Mar 27, 2013
Messages
1,451
Location
NC
Again you don't get a proper gasket for the sight glass. You only get the old style. Remember that if you need a new style sight glass gasket that you will not get one in the rebuild kit. You get 20 extras of stuff you won't use but no new style sight glass gasket.

This first gasket is a mystery to me. I looks like it could fit on the rear of the pump but the extra bit on top I have no idea. I will call this gasket the diamond ring. This one will be saved for future use, I can always cut the top part off.

Keep you old spacer you see in the last picture. The OEM is metal but the replacements are plastic. I don't like plastic. So don't mess with your spacer for your crankshaft bearing. It probably wouldn't go anywhere anyway since it is pressed in. But you don't want play in your crankshaft.
 

Attachments

  • IMG_7716-1.jpg
    IMG_7716-1.jpg
    70.6 KB · Views: 21
  • IMG_7715-1.jpg
    IMG_7715-1.jpg
    103.5 KB · Views: 19
  • IMG_7714-1.jpg
    IMG_7714-1.jpg
    104.2 KB · Views: 19
  • IMG_7713-1.jpg
    IMG_7713-1.jpg
    81.7 KB · Views: 19
  • IMG_7712-1.jpg
    IMG_7712-1.jpg
    84.1 KB · Views: 20
  • IMG_7711-1.jpg
    IMG_7711-1.jpg
    76.7 KB · Views: 21
  • IMG_7710-1.jpg
    IMG_7710-1.jpg
    82 KB · Views: 29
OP
J

jonathan75

Well-known member
Joined
Mar 27, 2013
Messages
1,451
Location
NC
Checkout picture 4 and 5. All the washers/gaskets I identified I stacked on the left in picture 5. All the ones on the right I have no idea what they are for or where they go. Must be for a different model or I may find some of them when I break down the valves which I have not done yet.

The filter housings I am still waiting on. They are stuck in the ocean between China and the US right now.
 

Attachments

  • IMG_7741-1.jpg
    IMG_7741-1.jpg
    95.7 KB · Views: 22
  • IMG_7740-1.jpg
    IMG_7740-1.jpg
    113.6 KB · Views: 22
  • IMG_7737-1.jpg
    IMG_7737-1.jpg
    147.8 KB · Views: 24
  • IMG_7729-1.jpg
    IMG_7729-1.jpg
    149.4 KB · Views: 24
  • IMG_7725-1.jpg
    IMG_7725-1.jpg
    79.9 KB · Views: 23
  • IMG_7718-1.jpg
    IMG_7718-1.jpg
    85.7 KB · Views: 25
  • IMG_7717-1.jpg
    IMG_7717-1.jpg
    93.3 KB · Views: 20
OP
J

jonathan75

Well-known member
Joined
Mar 27, 2013
Messages
1,451
Location
NC
Here is the new check valve. The old one would not spring back correctly. I got all new piping from Home Depot also.

I am taking out all the adapters and ball valves for the bottom drain. I will replace it with just a little ****.

Still have not taken apart the valves but I am looking forward to working on them. It is one of the more interesting parts of the pump.
 

Attachments

  • IMG_7755-1.jpg
    IMG_7755-1.jpg
    81.8 KB · Views: 27
  • IMG_7754-1.jpg
    IMG_7754-1.jpg
    89.5 KB · Views: 29
  • IMG_7753-1.jpg
    IMG_7753-1.jpg
    67.6 KB · Views: 30
  • IMG_7749-1.jpg
    IMG_7749-1.jpg
    105.3 KB · Views: 32
  • IMG_7748-1.jpg
    IMG_7748-1.jpg
    80.3 KB · Views: 33
  • IMG_7747-1.jpg
    IMG_7747-1.jpg
    112.3 KB · Views: 37
  • IMG_7745-1.jpg
    IMG_7745-1.jpg
    95 KB · Views: 33

9GUY9

Well-known member
Joined
Oct 12, 2009
Messages
248
Location
Mankato, MN
Oh sweet! Great job. Wow I have so many questions for you.

Where did you get the oil drain valve? I got a large handle ball valve but I like yours better.

Your exhaust is facing the front. Was it originally like that? Did you make new copper lines?

Did you do the powder coat yourself? Can you color match powder coat?

What is your crankcase breather T going to?

Do you have a closeup picture of your sight glass? It looks nice!

Is that a A.O. Smith motor or Leeson?


The oil drain is from Menards, its a toilet or ice maker water valve. I think its 3/8"NPT and 3/8" compression.

Thats the way the exhaust was, possibly a difference in the Asian pump vs the real deal, or maby a very tank set up vs a horizontal tanks setup.

I did the powder coating, the compressor was bought to run my sandblaster for power coating purposes. The color I used is RAL signal Blue. Its not a exact match for the Castair blue, but it was on sale and is close. The inter coolers and base are a wrinkle black, the filter covers and a few other little things are chrome.

The crank case breather is connected to a intake valve on each head.

I can get you a sight glass pic, it is what was on it when I got it. I believe its real glass, it sat in purple power cleaner for a week and came out ok.

The motor is a Leeson from Ebay. I think it was $569 shipped.


On mine all the bolts going into the block had crush washers on them to seal them up. That would be what all your extra copper washers are for. I have no idea on the round gasket with the thing on top.

Mine does not have a gasket on the sight glass, its pipe threads. So it is sealed with some good pipe dope.
 
Last edited:
OP
J

jonathan75

Well-known member
Joined
Mar 27, 2013
Messages
1,451
Location
NC
Old vs new oil rings for the HP and LP piston. The thumbs down is showing you the piston rings you don't need. They are really thin and I have no idea what type of 707 you would use these for. Good thing they are just extras and I did get the right ones as well.

Edit: Thank you 9GUY9! The thin rings go above and below the spacer. You DO need them. hahaha
 

Attachments

  • IMG_7773-1.jpg
    IMG_7773-1.jpg
    113.6 KB · Views: 25
  • IMG_7771-1.jpg
    IMG_7771-1.jpg
    103.2 KB · Views: 29
  • IMG_7770-1.jpg
    IMG_7770-1.jpg
    129.7 KB · Views: 23
  • IMG_7769-1.jpg
    IMG_7769-1.jpg
    128.4 KB · Views: 22
  • IMG_7768-1.jpg
    IMG_7768-1.jpg
    142.6 KB · Views: 24
  • IMG_7766-1.jpg
    IMG_7766-1.jpg
    66.3 KB · Views: 26
  • IMG_7762-1.jpg
    IMG_7762-1.jpg
    98.1 KB · Views: 25
Last edited:
OP
J

jonathan75

Well-known member
Joined
Mar 27, 2013
Messages
1,451
Location
NC
The oil drain is from Menards, its a toilet or ice maker water valve. I think its 3/8"NPT and 3/8" compression.

Thats the way the exhaust was, possibly a difference in the Asian pump vs the real deal, or maby a very tank set up vs a horizontal tanks setup.

I did the powder coating, the compressor was bought to run my sandblaster for power coating purposes. The color I used is RAL signal Blue. Its not a exact match for the Castair blue, but it was on sale and is close. The inter coolers and base are a wrinkle black, the filter covers and a few other little things are chrome.

The crank case breather is connected to a intake valve on each head.

I can get you a sight glass pic, it is what was on it when I got it. I believe its real glass, it sat in purple power cleaner for a week and came out ok.

The motor is a Leeson from Ebay. I think it was $569 shipped.


On mine all the bolts going into the block had crush washers on them to seal them up. That would be what all your extra copper washers are for. I have no idea on the round gasket with the thing on top.

Mine does not have a gasket on the sight glass, its pipe threads. So it is sealed with some good pipe dope.

I might be nervous to use the valve you got for the oil drain if it is not certified for WOG.

I forgot that you had the 707 clone.

So my kit must be for the clone also. Does yours have thin piston rings?

Probably I could get away with no gasket for my sight glass but I guess it is a good backup if the sealant ever leaked.
 
OP
J

jonathan75

Well-known member
Joined
Mar 27, 2013
Messages
1,451
Location
NC

Attachments

  • IMG_7790-1.jpg
    IMG_7790-1.jpg
    72.8 KB · Views: 22
  • IMG_7778-1.jpg
    IMG_7778-1.jpg
    150 KB · Views: 22
  • IMG_7777-1.jpg
    IMG_7777-1.jpg
    87.4 KB · Views: 22
  • IMG_7776-1.jpg
    IMG_7776-1.jpg
    79.9 KB · Views: 24
OP
J

jonathan75

Well-known member
Joined
Mar 27, 2013
Messages
1,451
Location
NC
Heres a little inspiration for you. I finished mine up and got it running this week. The pump was totally disassembled, cleaned, powder coated and rebuilt with necessary new parts. It went from a 10hp 3 phase to a 7.5hp single. Both the starter and motor pulley stayed the same and it is working well.


I just spotted a quick clue to find out if your 707 pump is real or clone. I will call it the Phantom Clue. Look around the oil drain on the bottom. The Saylor Beall does not have the split like that right down the middle.
 

Attachments

  • Phantom-Eric-alws-phantom-of-the-opera-movie-19743666-1943-2435.jpg
    Phantom-Eric-alws-phantom-of-the-opera-movie-19743666-1943-2435.jpg
    125.1 KB · Views: 20

9GUY9

Well-known member
Joined
Oct 12, 2009
Messages
248
Location
Mankato, MN
I just spotted a quick clue to find out if your 707 pump is real or clone. I will call it the Phantom Clue. Look around the oil drain on the bottom. The Saylor Beall does not have the split like that right down the middle.

I didn't notice that, but I did notice all the bolts on mine were metric.

I didn't learn of Saylor Beall or the fact mine was a clone until after I had bought it and was trying to find parts. The guy at the Castair head quarters swore up and down they were made here in MN. The fact that the place was obviously not a foundry didn't help his story. Later when I went back to buy parts for mine and he came out with a hand full of box with nothing but Chinese writing on them pretty much cemented the fact it is Asian made.

When I balked at his parts prices he tried to tell me Castair pumps were different that other similar pumps and I wouldn't be able to get parts else where. Well, I got all my parts from Ken for about 1/2 the price.
 
OP
J

jonathan75

Well-known member
Joined
Mar 27, 2013
Messages
1,451
Location
NC
I didn't notice that, but I did notice all the bolts on mine were metric.

I didn't learn of Saylor Beall or the fact mine was a clone until after I had bought it and was trying to find parts. The guy at the Castair head quarters swore up and down they were made here in MN. The fact that the place was obviously not a foundry didn't help his story. Later when I went back to buy parts for mine and he came out with a hand full of box with nothing but Chinese writing on them pretty much cemented the fact it is Asian made.

When I balked at his parts prices he tried to tell me Castair pumps were different that other similar pumps and I wouldn't be able to get parts else where. Well, I got all my parts from Ken for about 1/2 the price.

Hopefully all our documentation and personal experiences will help others in the future. But the Phantom Clue is great for when you are looking at a Craigslist picture or going to see one in person. If you see the Phantom think twice if you are looking for the real deal.

So since you have the clone tell me your thoughts on it. What do you feel about the quality or the weight of it? Mine is very heavy and 300 pounds when all together. Do you know how much your clone weighs? Do you get the feeling it may last just as long as a Saylor Beall or feels like it was made well?
 

9GUY9

Well-known member
Joined
Oct 12, 2009
Messages
248
Location
Mankato, MN
Hopefully all our documentation and personal experiences will help others in the future. But the Phantom Clue is great for when you are looking at a Craigslist picture or going to see one in person. If you see the Phantom think twice if you are looking for the real deal.

So since you have the clone tell me your thoughts on it. What do you feel about the quality or the weight of it? Mine is very heavy and 300 pounds when all together. Do you know how much your clone weighs? Do you get the feeling it may last just as long as a Saylor Beall or feels like it was made well?

Well, I would prefer to have the real deal and have a actual Saylor Beall. My goal of getting a new compressor started from a very under powered compressor running my blast cabinet. I was initially shopping new stuff, I had a new 7.5hp IR ordered from tractor supply, but after reading enough negative about it I canceled my order. Castair is a local company so you see their stuff around quite a bit and it is considered to be the high end. I was about to pull the trigger on buying a new clone of my compressor for about $2200, when I came across mine used . I got it for $700 with a 10hp 3 phase motor, I planned to just swap out the motor for a single phase and start using it. When I brought it home I decided to clean it up a bit and before long I had it totally disassembled in my garage. I felt it may have been blowing a little oil as well. That led to the rebuild and painting.

Now all said and done I have around $1500 into it. So I am not really that far ahead. Like I said I didn't learn that mine was a clone until after I was into it. Knowing what I know now I probably would have looked for the real thing. But I am pretty confident in mine. My compressor spent 10 years supplying air to the Fairbult MN Ford dealership. So that is a bit of a testament to its ability. The pump is definitely hefty, the Castair guy told me it weighs 280lbs and I believe it. I used my engine hoist to move it. The castings are a bit rough around the edges, but where it matters I feel its well made. The research I did in this project led to some positive reviews of the clone pump from commercial air compressor suppliers.

Sorry that got a bit long winded, and I am not meaning to ***** up your great build thread.
 
Last edited:
To avoid these ads, REGISTER NOW!
OP
J

jonathan75

Well-known member
Joined
Mar 27, 2013
Messages
1,451
Location
NC
Well, I would prefer to have the real deal and have a actual Saylor Beall. My goal of getting a new compressor started from a very under powered compressor running my blast cabinet. I was initially shopping new stuff, I had a new 7.5hp IR ordered from tractor supply, but after reading enough negative about it I canceled my order. Castair is a local company so you see their stuff around quite a bit and it is considered to be the high end. I was about to pull the trigger on buying a new clone of my compressor for about $2200, when I came across mine used . I got it for $700 with a 10hp 3 phase motor, I planned to just swap out the motor for a single phase and start using it. When I brought it home I decided to clean it up a bit and before long I had it totally disassembled in my garage. I felt it may have been blowing a little oil as well. That led to the rebuild and painting.

Now all said and done I have around $1500 into it. So I am not really that far ahead. Like I said I didn't learn that mine was a clone until after I was into it. Knowing what I know now I probably would have looked for the real thing. But I am pretty confident in mine. My compressor spent 10 years supplying air to the Fairbult MN Ford dealership. So that is a bit of a testament to its ability. The pump is definitely hefty, the Castair guy told me it weighs 280lbs and I believe it. I used my engine hoist to move it. The castings are a bit rough around the edges, but where it matters I feel its well made. The research I did in this project led to some positive reviews of the clone pump from commercial air compressor suppliers.

Sorry that got a bit long winded, and I am not meaning to ***** up your great build thread.

Oh it is fine to post on this thread. It is great information you are sharing. You know that even the castings on the Saylor Beall is very rough around the edges. I guess where it matters most is the machined parts of the cast and the quality of the metal. Even my Saylor Beall has air pockets and defects in the aluminum rods for the pistons. But considering it was abused for 17 years it did well and still could be repaired. I wonder if your clone is still made the same now as it was then? Do you know the year it was made?

I would be interested in comparing the running sounds.
 

arkansawer

Well-known member
Joined
Apr 28, 2013
Messages
51
Jon, I too almost messed up with the extra rings. I must of read the ring instructions 5 times until I figured it out. My quincy 308 had a big and small ring for 2 of the slots, 1 regular ring and the oil 3 part scraper. On the double rings the thinner one had to go on top or bottom of the thicker ring with a twist(cone shape) up or down which was decided when you expand the ring in your hand and get the ends to touch. I couldn't see it but when I closed my eyes I could feel it. Sounds weird but I think it worked.

Got impatient last night and reversed the motor and ran the pump for 1/2 hour or so to seat the valves and rings. Luckily I stayed close because 10 minutes in a strange sound started to develop. My head bolts were starting to get loose so I re-torqued to 30 lbs. Sounds low to me. everything seems fine, and the only thing to add are some copper head bolt gaskets and a cork gasket for the labyrinth thingy Ken spoke of which I left off to check to make sure the splash lubrication was working.so I guess it's on to paint and plumbing. Yee haw.
 
OP
J

jonathan75

Well-known member
Joined
Mar 27, 2013
Messages
1,451
Location
NC
Jon, I too almost messed up with the extra rings. I must of read the ring instructions 5 times until I figured it out. My quincy 308 had a big and small ring for 2 of the slots, 1 regular ring and the oil 3 part scraper. On the double rings the thinner one had to go on top or bottom of the thicker ring with a twist(cone shape) up or down which was decided when you expand the ring in your hand and get the ends to touch. I couldn't see it but when I closed my eyes I could feel it. Sounds weird but I think it worked.

Got impatient last night and reversed the motor and ran the pump for 1/2 hour or so to seat the valves and rings. Luckily I stayed close because 10 minutes in a strange sound started to develop. My head bolts were starting to get loose so I re-torqued to 30 lbs. Sounds low to me. everything seems fine, and the only thing to add are some copper head bolt gaskets and a cork gasket for the labyrinth thingy Ken spoke of which I left off to check to make sure the splash lubrication was working.so I guess it's on to paint and plumbing. Yee haw.

Glad you got everything working. Did you run it reversed to help break in or was it an accident? It sounds like your valves are like a car engine. On the Saylor Beall there are no valves to seat since basically they are just breathers with a spring and a plate inside.

What color will you paint yours?

I was thinking about replacing one of my inspection plates with a glass or plexiglass one. That way I can see it work inside. It would be cool to watch it run!
 
OP
J

jonathan75

Well-known member
Joined
Mar 27, 2013
Messages
1,451
Location
NC
I got my contactor, thermal overload and auxiliary contacts in this week.

1.0/SC-E2S-220VAC CONTACTOR 50A, 220-240VAC COIL, 54mm
1.0/SZ-A22T AUX CONTACT 2NO/2NC E02-E4 FRONT
1.0/TK-E2-4200 THERMAL OVERLOAD RELAY 32-42A 54MM

Here are some pictures of the contactor. During my research I found out if you are using IEC rated and not NEMA it is better to size one up on the contactor. Of course for the thermal overload you need to get the correct rating. For example I needed a 40 amp contactor and I got a 50 amp.

http://www.automationdirect.com/adc...tors_-z-_Overloads/32_to_50_Amp/SC-E2S-220VAC
 

Attachments

  • IMG_8163-1.jpg
    IMG_8163-1.jpg
    94.4 KB · Views: 28
  • IMG_8162-1.jpg
    IMG_8162-1.jpg
    114.6 KB · Views: 30
  • IMG_8161-1.jpg
    IMG_8161-1.jpg
    49.8 KB · Views: 28
  • IMG_8160-1.jpg
    IMG_8160-1.jpg
    41.8 KB · Views: 29
  • IMG_8159-1.jpg
    IMG_8159-1.jpg
    45.8 KB · Views: 32
  • IMG_8156-1.jpg
    IMG_8156-1.jpg
    50.9 KB · Views: 29
  • IMG_8155-1.jpg
    IMG_8155-1.jpg
    82.9 KB · Views: 27
OP
J

jonathan75

Well-known member
Joined
Mar 27, 2013
Messages
1,451
Location
NC

Attachments

  • IMG_8172-1.jpg
    IMG_8172-1.jpg
    38.4 KB · Views: 23
  • IMG_8171-1.jpg
    IMG_8171-1.jpg
    28 KB · Views: 24
  • IMG_8169-1.jpg
    IMG_8169-1.jpg
    57.2 KB · Views: 23
  • IMG_8166-1.jpg
    IMG_8166-1.jpg
    45.2 KB · Views: 33
  • IMG_8164-1.jpg
    IMG_8164-1.jpg
    65.3 KB · Views: 26
OP
J

jonathan75

Well-known member
Joined
Mar 27, 2013
Messages
1,451
Location
NC
And these are some extra contacts for the top. If you have no room in your box on the top you can also get some for the side. But I was told you could not use both at the same time. You have to pick between side or top mounting extra contacts. I want more contacts to control other things like maybe a red and green like or some cool under lighting.

http://www.automationdirect.com/adc...tors_-z-_Overloads/Auxiliary_Contacts/SZ-A22T
 

Attachments

  • IMG_8182-1.jpg
    IMG_8182-1.jpg
    68.5 KB · Views: 24
  • IMG_8177-1.jpg
    IMG_8177-1.jpg
    52.8 KB · Views: 19
  • IMG_8175-1.jpg
    IMG_8175-1.jpg
    50 KB · Views: 20
  • IMG_8174-1.jpg
    IMG_8174-1.jpg
    49.3 KB · Views: 18
  • IMG_8173-1.jpg
    IMG_8173-1.jpg
    59.2 KB · Views: 19
OP
J

jonathan75

Well-known member
Joined
Mar 27, 2013
Messages
1,451
Location
NC
Sounds like you're getting close to firing it up :thumbup:

Close but I didn't earn that cigar yet. Part wise I am almost complete. I have a pulley coming on Monday and hopefully some filter housings sometime soon after if the ship docks. Right now I am painting everything which takes a long time due to all the prep work required. I also still need to rebuild all the valves.
 

arkansawer

Well-known member
Joined
Apr 28, 2013
Messages
51
Glad you got everything working. Did you run it reversed to help break in or was it an accident? It sounds like your valves are like a car engine. On the Saylor Beall there are no valves to seat since basically they are just breathers with a spring and a plate inside.

What color will you paint yours?

I was thinking about replacing one of my inspection plates with a glass or plexiglass one. That way I can see it work inside. It would be cool to watch it run!

The 3hp motor had a clockwise rotation. Had to switch #5 and #8 wire to make it run ccw. Had to borrow the wifes magnifying glass for that. hope she doesn't miss it. She is always misplacing things...

Not quite, the valve body holds a dime sized disc of stainless steel, a spring and a disc "seat". The 1/2 hour run form fitted it the disc seat to prevent leakage under no load.

A dark blue implement color is all I can afford. I used to do body work 25 years ago . I had planned on Vari-prime for metal etch, primer, sealer then imron paint but a trip to the auto parts store to get a re-built kit for my Binks 7 paint gun and the subsequent pricing of current paint systems left me no choice.

By the amount of splashing I viewed coming out of the labyrinth I doubt a clear plate viewer would show me much after a second or two.

My crankshaft pulley's "noticeable" wobble seems to have corrected itself. My next problem is the plumbing. The compressor was set up with one unloader head with the line going to a pilot valve which 'of course, I took apart. I won't be doing that again. I think I want it set up so when I walk into the shop I can kick on the compressor to fill the tanks then shut off at 135lbs. or so and also have the option of letting it continuously run if I'm doing a lot of grinding, sanding etc. At this point I don't know if is even feasible.

This rebuild, and following yours and others has been a lot of fun. thanks to ken also for the help.
 
Last edited:
OP
J

jonathan75

Well-known member
Joined
Mar 27, 2013
Messages
1,451
Location
NC
The 3hp motor had a clockwise rotation. Had to switch #5 and #8 wire to make it run ccw. Had to borrow the wifes magnifying glass for that. hope she doesn't miss it. She is always misplacing things...

Not quite, the valve body holds a dime sized disc of stainless steel, a spring and a disc "seat". The 1/2 hour run form fitted it the disc seat to prevent leakage under no load.

A dark blue implement color is all I can afford. I used to do body work 25 years ago . I had planned on Vari-prime for metal etch, primer, sealer then imron paint but a trip to the auto parts store to get a re-built kit for my Binks 7 paint gun and the subsequent pricing of current paint systems left me no choice.

By the amount of splashing I viewed coming out of the labyrinth I doubt a clear plate viewer would show me much after a second or two.

My crankshaft pulley's "noticeable" wobble seems to have corrected itself. My next problem is the plumbing. The compressor was set up with one unloader head with the line going to a pilot valve which 'of course, I took apart. I won't be doing that again. I think I want it set up so when I walk into the shop I can kick on the compressor to fill the tanks then shut off at 135lbs. or so and also have the option of letting it continuously run if I'm doing a lot of grinding, sanding etc. At this point I don't know if is even feasible.

This rebuild, and following yours and others has been a lot of fun. thanks to ken also for the help.

I didn't know that about the valves. I was going to just clean them up but I will be sure to take extra special care to make sure the seat is perfectly smooth and level.

Maybe you can help me with my paint. I had trouble getting the self etching primer from Sherman Williams to stick to brass. Everything else it stuck no problem but the brass it would not. So I went back and sanded back down the brass parts with 220 grit and not the 400 I was using. I should find out this morning if after drying all night if it will stay on. The other problem was that when I would sand down the primer to smooth it out I would get to bare metal too fast or it would just come right off on the brass parts. So do I need to be more gentle or use a finer grit then 400? Or do I just need to lay it on a little thicker?

I am happy to hear your wobble went away. Take some pictures of yours and start a thread if you have a chance.
 
OP
J

jonathan75

Well-known member
Joined
Mar 27, 2013
Messages
1,451
Location
NC

Attachments

  • pulley1.jpg
    pulley1.jpg
    35.2 KB · Views: 51

Mr onetwo

Well-known member
Joined
Apr 6, 2011
Messages
2,006
Location
Coastal Maine
Since brass has zinc in it's composition you might try pickling it. Thoroughly de-grease the parts and then wipe them down with white vinegar.After it sets for a bit, wipe it down and then try the self-etching primer.
 

metal4130

Well-known member
Joined
Feb 11, 2008
Messages
225
Here is the link I used to calculate my pulley. It should come in tomorrow. The picture is what you will see after you calculate it on their website.

http://www.blocklayer.com/pulley-belteng.aspx

And this is where I purchased my pulley from. I got the 2B70-SK Pulley and SKX1-3/8 Bushing.

http://www.electricmotorwarehouse.com/pulley/two_groove_a_b_pulley_bushed_QTL.htm

I don't really trust that belt measurement at all. I have more or less the exact same set-up and I laid it out on my bench and measured with a string before I bought my belts. I ended up with a B79 belt that has an 82" outer circle.
 
OP
J

jonathan75

Well-known member
Joined
Mar 27, 2013
Messages
1,451
Location
NC
Since brass has zinc in it's composition you might try pickling it. Thoroughly de-grease the parts and then wipe them down with white vinegar.After it sets for a bit, wipe it down and then try the self-etching primer.

Thanks, I will try this.

I don't really trust that belt measurement at all. I have more or less the exact same set-up and I laid it out on my bench and measured with a string before I bought my belts. I ended up with a B79 belt that has an 82" outer circle.

I didn't set my center distance and left it at default. If you change the center distance it may be correct.

Where did you buy your belts? I am going to try the old belts first.
 
OP
J

jonathan75

Well-known member
Joined
Mar 27, 2013
Messages
1,451
Location
NC
Since brass has zinc in it's composition you might try pickling it. Thoroughly de-grease the parts and then wipe them down with white vinegar.After it sets for a bit, wipe it down and then try the self-etching primer.

If the primer is sanding off on just a few raised parts will the paint bond to the surrounding areas and be okay? Or will the paint not stick to the bare metal? I have a few areas where it is just 1/2 mm round spot or two here or there. It is taking me forever to touchup those spots, sand and have to keep doing it. The diecast metal is very bumpy and sanding likes to focus on the highs and not the lows.
 
OP
J

jonathan75

Well-known member
Joined
Mar 27, 2013
Messages
1,451
Location
NC
I got the official Saylor Beall paint put in some spray cans for me at a local automotive paint store. It seems to work great and they even put a nice label on it with the Kish paint number. The tank I will have someone come and paint that but I will do everything else with some rattle cans.

As you can see from the pictures I am having some trouble with some fibers in my paint. I think it is coming from my filter. So it looks like I will cover those up and see if it helps.

Now this is the problem. After every primer coat I will sand it down because it is very rough but every time after I sand there will be some primer that comes off. Do I have to keep going over and over again until this does not happen or can I paint with it like this? Will the paint stick to the surrounding areas and help it bond? The cast metal has too many ridges and valleys and it makes sanding very difficult. It seems like paint will always come off unless I get it very thick but at $16 a can I would really like to use less of this primer. I have been through four cans already.
 

Attachments

  • IMG_8199-1.jpg
    IMG_8199-1.jpg
    74.4 KB · Views: 70
  • IMG_8198-1.jpg
    IMG_8198-1.jpg
    79.9 KB · Views: 64
  • IMG_8197-1.jpg
    IMG_8197-1.jpg
    66.9 KB · Views: 64
  • IMG_8196-1.jpg
    IMG_8196-1.jpg
    73.2 KB · Views: 62
  • IMG_8195-1.jpg
    IMG_8195-1.jpg
    66.2 KB · Views: 69
  • IMG_8194-1.jpg
    IMG_8194-1.jpg
    66.8 KB · Views: 72
  • IMG_8184-1.jpg
    IMG_8184-1.jpg
    77.6 KB · Views: 84
OP
J

jonathan75

Well-known member
Joined
Mar 27, 2013
Messages
1,451
Location
NC
I don't really trust that belt measurement at all. I have more or less the exact same set-up and I laid it out on my bench and measured with a string before I bought my belts. I ended up with a B79 belt that has an 82" outer circle.

Is the center of your pulleys 21 13/16 apart? After playing around with it that is what it came up with.
 

Attachments

  • 82inch_belt_jpg.jpg
    82inch_belt_jpg.jpg
    39.5 KB · Views: 26

arkansawer

Well-known member
Joined
Apr 28, 2013
Messages
51
Jon, it's been 25 years so the new products I am unfamiliar with. I always have some sort of primer over bare metal. Anything metal should be totally free of any oil or contaminants. I usually use a lacquer thinner or acrylic enamel reducer applied to a lint free rag(cotton) to wipe down bare metal prior to and after sanding bare metal then apply self etching primer. On my air tank I might wet sand with a gallon of water in a bucket mixed with a little Dawn dishsoap then garden hose off then a quick dry off with compressed air to get all the nooks and crannies dry. prime immediately.The primer can be scuffed with 400 grit sandpaper to prevent cutting through to bare metal.

Once it's sanded wipe off with a tack rag and apply a sealer that works well with the primer and paint brands you decide on. I then usually give it a coat of paint and wet sand any bad spots with 400 grit. Then apply 2 coats or whatever it takes.

I'm polishing my brass or I would be contacting a shop to see what self etching primer is being used now on brass. Back then we had Vari-prime- used to work really well.

There are some good body and paint forums on the net. Maybe spend a few hours there for current advice.
 

EOC_Jason

Well-known member
Joined
Jun 25, 2012
Messages
11,388
Location
Bentonville, AR
Does it say you need to sand it after priming? I would assume you would only do that on a smooth surface to prevent the orange peel look... If you need to scuff up the primer, maybe go over gently with a green scotch-brite pad?
 

arkansawer

Well-known member
Joined
Apr 28, 2013
Messages
51
Re: Should I buy this Saylor-Beall?

Holy Toledo Batman . . . . that thing is BEAST . . . .
. . . . . 120 gallon tank and that compressor for $80 . . . . wow!

Once you get the ole girl fully restored, you'll have to make sure you keep an external air hose for all the neighbors to use . . . ie Community Air !! :rocker:

Just don't do what I did. A neighbor used my "community air tank" one day and left the air chuck on top of a outside barrel still hooked up. it fell onto the cement, kicked the air chuck out and the fitting stayed wide open the hose whooshed back and forth for awhile.. I came back from fishing the next day and found out my 5 hp craftsman was running for over a day non-stop. I unplug my compressor when not in the shop now.
 
To avoid these ads, REGISTER NOW!
Top Bottom