To avoid these ads, REGISTER NOW!

Scale Model Dozer Ride On For My Son

OP
D

dozerbuilder01

Well-known member
Joined
Jun 20, 2011
Messages
180
Location
Far Northwest Burbs of Chicago
The center lever is the transmission shifter. On the early Cats blade control wouldve been an aftermarket add-on stuck off the operator's right side (usually) since they didnt make blades until WW2, they werent "dozers" they were ag tractors meant for pulling rather than pushing.

Cool project btw and great job thus far.

Thanks for the info.

This is amazing. What an awesome project. How old is the little guy now?

He is 2 years 5 months. Still have a lot of time until he can ride it but I hope to take it to shows with him next summer/fall.

I asked because you seemed to have a good handle on the innerworkings of a dozer, not that CAT is the only manufacturer of dozers

I appreciate it but I actually don't know a lot about them. The biggest mistake I've made so far is having a fixed track tensioner. At the time, I thought it would be fine since this really isn't going to do much real work where there would be large rocks or branches. I think I have a fix for it though that I can do later. I'm having fun figuring this whole thing out; one of the reasons why I'm doing this.

I was surprised to see your shop. I expected it was somewhat larger till I saw the photos.

I always wanted a bigger garage. Still do. But this website has made me appreciate what I have. Seeing what other people have done with small garage gives me good ideas for mine. I'm sure everyone here would agree that a garage is never big enough.

What do you figure the weight is going to be ?

About 800-900 lbs. I haven't updated weights since I did the plow so I'm not sure.
 
To avoid these ads, REGISTER NOW!
OP
D

dozerbuilder01

Well-known member
Joined
Jun 20, 2011
Messages
180
Location
Far Northwest Burbs of Chicago
So I got the plow from my brother in law.

BD0528_zps0f2c8a61.jpg


And I took everything apart to mount the linkage and mock up the cylinders to make sure everything moves like I expected.

BD0529_zps8a60a772.jpg


Haven't been taking a bunch of pictures. Time is getting scarce around here so I gotta get moving.

BD0516_zpsde419cc3.jpg


Put it on the dozer to make sure things clear and move like I expected.

BD0524_zps6f633beb.jpg


BD0525_zpse5ef1978.jpg


IMG_26781_zpsf6c74360.jpg


I'm very happy with how it's turning out (even though this thing is completely ridiculous). I still have a lot of little work to do. I hope to do a full test at my brothers house around Dec/Jan before I take it all apart and start the painted process.
 
Last edited:

gregtwojeeps

Well-known member
Joined
Jul 30, 2013
Messages
5,096
Location
Ky
Man oh man, this dude has some serious skills and talent. :thumbup:

I wish I could get my old brain to work one millionth of what the OP's does.
 

BFBOB

Well-known member
Joined
Sep 20, 2011
Messages
5,073
Jeeze louise! I opened this thread expecting to find some little pedal car type thing!:willy_nil

Dude, you've got some serious issues
(wish I did too)
 

pertneer

Member
Joined
Oct 17, 2009
Messages
18
Location
Northern, Il
I don't know how I missed this before but I wish I had been following this from the beginning. I would have offered up my services just from some information on the design. I understand why you build things in your garage. There is just not nearly as much fun in buying something. I build my own CNC Plasma and have been looking for a new project. I can think of more than moving snow as work for something like this. With horses, they produce a lot of shall we say "fertilizer" that seams to need moved on a regular basis. Skid loader would be ideal, but not nearly as much of a cool factor.

I don't know if you are willing or if it has been asked before, but would you be willing to share this design? I have been a machinist for 20+ years and recently picked up working with cad, but I am no engineer. so designing something this large is a challenge. Also I live in Northern Il too and would love to come see this in person sometime. I visit my son from time to time in Gernee so not to far out of the way. Oh and if your friend is not have the capacity of cutting larger pieces let me know I have a 4x8 foot table.
 

Bsj04

Well-known member
Joined
May 28, 2012
Messages
194
Location
Aledo, TX
Awesome project. I hope to be able to do something like this for my daughter one day! Probably won't be nearly as cool as your tho
 
OP
D

dozerbuilder01

Well-known member
Joined
Jun 20, 2011
Messages
180
Location
Far Northwest Burbs of Chicago

I dig it. I printed it out and it's in my garage.

I'll give 20.00 to drive it for 5 minutes when it's done.

Deal.

so does he get a back hoe when he turns 4?

Thought about it. I'd actually like to do a tube frame tank track vehicle of some sort. Or a small Jeep. I've seen those stamped steel Willys bodies you can buy and put on lawnmowers. I'd build my own frame though. That will be for child #2. Which, by the way is due at the end of March. Another boy. Cats out of the bag now.

I don't know how I missed this before but I wish I had been following this from the beginning. I would have offered up my services just from some information on the design. I understand why you build things in your garage. There is just not nearly as much fun in buying something. I build my own CNC Plasma and have been looking for a new project. I can think of more than moving snow as work for something like this. With horses, they produce a lot of shall we say "fertilizer" that seams to need moved on a regular basis. Skid loader would be ideal, but not nearly as much of a cool factor.

I don't know if you are willing or if it has been asked before, but would you be willing to share this design? I have been a machinist for 20+ years and recently picked up working with cad, but I am no engineer. so designing something this large is a challenge. Also I live in Northern Il too and would love to come see this in person sometime. I visit my son from time to time in Gernee so not to far out of the way. Oh and if your friend is not have the capacity of cutting larger pieces let me know I have a 4x8 foot table.

I'm going to PM you about a few things. As for sharing the plans, I'm not sure yet. There are some things I still make the old school way and just build it as I go. I try to load those things back into the file but it's not 100%. I want to see how well it works when it's done and then I'll think about what to do.

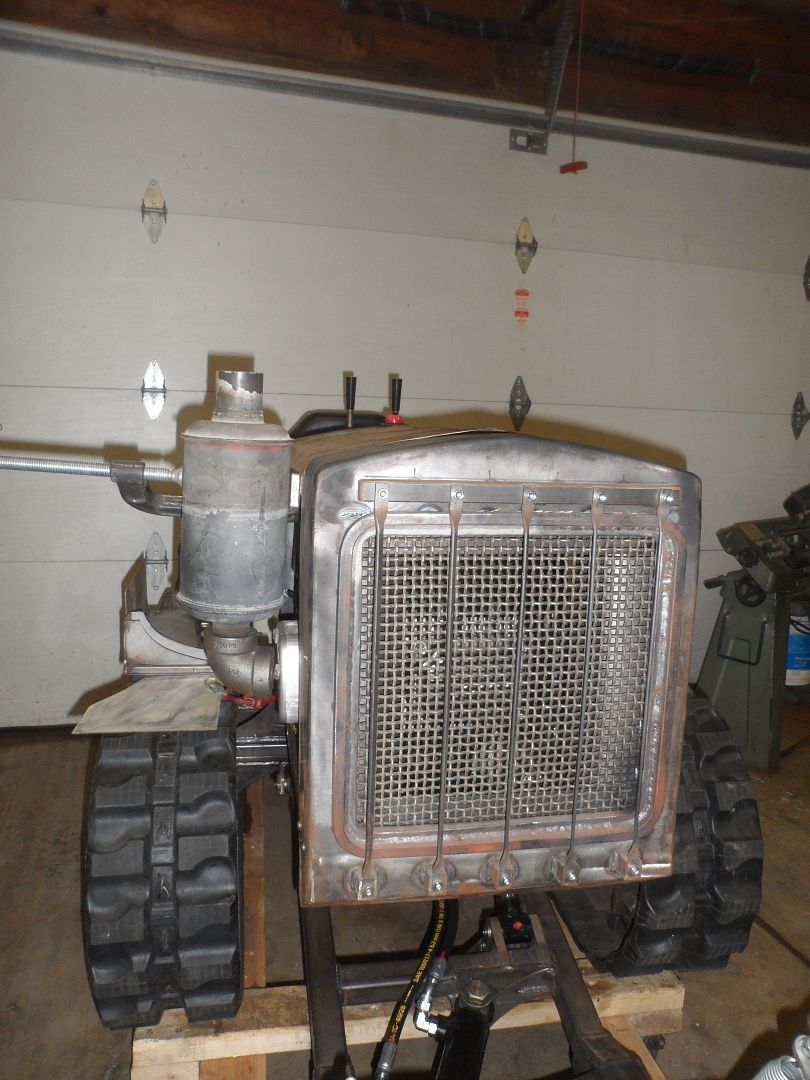
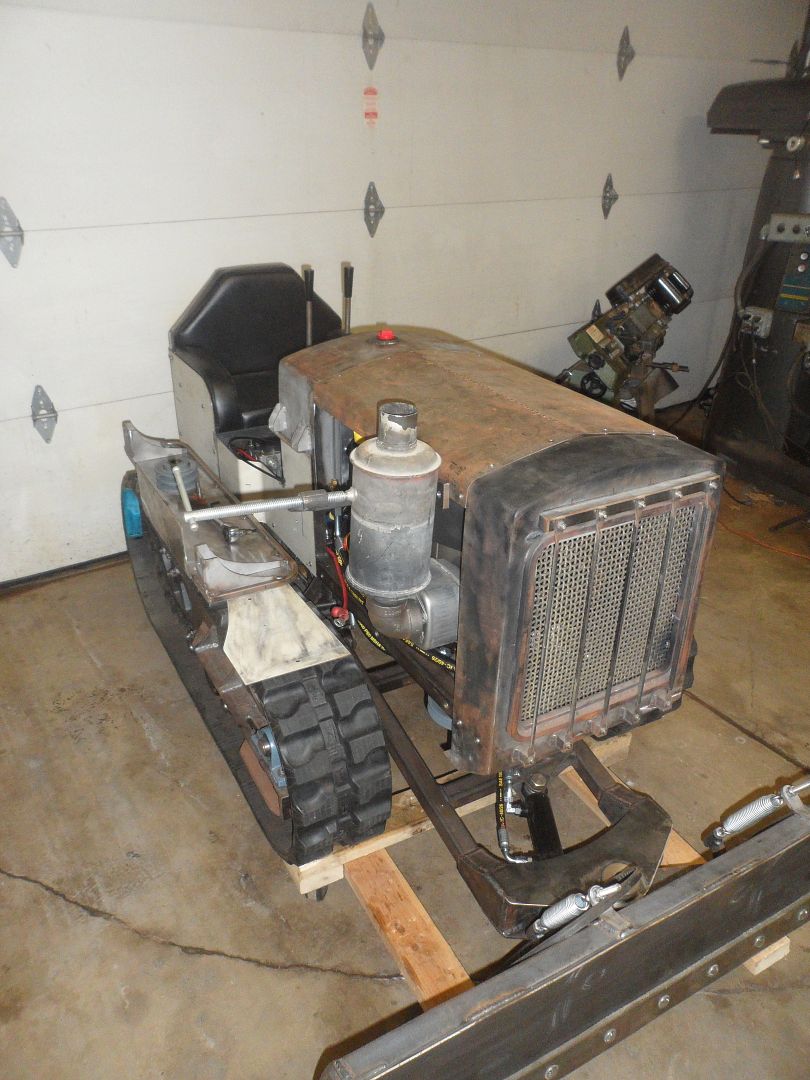
So I figured I'm over due for an update. It's crunch time now. With the new baby on the way, I'd like to get this thing done so I can focus on the family. This project has been very intense. Now it's all the little detail work to finish up.

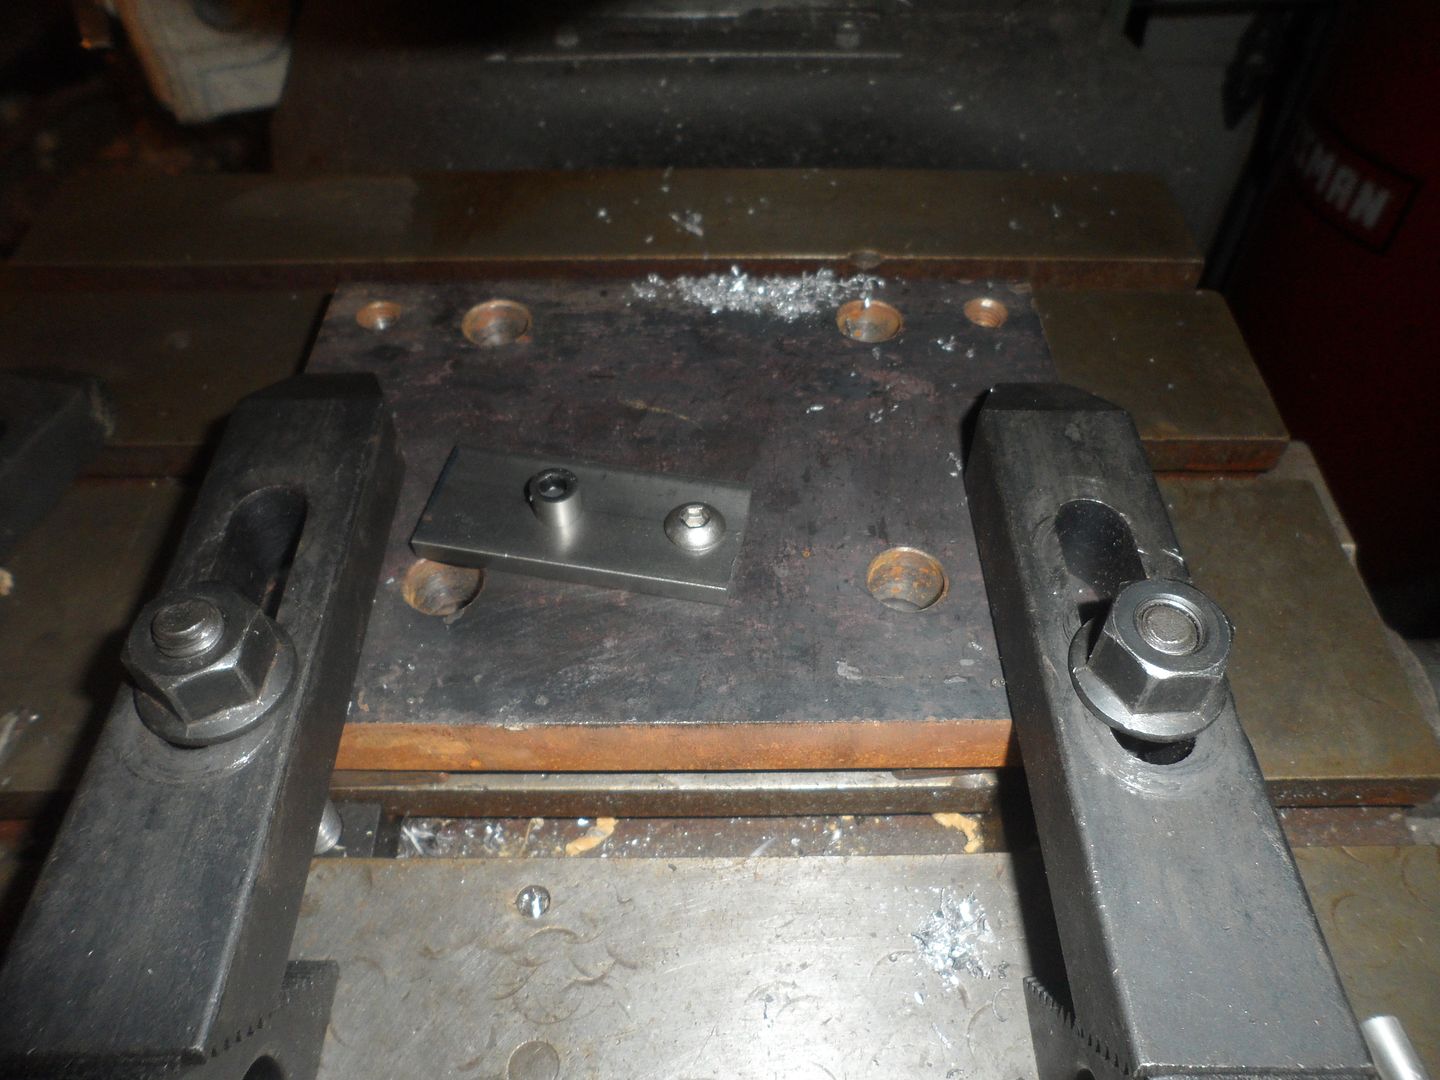
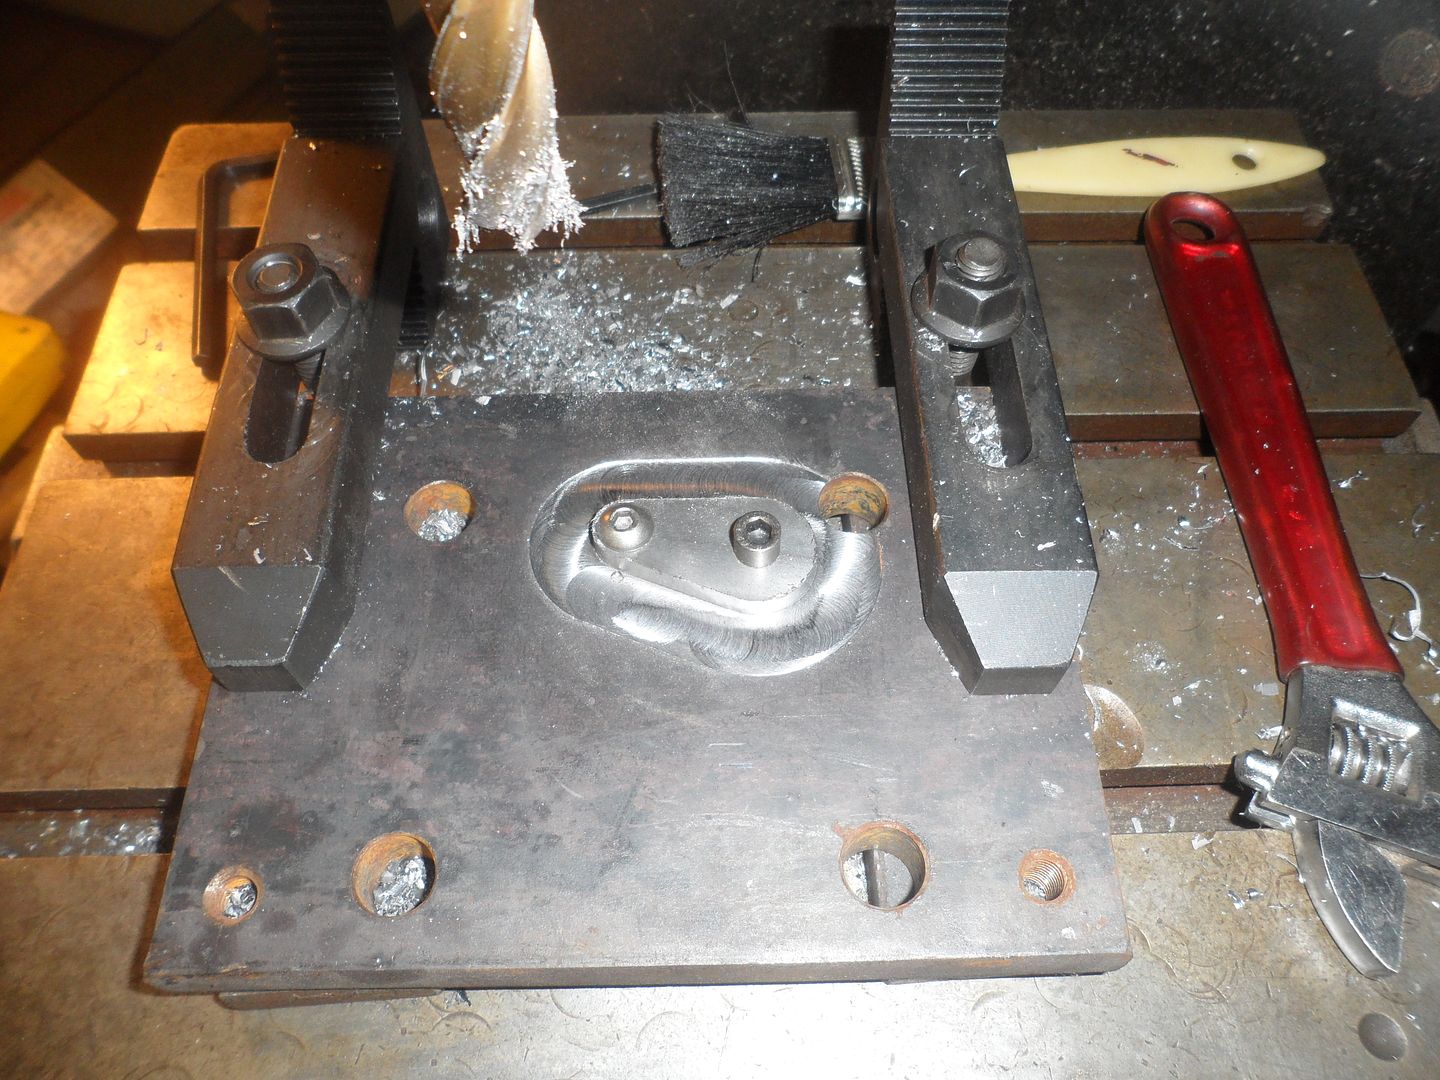
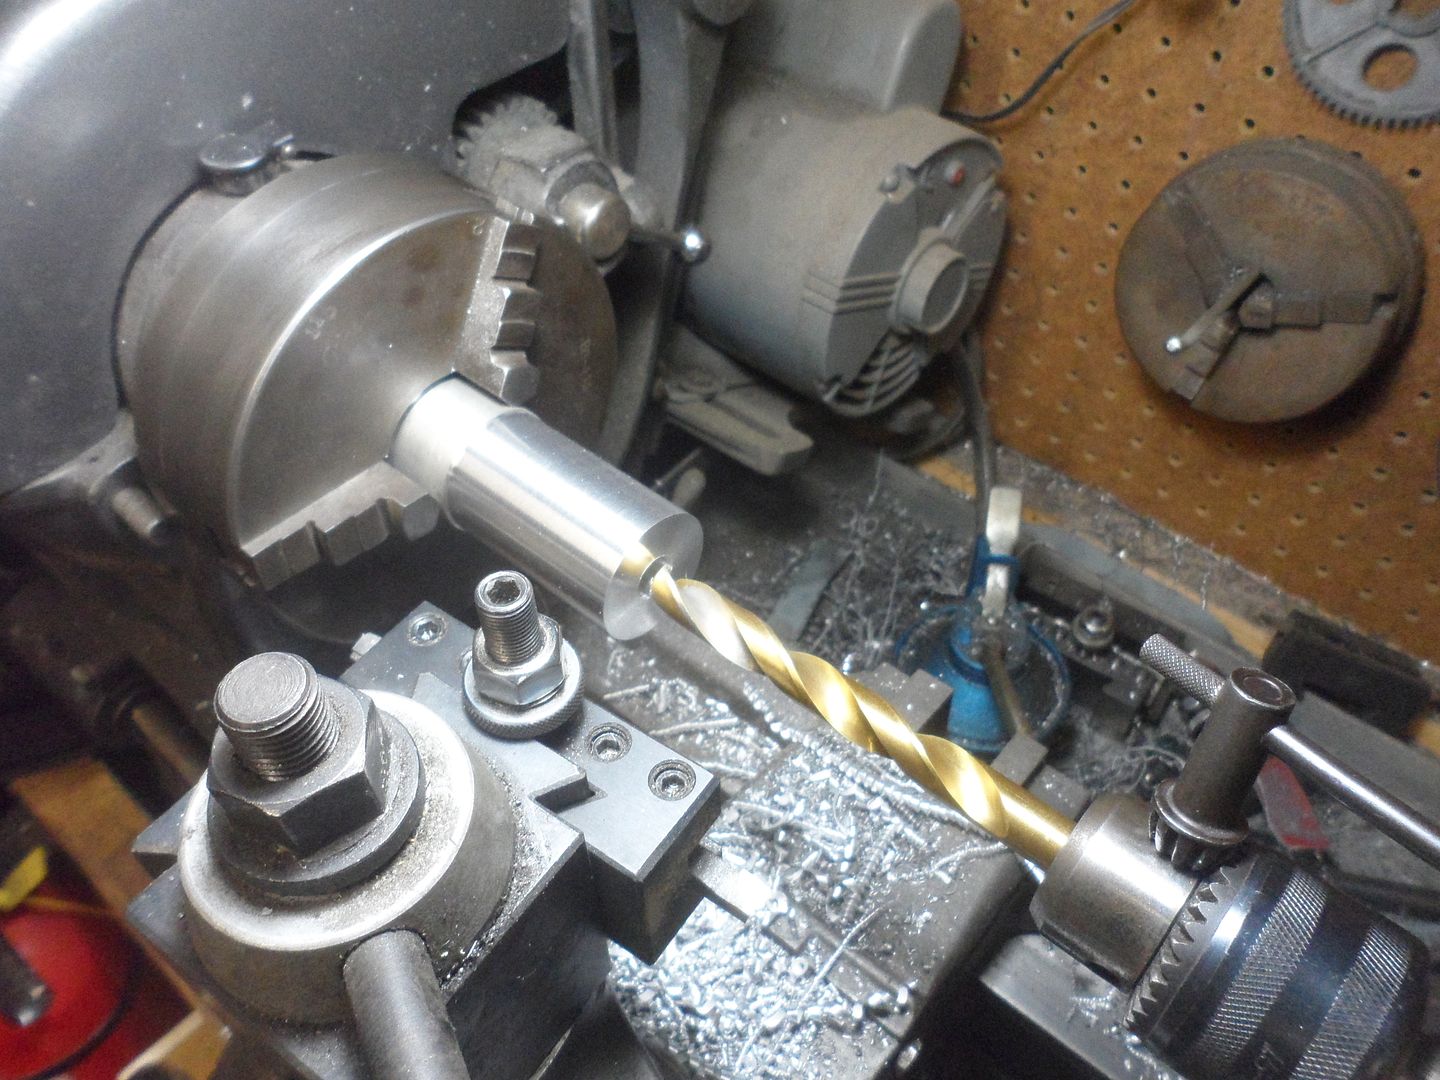
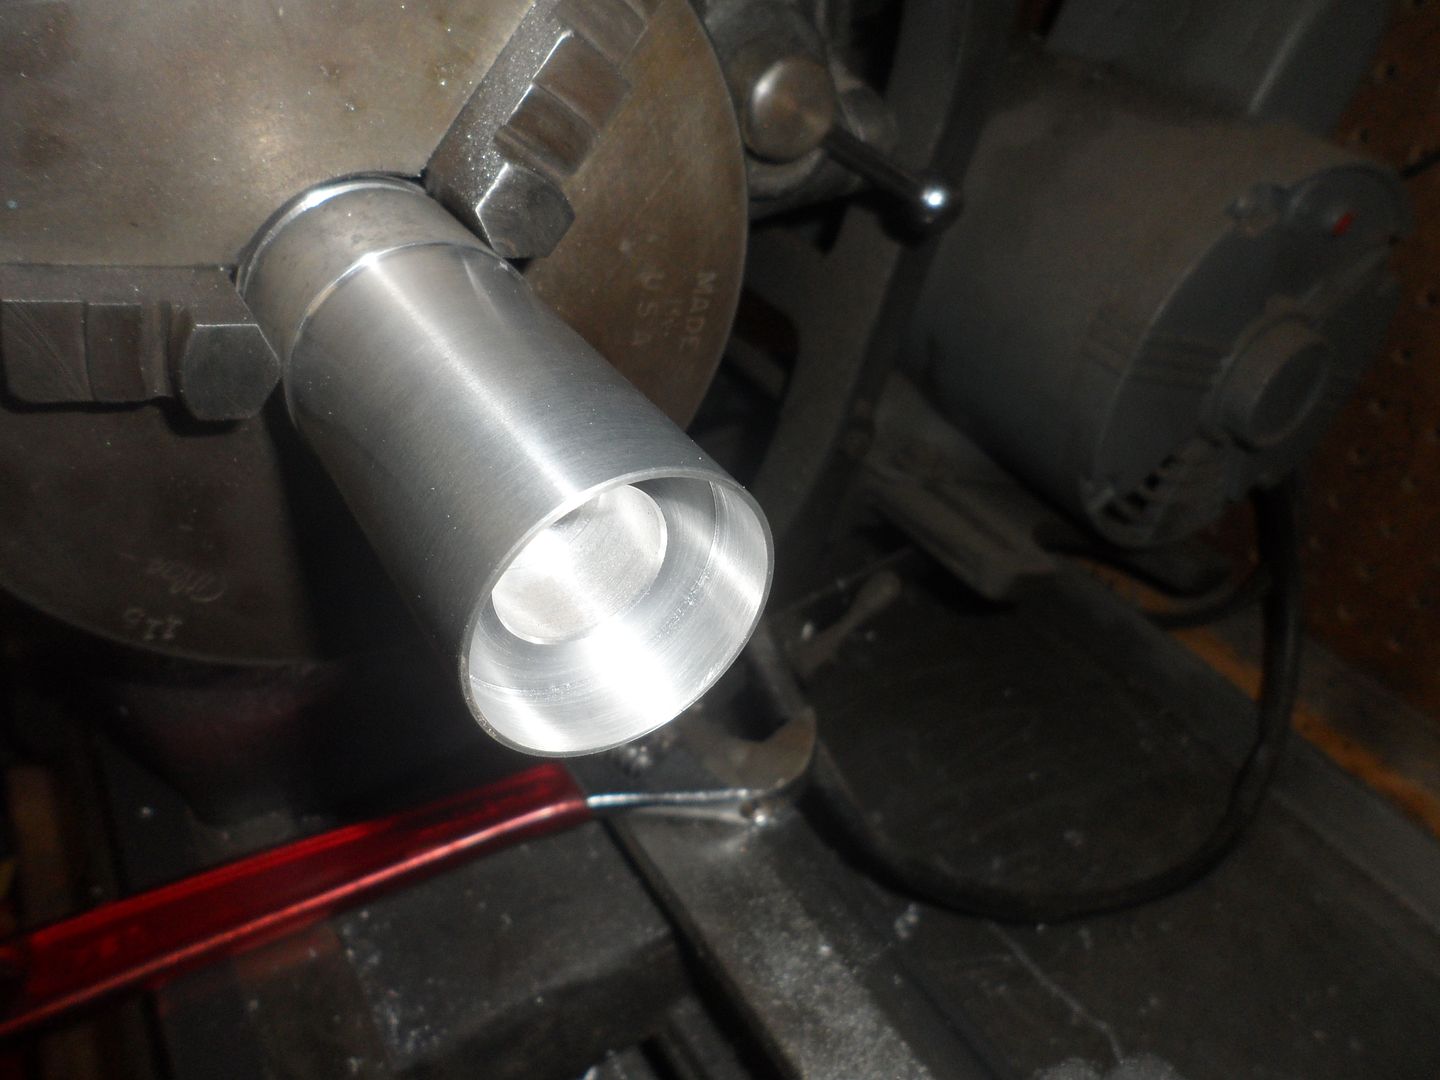
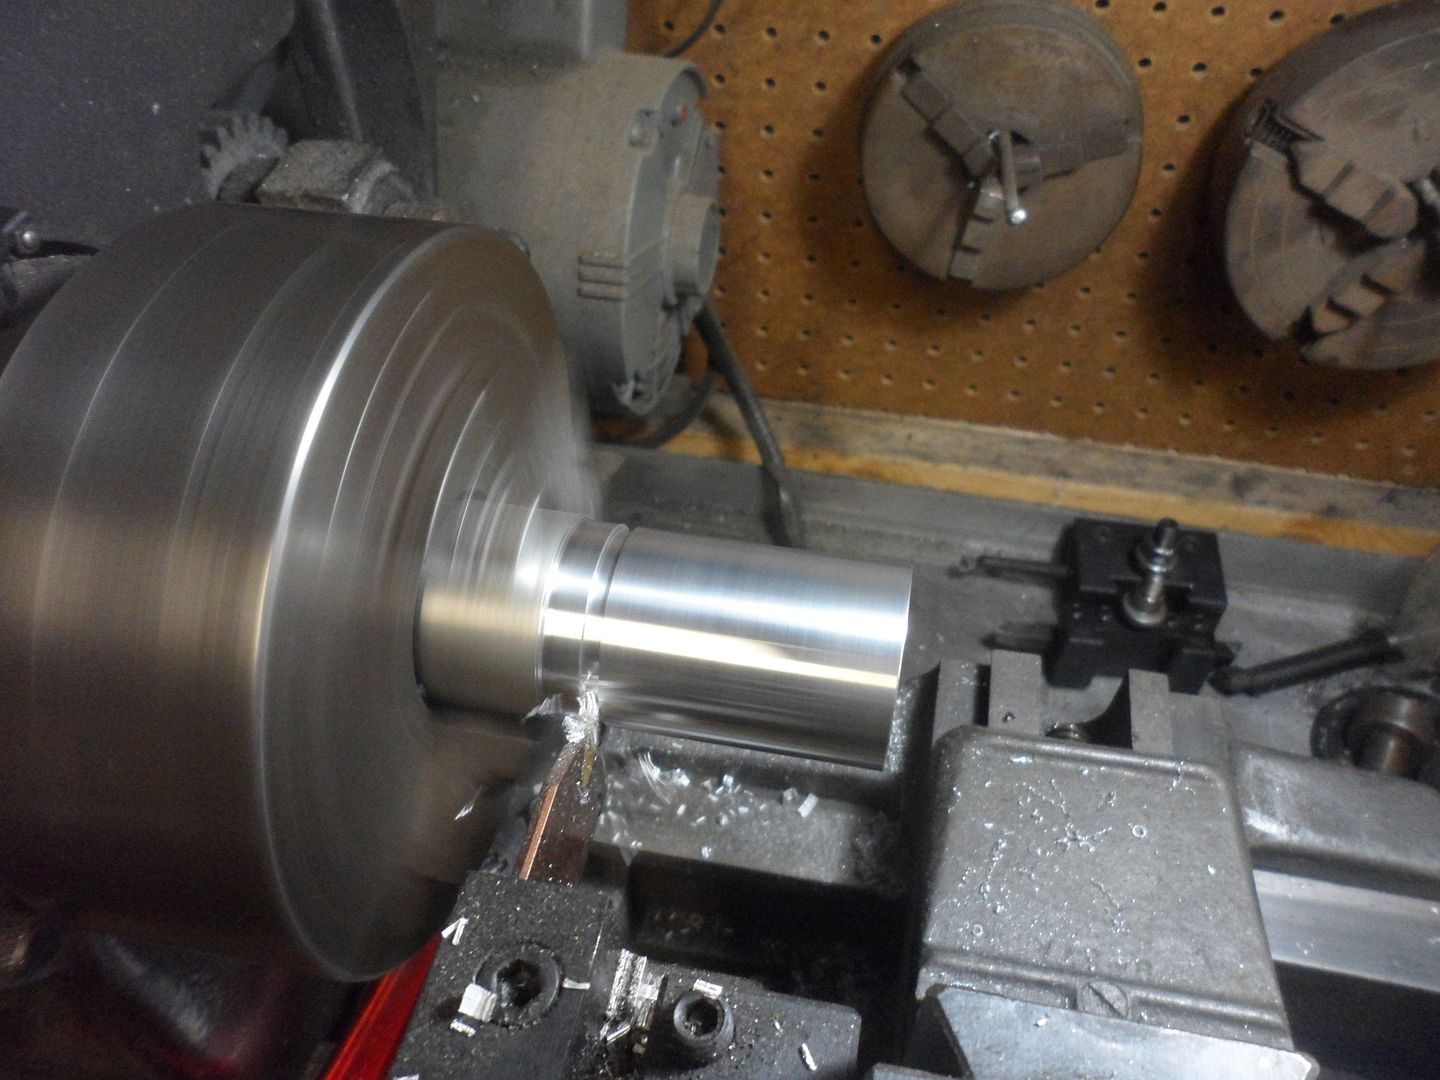
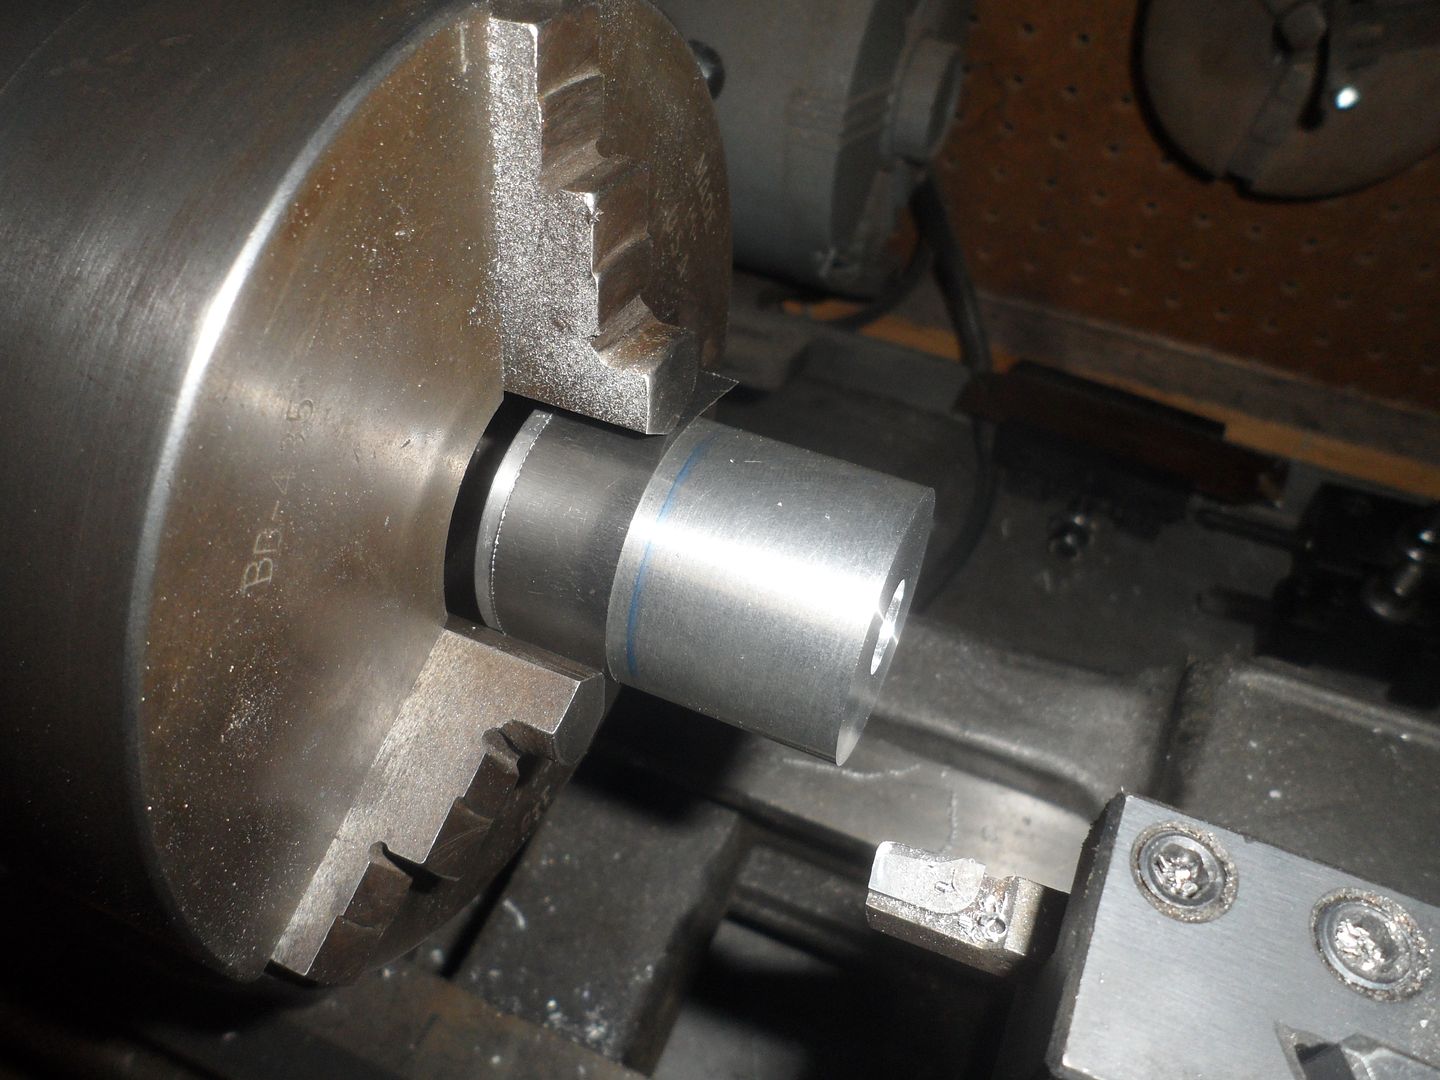
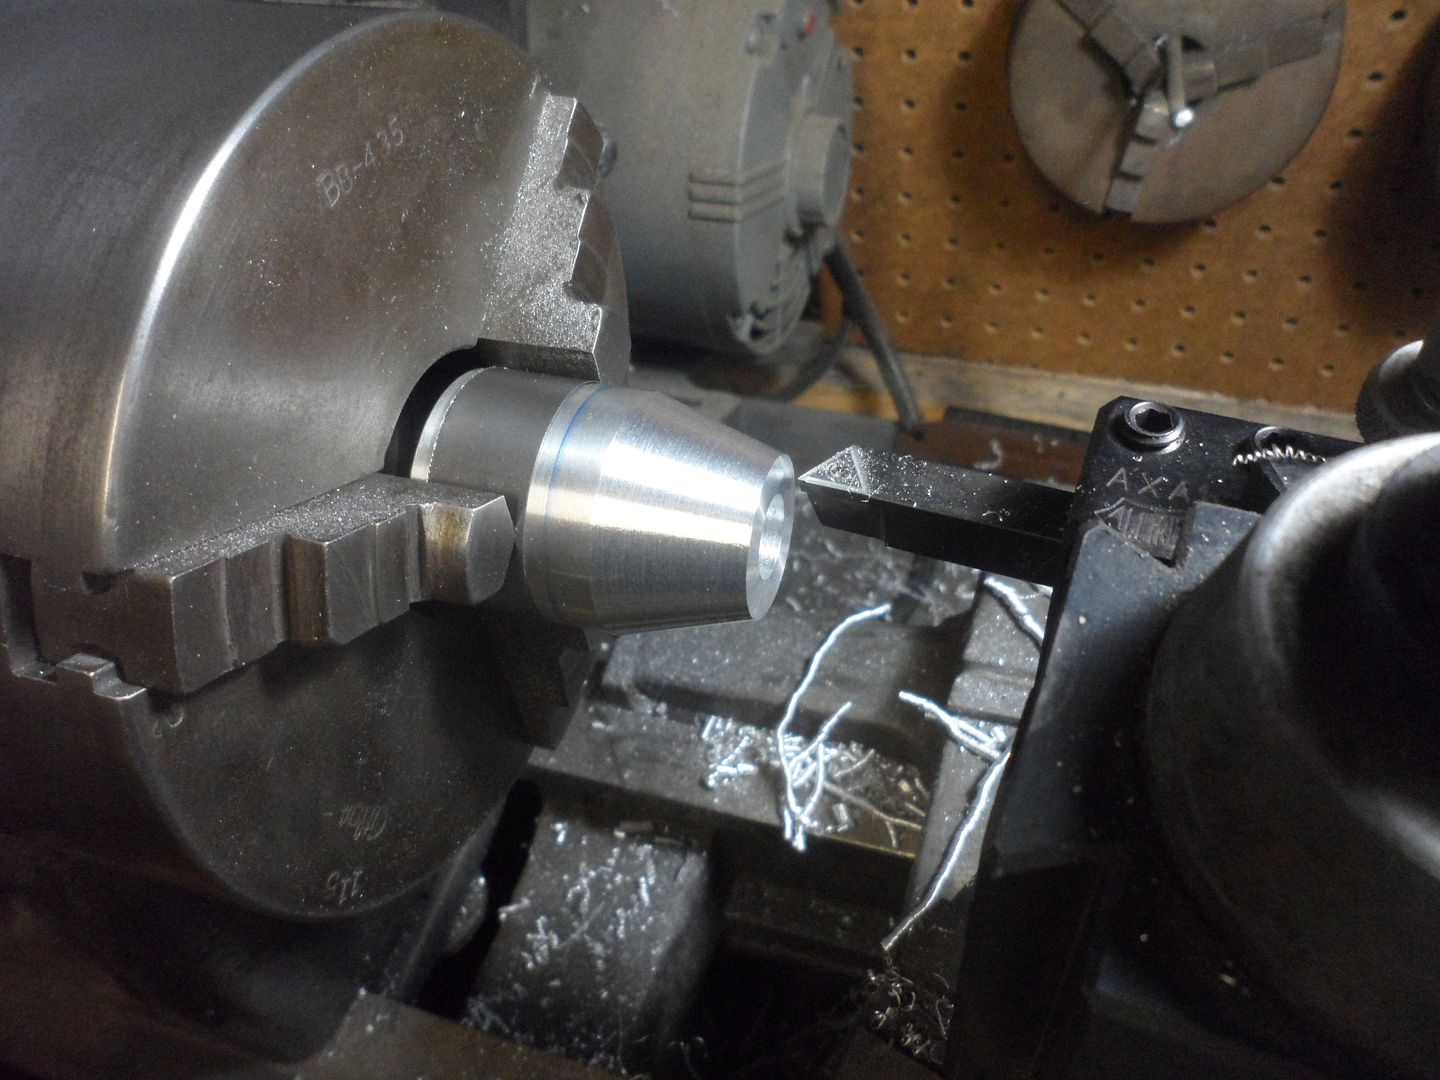
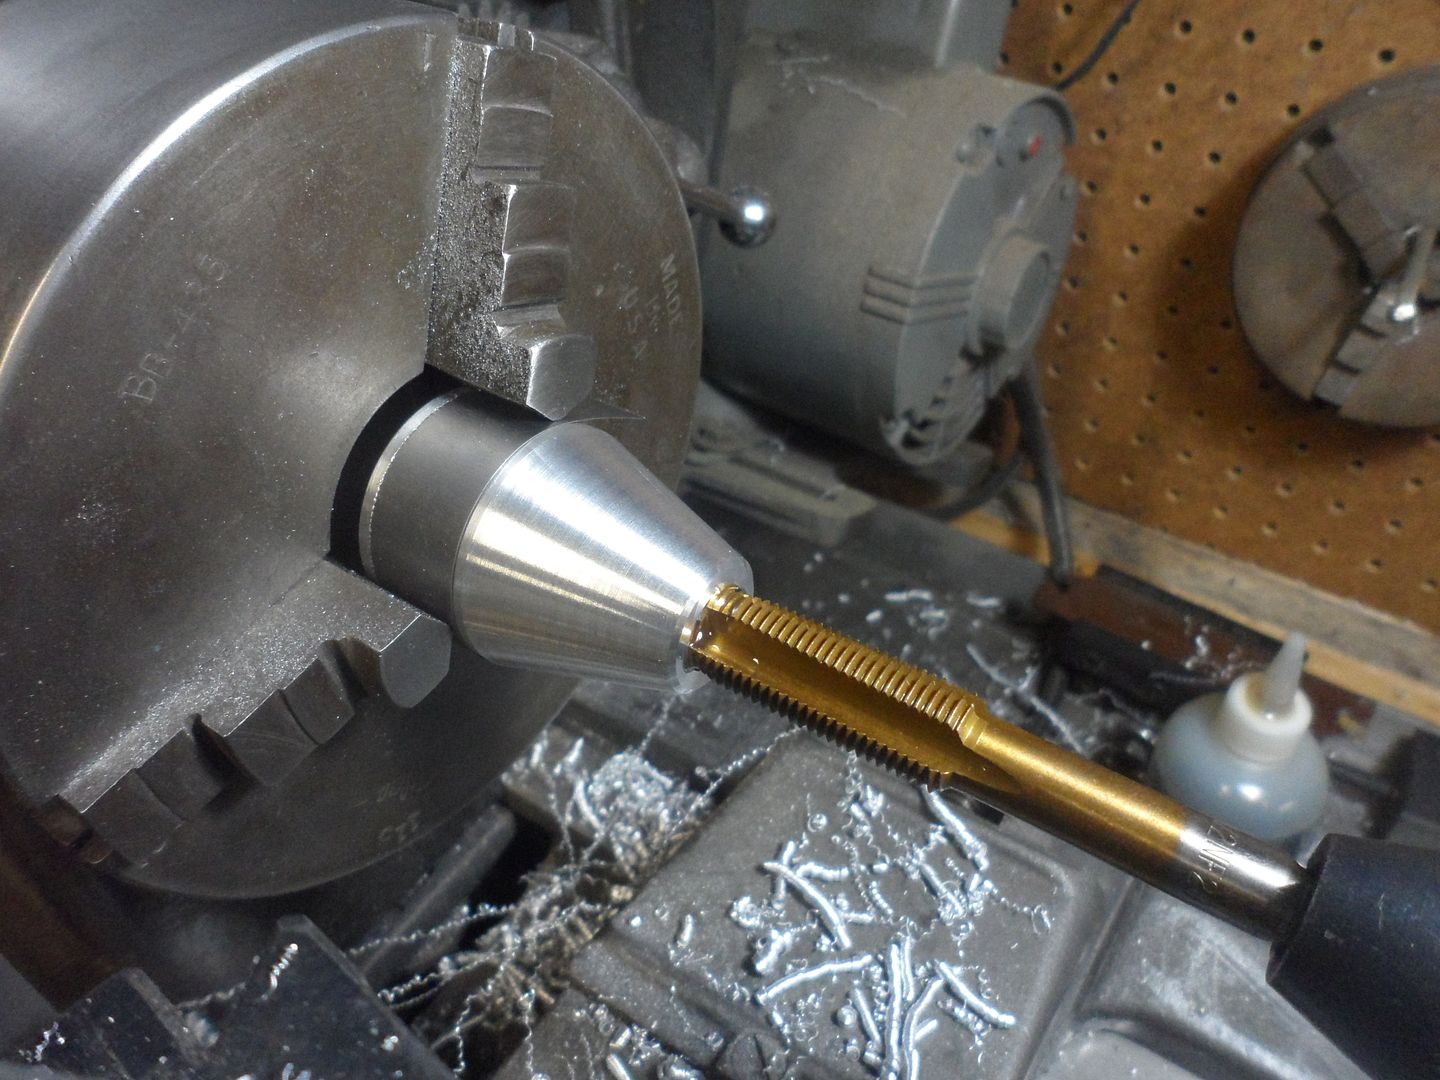
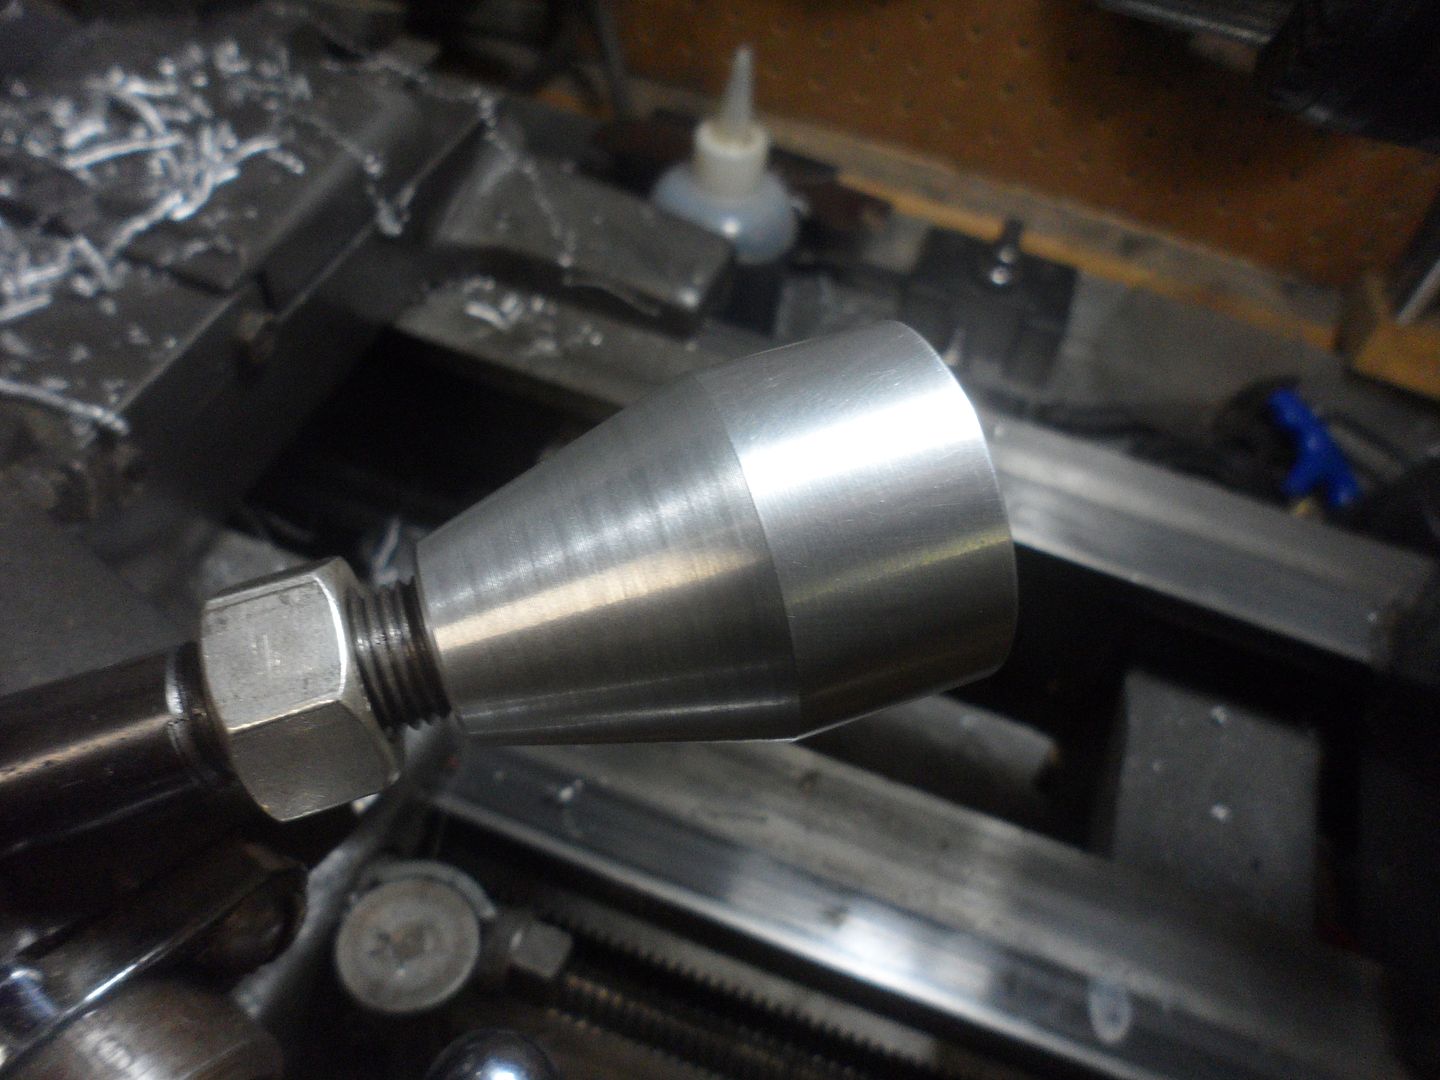
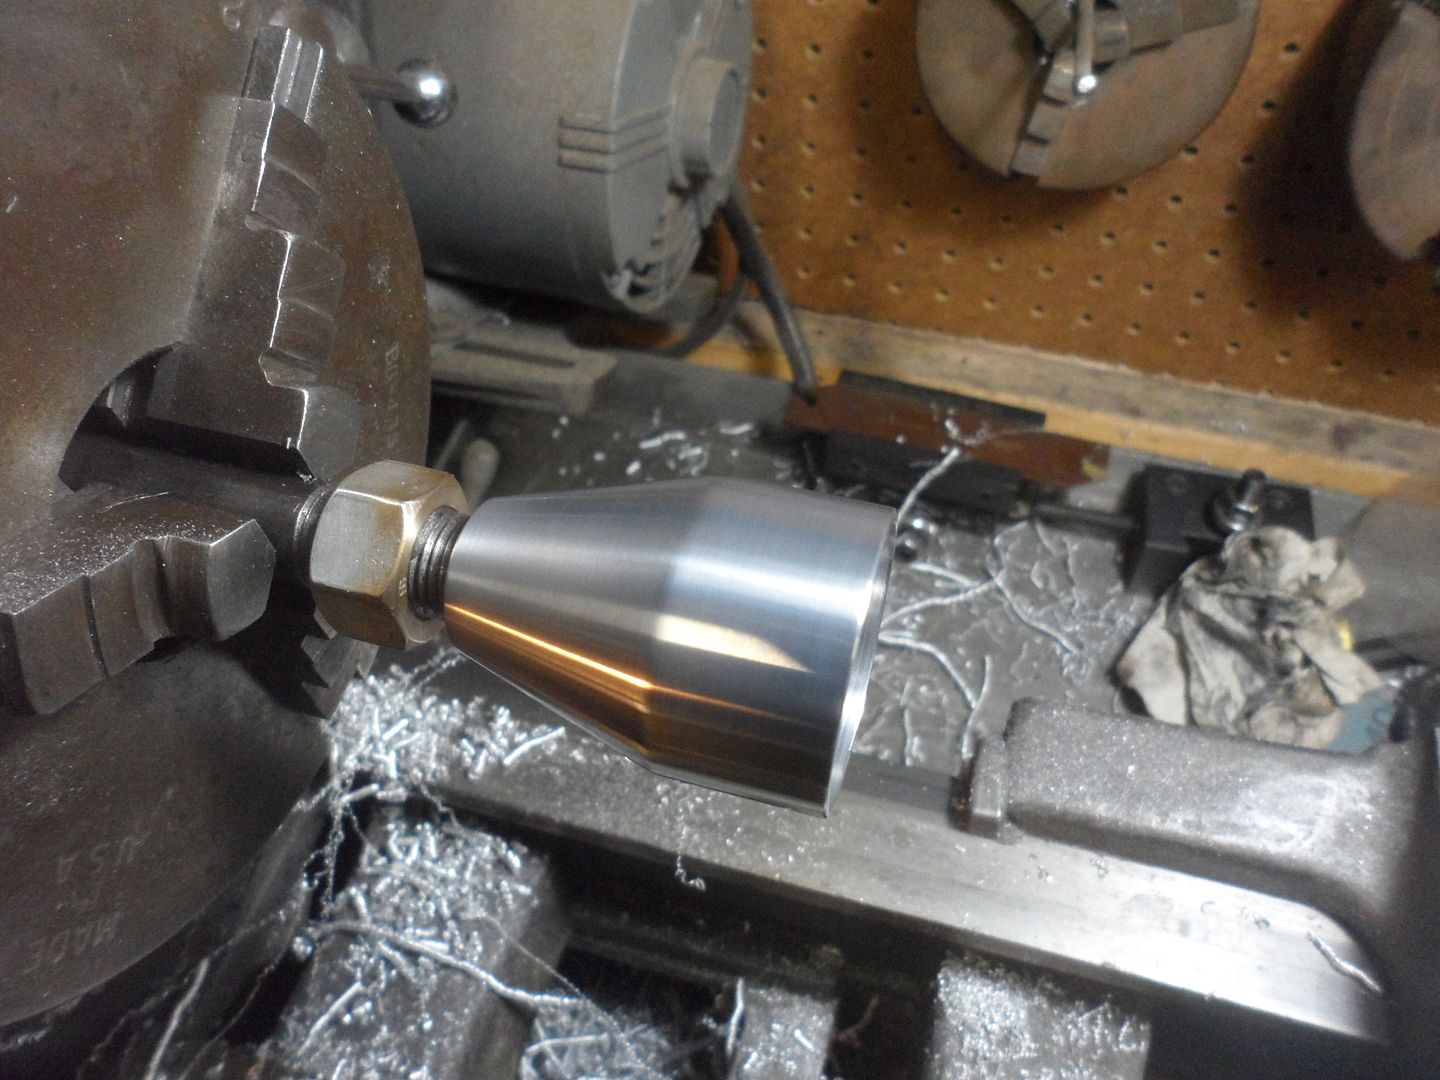
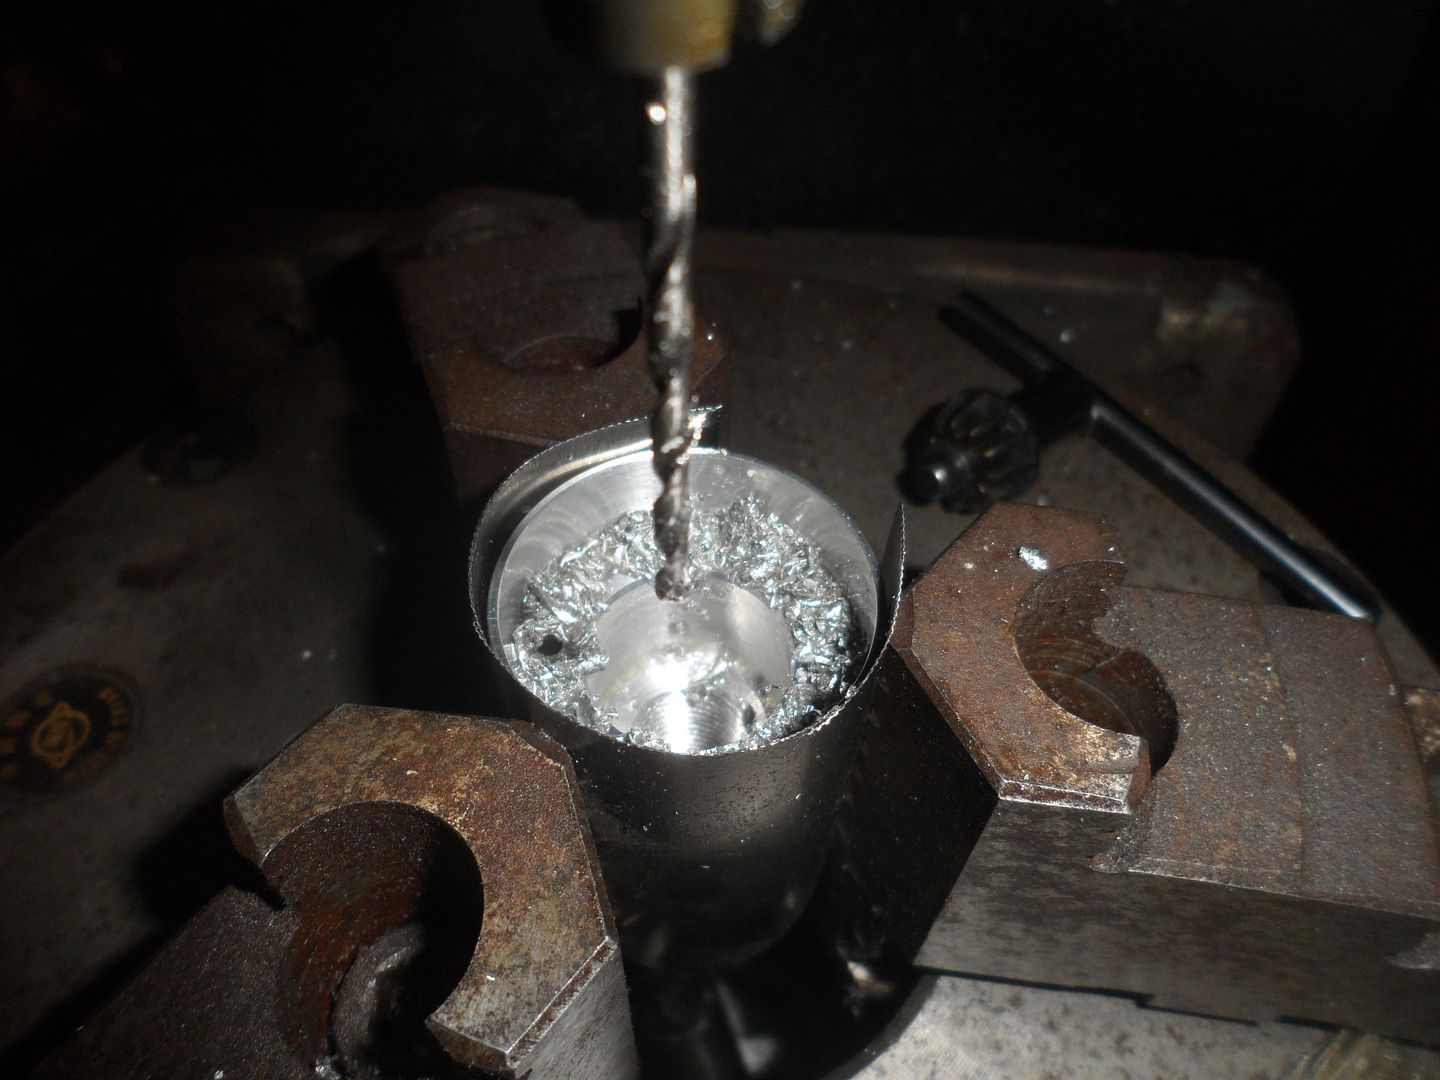
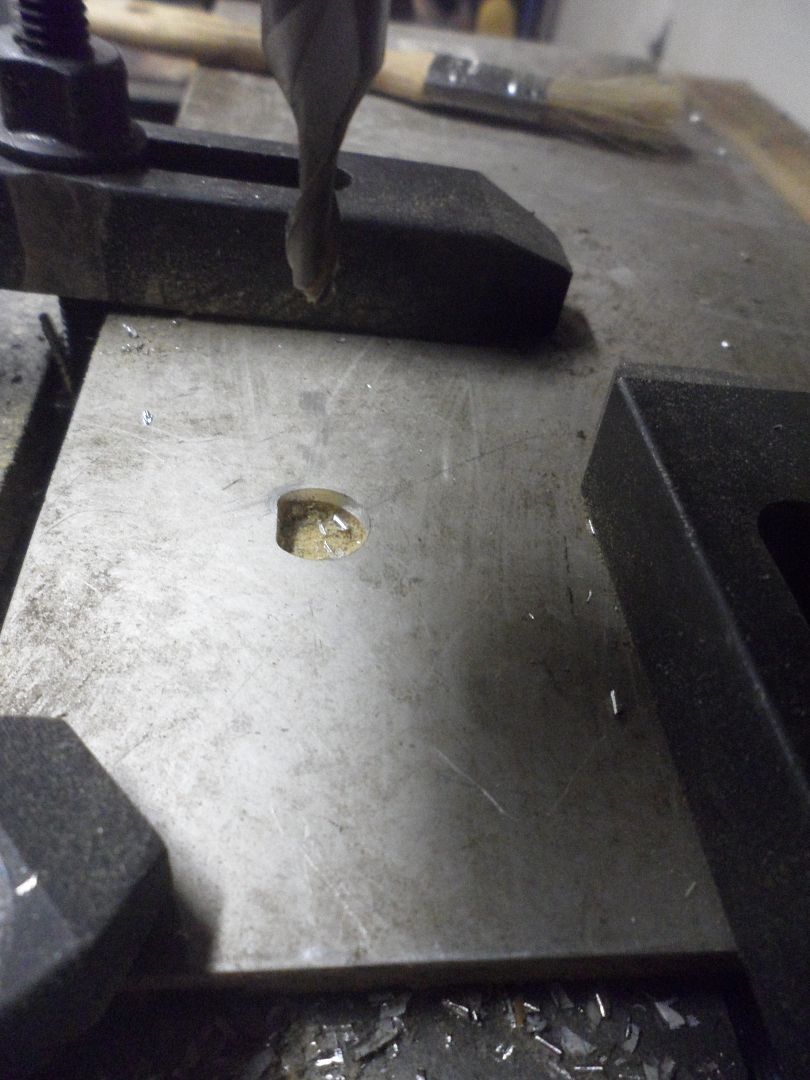
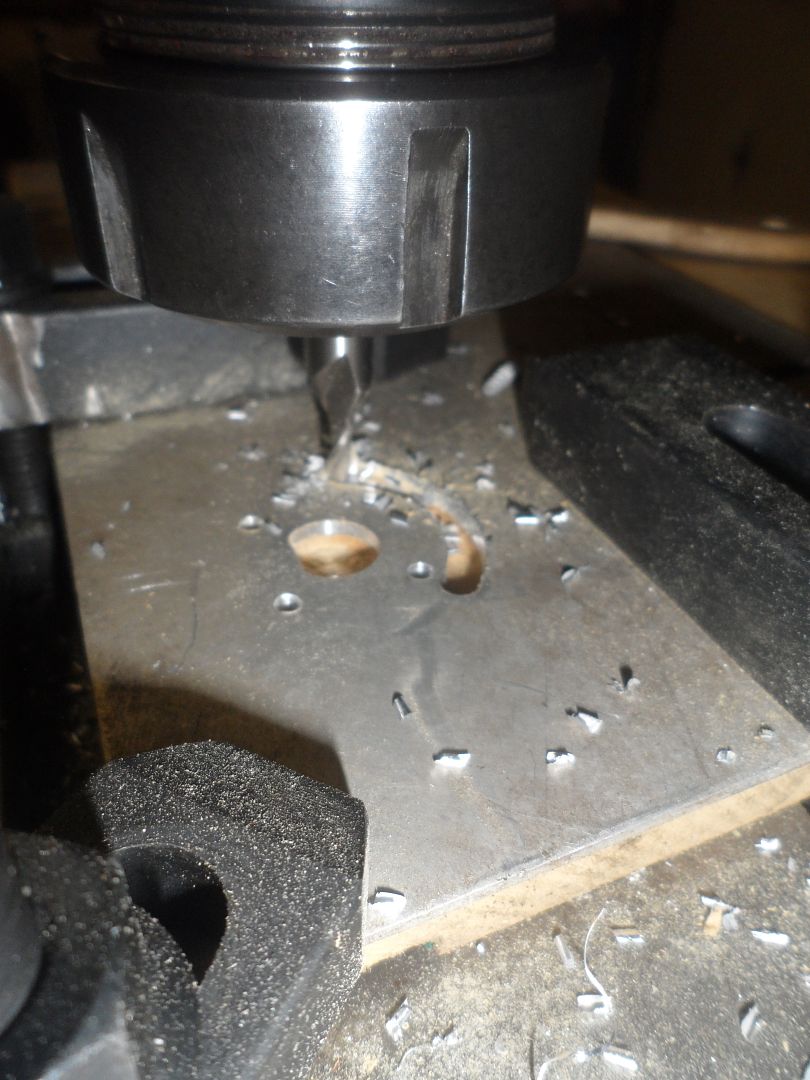
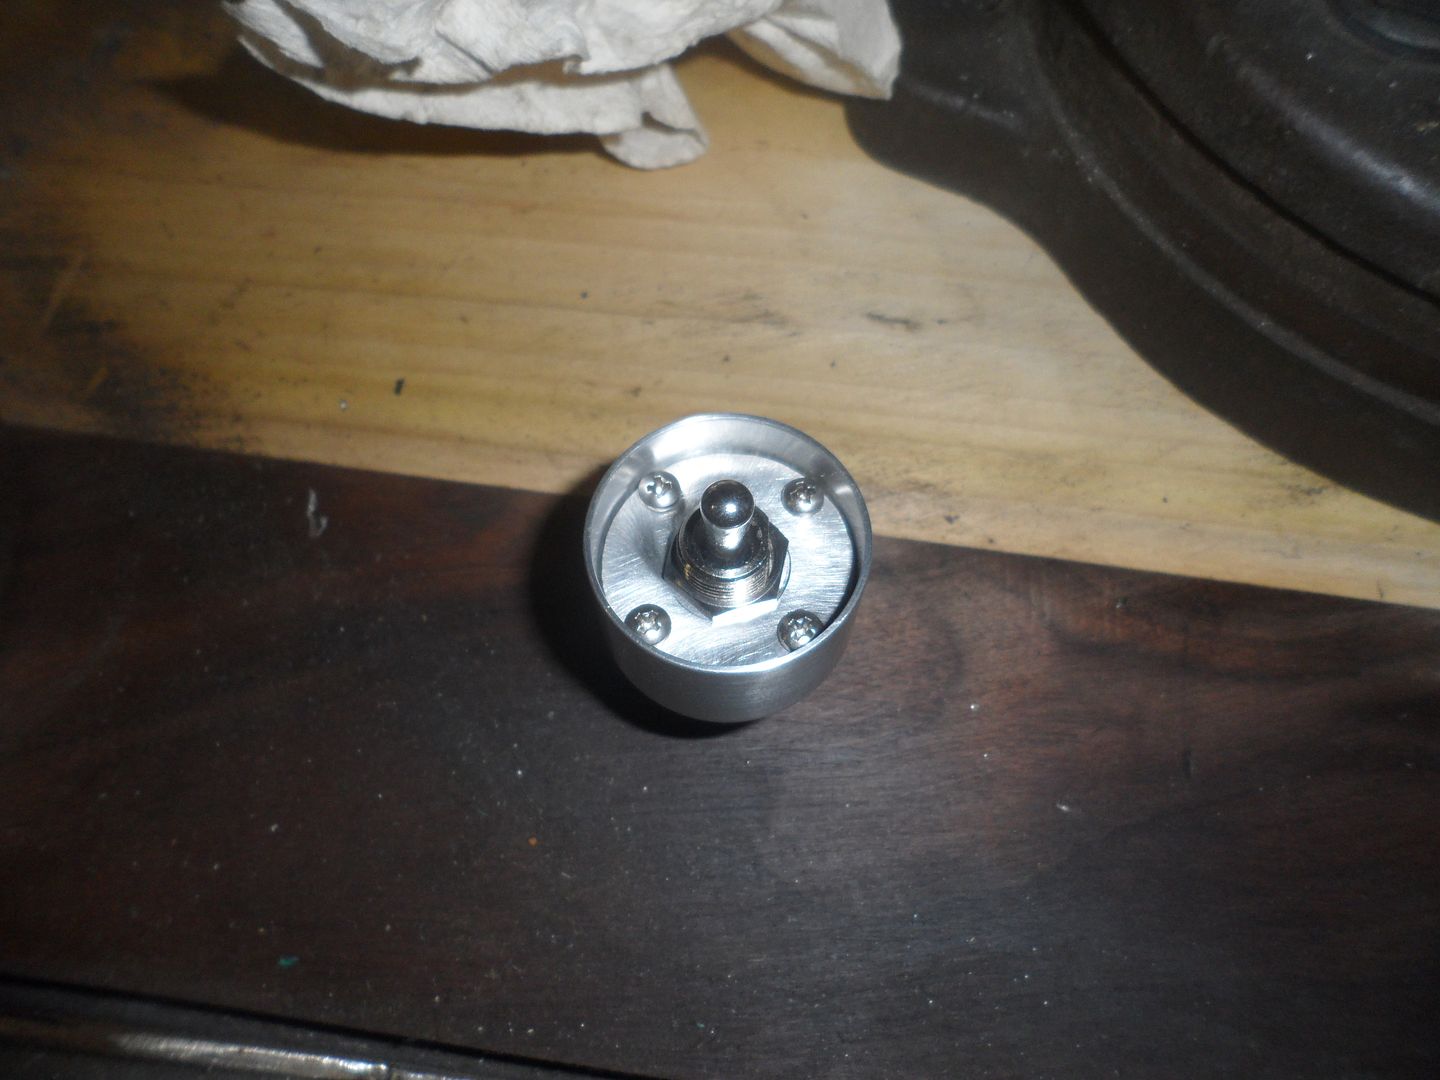
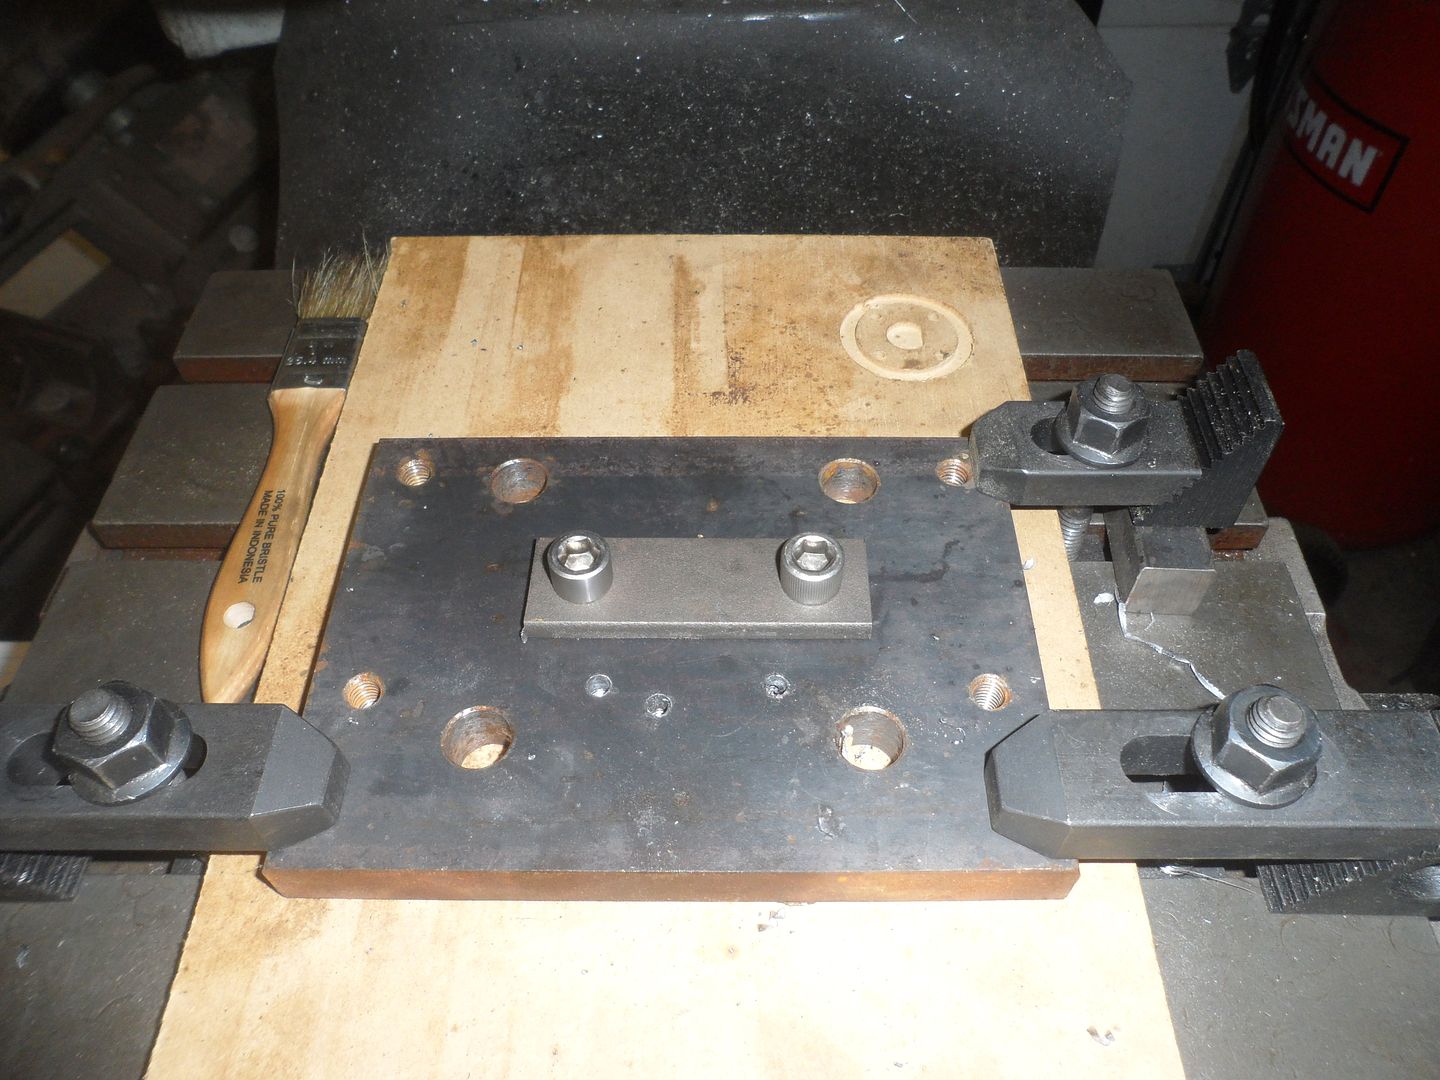
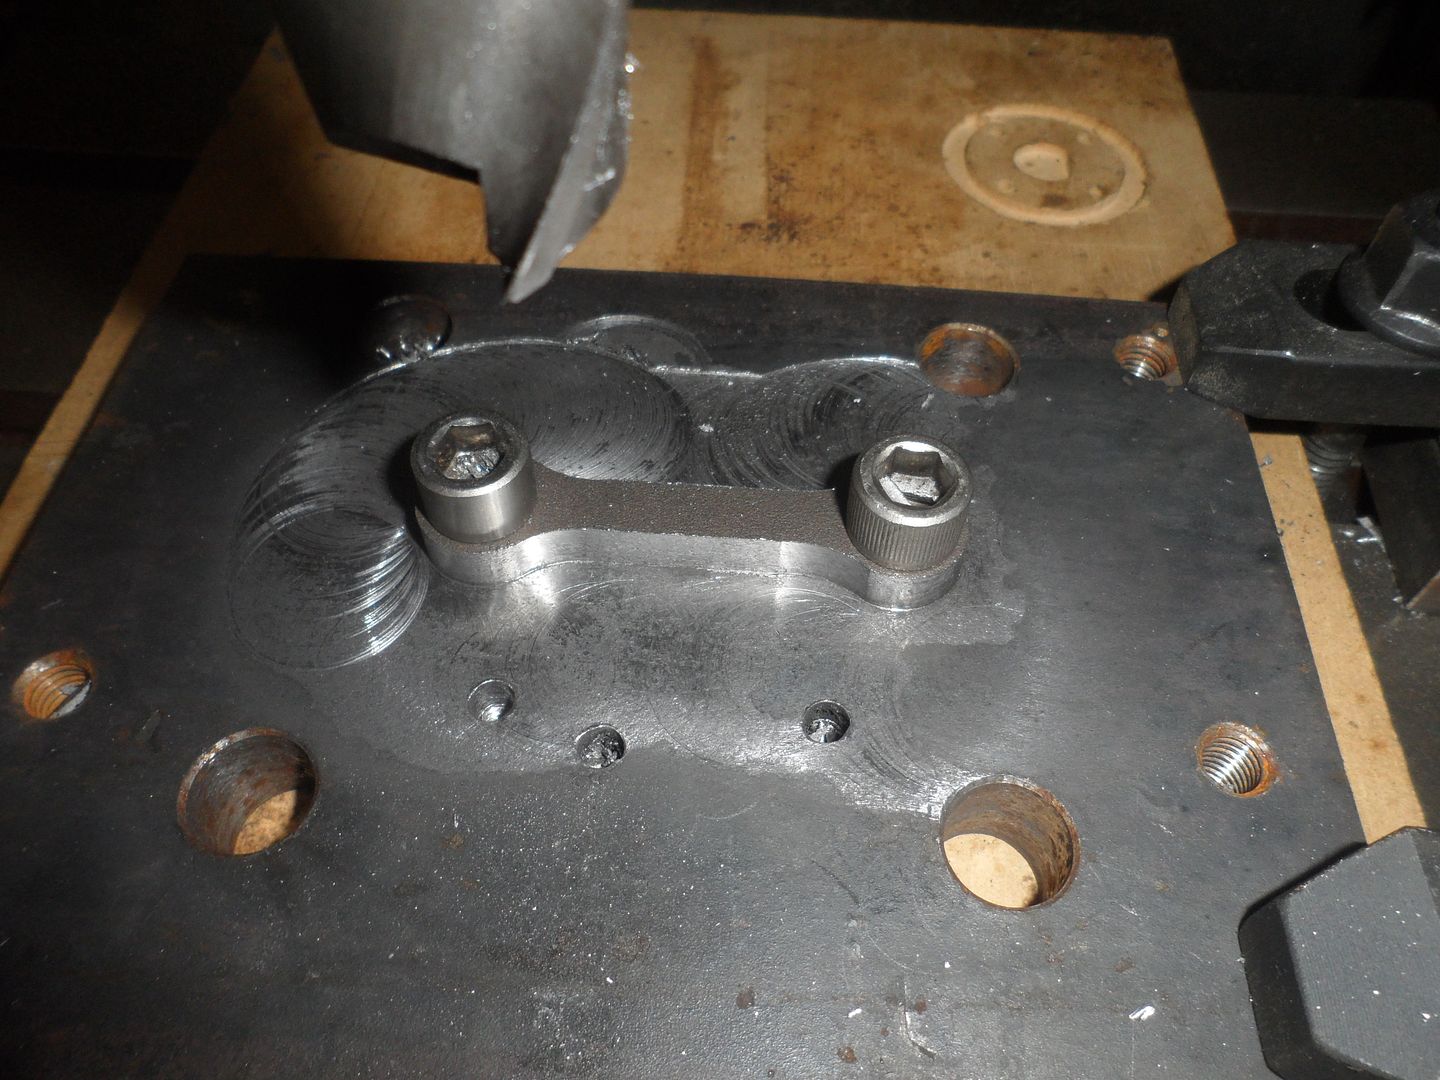
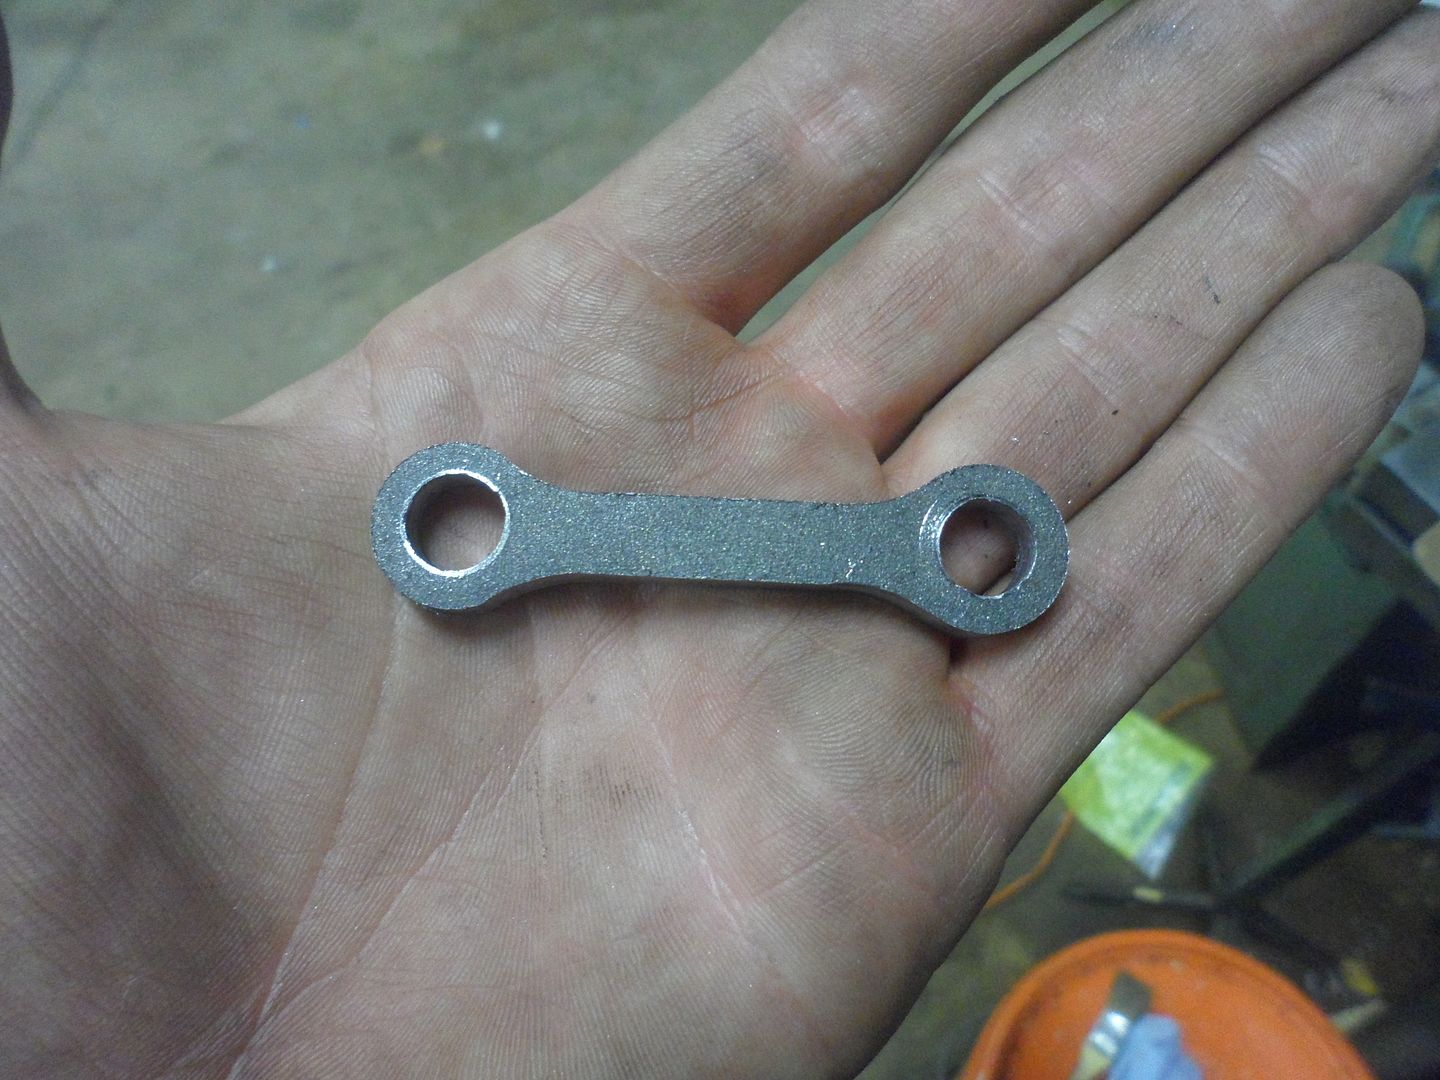
Since the pins for the lift cylinder go into a semi-blind hole, I wanted to make some retaining caps. And I felt like learning how to use my rotary table. A little overkill but it was fun.

SAM_1428_zps8060772d.jpg


SAM_1437_zps1fe02c47.jpg


SAM_1433_zps854bba65.jpg


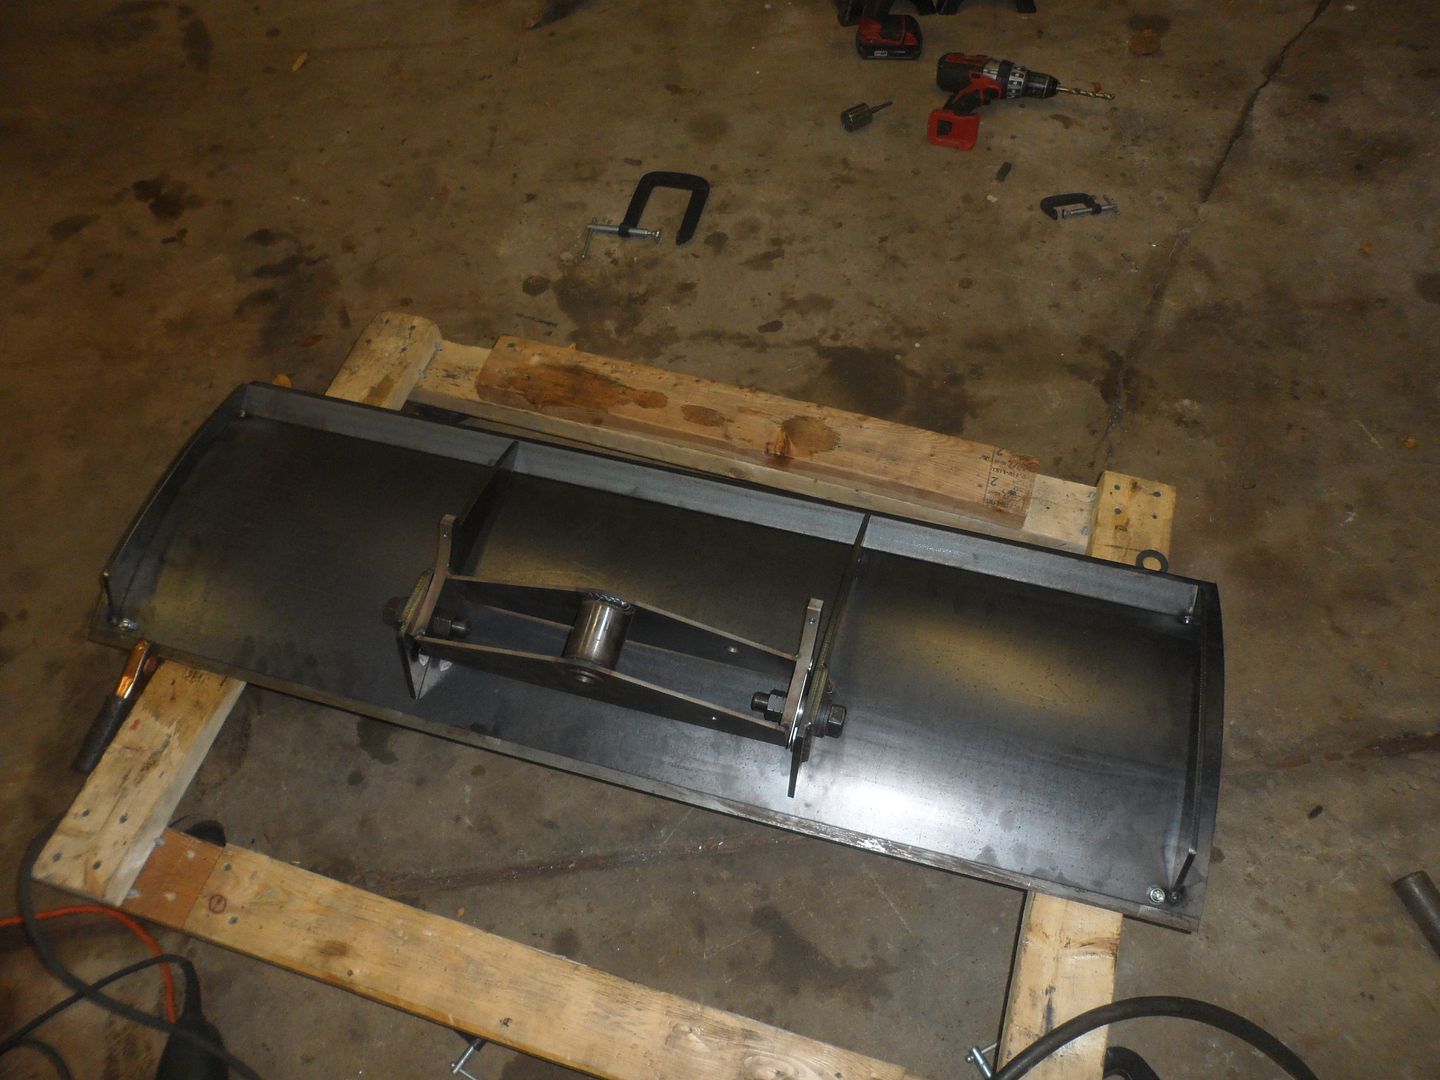
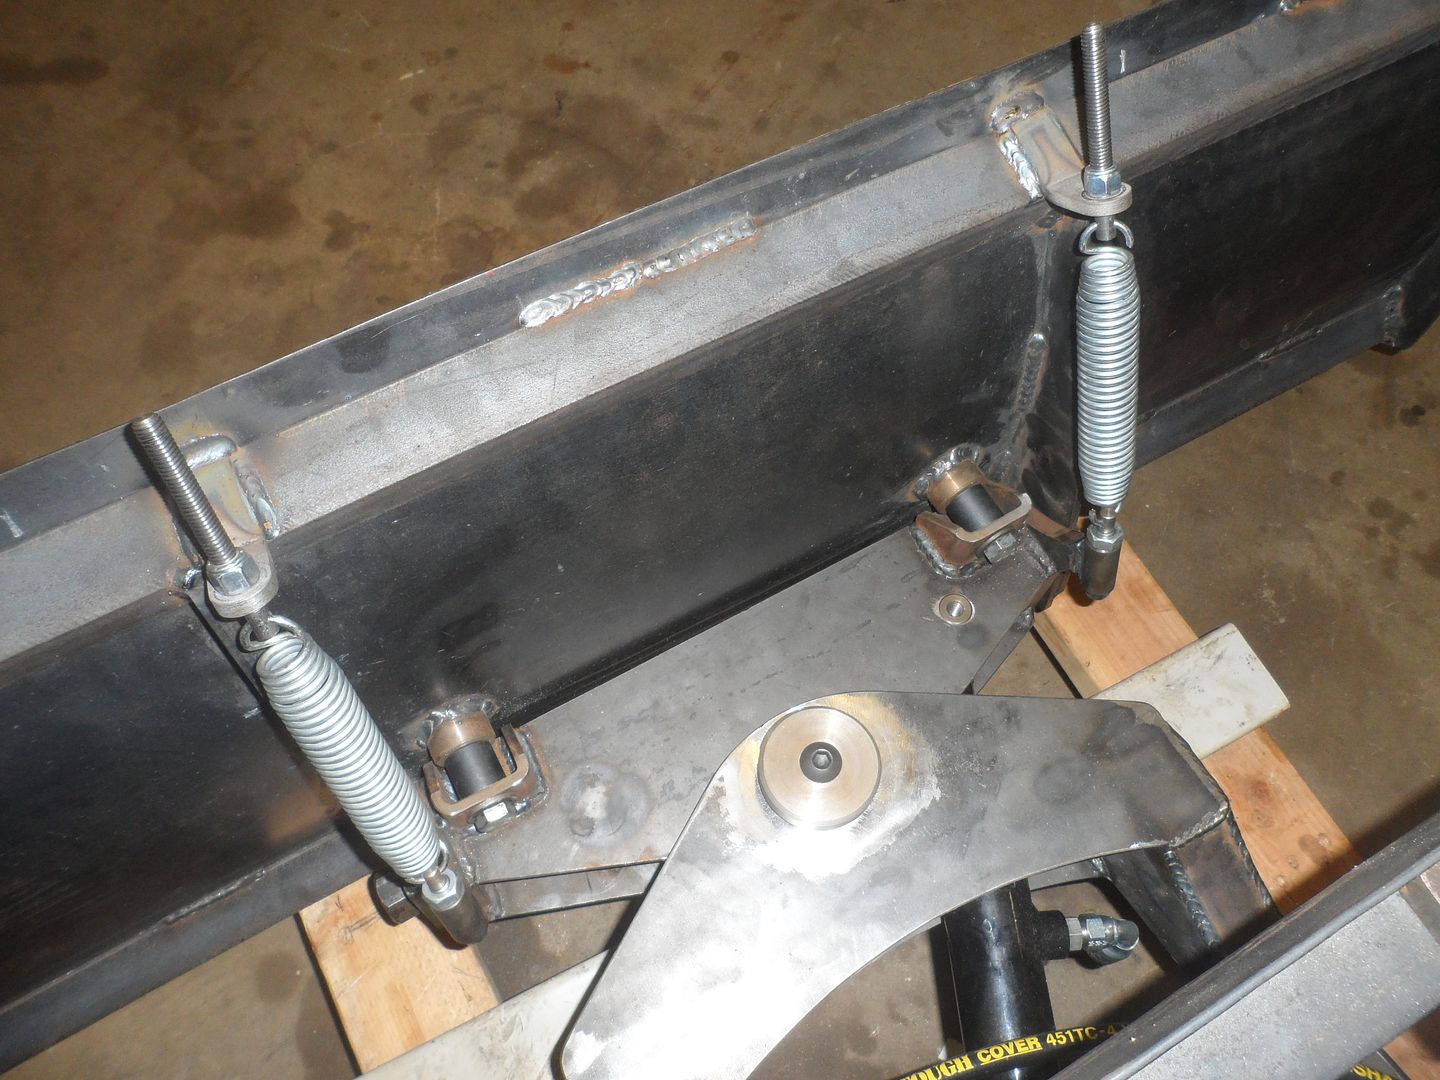
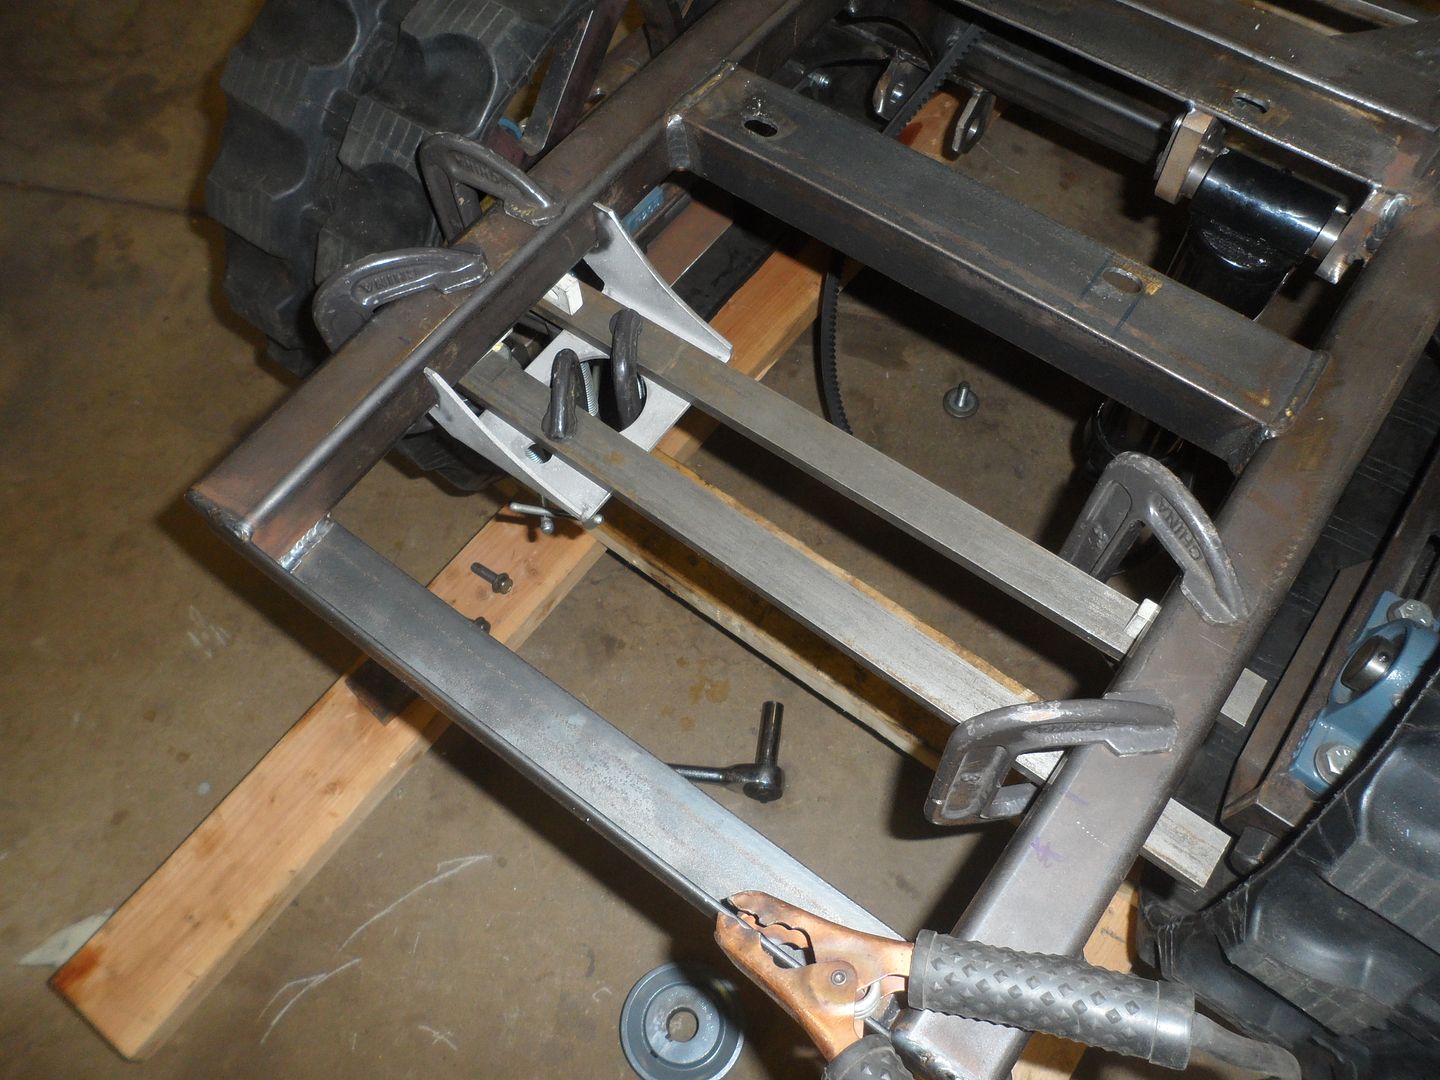
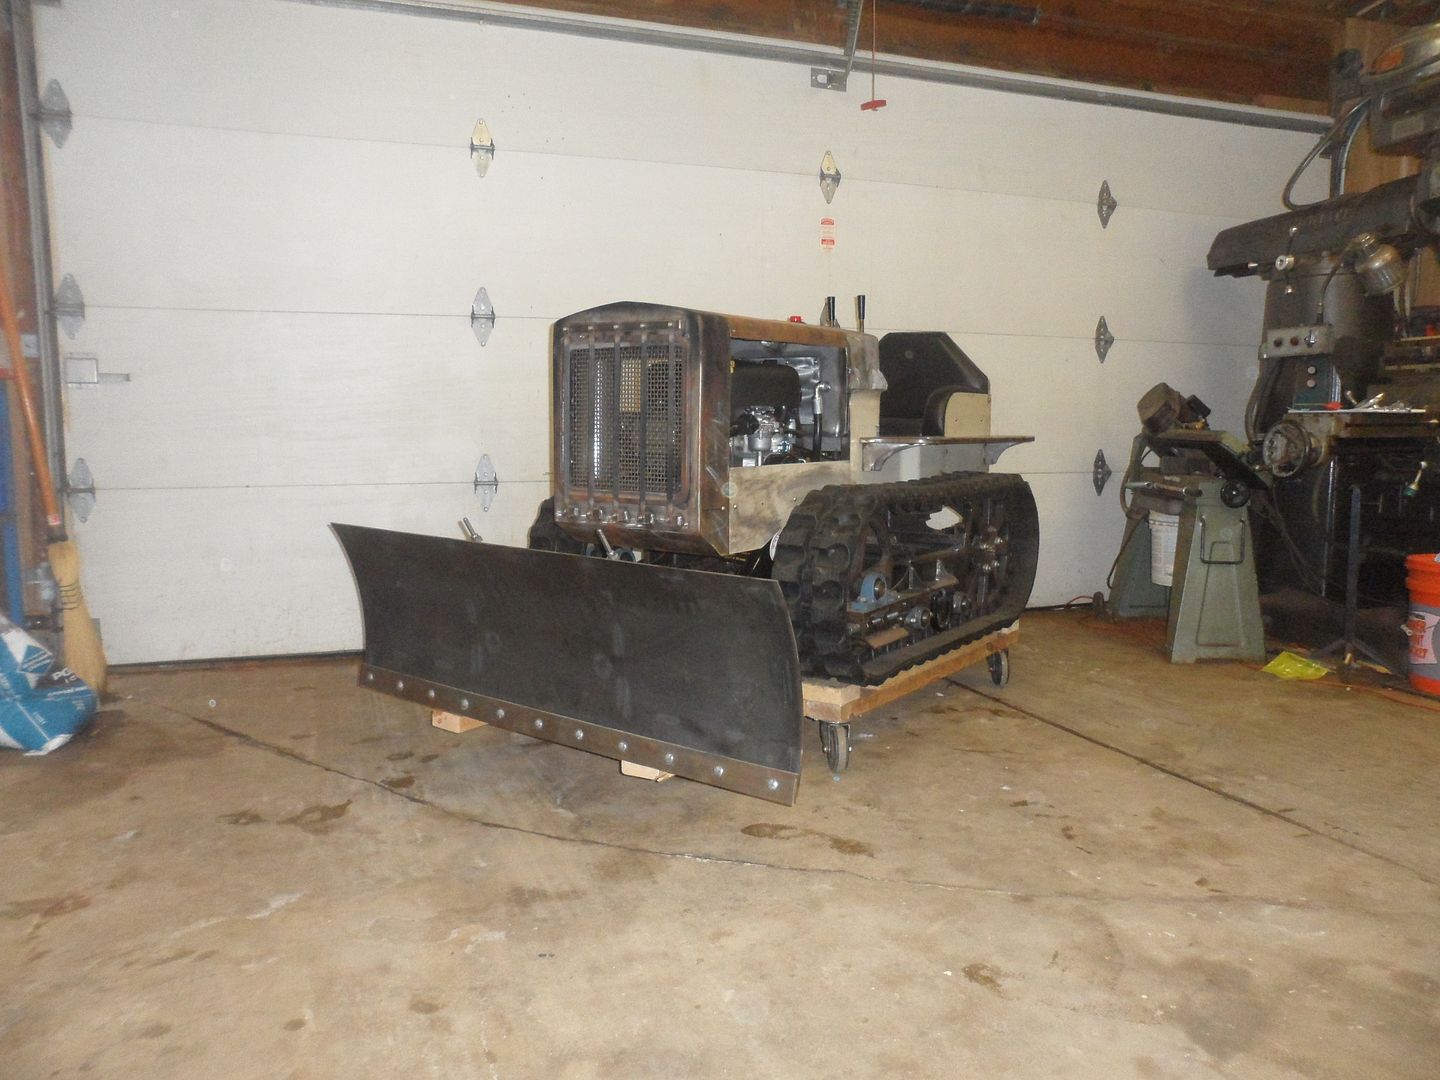
I've had a lot of people tell me that if I'm going to plow snow, I should make the plow break away in case I hit something. So I made it pivot but I can also lock it in place if I want to.

SAM_1456_zps53453678.jpg


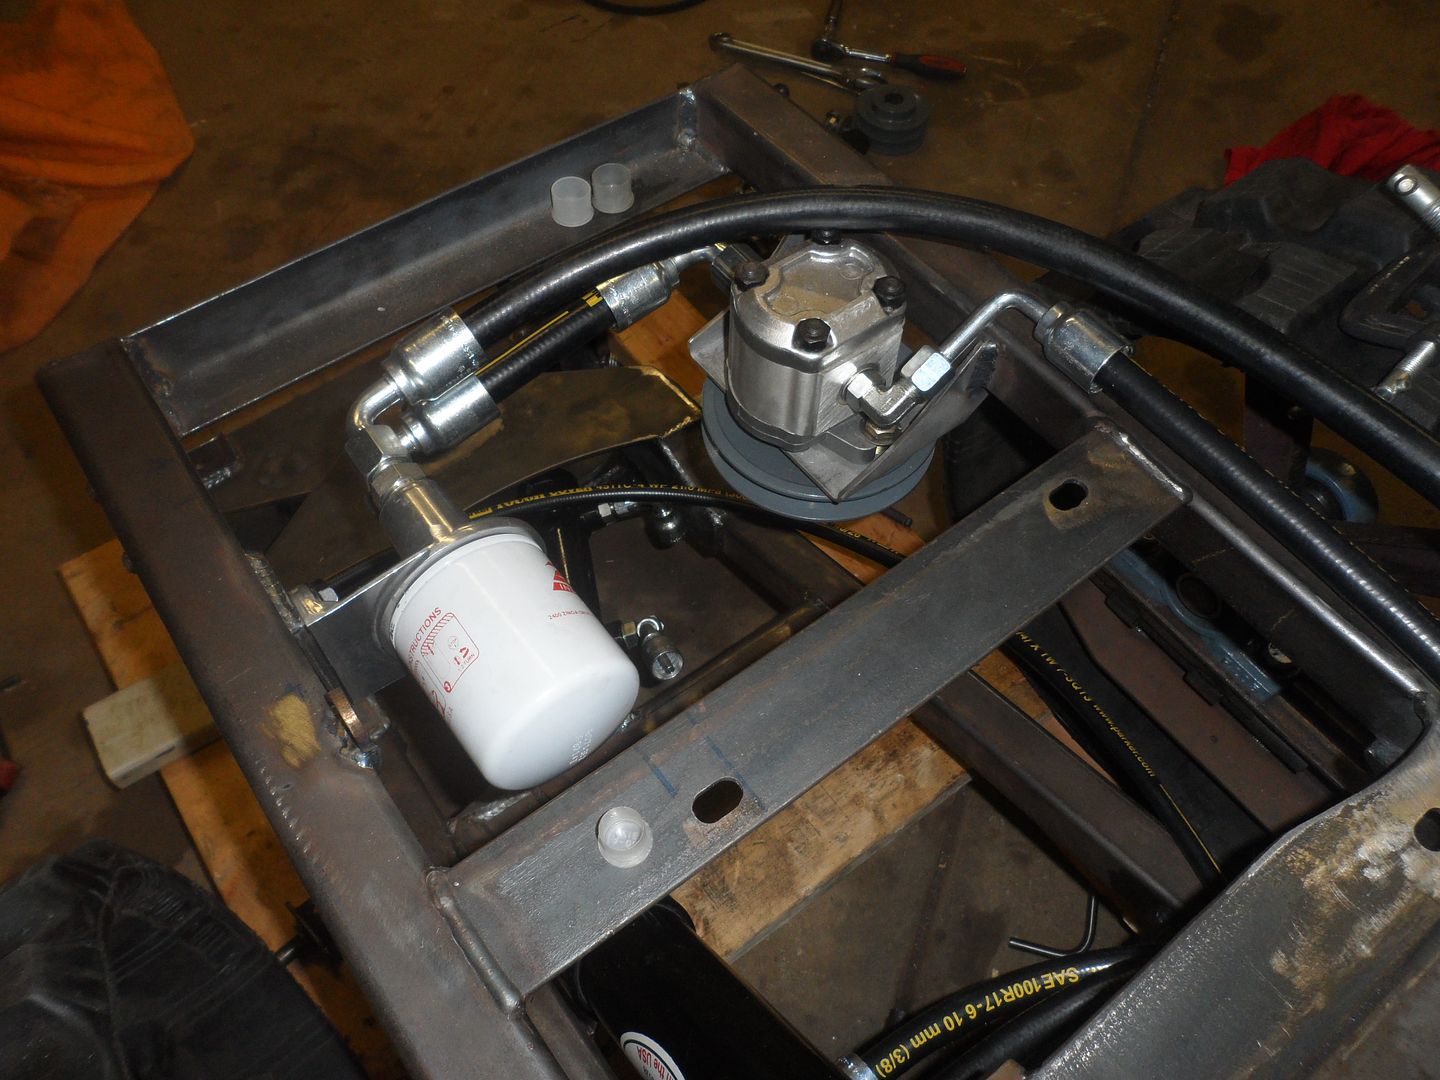
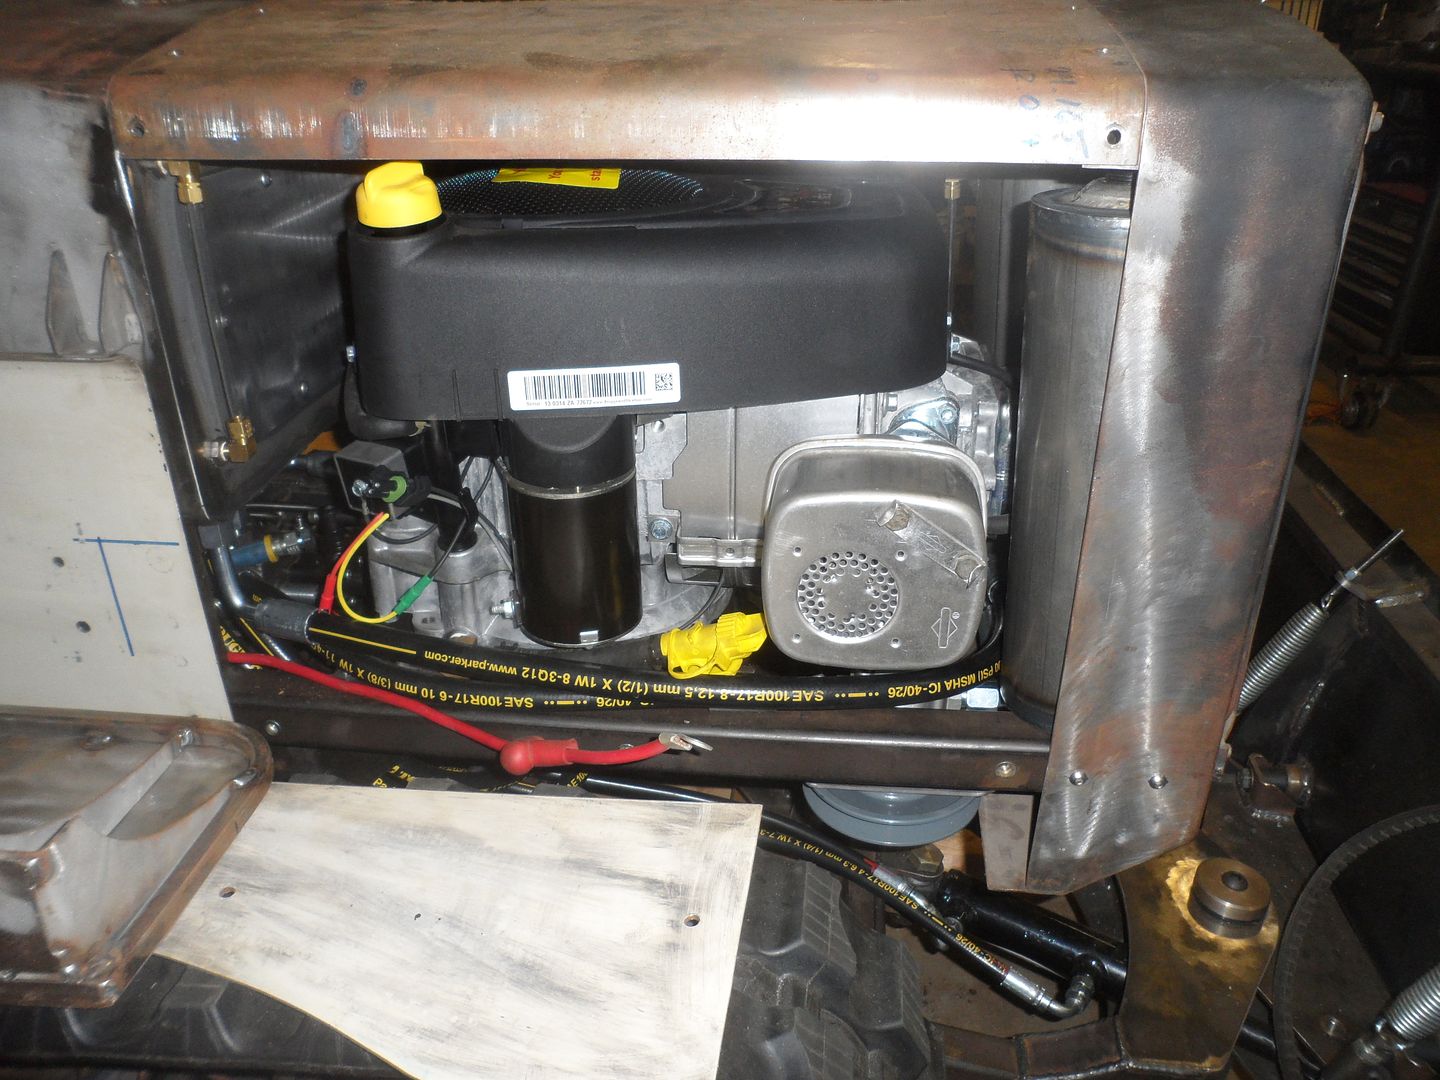
Made the hydraulic pump bracket and welded it in.

SAM_1445_zpsdd89eaf2.jpg


Mounted the pump and filter and started running lines.

SAM_1449_zps8f73af40.jpg


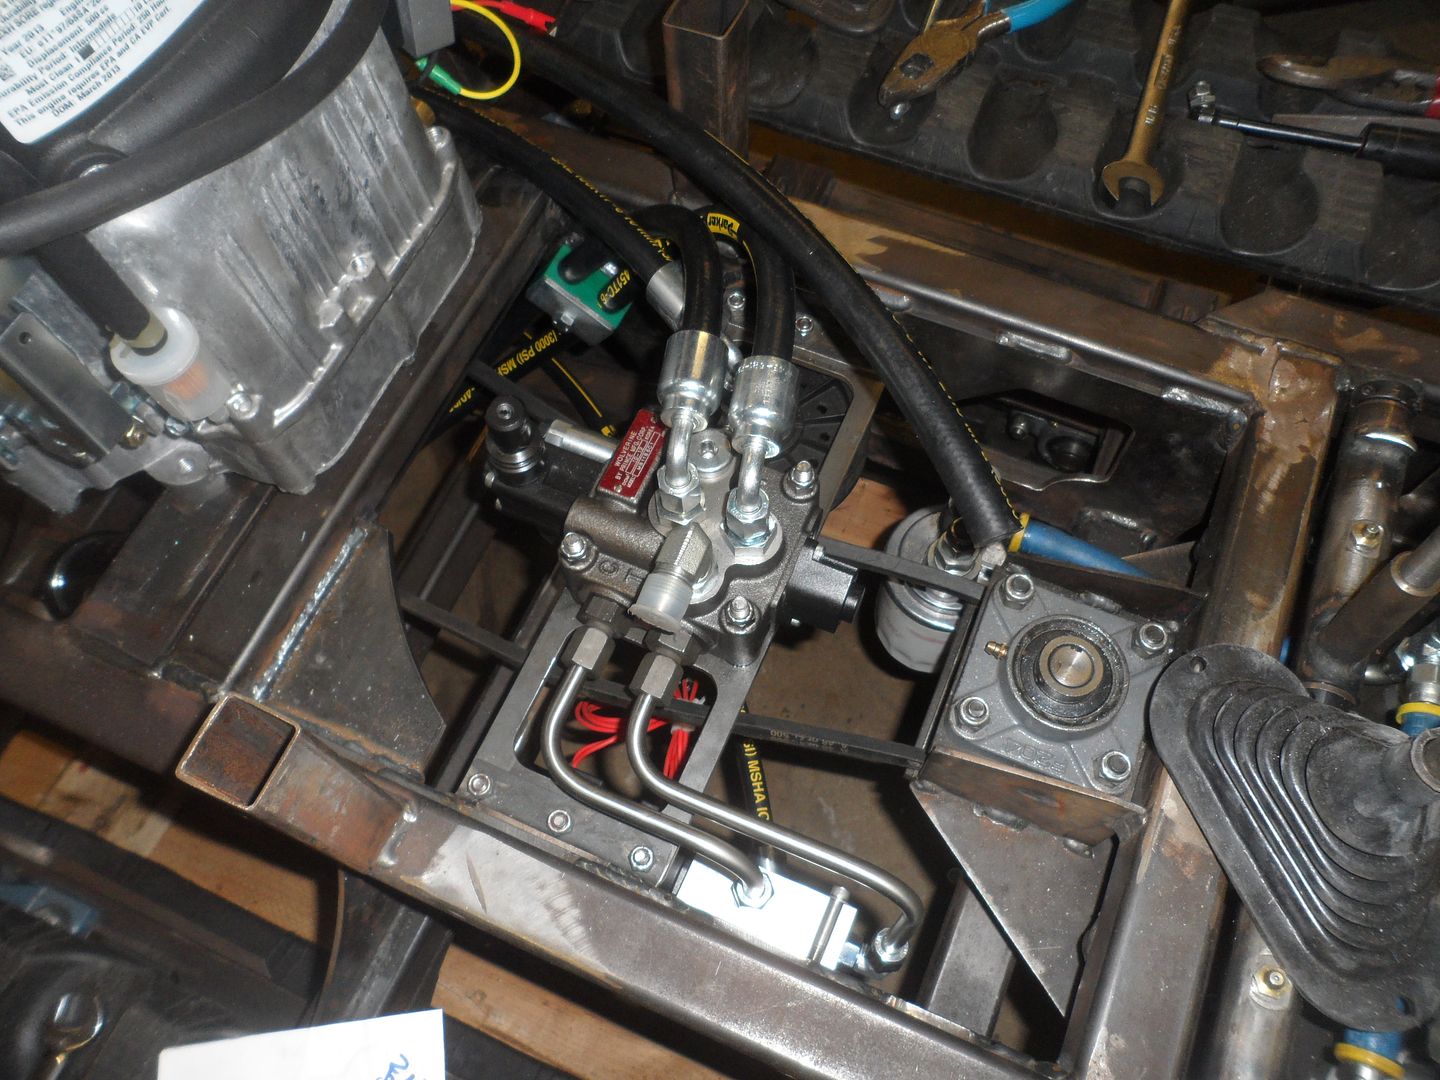
Bent the hard lines and running more hoses. I'm glad I modeled all of the hoses in cad. It's coming together just how I expected it to.

SAM_1457_zps61b0fa35.jpg


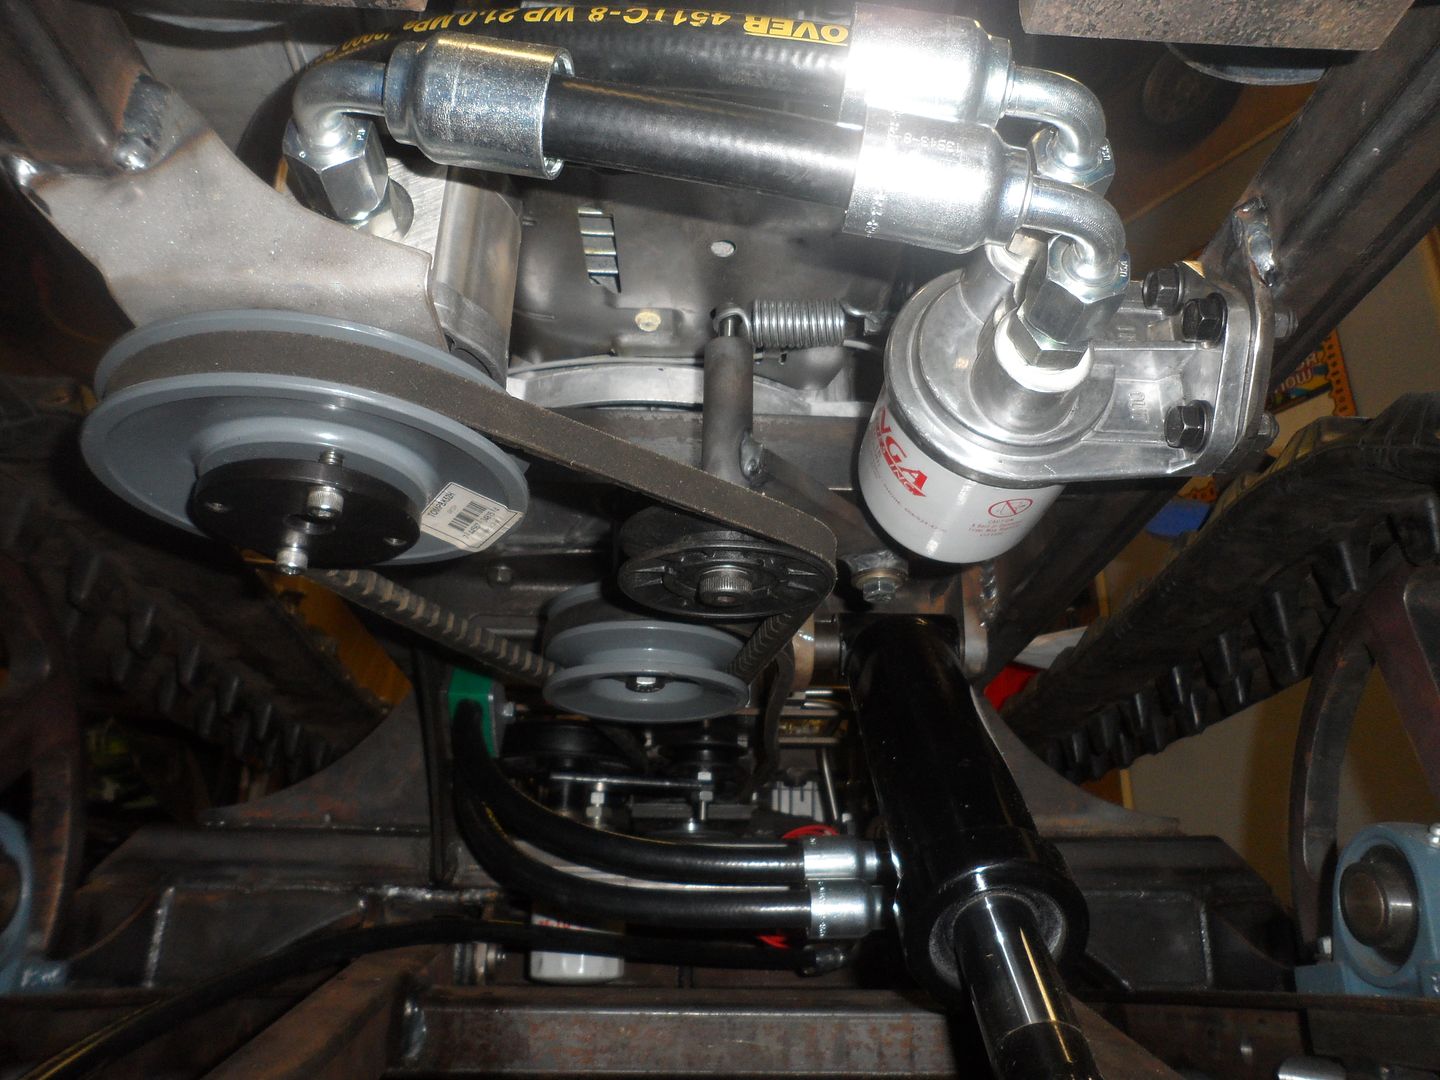
Here's the belt tensioner. I'm running out of space. It should work though.

SAM_1460_zps5dfc3ba2.jpg


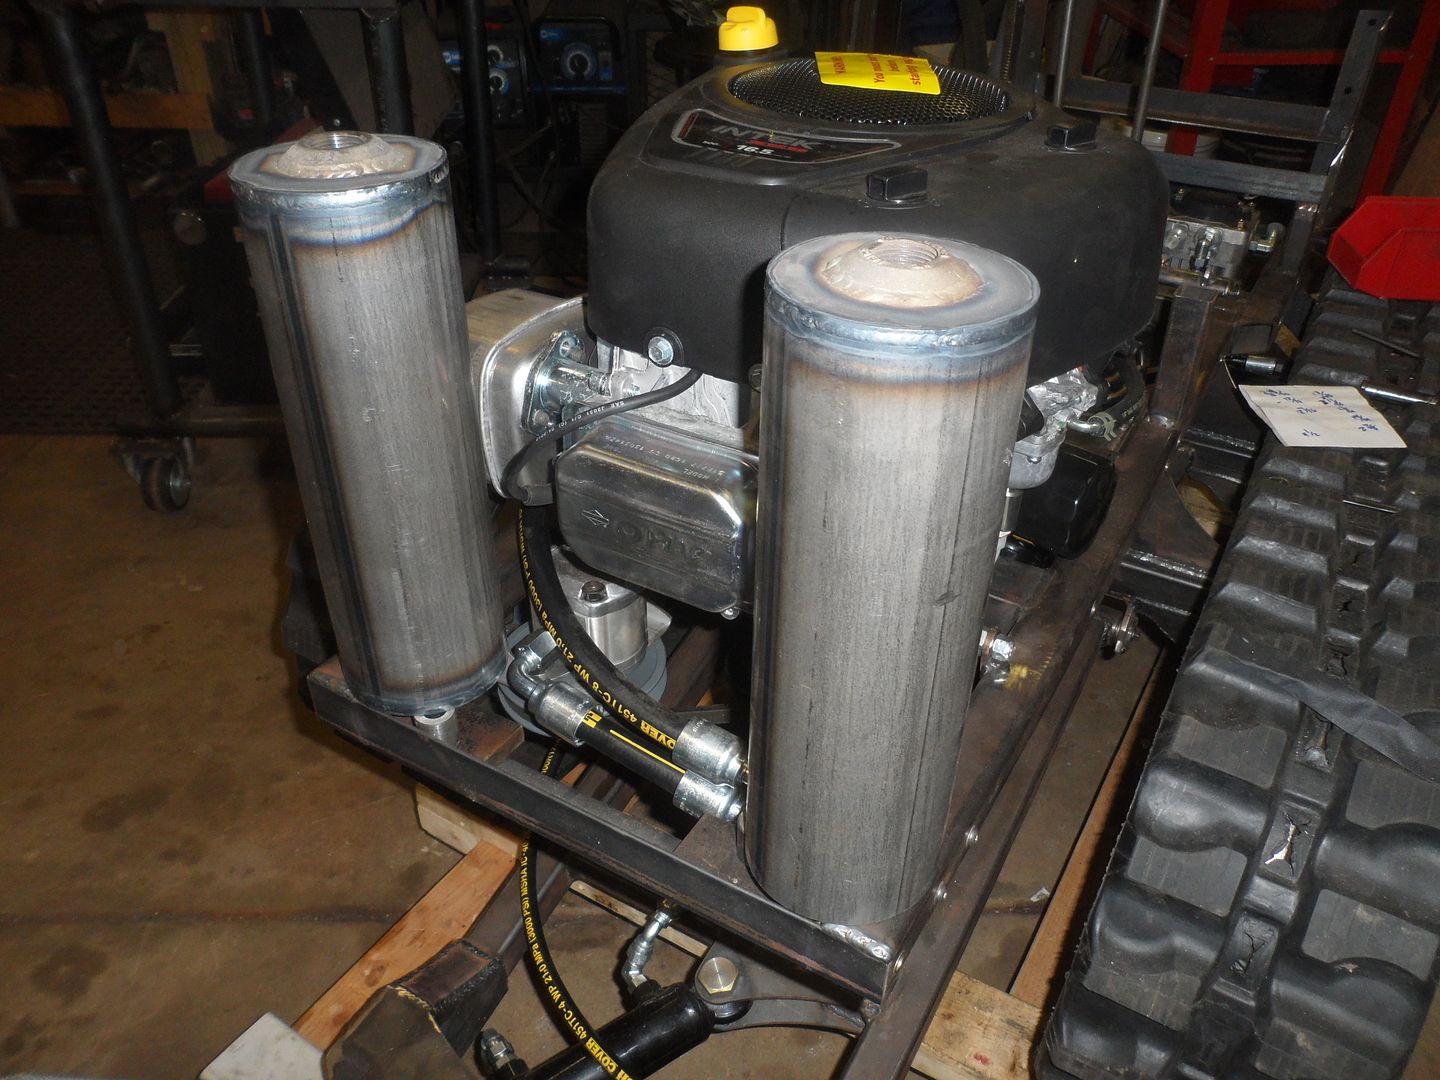
With the new engine being longer, I'm running out of room for a fuel tank. I tried looking for something commercially available (to save time as well) but I couldn't find anything that would work. So I am making my own out of thin wall tubing. I have two. They will be joined with tubing. I'll have just about a gallon of capacity. I bought some Caswell fuel tank sealer to handle my not so perfect welds.

SAM_1454_zpsedfcfdb7.jpg


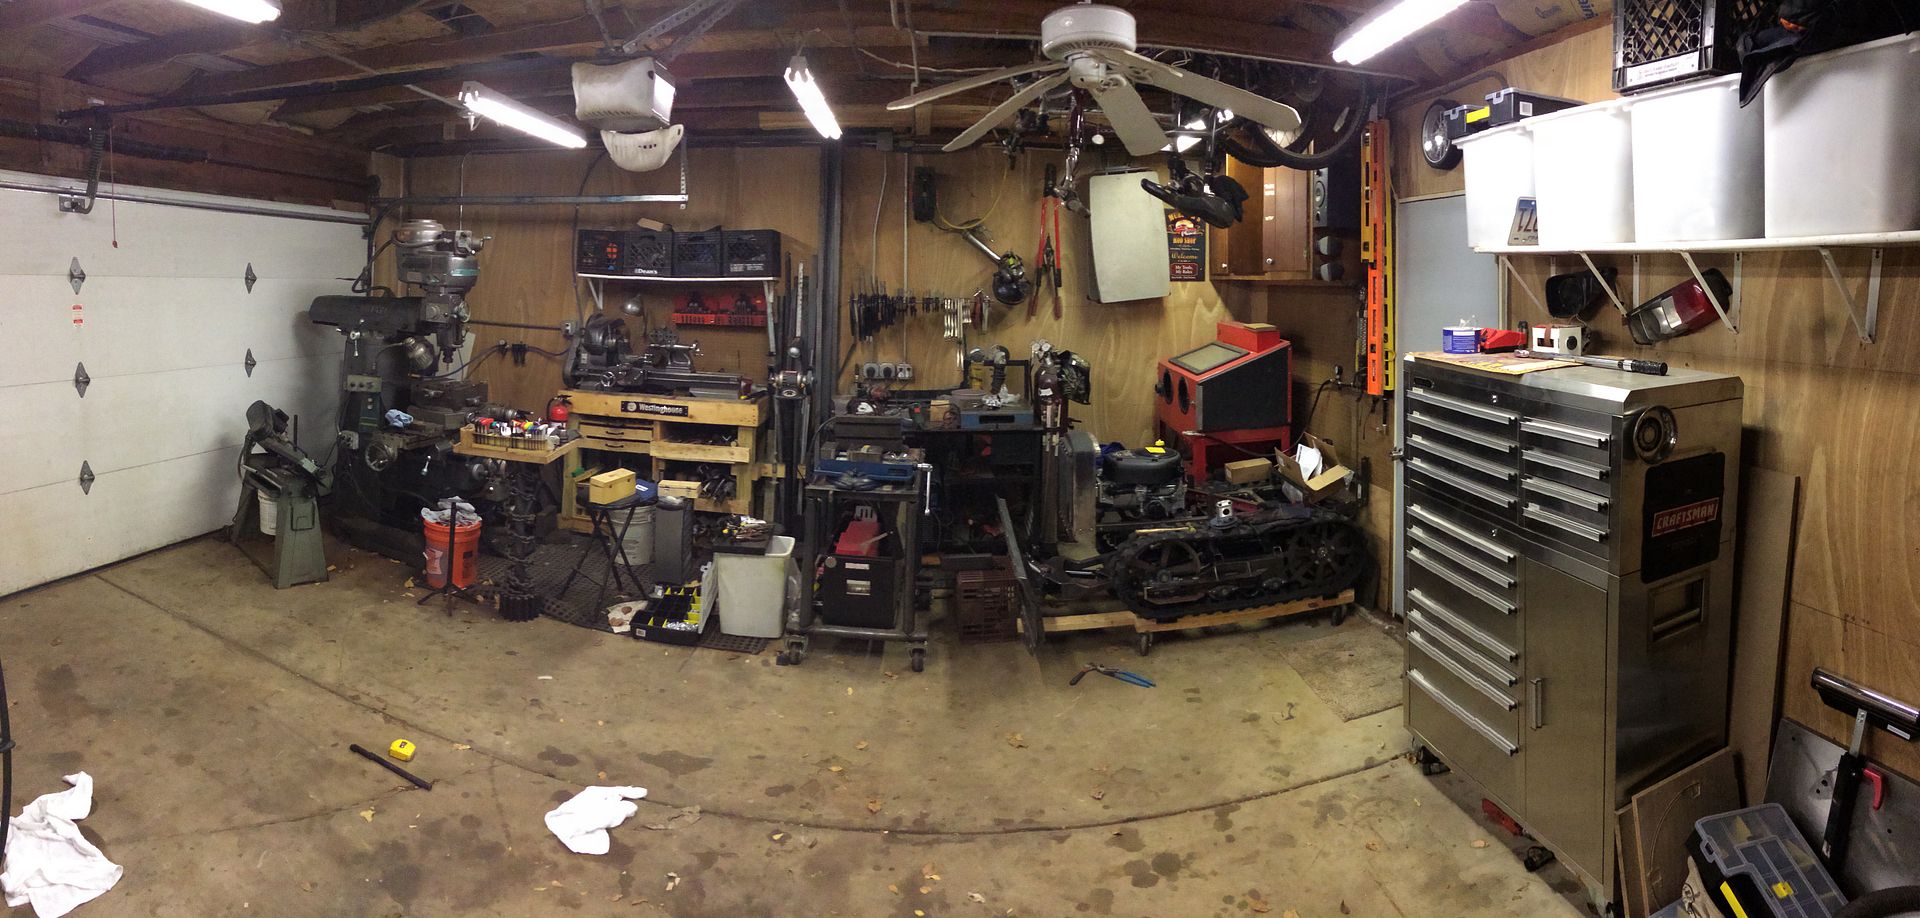
I was playing with the panoramic feature on my phone. Since this is garage journal, here is my workspace. It's a little messy.

Garage1_zpsdf459841.jpg


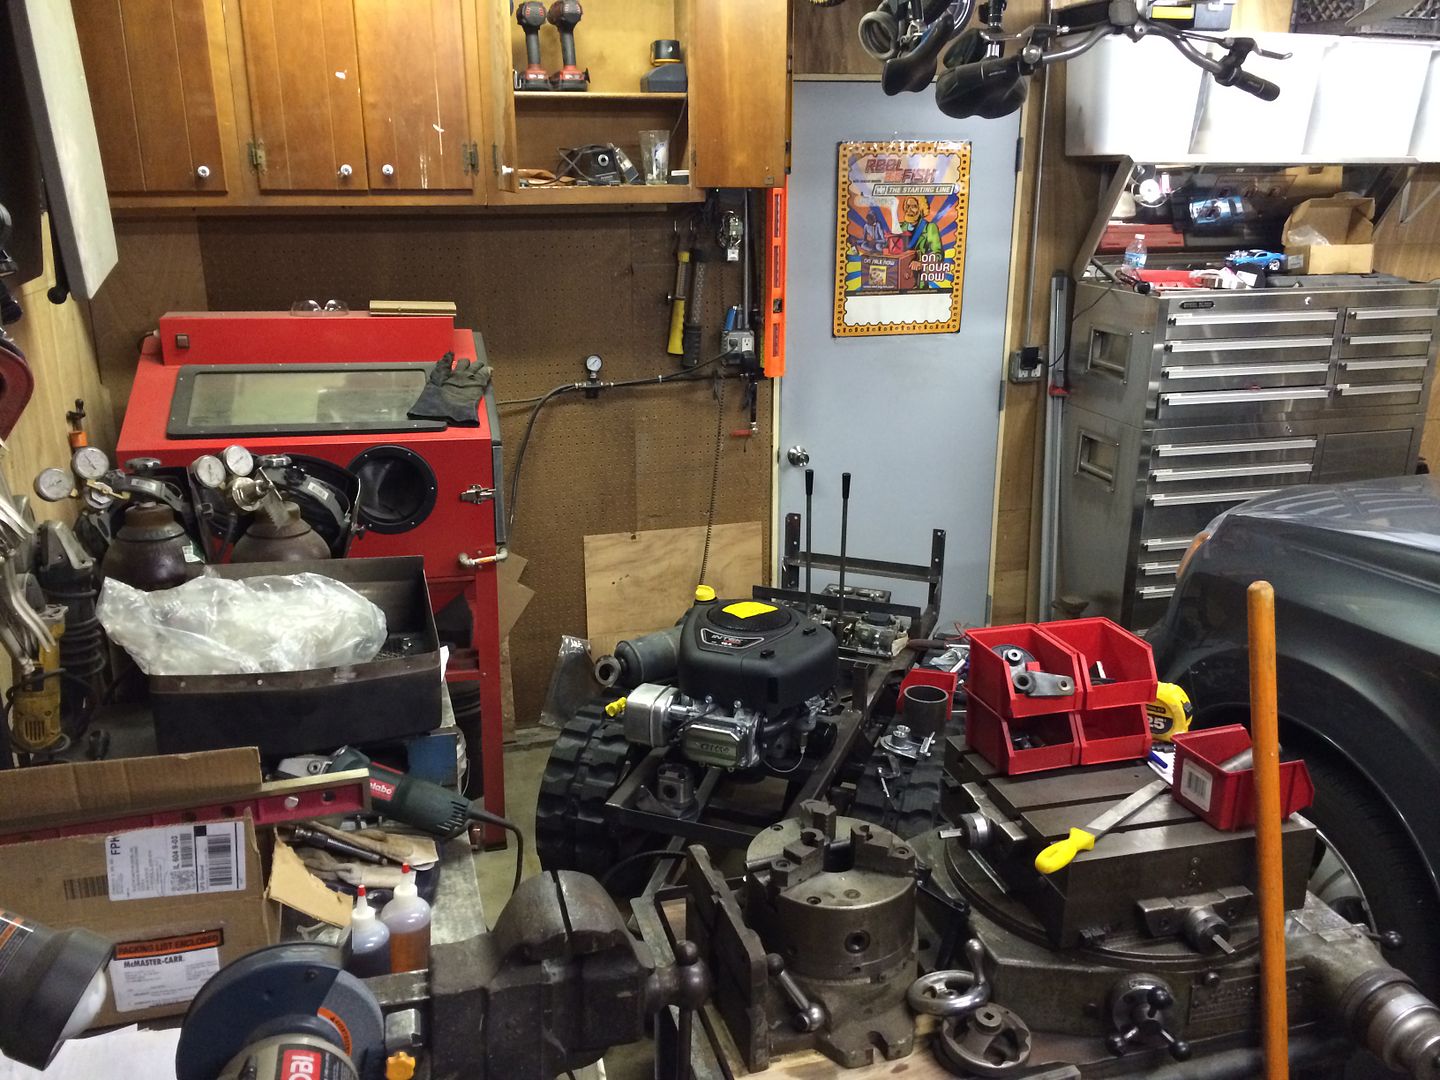
And sometimes I don't feel like pulling my wife's car out of the garage so this is how I work.

Garage2_zps3817e10b.jpg


I hope to run again over Christmas. Do final testing. Start body work. And paint shortly after. We'll see.

Thanks for looking. Hope you all enjoy seeing this project. I started a little over two years ago. I feel like I've come a long way and have learned a lot. Once it's done, I'll be taking it to a few tractor shows around the area. I'll let you all know when I do if you feel like checking it out in person.
 

hpw

Well-known member
Joined
Oct 7, 2007
Messages
989
Thanks for looking. Hope you all enjoy seeing this project. I started a little over two years ago. I feel like I've come a long way and have learned a lot. Once it's done, I'll be taking it to a few tractor shows around the area. I'll let you all know when I do if you feel like checking it out in person.

I can see a new company forming when the orders start pouring in:thumbup:

awesome job
 

Kevin54

MEMBER EMERITUS
Joined
Jan 12, 2005
Messages
29,341
Location
Urbana, Ohio
Dozer......I've been following this thread from the beginning. I know that you work with programming on CAD systems, but is this dozer all coming from your head, or is there something else you are referencing to for some things?

And if anyone deserved the Certificate of Badassery, it is certainly you, hands down.
 

Neverfly

Well-known member
Joined
Oct 9, 2013
Messages
372
Location
Arlington, TX
Utterly Speechless...

I can't really add to the 15 pages of "awestruck" already contained within this thread- but posting feeble words as a method of subscribing.
 

Turbo1Ton

Well-known member
Joined
Dec 23, 2007
Messages
53
Dozer,

This thing is killer! I can't wait to see it all painted up!

Question...Are you building your hydraulic lines yourself or having them built? I have to get a few done for a project and was curious how you were going about it.

Thanks,

Jeff
 
To avoid these ads, REGISTER NOW!

pertneer

Member
Joined
Oct 17, 2009
Messages
18
Location
Northern, Il
I'm going to PM you about a few things. As for sharing the plans, I'm not sure yet. There are some things I still make the old school way and just build it as I go. I try to load those things back into the file but it's not 100%. I want to see how well it works when it's done and then I'll think about what to do.
I look forward to you message. I can understand the file not being 100%. I have a project I have been working that has undergone a few changes and I too have not been able to keep it 100%. I would rather build than draw, but the need to check a complex design usually outweighs the on the fly work or should I say re-work in this case. :willy_nil
 

bullnerd

Well-known member
Joined
Sep 17, 2012
Messages
5,690
Location
Jersey
Thats a real mans rotary table! Damn!

Great job, you get a dirty shop pass forever with your skills.
 

spearfish

New member
Joined
Sep 15, 2012
Messages
2
Very Cool!! Somewhere in the thread you mentioned that you were hoping to build for $2000, were do I send the check HA!! My boy would love this but he had the bad luck to be born to a father, without the skills of you. I hope your sons will learn your skills and pass them on someday.
 

Neverfly

Well-known member
Joined
Oct 9, 2013
Messages
372
Location
Arlington, TX
Very Cool!! Somewhere in the thread you mentioned that you were hoping to build for $2000, were do I send the check HA!! My boy would love this but he had the bad luck to be born to a father, without the skills of you. I hope your sons will learn your skills and pass them on someday.

The reason many of us lack skills is from not having learned them.
 

69supercj

Well-known member
Joined
Jan 26, 2010
Messages
555
Dozer,

This thing is killer! I can't wait to see it all painted up!

Question...Are you building your hydraulic lines yourself or having them built? I have to get a few done for a project and was curious how you were going about it.

Thanks,

Jeff

Seriously? I think he built the machine to make his own hydraulic lines!!
I've followed a lot of different threads online from building your own cannon, a custom rifle, you name it. This is by far the most bad-*** display of engineering skills and talent yet. Awesome is an injustice in describing this build.
 

machine_punk

Well-known member
Joined
May 14, 2011
Messages
2,540
Location
Napa Valley, California
I was just thinking that you picked the perfect name for your account on GJ...you will be forever known as the guy who built the COOLEST mini dozer ever. Looking forward to seeing it finally finished (as I am sure you are too). Truly amazing work. I really like the way you just 'build the next thing.'

Kev
 
OP
D

dozerbuilder01

Well-known member
Joined
Jun 20, 2011
Messages
180
Location
Far Northwest Burbs of Chicago
Dozer......I've been following this thread from the beginning. I know that you work with programming on CAD systems, but is this dozer all coming from your head, or is there something else you are referencing to for some things?

And if anyone deserved the Certificate of Badassery, it is certainly you, hands down.

As mentioned in the beginning, the body styling comes from pictures from Model 22s. Real dimensions came from a Model 28 because it was local. As for the underframe, hydraulic system, component mounting etc, most of it comes from my head. I wanted to see what I was capable of. I sketched out the rough shape of the parts I had (pumps, tracks, engine) and put them in a rough shape of the dozer I took measurements of (scaled to 55%). and just started filling it in. Then I had to make sure that I could make it in my garage with the tools I had and from steel I had or could get at a reasonable price. I haven't really spent much time around tracked vehicles (rented them a few times in the past) so this was a challenge to me (the reason I did it). But of course, I've made a few mistakes. First one is starting to build before the design was complete. As I'd add new parts to the model, sometimes I'd have to compromise because where it's mounting to was already built and I didn't want to or couldn't change it. The second is making the track tensioners fixed. That's going to bother me until I fix it (I think I have a solution).
Sometimes I feel like I bit off more than I could chew with this project but man I've been having fun and learning so much. I always enjoyed reading about other peoples projects while I was on the road traveling for those first several years out of college so I figured its my turn to give back. Thanks for following.
 
OP
D

dozerbuilder01

Well-known member
Joined
Jun 20, 2011
Messages
180
Location
Far Northwest Burbs of Chicago
Dozer,

This thing is killer! I can't wait to see it all painted up!

Question...Are you building your hydraulic lines yourself or having them built? I have to get a few done for a project and was curious how you were going about it.

Thanks,

Jeff

I bought all of the loose pieces from the local hydraulic supply store. I cut the line with a cut off wheel. Then I use a little bit of dish soap to slide the fittings on. I position everything and once the soap dries, it holds tight enough so they don't move. Then I take them back in and they crimp them for me. I don't have a line to start with and I don't trust my model that much so I need to make them myself before they get crimped.

Parkers website is very good. I was able to download all of their fittings for my model. Their catalog also has all of the dimensions shown as well. It helped a lot.

The reason many of us lack skills is from not having learned them.

I couldn't agree more. I am by no means smart. I just ask questions and I'm not afraid to try.

Seriously? I think he built the machine to make his own hydraulic lines!!
I've followed a lot of different threads online from building your own cannon, a custom rifle, you name it. This is by far the most bad-*** display of engineering skills and talent yet. Awesome is an injustice in describing this build.

Haha. Thought about it. But no, I don't want anyone getting hurt from a poorly crimped hydraulic line. This thing is already dangerous enough.

Thank you everyone for looking and commenting.

The final details continue.

I'm using a standard single spool valve to control the blade up and down. For the swivel, I'm using an electrohydraulic valve. Reason I didn't use a two spool valve was because having the swivel hydraulically controlled was an after thought. And it would have made it too hard to route hoses. Hose routing, as I've probably mentioned before, has been one of the most difficult parts of this build. But overall, I've very happy with how it turn out.

So the up/down valve will still be controlled by a lever (connected by linkage which you'll see further down) and the elec-hyd valve will be controlled by a toggle switch. I want it on a single handle so I came up with this.

BD0583_zpsf147b961.jpg


BD0585_zps1be8bdf4.jpg


BD0587_zpsedd8cada.jpg


BD0588_zps179c0423.jpg


BD0589_zps6eb575c7.jpg


BD0590_zps01c72fc1.jpg


BD0591_zps5ac4313a.jpg


After a little polishing.
BD0593_zpsfb19c5b6.jpg


Drilled and tapped for the cap.

BD0596_zps06a08915.jpg


The switch has a flat so the hole is d-shaped. I probably could have gotten away with a round hole but I felt like putting the rotary table to use.

BD0598_zpsea9434c5.jpg


BD0601_zpsc02c6856.jpg


BD0606_zps4c748558.jpg


And since the rotary table was still on the mill, I needed a link for the valve handle. The valve is mounted backwards to help hose routing (because I didn't design everything in the beginning) so this was my solution. The temp piece was used for mock up but I wanted something fancier. Just because.

BD0612_zpscd72be31.jpg


BD0609_zps1285e15c.jpg


BD0610_zpsbe0a0ef1.jpg


BD0611_zps2ab6534c.jpg


I need to make a trip to mcmaster next week for bushings so no picture of it mounted yet.

Started putting sheet metal back on.

BD0614_zpsd6c0abed.jpg
 
OP
D

dozerbuilder01

Well-known member
Joined
Jun 20, 2011
Messages
180
Location
Far Northwest Burbs of Chicago
I'm looking for opinions on mufflers. I always wanted a stack out the top with one of those flapper caps (whatever they are called). Well, I have absolutely no room left. This is the stock muffler which I could keep but it's boring.

BD0621_zps9c0a5779.jpg


Or I picked up this muffler and I'd mount it outside the engine compartment. Also, it should keep heat away from some things.

BD0618_zps6a5361f1.jpg


BD0619_zps83d5e734.jpg


I can't decide. What do you guys think?
 

fatboy99

Well-known member
Joined
Apr 23, 2009
Messages
908
Location
Indiana
If you remove the stock muffler there should be pipe threads in the port that might make the round muffler install easier.
 

Oily Nails

Well-known member
Joined
Nov 18, 2012
Messages
213
Location
West Yorkshire, UK
Just finished reading through this thread it is simply awesome!
Stunning work, your boy is a lucky lad.

If I may on the muffler/exhaust, if this is going to be used occasionally by you boy perhaps stick with the stock internal muffler as it might be the safer option.
The second muffler looks great, but I'd be worried of it heating up and the lad touching it after getting out/turning the engine off.

You could fit a "dummy" stack and simply fit a counter balanced flapper on it that would flap up and down simple with vibration/movement.

Keep up the great work:rocker:
 

EOC_Jason

Well-known member
Joined
Jun 25, 2012
Messages
11,388
Location
Bentonville, AR
I like the second one, you could even add an extension to raise it up some so it would look like what you see on the big boys... But my question is, does it affect your view at all? You wouldn't want to block your view of the blade or tracks.
 

Bob Heine

ALLIANCE MEMBER
Joined
Oct 24, 2009
Messages
10,705
Location
Boca Raton, Florida
I'm looking for opinions on mufflers. I always wanted a stack out the top with one of those flapper caps (whatever they are called). Well, I have absolutely no room left. This is the stock muffler which I could keep but it's boring.

BD0621_zps9c0a5779.jpg


I can't decide. What do you guys think?
As long as you can't decide, here are two more options:


  1. If the sound from the stock muffler is acceptable, B&S makes muffler deflector plates that bolt to the stock muffler (using those 4 threaded holes in the face of the muffler). Not knowing the engine model number, this might not be the right one but it is for an Intek engine:
    31cr9r9HFbL._SL500_AA300_.jpg


    This one is available from Amazon ($8.26):
    http://www.amazon.com/BRIGGS-AND-STRATTON-497682-DEFLECTOR-MUFFLER/dp/B002WNVWD2


    Cut off the appropriate piece of mandrel bent exhaust tubing from this J-bend and weld it to the deflector plate. You'd have the vertical stack you're after and no bulky muffler on the side of the dozer.
    sch-016218j_ml.jpg


    This one is available from Summit Racing ($11.00):
    http://www.summitracing.com/parts/sch-016218j/overview/

  2. If you don't like the sound of the stock muffler, B&S sells an exhaust pipe that bolts right to the engine. You might even be able to snake an extension to pass through the hood. Connect the muffler and have the ultimate look you were after. Kinda hard to tell looking at a 2-dimensional photograph.
    41hsDyUIfhL.jpg


    This one is also available from Amazon ($12.00):
    http://www.amazon.com/dp/B00437O7EG/?tag=atomicindus08-20
 
To avoid these ads, REGISTER NOW!
Top Bottom