To avoid these ads, REGISTER NOW!

Scepter's Shop Build and Projects

OP
S

ScepterToad

Well-known member
Joined
Nov 9, 2023
Messages
340
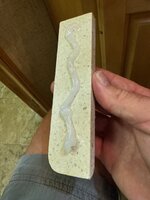
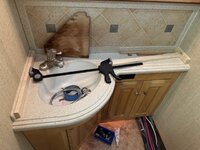
Well, another weekend down and it was pretty decent. I spent less time at the shop this weekend (which I don't really like), but I got some down time both mornings, which I needed. Saturday I spent the morning drinking some coffee and watching This Old House. I love that show. Headed over to the shop to button up the bathroom project on the coach. I started with the two end "backsplash" pieces on the countertop. They were originally put on with silicone adhesive, which is what I used to put it back on. I cut some small pieces of 1x2 and used them to push on the corian parts with a bar clamp with the ends turned around. Unfortunately, it was on an angle. More on that later.

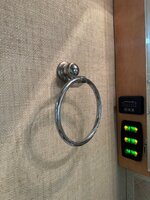
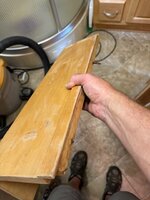
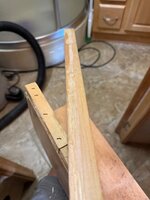
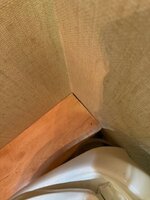
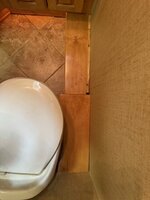
From there, I moved on to the wood case that sits over the cable/waterline chase at the bottom of the outside wall. It's two pieces and once I figured out how it went back in, I was able to get it cleaned up and in place. Again, secured only with one screw and some silicone adhesive caulk. The wall was a little out of square, which created a small gap in the corner. However, once I got it caulked in, it looks pretty OK. The second screw had broken off when I pulled the parts, so I didn't try to put it back in. I'm not sure how that will work out long term, but I'll keep an eye on it. After that went in, I moved to the corner cabinet and piece of "crown molding" that goes in on the outside wall. Cabinet is screwed to the wall and the crown is glued on. I also tackled the TP holder and towel holder. Easy Peasy.

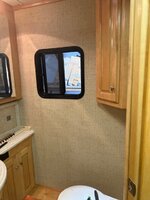
Final piece for the day was the window. I didn't realize when I pulled it out that it has a rubber gasket around it and not butyl tape like a lot of camper windows have. I managed to cut it while removing the caulking along the top of the window. Given that, I opted to seal the entire window. I laid a bead on the rubber gasket and pressed the window in. Securing it inside with the 13 or so screws that make up the inner frame. From there, I sealed it up along the outside edge with more silicone caulking.

Yet to do is the dryer vent and some small trim pieces along the floor, which are siliconed on with small pins (not brads). I ran out of silicone, so I couldn't finish up. That worked out though, because my buddy called with a problem tractor stuck in the field. One of the guys had been bush hogging and it just died. He's not much for maintenance on things, so the phone diagnosis was a fuel filter (which probably hasn't been changed in years, if ever). Got to the tractor, cracked the bleeder screw after verifying that it had fuel in it and there was fuel coming out. Ok, not a filter. Cracked an injector line loose and nothing. Ok, injection pump INOP. Turned out to be the shutoff solenoid wire was loose (spade connector) causing the injection pump to not push fuel. Rigged it back on and sent him on his way. He can deal with putting a new connector on.

Sunday, was a lot of the same in the morning and then went to see my folks. I hadn't seen them in about a month and they're getting up in years. Any time I can get with them is appreciated. My dad has two barns FULL of stuff and his health is not great these days. All that stuff will go to me at some point, so he's trying to unload a few things here and there now. Stuff he'll really never use. There are a few items that he's eyeing and they'll be a welcome addition to my collection of tools. More on that later. For now, some pics of the bathroom remodel.
IMG_0734.jpg
Bead of silicone for the "backsplash"
IMG_0735.jpg
Rigged up clamp


IMG_0738.jpg
Towel holder. I'm really starting to like this wallpaper.
IMG_0739.jpg
Half of the base that sits over the utility chase.

IMG_0740.jpg
I had to take the cap off to expose the screws.
IMG_0743.jpg
Removed

IMG_0744.jpg
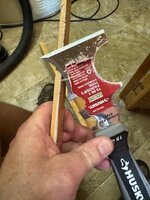
These scrapers work really well for removing old caulking. Just have to be careful as they'll dig in pretty easy.
IMG_0746.jpg
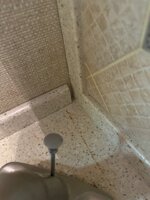
Just out of square. I wasn't expecting the the walls would be square, so this wasn't a surprise.

IMG_0747.jpg

Test fit.

IMG_0750.jpg
In with the caulking sealing up the joints.

More to come.
 
To avoid these ads, REGISTER NOW!
OP
S

ScepterToad

Well-known member
Joined
Nov 9, 2023
Messages
340
Moving on with more pictures.

IMG_0752.jpg
Final fitment of the chase cover.

IMG_0753.jpg
Corner cabinet and moulding at the top.

IMG_0757.jpg
Window in and secured.

IMG_0758.jpg

And this is why you don't use an angle when clamping parts. Unfortunately, one of the ends slid. Luckily, I was able to remove it as the silicone hadn't cured all the way. At fist glance, I freaked out because the wallpaper is what it's glued to. Fortunately, it was wet enough to remove without pulling the wallpaper.

IMG_0763.jpg

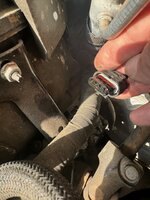
Almost forgot! The Jeep has been experiencing random codes related to the camshaft position sensor on Bank 2 (drivers side). I found the pinout online and there are 4 pins on this connector. 3 should have 5 VDC and 1 is a ground. I went into it thinking that maybe I had a grounding issue. I also have an intermittent ABS light and a front turn signal that keeps going out. I pulled the connector (which is a pain by the way) and right away realized that this particular sensor is passing oil through. That explains the codes. So, I'll source two new sensors and get those put in. For now, I cleaned it up best I could and plugged it back in. The Jeep is at the house, so I'll want to drive it over to the shop to swap these out. Or maybe I'll do it at home so it's not a hot mess under the hood. To be determined.

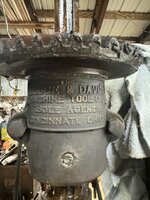
Ok, so, my dad has been collecting tools, tractors, dozers, and all manner of steel, parts, everything you can imagine since he was 5 or so years old (the better part of 70 years). My parents have some acreage and two barns that are chock FULL of stuff. Recently, he's been asking me if I want certain items. Twice now, we've looked at one of 3 drill presses he has. I've finally chosen one to take. It's pretty old. Run by a flat belt and a 110V 1.5 HP motor. It has a 1" Jacobs chuck and if I'm lucky, I'll get some of the drill bits with it. It's way overkill for anything I plan on doing in the near (or far) future, but it's a really cool old drill press and I'll make good use of it wherever I can. I haven't moved it yet, but I did snap a picture of the data plate. I figure if nothin else, I'll try my hand at restoring a really old drill press back to it's former glory.

IMG_0765.jpg

Best I can tell, this drill press would be from the early 1900s, possibly prior to WWI. Anyone have any real info on this?
 
OP
S

ScepterToad

Well-known member
Joined
Nov 9, 2023
Messages
340
Well, summer is about over and I for one am not super happy about it. I hope everyone had a great Labor Day weekend.

We had a party at the house this weekend for a couple of birthdays and Labor Day, all combined into one shin dig, complete with "Dunk the Birthday Boy" dunk tank. My SIL loves to come up with games during these parties and she never disappoints. Prizes even! One other upside was that as the "Birthday Boy", I got to trash talk everyone trying to hit the dinger to dunk me. Most couldn't hit it, but they paid me back by running up to it and smacking it with their hand. Fun was had all around.

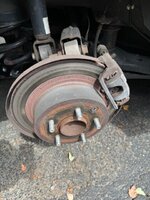
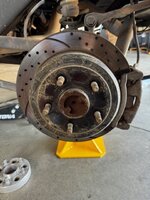
Saturday we prepped for the party, but since one of the girls were back home from college, I got tagged to do some work on her car. She somehow ended up with a hole in her AC condenser, which I don't really have the expertise to fix. I could have pulled the bumper and R&Rd the condenser and lines, but evacuation and refill is not really in my wheelhouse. So, that went to a local shop we trust. From there, she had back brakes needing replacement. I picked up new rotors and pads from NAPA only to figure out that the passenger side soft hose had collapsed (which caused her rear pads to go to metal...you get the idea). So, driveway repair it was. I didn't think that I'd be able to bleed the brakes well enough by myself with my Mityvac. I have the small handheld one and I've never been able to get it to work very well. Probably operator error, but I also didn't want to be stuck at the shop with no one to help me bleed them manually. So, I stayed home. Overall, not a bad job as brakes go. The brake lines were a bit tight and somewhat rusted, but they came right loose with a little WD-40 presoak. The only other thing I'll say about this particular brake job is that the top caliper bracket bolt is a bit tough to get to with the car jacked up from the middle. When the suspension sags, the bolt head is just clear of the top control arm to get a wobble socket on it. Regular socket wouldn't fit, shallow or deep. And there's no room for a big battery powered impact in there, so all the bolts came out and went back in by hand. Not a huge deal, but it does take longer.

On to the pics.

IMG_0806.jpg
I picked this piston compressor kit from Amazon. Cheap set, but it'll do for anything I ever need. Much easier than the old C-clamp method.

IMG_0808.jpg
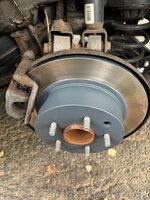
So, NAPA sold me these two rotors. As you can see one is made in USA, and the other China. As you can probably guess, the China part was NOT the same and was in fact rusty out of the box. The USA one had much thinker plastic wrap. Both had dessicant in the bags.

IMG_0800.jpg
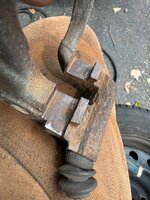
I like to file the area where the pads sit in the little metal clips to make sure there are no high spots. I don't use grease on brakes at all, and I like the pads to be nice and loose in there so they'll move freely.

IMG_0799.jpg
This is what they looked like before. Rusty and crusty. You have to love the salt.


IMG_0798.jpg
Drivers side was getting low, but not gone.

IMG_0797.jpg
Passenger side. This cleaned up pretty well.

IMG_0796.jpg
Plenty of junk floating around.

IMG_0795.jpg
Nice dent in the rotor from the last time the dealer did the brakes.

IMG_0794.jpg
Nice amount of junk sitting on the bracket for the brake line. It's no wonder these OH cars rust and fall apart.

IMG_0792.jpg
Drivers side. Not terrible, but getting there for sure.

More to come.
 
OP
S

ScepterToad

Well-known member
Joined
Nov 9, 2023
Messages
340
Moving on to the rest of the brake swap pics.

IMG_0801.jpg
Drivers side put back together. I waited to swap out the brake lines until I had everything mounted back up. Just easier to break the banjo bolt loose from the caliper without it flopping around.

IMG_0802.jpg
High temp anti-seize on the mating surfaces.

IMG_0803.jpg
This is the China rotor.

IMG_0804.jpg
China rotor again.

IMG_0805.jpg
China rotor went on the passenger side. It wasn't terrible, and that rust was long gone by the time I bedded the brake pads. I guess my expectations of NAPA "premium" parts is a little too high.
 
OP
S

ScepterToad

Well-known member
Joined
Nov 9, 2023
Messages
340
Day after the party, I ran over to the shop to get a few things done. The Jeep Camshaft position sensor on the drivers side was passing oil to the connector, which was causing it to throw a code. I had ordered Mopar replacements and they came in last week. So, that's one project. Also, the antilock brakes have been intermittently popping lights. Third, the front left turn signal is intermittent. It sometimes works and then will go out, causing a message on the dash.

I tore the turn signal apart at the plug and cleaned it all out, inspected the bulb, filaments are intact. At this point, I suspect that the bulb itself is having trouble getting good contact as the wires aren't great on the bulb. I'll give that a try before I start chasing wires or changing the bulb socket.

Same thing with the antilock brakes. I need to replace the brakes on the Jeep, and I suspect that the dust has gotten to the tone wheel. I did blow it out as best I could with the air hose, but you can't really get in there. Once I get to the brake change, I'll pull it apart all the way in that process and clean it up good. It's the same sensor that I already replaced with an Autozone (duralast) brand. If I go at it again, I'll get a Mopar sensor.

On to the camshaft sensor replacements. Turns out, the drivers side was the worst of the two. Overall not a bad swap, but I did have to take some stuff apart. The worst part was getting the connectors off of the sensors. They have the little lock on them, which slides out, and then you have to lift a small tab on the other end and slide them off. Took me a while to figure that all out. From there, it's a T30 to pull the screw that holds them in and they just lift out of the hole. Back in the way they came out, tighten down, and plug back in. Not a huge deal. I do wonder though, anyone have a torque value for a fastener like that? I'd be interested to know if there is one. If I could find a dang FSM for this Jeep, they might have it in there. I digress...

IMG_0813.jpg
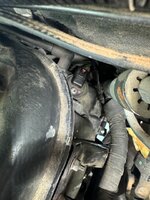
Drivers side camshaft sensor located on the back of the valve cover. Had to take the foam insulation off of the back of the intake to get to it properly.

IMG_0814.jpg
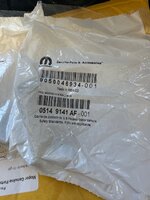
Mopar part number for the camshaft sensors.

IMG_0815.jpg

IMG_0816.jpg
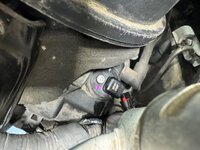
Passenger side. Actually much easier to get to vs the drivers side.

IMG_0819.jpg
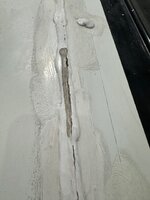
Other project for the day was the skylight over the shower on the coach. The dicor was showing signs of age I didn't' like. The rest of the dicor up on the roof looks brand new, even though it's at least 3 years old now.

IMG_0820.jpg
Heat gun and a scraper make short work of it.

IMG_0821.jpg
And, back with new. At some point in the future, I'll pull this all back off, remove the skylight, and rebuild part of the inside. There are a few screws that are stripped in there and will eventually need fixing.
 

zmotorsports

ALLIANCE MEMBER
Joined
Oct 20, 2009
Messages
21,441
Location
Northern Utah
Nice job on the repairs Keith.

I just replaced the skylight in our 2003 Dynasty a couple of years ago. It wasn't broken or cracked but glad I did as it was fairly brittle when I got it off. I don't like the pressure the screws place on the Lexan, even though that is the industry standard of how they are affixed to the roofs, but I fabricated a picture frame out of aluminum strap and used that to evenly apply pressure and sandwich the skylight as well as the inner clear bubble down to the roof. I used a butyl caulking between the layers then covered the screw heads with Dicor. I had read years ago that they don't recommend Dicor directly to the Lexan as it can break it down and cause accelerated deterioration, so I have used a skylight specific caulking on ours during our ownership. Maybe that's why ours was still intact and not cracked or broken, not sure.

I only applied Dicor to the screw heads on the aluminum when I replaced it and not directly on the Lexan.
 
OP
S

ScepterToad

Well-known member
Joined
Nov 9, 2023
Messages
340
Nice job on the repairs Keith.

I just replaced the skylight in our 2003 Dynasty a couple of years ago. It wasn't broken or cracked but glad I did as it was fairly brittle when I got it off. I don't like the pressure the screws place on the Lexan, even though that is the industry standard of how they are affixed to the roofs, but I fabricated a picture frame out of aluminum strap and used that to evenly apply pressure and sandwich the skylight as well as the inner clear bubble down to the roof. I used a butyl caulking between the layers then covered the screw heads with Dicor. I had read years ago that they don't recommend Dicor directly to the Lexan as it can break it down and cause accelerated deterioration, so I have used a skylight specific caulking on ours during our ownership. Maybe that's why ours was still intact and not cracked or broken, not sure.

I only applied Dicor to the screw heads on the aluminum when I replaced it and not directly on the Lexan.
Thanks Mike!

I have seen your video on the skylight repair you did. I figure something along those lines is in my future.
 
OP
S

ScepterToad

Well-known member
Joined
Nov 9, 2023
Messages
340
Finally finished up the Coach wall separation project this past Sunday. Just a few items were left from that project and added in a few more while I was at it.

First up, the valance for the blind in the toilet room. It's attached to the wall with 4 small L brackets with screws into the wall and then into the wood valance. When I first tried to reinstall it, I couldn't get the holes parked on the wall because the valance is only about 2.5" deep and I didn't have a marking device that would fit. At the time, I set it aside. I searched online for a marking device that would fit, to no avail. So, as I was driving home from work last week, I thought, why not just use a pencil and cut a small section off of it which would fit in the hole? Duh. Sometimes I'm amazed at my own stupidity. So, got that positioned and screwed down. We've opted to not replace the same blind that was in there before, so I didn't replace that. We're not sure what we want to put in just yet. From there, I replaced the remaining trim around the bottom of the cabinets and hung the toilet spray nozzle onto the wall. Cleaned the bathroom and moved back outside.

I replaced the dryer vent sealed that up, not much else to say about that. Moved up to the roof to check the skylight repair from last weekend and see if I needed to add a bit more dicor. I did find a spot or two that looked a little thin, so I added that and moved over to the side of the coach that the wall delamination was on. Looking for possible places where water could come in, I noticed a few things. One, what I thought was nice clean, new(ish) dicor on the remainder of the roof is actually some sort of paint on top of dicor that probably looks like what I removed from the skylight. I've been up there a lot and spent a LOT of time up there last summer compounding and buffing the fiberglass roof. Not sure how I missed the fact that it's painted, but I did. So, inspecting that, I realized there was at least one area where the awning bracket is attached that needed fixing. So, I stripped a section out and replaced with more dicor. That will do for the time being and I'm thinking I may strip it all out and go back on the bracket with eternabond tape. My only issue with that is, it's fairly permanent. More research is needed.

Second, I noticed that one area of the belt along the top of the coach, almost directly above the area where the delamination was, there was a split in the caulking. So, I cleaned it all up with acetone and applied some Geocel Pro RV Sealant. I also used that anywhere else that I saw small gaps up there. Specifically, a vertical joint in the same area. I think that'll suffice for the remainder of the camping season. Once it turns cold here, I'll start to strip everything back and spend a fair amount of time sealing it all back. There are plenty of areas that I'd like to redo, such as the clearance lights, all belt molding, and the slides.

After that, I think we're ready for a quick weekend getaway this weekend up to Hocking Hills, which is near one of the kids at school. It's family weekend at the University, so we'll get a bit of time away.

We'll be taking the Jeep up there and I've struggled with Apple Car Play for a bit now. The stereo that I have (came with the Jeep) is not the greatest, but it works. What I don't have is any type of cell phone mount. I've been eyeballing the Bullet Point Mounting Solutions mount for a while, but never pulled the trigger on one. I ended up with one for my birthday, so, I looked at mounting it in there. I'm not a huge fan of drilling holes in dashes of cars, but I'll make an exception for this one. Only challenge right now is the fact that the stereo is very close to the underside of the dash pocket on top where the mount will sit. That put me off long enough to put the mount back in the box and munge on it a bit more. For now, a few pictures.


IMG_0830.jpg
This is the cell phone mount. This particular kit came with a regular cell mount and a camera mount. It uses ball mounts for everything, so I can get other mount types and swap them out. Ipad mount may be another one I get for offroad maps.

IMG_0832.jpg
Here you can see the "paint" and the cracked dicor underneath. I stripped all that out and replaced with fresh dicor.

IMG_0833.jpg
Fully stripped out.

IMG_0840.jpg
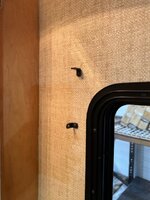
Brackets for the valance installed on the wall.

IMG_0841.jpg
Here's my tiny pencil. I wanted one of those chalk spray markers, but I couldn't find one with a curved end.

IMG_0845.jpg
If you remember, a while back I noticed that the door seal below the fridge vent was rusted and bad. I removed it and found this on Amazon. Installed that as well and now the door closes very well and I'm sure it has a good seal.

IMG_0846.jpg
It's a bit different profile than what was there, but worked out well. I'll inspect the other doors and possibly replace others.
 
OP
S

ScepterToad

Well-known member
Joined
Nov 9, 2023
Messages
340
No work this past weekend at the shop as we took a much needed weekend getaway. Went to visit with one of the kids at school in eastern Ohio. There was a Pawpaw festival that weekend, and it was family weekend at the university, so there wasn't much in the form of campsites. We ended up at a Hipcamp, which turned out to be quite nice. Very nice owner of property that had been in his family as a tree farm for many years. He's turned part of it into several campsites with 30 amp electric and water. Would stay there again. Did some hiking but other than that, it was just nice to visit and relax. IMG_0876.jpg
Early morning view stepping out of the coach. The leaves are starting to turn here in OH as we're experiencing a bit of a drought these days.
 
OP
S

ScepterToad

Well-known member
Joined
Nov 9, 2023
Messages
340
A bit of work done in the shop this past weekend. Hopefully everyone had a great weekend. It's moving into fall here, so temperatures are starting to be more comfortable in the shop during the day. Saturday was super nice, and Sunday was a bit warm, but not terrible.

I had three specific things to get done: two sets of brakes and an oil change.

First up, one of the kids' cars. 2013 Kia in for a brake job. I had changed out the busing for her steering wheel, which took a bunch of play out and the incessant rocking back a forth. From there, she had a fair amount of vibration when braking. So, we ordered up a set of rotors and pads and went to it. I didn't get many pictures. It was pretty straightforward. Except, it's a Kia and they apparently like to make it hard. Front's were easy, but the rear had an issue. In order to get the caliper bracket off, I had to remove one bolt of the control arm. About the dumbest thing I've seen on a car in a while. In any case, brakes replaced, all bolts torqued, and pads bedded in. She went with powerstop, which was in her budget and they have a pretty specific bedding process. For this set, they wanted 30 repetitions at 35 to 5 mph. Seemed like a lot. I got through 20 and called it. Brakes smoked a bit early on and they work just fine. No more vibration.

Next up, the Jeep. Now, I haven't had any issues with it, but it did make a bit of noise at very low speeds. So, I also went with the Powerstop but in the "truck and tow", which is a ceramic pad with drilled and slotted rotors. Got it in the shop and up on jack stands, drained the oil, and pulled it apart. I did have to "phone a friend" in the middle of it because when I pulled the rear caliper brackets, the slide pins were frozen solid. The passenger fronts were also a bit frozen, and probably could have been replaced, but they cleaned up fairly well. Overall, a pretty easy job. This version wanted 5 cycles at 40 to 10 and 5 cycles at 35 to 5. These also smoked a bit during bedding, but all works as it should now.

First up: Kia

IMG_0921.jpg
Because I wanted to rotate the tires, I did one side at a time instead of front then back.


IMG_0922.jpg
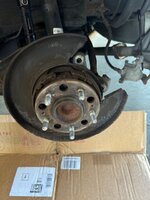
Rears were in pretty tough shape. Luckily, the last person used some anti seize on the screws holding the rotors on, so I didn't have to fight any of them.

IMG_0923.jpg
The fronts were also in pretty tough shape.

IMG_0924.jpg
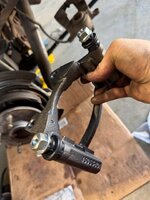
Here's the view of the control arm bolt that needs removed so that the caliper bracket bolt can be removed.

IMG_0925.jpg
Better picture. I did use a wrench and get it loose and backed the bolt out quite a ways. However, I don't think it would have come all the way out and it was taking forever.

IMG_0926.jpg
For an Ohio car, it's not it terrible shape for its age rust wise.

IMG_0927.jpg
And the back of the front rotors. Not great.

That's it for the Kia.
 
OP
S

ScepterToad

Well-known member
Joined
Nov 9, 2023
Messages
340
Moving on to the Jeep. I also picked up a set of 22 ton jack stands. I've needed to get some for the coach for a while and I've looked at these over and over again. Pretty well built as far as I can tell. I use the 6 ton Daytona's from HF all the time with the Jeep due top their height, and these matched up pretty well. I'll pick up at least one more set for the coach as I get further into the heavier maintenance items on that.

IMG_0929.jpg
As you can see, the MT's that the Jeep came with when I bought it are on their last legs. I also rotated them front to back for the last bit. I've settled on the Mickey Thompson Baja Boss ATs as a replacement. Just would like to find them on sale or some other deal before I pull the trigger. Definitely before winter sets in.
IMG_0930.jpg
Up all the way off the floor.


IMG_0932.jpg
Also, the rears were on "backwards". In my view, the slots should face to the rear.

IMG_0933.jpg
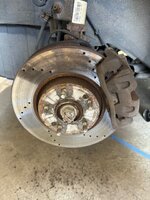
Front bearings in really good shape still.

IMG_0934.jpg
Front rotors and pads were still in decent shape. I thought about keeping them, but decided not to in the end.

IMG_0935.jpg
Even the inside surface wasn't terrible.
IMG_0936.jpg
I used foam ear plugs in the slide pin holes when using the wire wheel to clean them up. Keeps the junk out.

IMG_0937.jpg
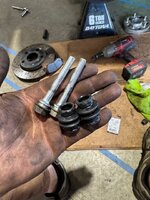
Drivers front slide pins looked brand new. New boots came with the brake kit. All went back with brake grease.

IMG_0938.jpg
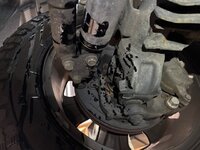
And I wonder why my ABS light has been on...I need to investigate this a bit more as that's oil. My fear is that I have a leaky axle seal. I hit it hard with brake cleaner and driving away the light went out. Only to come back on later.

IMG_0941.jpg
Front passenger slide pins were almost toast, but they cleaned up good. More to come.
 
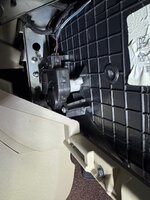
OP
S

ScepterToad

Well-known member
Joined
Nov 9, 2023
Messages
340
Finishing up on the Jeep.
IMG_0942.jpg
A little wire wheel action worked pretty good on the fronts.
IMG_0943.jpg
Shiny new rear caliper brackets.
IMG_0944.jpg
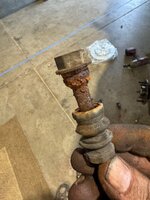
I ended up having to use two of the old pad slides. They sent enough, but they have specific orientation and I was missing two. Cleaned up two of the best looking old ones and they worked out fine.

That's about it for the weekend.
 
OP
S

ScepterToad

Well-known member
Joined
Nov 9, 2023
Messages
340
Hope everyone had a great weekend!

I've been slacking on the shop work for a few weekends. We went last weekend to a "staycation" here in town at a camp resort. Our nieces had soccer tournaments all weekend and we went to the Halloween Haunt at a local amusement park. Nice little weekend getaway.

This weekend, I went on a cleaning tear. I'm not one to keep vehicles super clean inside. However, with the Jeep, I have a bit more desire to keep things nice. Especially since I plan to keep it for a long time and eventually LS swap it. I had the soft top on for the summer and late in the summer, it seems to have sprung a leak. I hadn't driven it for almost 2 weeks and the first time I got back in it, I could smell it. Passenger floorboard wet. So, I swapped out the hard top and this weekend I dug into it. I started by just pulling the rubber mats and thought maybe I could just clean up the carpets. About 5 minutes in, I realized the extent of the dirt. So, I pulled the carpets front to back and got to cleaning. And it was FILTHY. IF I'd had more time on Saturday, I would have pulled the seats and all the plastic and pressure washed the dang thing. In any case, several hours later, it's mostly clean. Certainly better than it was. I think next spring, I'll pull the seats and all the plastic aside from the dash and do another deep clean. I also need to sort out how the leak started and what the weatherstripping should be. It's certainly got some added along the top and front of the door openings.

Sunday, I pulled the coach out and did a quick wash on it. There was several layers of dirt dating back from when we rolled through storms coming out of Moab this year. She was a dirty mess. I also hit the battery compartment, generator, and part of the engine bay while I was at it. More cleaning is necessary there, but we also have at least one more weekend trip this month so it'll get dirty again.

After that, I started messing around with the old Speedaire Compressor I pulled out of my dad's barn. I need to wire it, put the new pressure switch on (wired and plumbed) and get it a bit cleaned up. I still haven't fired it up just to make sure it works, but I'm pretty close now. Just need a few more small pipe fittings that I didn't have in stock. I also hit it with a wire wheel on the outside just to get the 15 years worth of barn dirt off of it. I may take it further in the future, but mostly clean is good enough for me right now. I also ended up buying a 1/2" 100' hose for it. I contemplated plumbing the shop and running drops all around. However, since I don't own the facility, I didn't really want to put that kind of cash up. The Jeep needs tires, and those ain't cheap.

On to the pics. I didn't get many, but here they are.
IMG_1048.jpg
These batteries were COVERED in dust and dirt. At some point I'll have to take it all out and sand, treat and paint the entire compartment.

IMG_1049.jpg
Not super clean, but she's still looking good for an old girl.

IMG_1050.jpg
Haven't waxed the coach for over a year and you can still see good reflections in the paint.


IMG_1053.jpg
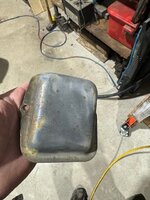
This is the electrical cover. Once I started cleaning it up, I decided to clean the rest of the compressor up.

IMG_1054.jpg
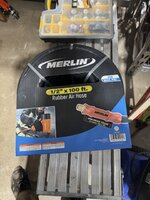
New hose. I've had this brand for a while at the house and they work well. Being 1/2" though makes this one heavy and a bit unruly.

IMG_1056.jpg
I also straightened out these cooling fins where they were bent from getting it out of it's hole.

IMG_1057.jpg
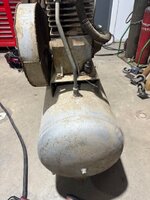
Before any real cleaning.

IMG_1058.jpg
IMG_1059.jpg
Turned out halfway decent.

I have one more weekend before the next trip, so I'll be changing out the water hose on the coach and the round deck hatch under the sewer drain. The one I have in there is NOT big enough to connect the stinky slinky without snaking it up and around. Not a huge deal, but it's a bit of a pain to get connected right.
 
OP
S

ScepterToad

Well-known member
Joined
Nov 9, 2023
Messages
340
One last little project this weekend prior to out trip this weekend coming up. Overall the coach is in great shape and ready to roll.

The sewer outlet in the water bay has been awful since we got the coach. There are two options. One, leave the door open and hook up the stinky slinky direct, or run it up through the bottom and bend it all around to get it connected. Wish I had a picture of it. Long story short, it was a giant pain in the you know what.

I purchased a smaller 6" deck hatch a while back at a small hardware store. However, it just wasn't quite big enough. So, I recently found one on Amazon in the 10" variety. That'll do.

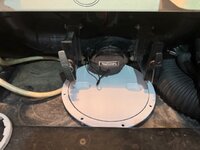
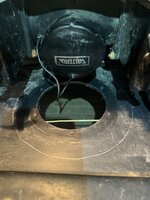
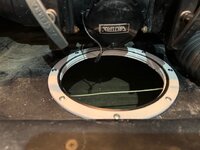
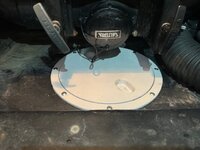
I started by removing the tiny screws holding the factory deck hatch in and pulled it right out. Cleaned up the area. I made a cardboard template for the new one and cut it out. Easy enough. Transferred that onto the black plastic with a silver pencil commonly used for marking metal. Worked fairly well. I then tried to figure out what I'd use to cut the new hole. Turns out that I had some drill bit cutters for my dremel that worked beautifully. Cut the new larger hole out. Had a couple of test fits and then it was down to drilling the holes for the screws. Since it was pretty tight in the top, I put it up from the bottom and used the ring as the template, pulled it back off, and installed on the top. I used some silicone under it as well.

After that, I finished up setting up the air compressor (mostly). Wired up and plumbed in the pressure switch, turned the breaker on, and then the switch. She fired right up and started making air. I did find that the reference line I put on was a little crooked and started leaking air. I also noticed that there's another small copper line that runs from the side of the compressor up to the head. I'm not sure what it actually does, but there's a leak in the fitting. Pretty standard fitting, so I'll replace that without much issue. The main problem with the compressor at this point is that when I shut it down, I could hear air leaking back past the compressor head from the tank. So, the reeds are bad or out of adjustment (if that's a thing). In any case, I needed another winter project anyway so I'll tear it down and see what's what. I also started eyeballing where I'll put the vintage drill press that's coming my way probably weekend after next. It needs about 3'x4' of floor space.
IMG_1074.jpg
Old opening


IMG_1075.jpg
New one sitting about in position.

IMG_1076.jpg
Cardboard template

IMG_1077.jpg
Ready to cut the new hole.

IMG_1079.jpg
Installed underneath to get the screw holes in the plastic.

IMG_1080.jpg
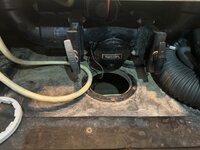
Installed. Not sure what that green wire is for. I meant to investigate that but forgot.

IMG_1081.jpg
I think this will work out nicely.

IMG_1084.jpg
Switch wired up on the compressor. I did go back and fix that cut in the white wire you see there.


IMG_1085.jpg
That fitting there in the center is leaking straight out the bottom.

That's it for now. Next weekend we'll head south for the weekend to spend some time with the kids.
 

zmotorsports

ALLIANCE MEMBER
Joined
Oct 20, 2009
Messages
21,441
Location
Northern Utah
You will like that larger sewer hose opening much more Keith. I replaced the small 4" marine cap with a larger one nearly 18 years ago now. Found out that wasn't going to work during the first trip.

I don't need it to be close to the size of the sewer hose because I never leave the sewer hose connected while staying at an RV park. I only connect it to dump, then it gets stowed back into the storage tube until I need it again. I despise the look of having the sewer hoses connected while parked. I'm also to the point where I don't even hook up the water supply. I fill my tank and run off the onboard system then when low I refill, usually before breaking camp and heading to the next location or home. When parked I generally only have the shore power cord connected to the coach.
 
To avoid these ads, REGISTER NOW!
OP
S

ScepterToad

Well-known member
Joined
Nov 9, 2023
Messages
340
You will like that larger sewer hose opening much more Keith. I replaced the small 4" marine cap with a larger one nearly 18 years ago now. Found out that wasn't going to work during the first trip.

I don't need it to be close to the size of the sewer hose because I never leave the sewer hose connected while staying at an RV park. I only connect it to dump, then it gets stowed back into the storage tube until I need it again. I despise the look of having the sewer hoses connected while parked. I'm also to the point where I don't even hook up the water supply. I fill my tank and run off the onboard system then when low I refill, usually before breaking camp and heading to the next location or home. When parked I generally only have the shore power cord connected to the coach.
I'm about 50/50 on connections while camped. We generally have at least 4 people, sometimes as many as 8 staying in the coach, so keeping the grey tank open and water hooked up is usually the way to go for us. When it's just the two of us, most times I won't worry about it. Water pressure is better with the tank anyway. That's my mistake though. I thought I'd get fancy and get one of those collapsible hoses. Half the dang water pressure keeps the hose inflated, so I lose a bunch. That's next on the project list.
 
OP
S

ScepterToad

Well-known member
Joined
Nov 9, 2023
Messages
340
You are much more generous than I am with sharing your coach Keith. Like my wife says, "our coach allows drinks for 6, dinner for 4 but only sleeps 2". :bounce:
I'd like to be there someday. My better half has 7 siblings, including a twin sister. All with kids and we have 4. When we go camping, let's just say we go camping. It's a zoo for sure but it's a heck of a lot of fun...mostly.
 
OP
S

ScepterToad

Well-known member
Joined
Nov 9, 2023
Messages
340
Back from a long weekend in Guntersville, Alabama. Probably last trip of this year, but hopefully we'll get out again early next year for a winter trip.

The campground (River Ridge Retreat) was built on land that was at one point a Monsanto polyester filament plant. There are remnants of that facility all over the campground, which encompasses over 600 acres. It's a pretty neat place. The plant closed in the early 80's according to the internets.

There's not much around this area of the lake aside from houses and a small town (which we didn't get to). This trip was about relaxation and spending time with 3 of the 4 kids. We did a couple of small hikes, ate some good food, and had a great time. Back to work at the shop next weekend as the winter projects are starting to stack up a bit. I need to rewrite my project list.

IMG_1112.jpg

View from just across our campsite.

IMG_1116.jpg

Lake right around sunset. If you look close on that piling, there's an Osprey nest on there. We also had two bald eagles flying around chattering to each other. They were massive with what I expect was probably a 6' wingspan.

IMG_1118.jpg

One of the dogs found this along the bank of the lake. Looks to be a catfish skeleton. At least 3' long.
IMG_1126.jpg
Another view of the lake in the morning. That second piling had an Osprey nest on it as well.


IMG_1145.jpg
There were all these concrete structures all over the property. Rows of them. Most didn't have any indication as to what they were for, but walking in the woods, I ran across the pipes. I suspect that they all held pipes which were used to run material from the plant to the lake for ship transport.

IMG_1146.jpg
Also found this in the woods. I had the dogs with me or I would have likely gone down in there to investigate more.
IMG_1148.jpg
And more interesting things. T-handles for turning valve on and off I suspect.

I'll probably hit this area again in the future. The lake has some things that we didn't see that I wouldn't mind seeing. Overall, nice place and super nice folks who own the campground. Very nice facilities as well with spacious campsites.
 
OP
S

ScepterToad

Well-known member
Joined
Nov 9, 2023
Messages
340
I hope everyone had a great weekend! I was able to spend a few hours at the shop on Friday. I don't have any pressing projects going right now, so I went over to see about getting the Speedair compressor torn down to see what's up it. If you remember, the first time I fired it up, the air was back feeding through the head from the tank, indicating (to me) that the reeds were not holding. There was also a leak on the side of the crankcase coming from a fitting that had a small line that went back up to the head. Not knowing what any of this stuff was, I dove in to try and figure it out.

Along the way to working on the compressor, I had one of the kids cars in the shop for an oil change. 2015 Altima. While I was SUPER thankful for having a heated shop, I was a bit irritated by how low to the ground these things are. Time to start a serious search for a lift (After a forklift for the shop).

IMG_1184.jpg
This was my thinnest catch can, and this is with the car jacked up several inches. I don't like not having them level, but the good news was that the drain plug is on the drivers side of the pan bottom. Jacked from the passenger side, it drained into the pan.
IMG_1179.jpg
Have to take several plastic clips off of this cover to get to the oil filter.

IMG_1180.jpg
Oil filter. She gets her oil changed while at school at the only place in town. Walmart.
IMG_1185.jpg
At just over 60K on the odometer, I have some other maintenance to get done next time she's in town, probably over the Christmas Holiday. I'll have to get the parts together and do a bit more research on the CVT fluid and filter change. As I let that drain, I moved over to the compressor.

I started with the small line and the fitting that I thought was leaking. I pulled the line and the fitting was a bit loose and almost turned out by hand. Once out, I found a valve core inside the fitting and a hole on the bottom, clearly factory.

IMG_1176.jpg
Tough to see in the pic, but there's a valve core in there.

IMG_1177.jpg
Factory hole in the bottom.
IMG_1178.jpg
And a spring loaded pin coming through the end of the hole, which pushes on the valve, releasing air through the small tube and back up to the compressor head.
IMG_1173.jpg
You can see the small line going back up to the top of the head, along with the supply line to the tank and the intercooler pipe, which goes from the large piston side over to the small piston side. I had originally thought that this was a single stage compressor. I was proven wrong.
IMG_1175.jpg
This is the bottom of the intake filter housing. Apparently, this compressor was green originally. At least the head was. I'll have some cleanup to do as this goes back together.

More to come.
 

zmotorsports

ALLIANCE MEMBER
Joined
Oct 20, 2009
Messages
21,441
Location
Northern Utah
Nice work Keith.

My wife's daily driver for many years and 220k miles was a 2004 Nissan Altima. It was a great car with a relatively low cost of ownership to maintain. We would have replaced it with another one back in 2016 when we went on the hunt for the wife's newer car, but I wouldn't have one with the CVT, otherwise they are great cars and either their 2.5 I4 engine or the 3.5 v6 were great platforms.

My one complaint in all those years was also the small plastic cover over the oil filter and harmonic balancer, but I replaced the Christmas tree style barbs with the reuseable style that had the center pin that expands the backside and it made it much more pleasant during each LOF service.
 
OP
S

ScepterToad

Well-known member
Joined
Nov 9, 2023
Messages
340
Continuing on with the compressor.

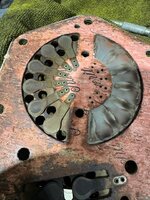
I removed the crankcase housing. I didn't really need to in hindsight, but at the time I was still exploring. This housing contains the bearing for one end of the crankshaft of the compressor. I'll have to find another gasket. And, I found a small sponge inside the housing. My guess is that it's a barrier to keep crankcase oil out of the small tube going back up to the head. I also believe at this point that the valve is there to prevent excess crankcase pressure.
IMG_1181.jpg
Bearing and spring loaded rod. Those metal "flaps" rotate outwards. Not sure why, but that's my guess. Possibly to keep the oil from getting into the housing. I'd appreciate anyone chiming in if they know how this actually works.

IMG_1182.jpg
Bearing race on the back of the housing.


IMG_1183.jpg

Small sponge I found inside the housing. More in the next post.
 
OP
S

ScepterToad

Well-known member
Joined
Nov 9, 2023
Messages
340
Moving on to the meat of the compressor problem, the reeds (that's what I'm calling them.

I removed the supply line to the tank and the intercooler line and the bolts holding the head on, revealing the two pistons.

IMG_1187.jpg
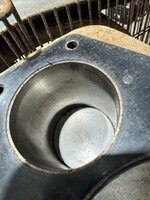
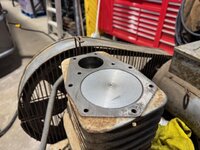
Small piston. The walls are "lined" but not "scored". This is an old compressor, and I'll run it this way. Not going down the road of tearing it down more than this.


IMG_1195.jpg
Large piston. Not sure what the dimple is or the circle. The dirt wiped off fairly well.
IMG_1186.jpg
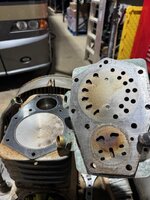
Here you can see the bottom of the metal plate, of which there are two with a gasket sandwiched between.

IMG_1188.jpg
Closer view of the large piston.


IMG_1189.jpg
Those two allen bolts hold the gasket sandwich to the head itself.

IMG_1190.jpg
Bolts removed and on the bench for disassembly.
IMG_1191.jpg
Removed. There's actually 3 gaskets here total. One on the head, one between the two metal plates, and one on the jug.
IMG_1192.jpg
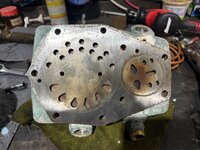
Split in half, and now we get to see the reeds, which are super dirty. I may have been able to clean this all up and get it back together, but since I had it apart and the parts are around $150, it makes sense to not have to tear it down again.
IMG_1193.jpg
Little closer shot of the reeds. That's all part of the gasket.

IMG_1194.jpg

And that's where I stopped work and ordered the gasket set. Once I get that, I'll get it all back together. Thanks for looking.
 
OP
S

ScepterToad

Well-known member
Joined
Nov 9, 2023
Messages
340
Nice work Keith.

My wife's daily driver for many years and 220k miles was a 2004 Nissan Altima. It was a great car with a relatively low cost of ownership to maintain. We would have replaced it with another one back in 2016 when we went on the hunt for the wife's newer car, but I wouldn't have one with the CVT, otherwise they are great cars and either their 2.5 I4 engine or the 3.5 v6 were great platforms.

My one complaint in all those years was also the small plastic cover over the oil filter and harmonic balancer, but I replaced the Christmas tree style barbs with the reuseable style that had the center pin that expands the backside and it made it much more pleasant during each LOF service.
Thanks Mike!

I can't complain about the car other than the difficulty of things while on the ground. I think this car will last her a good long time. I don't particularly like the CVT either, but that's just my internet research (and possibly unfounded). They seem to have issues in some cases, but I suspect that maintenance is the culprit in most of those cases. Seems like there's still a ton of people out there that think transmission fluid is a lifetime fluid and changing it will damage a transmission. Probably one of the top 3 internet myths as far as cars go in my view.

This one has the reusable barbs in it from the factory on the filter cover, so it's not terrible to get to.
 
OP
S

ScepterToad

Well-known member
Joined
Nov 9, 2023
Messages
340
Hope everyone had a great weekend! The year is winding down and I'm not quite sure where it all went.

We had our office Christmas party on Friday night and started getting the house ready for the holidays on Saturday. I'm starting back on some house projects these days, so I won't get as much shop time, but that's ok. The house needs attention too. I'll be gearing up to redo the kitchen this winter with minor projects before a big push to build cabinets myself.

Anyway, Sunday I had a request from my buddy to work on his 17 Ram again. The heat in the truck has not been performing very well. They had taken it to a dealer (Toyota) and the guy said that the heater core needed flushed. Well, I had done that already last year when I worked on the EGR system replacing the valve and motor. I'll be using it to transport product to a trade show in DC at the beginning of the year, so I want it to be right. I also learned that the oil hadn't been changed on time, and so we rectified that.

IMG_1237.jpg
This is the drain plug on the 6.7. This is the first service of this truck I've done, so I was a bit disappointed when I saw the drain plug. 3/8" square drive and it's only about half the depth of a standard 3/8" ratchet end. I'll be looking for a replacement in the near future for the next time I change this oil. Also, with a regular oil drain pan, the oil comes out so fast that it sprays everywhere. To add insult to injury, the oil filter is super easy to get to, but you have to tip it sideways to get it out of the hole (or take the intake and charge air pipe out). They had this awesome little screw cap that you put in the filter after removal so you don't spill anything. Unfortunately for me, I didn't use it when pulling the filter out. I got smart putting it back in as the new filter was full of new oil. Worked like a charm. IMG_1239.jpg
And of course, it slopped all over the tire and suspension parts. Lesson Learned.

IMG_1236.jpg
This is the blend door motor. You can see it move as the desired temperature is changed. Works as it should. So, to confirm, I pulled the motor, and you can feel the door hitting both stops inside. Put it back together, and still works as it should.

I should also mention that the hoses going to the heater core are both hot. So, the heat is not dissipating from the heater core. My gut is telling me that the heater core has some sort of blockage such that the air doesn't flow very well and therefore the heat doesn't work very well. Certainly the air flow is much greater when AC is selected and the temperature is turned to cool. There is approximately half of the air flow when AC is turned off and the temperature is moved to hot (at maximum fan speed). Short of removing the entire dash to get the HVAC out and pulled apart, there's not much else I can do. I may take the cowl off and see if I can snake a borescope in there and see what's going on. They do live on a farm, and they do have lots of field mice, squirrels, etc. It's unlikely that something built a nest in there given that there's no smell, but I suppose it's possible. I suppose it's also possible that the heater core is plugged with dirt in some way. If anyone has ideas, I'm all ears.

Moving on to the Speedaire compressor. I was able to order and receive the reed gasket along with a new filter and head gaskets. I started to clean all that up as well. I don't have a DA sander, but that seems like what I should be using. I substituted a piece of red (maroon) scratch pad and that seemed to work fairly well. Other harder (rusted) spots I used a wire drill cup with light pressure. I suspect that it doesn't have to be perfect, but should be in relatively good surface condition. I'll keep working on it. Might be a good excuse to get a DA.


IMG_1240.jpg
Head. Still have a few bits of the old gasket to get off.
IMG_1241.jpg
Jug cleaned up pretty well. I'll hit it a bit more before putting it all back together.


IMG_1245.jpg
Had the door open towards the end of the day and noticed that the Jeep was looking pretty good. Had to snap a quick picture. Still a few bits to work on here as well to fully prep for winter. That fluid film last year did really well. I want to do that again if I can get the weather to cooperate just a bit more.
 
OP
S

ScepterToad

Well-known member
Joined
Nov 9, 2023
Messages
340
Went and took the Ram for a quick spin around town to get it up to operating temperature.

Hose going in to heater core was ~183 degrees
Hose coming out of heater core ~172 degrees
Air coming out of floor vents at highest temp and highest fan setting was ~83 degrees.

According to a bit of literature I found, at 60 degrees ambient temperature (it's 54 here today, close enough), the floor heat, at hottest temp, and full fan should be around 144 degrees. So, my working assumption at this point is that either the exterior of the heater core is blocked/plugged or there's a blockage of some sort in the air flow in another area.

Will be the weekend before I get back to it, but I suppose I have a pathway for sure now.
 
OP
S

ScepterToad

Well-known member
Joined
Nov 9, 2023
Messages
340
Sheesh. Just like that, it's been over a month since I spent any appreciable time in the shop. Holidays, forgot to post up on the "fix" for the Ram, got sick and house projects are really taking their toll on my shop time. I'll hopefully get a bit more time out there as winter winds on.

This past weekend I spent Sunday at the house getting back to some of those projects. Old houses don't like being mistreated, and as soon as I started doing stuff, more stuff broke (it seemed). Got to spend half a day in the dishwasher taking that apart for a no drain situation. Cleaned it up, pulled the glass, a screw, and a piece of metal out of it and back to normal. Not bad for a ~15 year old unit.

Saturday I got over to the shop to do something I've been putting off for a while, for a lot of reasons. I'll start diving into a few of the "work related" shop items as we've come our of the woodwork a bit with this business we're getting up on its' feet. Working in 2 new companies (and consulting on top of that) at the same time isn't easy, but I'm having fun.

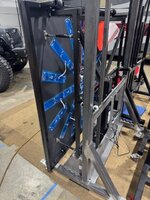
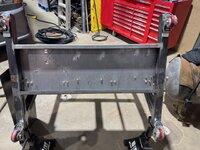
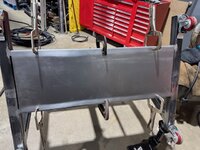
We had a trade show first weekend of January (in DC) that we took one of our new products to for the ABCA. First time I've been in a booth for a trade show and I will say it was quite the experience. Products performed as expected, and we're back to gearing up for larger scale manufacturing. Essentially, these "lightboards", as they are currently designed, are a custom build each time. We put these together on a small scale (5 units) in order to get to market with the frames for 5 more. What we figured out, without being too long winded, is that the design works well, customers love them, and they're SUPER sturdy. However, they're a pain in the neck to actually build. Specifically, the frame. Operator has to drill the steel tubing while having parts clamped in place and if they aren't pretty close to exact, it throws the whole system off. So, we came up with a sheet metal alternative and had a prototype made. Unfortunately, even though we did an FEA on the new design, we had a fair amount of flex in the frame, which was unacceptable.
IMG_1306.jpg
This is the old frame design. While sturdy, it's terrible to attach things to.


IMG_1305.jpg
New design, with the parts hung on it. That televator in the middle needs to be spot on so that everything rides up and down correctly and safely.
IMG_1307.jpg

And we have some additional sheet metal that goes on after to hide electronics. So, all that has to be attached and if everything isn't right, well, you get the point.

IMG_1310.jpg

The new sheet metal bottom is a C shape and welded to the uprights. We have them install riv-nuts in all the placed we used to have to drill holes or attach items otherwise.


IMG_1312.jpg
So, I welded a piece of metal on the bottom to close up that c-shape. Mocked up, scrubbed with a maroon pad, and wiped with acetone.

IMG_1313.jpg

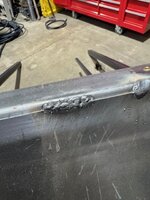
For someone who hasn't welded (and isn't real good at it in the first place) for a long time, I did OK. I started having issues towards the end. Not sure why. I got it stuck on there though.

IMG_1315.jpg
The last weld. I played with some settings towards the end and I think that may have been it. Just not enough amps to get it done. That weld on the right is when I realized that the last time I welded was in the sun and my shade was WAY too dark for inside work. :sad:

I'll continue to work on my welding as I have more time. This was done with flux core as I don't even have gas for my machine. Long way to go on the welding front.

So, all that to say that putting that plate on the bottom took ALL of the flex out of the system. I'm excited to get this back to the frame builder and get these put together properly. This should cut several hours off of my manufacturing time.

More to come.
 
OP
S

ScepterToad

Well-known member
Joined
Nov 9, 2023
Messages
340
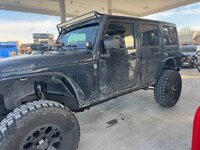
Also got the Jeep washed. I don't care for automatic car washes, but it's been too dang cold for me to stand out there and wash all the grime off. So, pulled the ******** of the hood and ran it through. Clearly pretty dang dirty. We love out salt here in southwest Ohio, and we had a bit of a snow a few weeks back. It's nice to have it clean, even for a day. We'll get rain this week, which will start the cycle all over again with the salt splashing up onto the Jeep. The fenders I have don't help.


IMG_1301.jpgIMG_1299.jpg


IMG_1302.jpg
Pretty clean and I'm liking not having the jack on the hood. I think I'll pull the brackets off. May leave them on until I can get the rear bumper reworked to accommodate the hi-lift.

IMG_1303.jpg
I let it drip dry in the shop as I was working.

Just a bit more.
 
OP
S

ScepterToad

Well-known member
Joined
Nov 9, 2023
Messages
340
The last item for the shop time was cleaning up a bit. I have the air compressor project still going and I needed to give up a shelf to some inventory elsewhere in the shop. When I did that, I just kind of dumped it in front of the wood work bench. I need to go through the rest of it, but I at least made a dent this weekend.
IMG_1320.jpg
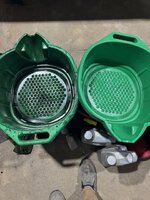
Cleaned up my drain pans. As you can see, they were dirty. With a capital D.

IMG_1322.jpg
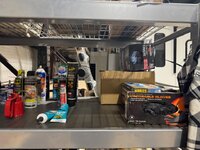
Re-org on one of the shelves. I had these plastic shelf liners. which worked great.
IMG_1319.jpg
Here's the mess.


IMG_1325.jpg
A bit more organized. Those buckets have bolts in them from my dad. He's been collecting for the better part of 60 years, maybe longer. I think he started working on stuff (starting with bicycles) at around age 5 and he's over 70. A long time. Anyway, I think I'm gonna hunt some bolt bins of some sort on FB marketplace and see if I can sort them into something a bit more meaningful. Also got rid of some of the waste oil I have. It never ends and I could spend DAYS out there trying to get a bit more organized.

That's it for now. Hopefully I can get more time out there in the coming weeks and months. There's always something to do.
 
OP
S

ScepterToad

Well-known member
Joined
Nov 9, 2023
Messages
340
Looks good Keith. Cleaning up after a project is always a good feeling. Putting everything back into its place. :thumbup:
Thanks Mike! It's getting there. I think with a bit more actual organization of the small parts (screws, nuts, bolts, fittings) it'll be that much better.
 
To avoid these ads, REGISTER NOW!
Top Bottom