To avoid these ads, REGISTER NOW!

Between 265 & 485 SQ/FT Seedy city 2 car garage

Workspaces sized between 265 and 485 squarefeet.
OP
J

jb3

Well-known member
Joined
May 2, 2014
Messages
14,946
Location
Rhode Island, USA
at the risk of boring everyone to death, it is fun and utterly ridiculous free form engine swap project, I had a good time and continue to have a good time screwing around with it.

Here is the van as it looked with the 4cyl turbo diesel. To achieve this appearance and fit the engine, (which is considerably taller than the 4.3) the van is both lifted 4 inches with a body lift to increase engine bay space, and also dropped 2 inches with drop spindles to bring the front end back down. The result is a generally stock appearance but it gives me joy to have a vehicle that is both lifted and dropped at the same time.

001 (77).JPG

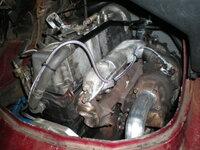
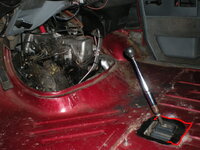
Here is the 4 cyl with custom turbo manifolds grafted to it and shifter. (adapted from the 5cyl diesel. the 4cyl only came NA)
003 (27).JPG
008 (15).JPG


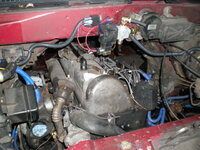
After enjoying that arrangment for about 7k miles I decided it would be nice to have twice the power, so put the 5cyl in which actually lives in the engine bay a bit more naturally, and as a bonus is about the same HP as the stock 4.3.
012 (11).JPG
013 (10).JPG


I never put many miles on it with the 5cyl as I had a ongoing issue with clutch engagement that I finally tracked down to an issue with the adapter plate, so Id like to get it going again and shake it down. Its a fun little van to drive around in
 
To avoid these ads, REGISTER NOW!

M-technik-3

Well-known member
Joined
Feb 16, 2008
Messages
1,787
Location
Western Mass
Would never expected an oil burner in it, a 2 cylinders shy of a 305 shure aka a 4.3l but with a turbo diesel you get best of both worlds What is the cruddy citty in R.I. you mention, first city I think of is Fall Lever but that's a Masshole town. Renovations look like what I have gone through with my place built in 1898 so years of crazyness. Keep the updates coming we like new projects.
 
OP
J

jb3

Well-known member
Joined
May 2, 2014
Messages
14,946
Location
Rhode Island, USA
Would never expected an oil burner in it, a 2 cylinders shy of a 305 shure aka a 4.3l but with a turbo diesel you get best of both worlds What is the cruddy citty in R.I. you mention, first city I think of is Fall Lever but that's a Masshole town. Renovations look like what I have gone through with my place built in 1898 so years of crazyness. Keep the updates coming we like new projects.

City of Providence. Great place to live with some really nice areas. Beautiful public school campuses. Some of the top colleges in the country ect.

However, an appalling ranking of 1 out of 10 for public schools with a 9% proficiency in things like math. About the worst in the state.

I cannot afford the private school solution so live in a better school district.
 
Last edited:

burger

Well-known member
Joined
Jun 6, 2005
Messages
995
Location
Erf
It's a swap out of a Mercedes 300D. It's a 617 series turbo diesel. I'll post a picture or two when I get back up there.

It's the 3rd diesel motor that's gone in there. I started with a 4cyl. The current one is totally untested, I am looking forward to that part of it.

Sounds like a neat project! Looking forward to the pictures.
 
OP
J

jb3

Well-known member
Joined
May 2, 2014
Messages
14,946
Location
Rhode Island, USA
work has been very busy but I did get the apartment renovation taken care of and rented, refreshed the kitchen on a budget.

this is what it originally looked like, cabinets are all 1952, and the last major work done here was some time in the 70s. Its a sort of unusual space with most of the kitchen portion in an arched alcove with an otherwise square room, and the alcove walls of course have gas and steam heat in them, so they are staying.

Upper cabinets were in excellent shape apart from wear and tear around handles, but lowers were beat up and heavily worn, counter was worn down, and the placement of the dishwasher was just terrible, opening right in front of the sink. Source of legitimate tenant complaints for many years

What I ended up doing is refinishing all upper cabinets, replacing the lowers and changing sink and dishwasher locations for better usability. Also swapped all appliances to stainless since thats in vogue, and removed 3 floors to expose and sand the original hardwood. Lot of paint as well.

20230115_093751.jpg
20230115_093759.jpg


And refresh. (Thst hideous radiator does need a cover) who would paint a radiator beige?

20230824_204823.jpg
20230824_204834.jpg


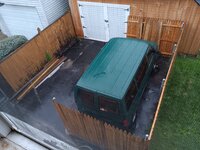
Also got my van dragged over, nice and out of the way with (just) enough room to work on it

20230825_092524.jpg
 
Last edited:
OP
J

jb3

Well-known member
Joined
May 2, 2014
Messages
14,946
Location
Rhode Island, USA
I have had very good luck with a specific brand and model simple dishwasher with tenants, but could not get my hands on a stainless one in a reasonable time frame, and it was also 200 dollars more than a black unit.

I found this stainless appliance sticker on Amazon for under 50 bucks and am completely sold on it. We will see how it holds up long term, but it went on very well

20230811_165353.jpg
20230811_171458.jpg
 

driftpin

Well-known member
Joined
Dec 22, 2016
Messages
11,292
Location
Miami-Dade/Broward Co. Florida
Saw your post from the beginning, keep working, it's a good use of time & materials from what I've seen. I think I would have thrown up some LED 4 ft length luminaires, after dealing w/the skinned wires in the garage. Lots of light makes things less-depressing, and they don't cost much. I have about a dozen or more from Costco, FEIT, and after a few years, they're still doing the job.
 
  • Like
Reactions: jb3
OP
J

jb3

Well-known member
Joined
May 2, 2014
Messages
14,946
Location
Rhode Island, USA
A lot of time has gone by where I just didn't get around to organizing the huge mess, and started adding to it to the point I couldn't even walk in the garage at all.

I've been busy with work so just eventually let the mess become a bogeyman that prevented any forward movement. Finally i hired a couple guys this week to just help me move all the boxes around so I could start sorting for real. Not a tremendous difference but being able to walk into the shed is nice

In the meantime I've got a bunch of 100 year old rafters from a renovation job I was working on that will become the basis of a loft in this shed. It's still going to be tight, but I now have the room to start on the loft

Starting hoarding pile-

20240206_110903.jpg

After some much needed organization-

20240627_110242.jpg
 
Last edited:
OP
J

jb3

Well-known member
Joined
May 2, 2014
Messages
14,946
Location
Rhode Island, USA
Here is the basic plan for the loft, it's going to be about 18' x 8'. As you can see from this drawing the issue of me not entirely trusting the block walls of this garage remains.

I'm going to construct it in a quasi free standing way with 6 supporting legs or posts, that will also be tied into the block, so that any weight I put up there will be supported by the posts primarily instead of the cinderblock.

20240629_091214.jpg


I need to get this done as I have a backlog of stuff to get rid of and also repair, and the lack of organized room in such a small space is a crippling problem.

On a totally alternate subject I scored this free utility trailer off a property I was doing some brush cutting on, where the property owner had no idea it was even in there.

I noticed what looked like a tire through the brush-

20240628_123702.jpg

And after half an hour cut enough stuff to see an outline-

20240628_123749.jpg

And after cutting endless Briar I dragged out this complete and decent 4x8 trailer and the lights even work. I already have a 4x8 but this one is a lower weight rating and a lower height on smaller tires, which coincidentally tows level behind the low hitch of my other old ford van, so I'm thinking of fixing this one up and using it instead

20240628_125505.jpg

I have this stashed in front of the shed for now
 
OP
J

jb3

Well-known member
Joined
May 2, 2014
Messages
14,946
Location
Rhode Island, USA
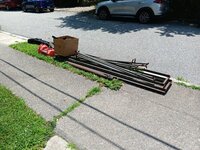
Some loft progress, first I had to come to terms with just letting go of a huge tire rack frame, the wooden part of which I had already used for the roof of the shed. It just doesn't fit in here and going on the street opened some serious room.
20240711_125733.jpg

Now room to actually build something-

20240711_103744.jpg

And the start of the loft, building with no real plan I realized that a 16 foot board would end short of the back wall with just enough space to put in a 2 and a half foot wide steep stair up to the loft area.
I can't wait to organize this mess and get this put away

20240711_124154.jpg
20240711_124159.jpg
 
OP
J

jb3

Well-known member
Joined
May 2, 2014
Messages
14,946
Location
Rhode Island, USA
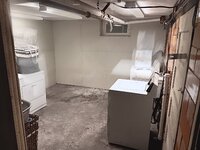
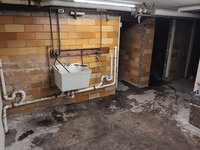
Been a while since I updated, on a totally alternate subject I decided to focus on some of the horrible basement rooms of the building. Turning one cell like space into an expansion room, possible office/guest room, and the other is public laundry for 2 apartments and is horrible, mostly the 100 year old floor. Both are about 12x12 ft.

Starting situation, laundry-

20250113_193827.jpg
20250113_204206.jpg


Extra cell like room (this is after removing a little under a ton (dump scale at 1900lbs) of random wood and trash packed in here-

20241211_114645.jpg


Concrete people came and ground down the existing floor which was moon like and had many patches, but otherwise solid and no cracks

20250114_192506.jpg
20250114_192556.jpg


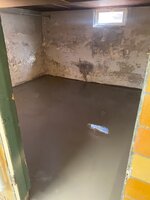
And after leveling with about an inch of new concrete, already looking much better-

IMG_2013.jpg
IMG_2014.jpg
 
OP
J

jb3

Well-known member
Joined
May 2, 2014
Messages
14,946
Location
Rhode Island, USA
I am still on the fence on these walls, both rooms have these orange brick walls which if clean and taken care of, could possibly look good if the rest of the room looks good. Initially I was just going to paint them or cover them.

Expansion room is first door on right, other two doors lead to the majority of the basement and boiler area, which will remain unfinished for now.

I think they will be very tough to effectively paint without future peeling, they have a nice gloss finish .

20250113_204823.jpg
 
OP
J

jb3

Well-known member
Joined
May 2, 2014
Messages
14,946
Location
Rhode Island, USA
Part of the switch to a basement focus for the moment is I have to bring things into a state wide lead compliance standard that just went into effect.

Basement spaces can be immune to lead inspection standards IF they are technically a separated space, so I need a door to the basement that has to remain closed.

Originally this building did have a door at the top of the basement stairs, but that's long gone, and a really terrible spot for a door to begin with.

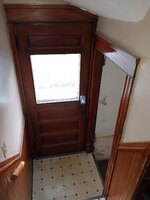
From this image you can see the normal height exterior door to the left, and original basement door to the right, which is about 5 and a half feet high. The winder is right above that so I'd have to make some kind of cut down door fit, which would make an already cramped spot pretty bad.

20250116_123506.jpg

Option 2 is move the doors into the basement to make the separation between utility and living space.

That means 4 doors down here instead, which is the way I'm going to go (since it also means secure storage for the units), including the laundry as living space. I may even section that off with its own door as well, meaning all I need is perfect paint in the stair and basement landing area going up.

20250117_104338.jpg
20250117_104248.jpg
 
OP
J

jb3

Well-known member
Joined
May 2, 2014
Messages
14,946
Location
Rhode Island, USA
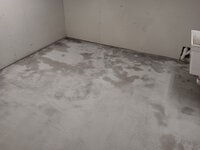
I'm not entirely psyched on how this thin coat is working out, it's pretty splotchy even after drying over a week, and there are a fair amount of air bubbles that developed. The dark areas are also dry, but shiny with a glossy finish.

I'm hoping it just needs way more time to fully cure, but this week I need to get the floor done as people are waiting on laundry access ( including myself).

Luckily I'm going to paint it.

Areas with bubble holes-

20250118_083719.jpg


Overall and shiny areas

20250118_084019.jpg
20250119_135111.jpg
 
To avoid these ads, REGISTER NOW!

runit

Well-known member
Joined
Aug 22, 2022
Messages
195
Location
Raleigh NC
Yea...maybe a thick coat of paint will fill those hole decently....

Is that Aerostar your DD? Deets?

Great vans!
 
OP
J

jb3

Well-known member
Joined
May 2, 2014
Messages
14,946
Location
Rhode Island, USA
Yea...maybe a thick coat of paint will fill those hole decently....

Is that Aerostar your DD? Deets?

Great vans!

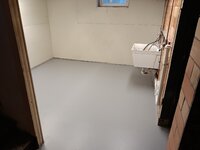
Paint did do the trick, 3 coats filled in all the pin holes nicely

20250121_073801.jpg

I even managed to get the machines back in here without destroying my new paint which was a challenge. I got cushion feet off amazon for them in an attempt to preserve paint. I wasn't impressed with the feet initially, but have started to like them quite a bit.

They are sitting on a sort of rubber suction cup base


20250121_181049.jpg


Re aerostar- yes I am stupidly running an oddball 30 year old van as a daily work vehicle which I cannot possible dent ever, since I will not be finding body parts easily. It popped up for the right price and I took the gamble.

I was an astro enthusiast forever, and the astro does possess some significant advantages over the aerostar. However I've come around quite a bit and admit the aerostar is considerably more roomy and comfortable for driver and passenger. I just cannot beat on it like I would have otherwise.

I suppose eventually I'll need to enter the 21st century for work vehicles. It's a 97 awd.

20240729_100958.jpg
 
Last edited:

runit

Well-known member
Joined
Aug 22, 2022
Messages
195
Location
Raleigh NC
Rad!

Love the aerostar!

And yea, Astros were/are the perfect size for so many people and tasks. Always been a fan as well.
 
  • Like
Reactions: jb3

old_smokey

Well-known member
Joined
May 16, 2018
Messages
410
Location
Manitoba
Just found and read-up on this thread. Great projects!
Can you elaborate at all on the process for levelling the basement rooms? What kind of concrete did you use? I live in a 1930s house that has a 'rat slab', 1"-ish thick concrete floor. It slopes pretty significantly and I'm in interested in pouring something over top, but it would have to feather from pretty thin up to almost 4"
 
  • Like
Reactions: jb3
OP
J

jb3

Well-known member
Joined
May 2, 2014
Messages
14,946
Location
Rhode Island, USA
Just found and read-up on this thread. Great projects!
Can you elaborate at all on the process for levelling the basement rooms? What kind of concrete did you use? I live in a 1930s house that has a 'rat slab', 1"-ish thick concrete floor. It slopes pretty significantly and I'm in interested in pouring something over top, but it would have to feather from pretty thin up to almost 4"

I had a company do it so unfortunately I am unaware of the specific product, it's a self leveling concrete compound.

What they did was first really cleaned my awful concrete, worst part of that was where a tenant had spilled soap which soaked into the old slab, that had to be power washed.

Once it dried they did a grinding pass to take off high points and smooth things out, then another cleaning. Then they put on a primer to help the new concrete adhere to the old concrete.

I will say that it's more cosmetic level than actually level. I'm also not entirely sure what tool they used to rake it flat as it left a definite impression on the product.

There was a little of the lipstick on a pig attitude with the crew, where they saw a dark old horrible basement and rushed a bit, missed some silly stuff, built a half
assed dam out of spray foam Instead of using a board, Ect

Still it turned out nice enough to be worth the money
 
Last edited:
OP
J

jb3

Well-known member
Joined
May 2, 2014
Messages
14,946
Location
Rhode Island, USA
on the subject of being stupid enough to run a 30 year old van as a work vehicle, had a little fun.

Initial complaint, little to no heat. Its cold right now so that's a bother. Access is terrible, but I did identify the heater hoses are getting hot, heater control valve functioning, and flow through the heater core is bad. Garage is organized enough to work on something in front of it luckily.

20250210_141503.jpg

Bad news, radiator is also badly plugged, cooling system is full of what appears to be dark brown pond water.

Used the opportunity to upgrade to a HD all aluminum radiator. Changed the water pump which has been eaten away by whatever was in the cooling system, new thermostat, new cooling fan (cracked to hell) other incidentals. Flushed the block before the cold snap.

20250208_134347.jpg
20250208_134436.jpg

Van is down two weeks, waiting on a new heater control valve now, one on there is good but no way it survives being disturbed, and result of multiple hours of work is... still no heat.

Lot of nice new Shiny stuff in here now though. To do this right I need to get the other van going, as this has been an inconvenience. Old stuff used daily needs safety in numbers.

20250210_141550.jpg
 
Last edited:

RyanE

Well-known member
Joined
Feb 4, 2013
Messages
201
Location
Golden, BC
Oh man. Fond memories of working on our family Aerostar as a kid. Not!

Our 4.0 became a major oil leaker, valve covers and headgaskets. My dad replaced those one weekend, in chassis. I bet that was a fun job.

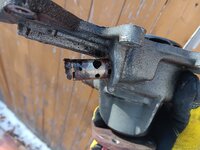
I sure loved changing the oil and filter on that thing, oil poured all over the exhaust collector and everywhere but the drain pan lol. The designer must have known that would happen, they put a strategically placed drain hole in the exhaust heat shield to let it drip out, seemingly forever.

Kudos to you for finding one that still exists (intact) and keeping it on the road!
 
  • Like
Reactions: 555
OP
J

jb3

Well-known member
Joined
May 2, 2014
Messages
14,946
Location
Rhode Island, USA
Oh man. Fond memories of working on our family Aerostar as a kid. Not!

Our 4.0 became a major oil leaker, valve covers and headgaskets. My dad replaced those one weekend, in chassis. I bet that was a fun job.

I sure loved changing the oil and filter on that thing, oil poured all over the exhaust collector and everywhere but the drain pan lol. The designer must have known that would happen, they put a strategically placed drain hole in the exhaust heat shield to let it drip out, seemingly forever.

Kudos to you for finding one that still exists (intact) and keeping it on the road!

I cannot imagine doing the head gaskets in the van, perhaps things would look a lot less bleak with all the accessories off, but I'd feel like I'd rather pull the motor forward out of the van to do that job, just for the sake of my back.

I'm looking forward to the heater core, the job is suspiciously undocumented, even my ford shop manual for this van dedicates a single paragraph, presenting it as 4 bolts and it's out. We shall see. Usually a heater core is in the top 5 of biggest pain in the rear jobs on most vehicles
 
OP
J

jb3

Well-known member
Joined
May 2, 2014
Messages
14,946
Location
Rhode Island, USA
My decision on whether to cover the orange brick has been forced by a dumb mistake I made with my old steam radiator system in this building.

People familiar with steam radiators may remember that you need to add water on a regular basis, which involves cracking a supply line to slowly add cold water (otherwise you will crack the boiler if it's hot).

The temptation is to crack open the water supply, then go off and do another chore. In my case, laundry, then return to shut off the water. Great idea unless you forget to shut off the water, which I did. I remembered after 45 minutes, meaning I only flooded half the basement, drained 20 gallons out of the system, but by then I had pumped tons of water up into the steam lines and radiators, resulting in this mess in my future finished room and laundry room, staining all the grout where the rusty water spilled out-

20250218_073339.jpg
20250218_073205.jpg
20250218_073213.jpg

They do make attachments which perform this step for you based on water level automatically, which I will be adding before any finish work.

A bonus is this demonstrates how faux level the concrete levelling compound actually is.
 
To avoid these ads, REGISTER NOW!
Top Bottom