
Modeler
Active member
Hi all,
Joined a few days ago, thought I'd take a few minutes and post a build thread with my latest project.
A little background: My wife and I have been married for 1 1/2 years. She was previously living in a 1,200 sf townhouse, but we decided that it would be best if she moved in with me rather than me moving in with her. I have 5 acres and two houses (one is a rental), the downside to that plan is that my house is only 800 sf; the result has been a second bedroom filled with boxes and a 5x10 storage unit in town costing us $70 a month. I recently sold some things that netted us a few thousand dollars, so after paying off the last of my debt we decided that it would be a good idea to build a shed to replace the storage unit and have a place to keep general garden stuff. A side benefit is that I will get most of the garage to myself, which she wholeheartedly supports; she wants me to have a space to build things and work on projects
Local code allows us to build a building up to 200 sf and with an "average roof height" no more than 10' above the finished floor without a permit; we decided 10 x 16 would be a good balance of size and cost for the space we had.
Last Wednesday I started by digging out holes for eight 10" diameter footing/piers. Local code requires footings to be 12" below finished grade so I dug them down a few extra inches, filled them with gravel (and tamped it all down), then suspended the 4x6 skids over the holes and poured the concrete into 10" sonotube forms. A rented laser level ensured that everything was perfect, and the tops of the 12" tall footings are just at ground level (That took up all of day 1).

After that a friend admonished me for not scraping the sod first. He was right, so I ended up renting a skid-steer and doing it after the concrete went in, hand digging along the edges and putting down landscape fabric and gravel. I should have done that before pouring the footings. Live and learn...

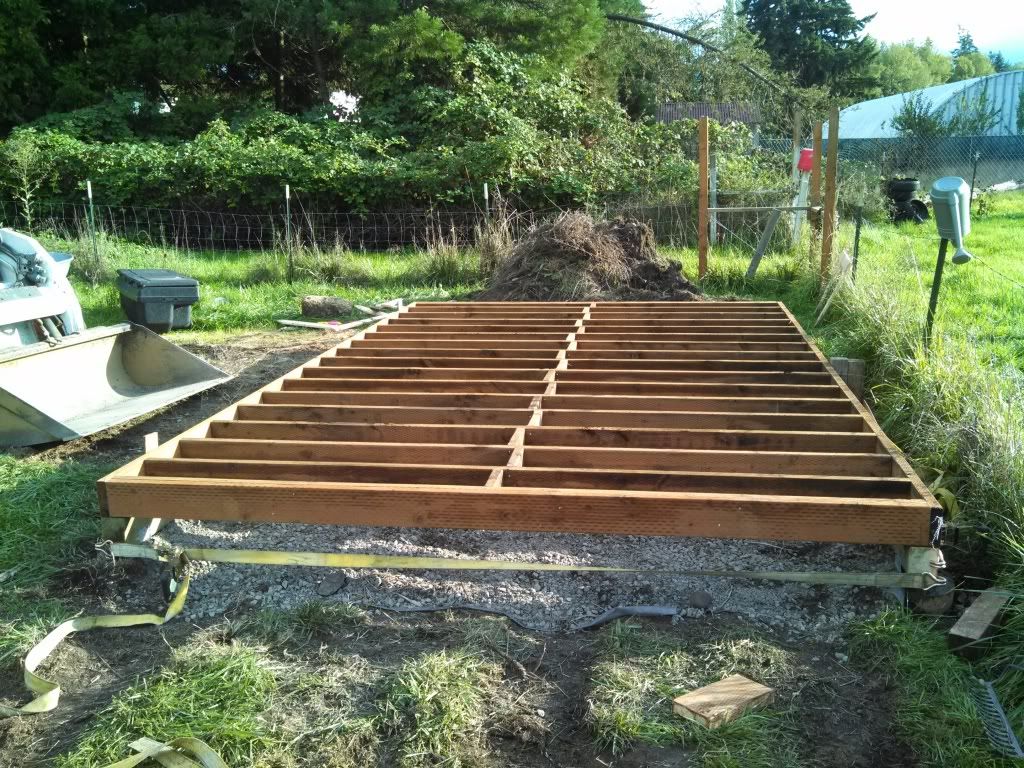
Next came the floor framing, PT 2x6 at 12" o.c. with blocking and doubled joists at the ends:
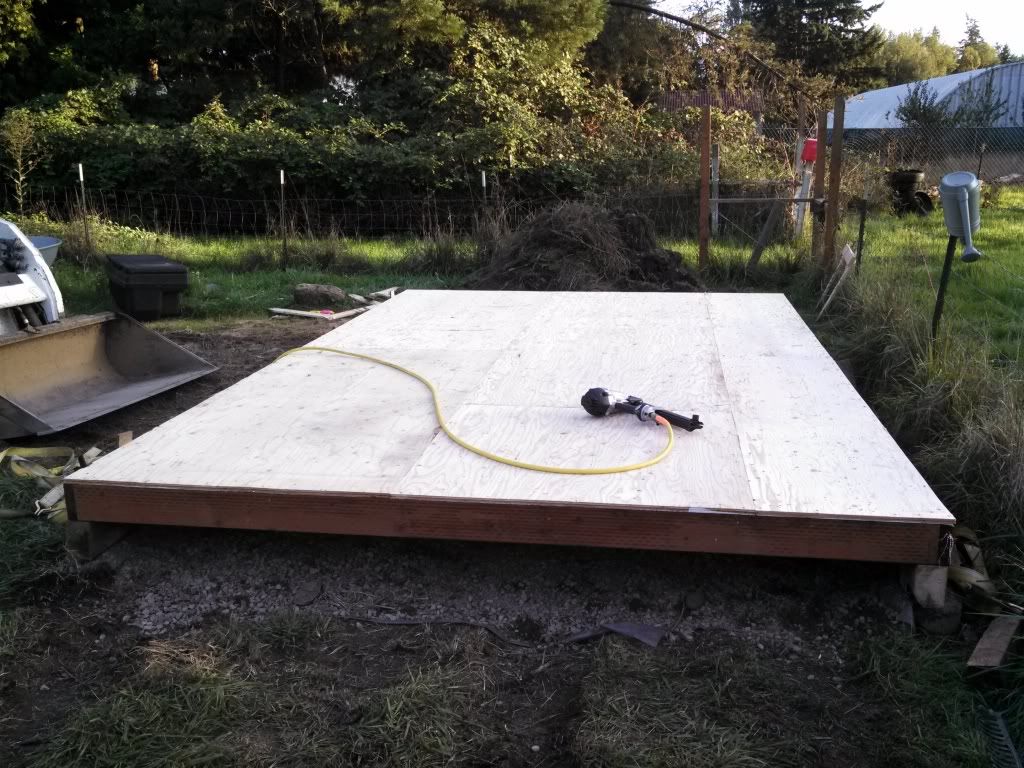
I ended day 2 by putting down the flooring, 3/4" T&G fir plywood that had been painted with Kilz primer on the underside to discourage water absorbtion:
By day 3 there was a storm brewing; I spent all day working in the rain to get the walls up. Standard 2x4 framing, 16" o.c. on the side walls and 24" o.c. on the end walls. Corner posts are 4x4's as are the posts framing the 6' wide door opening. The east wall (left in the photo) is framed for two 2'x3' windows and the south wall (far wall in the photo) is framed for a single 3'x3'. The north wall has a header (doubled 2x6's with 1/2" plywood) spanning the whole thing to support the roof framing. Sheathing is 5/8" T1-11 fir plywood with 4" grooves; there will be no OSB in this shed. I made it this far before running out of daylight:

That was Friday, I had plans for folks to come over and help frame and sheath the roof Saturday but a storm hit a little earlier than expected and I didn't feel safe standing on a ladder with a 4'x8' sheet of plywood in 30 mph winds
It's now Monday, the storm has been raging off and on all weekend but the weather is supposed to improve starting this afternoon. The radar shows the current shower should move through within the next hour or so; I'm hoping to spend the afternoon framing the roof and getting the rest of the siding on.
Joined a few days ago, thought I'd take a few minutes and post a build thread with my latest project.
A little background: My wife and I have been married for 1 1/2 years. She was previously living in a 1,200 sf townhouse, but we decided that it would be best if she moved in with me rather than me moving in with her. I have 5 acres and two houses (one is a rental), the downside to that plan is that my house is only 800 sf; the result has been a second bedroom filled with boxes and a 5x10 storage unit in town costing us $70 a month. I recently sold some things that netted us a few thousand dollars, so after paying off the last of my debt we decided that it would be a good idea to build a shed to replace the storage unit and have a place to keep general garden stuff. A side benefit is that I will get most of the garage to myself, which she wholeheartedly supports; she wants me to have a space to build things and work on projects
Local code allows us to build a building up to 200 sf and with an "average roof height" no more than 10' above the finished floor without a permit; we decided 10 x 16 would be a good balance of size and cost for the space we had.
Last Wednesday I started by digging out holes for eight 10" diameter footing/piers. Local code requires footings to be 12" below finished grade so I dug them down a few extra inches, filled them with gravel (and tamped it all down), then suspended the 4x6 skids over the holes and poured the concrete into 10" sonotube forms. A rented laser level ensured that everything was perfect, and the tops of the 12" tall footings are just at ground level (That took up all of day 1).

After that a friend admonished me for not scraping the sod first. He was right, so I ended up renting a skid-steer and doing it after the concrete went in, hand digging along the edges and putting down landscape fabric and gravel. I should have done that before pouring the footings. Live and learn...

Next came the floor framing, PT 2x6 at 12" o.c. with blocking and doubled joists at the ends:

I ended day 2 by putting down the flooring, 3/4" T&G fir plywood that had been painted with Kilz primer on the underside to discourage water absorbtion:

By day 3 there was a storm brewing; I spent all day working in the rain to get the walls up. Standard 2x4 framing, 16" o.c. on the side walls and 24" o.c. on the end walls. Corner posts are 4x4's as are the posts framing the 6' wide door opening. The east wall (left in the photo) is framed for two 2'x3' windows and the south wall (far wall in the photo) is framed for a single 3'x3'. The north wall has a header (doubled 2x6's with 1/2" plywood) spanning the whole thing to support the roof framing. Sheathing is 5/8" T1-11 fir plywood with 4" grooves; there will be no OSB in this shed. I made it this far before running out of daylight:

That was Friday, I had plans for folks to come over and help frame and sheath the roof Saturday but a storm hit a little earlier than expected and I didn't feel safe standing on a ladder with a 4'x8' sheet of plywood in 30 mph winds
It's now Monday, the storm has been raging off and on all weekend but the weather is supposed to improve starting this afternoon. The radar shows the current shower should move through within the next hour or so; I'm hoping to spend the afternoon framing the roof and getting the rest of the siding on.


