MichaelBikel
Well-known member
I build my first firewood rack this winter and I am in the process of building another. Post a picture of YOUR firewood rack or shed!


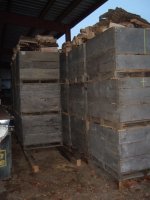
My firewood storage is a pile of pallets, we built our fire pit big enough to burn pallets. So when we get pallets to build things with we just stack them up. Don't have a picture of the stack but I have a picture of the fire pit.
I try to look at them I make sure they are painted or marked. I also check them to see if they are hardwood. Hardwoods are usually put aside to build things withI would highly recommend learning the pallet treatment ID codes. You may be using wood that has been treated with stuff that's REALLY nasty when you burn it. In short, DO NOT use anything blue, red, marked "MB" or "EU" for building materials or burning.
Tommy

Sure did!This thread sure went sideways fast

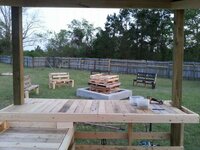
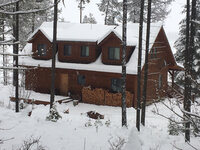
Holds 7 cord. Open sides, front & back, & elevated wooden deck.

My brother gave my son-in-law this book for Christmas:
Norwegian Wood: Chopping, Stacking, and Drying Wood the Scandinavian Way
https://www.amazon.com/dp/B0147CHVFS/?tag=atomicindus08-20
Full of neat pics and more info than you would ever want to know about cutting and stacking firewood!! Really fun book to read if one is interested in the subject.
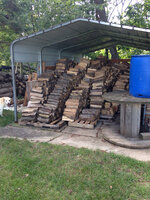
My rack is a hickory tree on one end and an oak on the other. Of I run out of convenient tress I do a crOsseo stack at the end.
Got some old 2x4 layin on the ground to keep everything up a few inches. It's cheap and it works.
I'm not saying you don't need to keep your firewood off the ground, but carpenter bees don't care if it is or not...
Tommy

Mine is smaller I don't burn much wood.
I understood that they are attracted to wood in contact with the ground that doesn't remain dry. (In my case, those were the pieces they chose to snuggle up in and make a home of.)

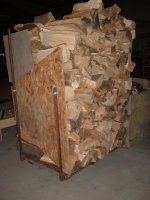
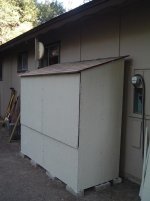
Awesome use of pallets!!I reused the metal roofing and the posts from a swingset/playhouse to build this this weekend:
I still need to get one more board to hold the pallets on the left wall before I can say it's completely done. 7'3" wide by 8' deep, and ~5' tall in the back to ~7' tall in the front.
where did you get the wire mesh on the bottom???
I've had then make nests in 5/8" thick cedar address sign hanging from my mailbox on brass double jack chain and in the trim on houses. It was always dry as a bone...
Tommy
I saw somewhere, don't remember exactly, somebody used 2 T-posts on each end. Slid a pallet on edge over the T-posts. Then they put pallets between the upright pallets on the ground. Stack firewood on the pallets. Cover with a cheap tarp.