BD1
Well-known member
Jack does not allow rainfall in is area. Only sun. 

+1 on the photos included in quotes. Also, what's going on with all the different photo hosts (many of which show "photo removed by poster" or some such) What's wrong with just using the site included file attachment tool?
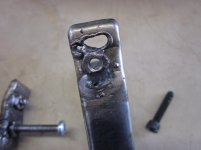
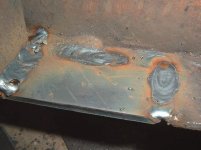
custom submerged surge tank for inline Bosch 044 fuel pump. CNC face plate with -6 an fittings, 1/8" 6061 sheet metal. 3/32 green tungsten with 3/32 rod, 19cfh, #6 gas lens, 90 amps with Eastwood TIG200...sorry for the ****** pics, taken with my cell with the horrible lighting in my garage last night
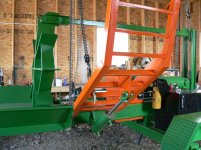

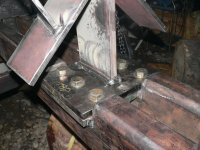
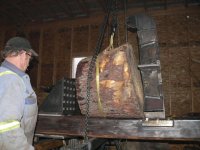


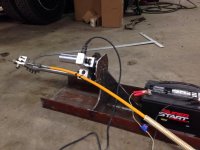
This is a wood splitter I built for my Dad. He wanted to split 38'' stumps all in one pass.All he had was an ac/dc welder- max 1/8'' 7018.Lots of multi-pass.
that is nice. We need video!
Thanks 64Trvlr, same to you!
That looks awesome. I need to get practicing with aluminum and my Eastwood tig200 also. This could be the inspiration I needed. What rough setting were you running on the machine?
This is a wood splitter I built for my Dad. He wanted to split 38'' stumps all in one pass.All he had was an ac/dc welder- max 1/8'' 7018.Lots of multi-pass.It has had some mods since.The 7'' hyd. cyl. has the snoot to make heavy iron flex...

This is a wood splitter I built for my Dad. He wanted to split 38'' stumps all in one pass.All he had was an ac/dc welder- max 1/8'' 7018.Lots of multi-pass.It has had some mods since.The 7'' hyd. cyl. has the snoot to make heavy iron flex...


Here's one more project I did for the garden. I have some climbing Wisteria that needs a backing lattice. The wood I used on the first set are toast so I made a set of 5 out of tubing here.
Hey guys I need a little help to finish the project to post it here:
How to weld miter edges the pretty way?
Looks like the heat generated from the weld put the legs out of square going by the pics. I like to clamp a piece of 1 1/2"x1/4" flat bar or similar tube at a 45 on both ends to keep it square while I weld something like that up.
Rereading your post, I don't like to have any bevel and the least amount of gap. When you bevel you are thinning the metal and making burn thru much more likely. there really is not a good way to make this joint flat with a weld.
Looking at the example pic you showed, I can tell that the weld is getting it's strength from the out side of the tube and the inside. the surface welds have been ground down flat and are doing nothing for the strength of the joint. In this case its not a big deal, there is plenty of strength from the inside and outside welds.
I have some of these BESSEY angle welding clamps. They have paid for themselves in no time. Really makes the fabrication easier.
http://www.amazon.com/dp/B0006694FA/?tag=atomicindus08-20


What size wire are you using? .021/.023 wire and run a little hotter, and move along faster and you should be able end up pretty flat. Looks like it could be V,ed out a little wider also. Practice on some scrape until you get it down. Mike
Oh I'm with you on the Mig to look like tig approach and I followed that thread on the other forum where they discuss it as well. I have practiced the cursive E lots and also made sure that I do a practice run to make sure that I have good hand position all the way from start to finish of the weld. I am now trying to preheat the metal before to see if that will give me my stack of dimes look... practice practice practice.Having a Lincoln myself I can't offer any help on Miller settings but I have found I have to adjust my machine a little from the recommended settings so it's definitely worth trying. Something I found helpful that was advised to me on another forum was to do like a cursive "e" which allows you to flow (for lack of a better word) the puddle. To get a better visual, it's the way Jodi from weldingtipsandtricks.com gets his mig like tig look. That and the bevel might get you a little closer to what your trying to achieve.
The direction you lean the torch has an effect on the heir of the bead. Were you pushing or pulling?
I was pulling for most of them.
Hey thanks a lot I appreciate that, I am trying to do as much prep work to the metal beforehand to achieve a clean weld to some day not have to grind as much.HCS
That bead may not be the look your after but I think it looks very good and strong; If you want the (look) slow down the wire and make the cursive e loop as you go?
Thanks! I actually have that picture from that page of the wand angle on my cell phone that I glance before to remind be of the right position.
Thanks for all the feedback guys
I'll stop junking up my favorite thread with too many questions and try to stick to posting pictures of actual "welding projects"
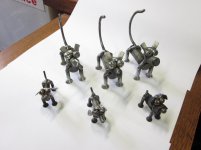
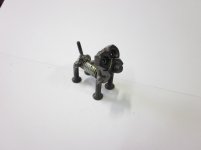
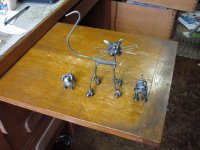
Not sure if I posted this or not. I do a bunch of welding art, mostly critters I call mechanimals. This was the last thing I welded and my first attempt at a motorcycle.
![WELCOMEHOME[1].png](/forum/data/attachments/245/245168-7372ae272abb6dbbe992a2666687f034.jpg)