Beerhippie
Well-known member
Water-cooling for compressed air?Thanks guys, I appreciate it
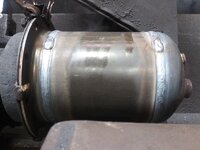
They're for air dryers for large compressor systems. I should've also said hydrostatic testing.
Yes

Water-cooling for compressed air?Thanks guys, I appreciate it
They're for air dryers for large compressor systems. I should've also said hydrostatic testing.
Yes
The water is for testing purposes only.Water-cooling for compressed air?
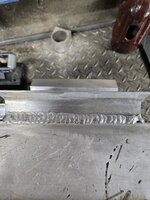
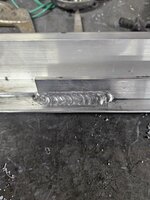
Is that so you can drink beer both standing up and hanging upside down?It's not pretty at all, but it's so much better than the previous attempt. This totally reinforced to me that there's no replacement for practice.
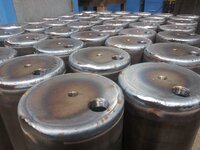
I find you need to put it on TooYube or some other video service, then link to it here.More components of some of the vessels I used to make, this is dirty work haha.
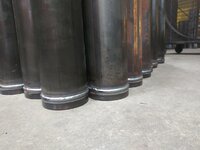
The shorter ones were set in a jig and tacked with a 1/16 gap. The taller ones had machined bottom flange and top plate. Both full pen.
I tried to download a video of welding them but it's not workin for me.
ThanksI find you need to put it on TooYube or some other video service, then link to it here.
") , I appreciate the info. I'll have to look into that.
, I appreciate the info. I'll have to look into that.Ah, just a great big refrigerated air dryer--or temp control for some process?The water is for testing purposes only.
They have refrigerant running through them for temp control for compressed air.
I wish I got pictures of them fully assembled without the bodies on them, pretty neat.


They varied in size but, that's it in a nutshell.Ah, just a great big refrigerated air dryer--or temp control for some process?
Hear, hear!A grinder and paint make a welder what he ain’t

Nice! I assume TIG? What were your settings?It's not pretty at all, but it's so much better than the previous attempt. This totally reinforced to me that there's no replacement for practice.
- Starting amps: 5Nice! I assume TIG? What were your settings?


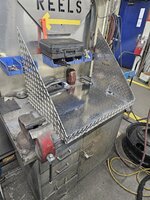
Your metal welds are looking better than most of mine--but that spray-foam... gotta cut the feed speed!Made a riser extension for my engine hoist. It's a struggle to get high enough sometimes, especially when you add in straps, so I made this out of some tube and angle. Might make a carrier to allow the hook to swing vertically, but that’s a job for the future. This will be used on either the 2t or 1.5t setting so that the end of the riser is still inside the main arm/ boom. Welds are slowly getting better.
What it looks like without the riser extension
 Believe it or not, that’s the good part!
Easy job to trim it flush with a handheld hacksaw blade...Yeah, I did think about the background for that picture
This was some spray insulation that someone gave me with a basic gun. Nowhere nice to use as the expanding foam stuff, but I figure it was free and it helps keep the garage warm so I can live with the ugly
Old cross-cut saw is even better.Easy job to trim it flush with a handheld hacksaw blade...
The kind of gun I show above uses 24 oz cans that screw onto the basket-looking fitting on top.Yahbut I’d be trading R-value for prettiness!
Besides, it’s a daily reminder not to buy spray insulation in a can


Heck yeah, looks like it past the torture test with flying colors. Nicely doneLandscape rake is done !! I weldered lever deals onto the bolts so I can loosen them easily to angle it without getting out wrenches and such.
Decided to make it fit in a 2” receiver so I can use it on the lawnmower as well as the skiddy.
Time to torture test it !! I angled it as aggressively as I could and went all the way fast to see if I could make things fall off. In and out of the snow, banged one edge in a round bale and pulled until the tractor spun out, backed up and made it bounce and shake and rattle and it held together. Sweet deal. It worked surprisingly well to scar up the hard packed snow and ice in the driveway.
Weldered! I love it You just invented a new word!I weldered lever deals onto the bolts


 2spd gear box and three speed motor plus vfd. It take some effort to get it rolling but it moves smoothly once it starts moving.


Does that mean the other 85% enjoys it?I was just reading that something like 15% of the US population suffers from tinnitus.
It's music to my ears.Does that mean the other 85% enjoys it?

So, are you extending the column?Was working on the drill press again.

So, are you extending the column?