PCO6
Well-known member
Thanks LG63. It's the second tombstone I've owned. I had a Mastercraft from Canadian Tire for a while. It worked well but I'm happier with this one.


Last night I worked on building a wall-mounted hula-hoop rack for the wife's fitness studio. One of the new programs called "Hoopnotics" uses oversized hula hoops in a workout regiment. This will be the sales rack for the hoops. I used 1-1/2" flat bar, 3/8" solid rod, and went a little artsy forming the letters from some leftover 1.75" DOM tubing. Still needs to be painted of course, but the wife was tickled pink. Here's the result:
http://i164.photobucket.com/albums/u9/VKZ24/IMG_20130625_084239_744_zps78d89c28.jpg
I like it.
I hope there be some kind of padding on the rods or will it be high enough to not have someone impale themselves for your wife's sake.


Thanks.
It will high on the wall behind the check-in desk. Most of the ladies are pretty short so they will actually have to reach up to get the hoops off the rack.

A lily I made for my bosses wife.


This is about the 4th time I have cut remeasured recut then rewelded... Needless to say I am getting a lot of use out of my sawzall and a lot of practice on my welds. It seems so easy to measure a square box and then frame it then expect it to be square and fit that box.. Not so much


Some nice fab work there, Mike


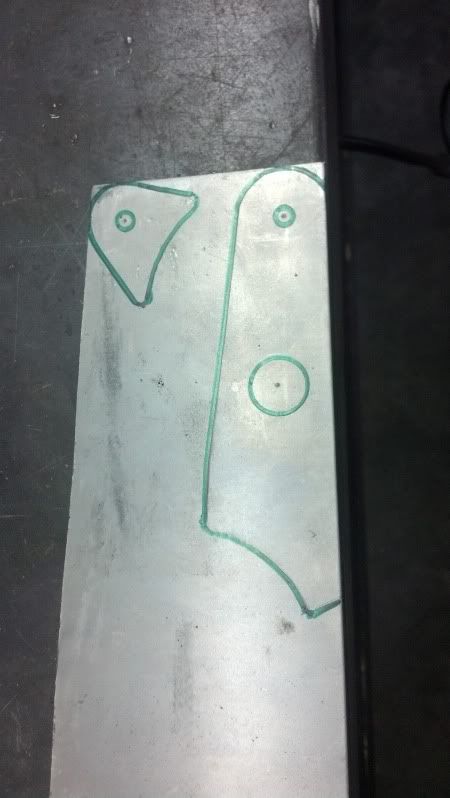


Good grief man. That is beautiful!


I recently made a stand for my Lincoln 225 arc welder (post #1440). I had to move my plasma cutter which was sitting on the floor out of the way to get to it so I figured it was time to make a stand for it too.
IHere it is with the plasma cutter, ammo box and cables (sorry ... it's a bit out of focus).

This shot shows the cable and air line storage.


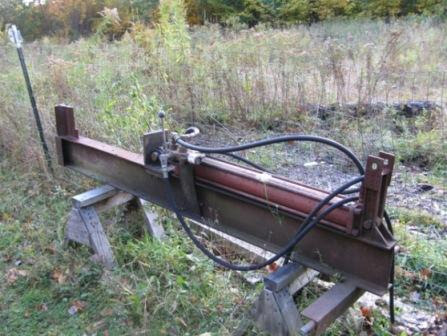
Today I got most of the frame welded up on my bender stand and got to test fit the whole assembly on it for the first time. Still got lots to do, but I make a little progress every week.


My latest is another example of the fact that I'm not much of a welder -- but I never let that stop me from 'going big.'
There's been a separate thread on the deck and the pergola already, but the steel part of it might interest someone here. (If you've already seen it, accept my apologies.)
I decided to make a cover for a deck I was building -- the idea was that it would hold shade fabric so my kids wouldn't get sunburned when they played on the deck.
I started with 500' of 1-1/4" square tubing. I have a Harbor Freight tubing roller and I got some square dies.


My math on what the arches should have been was all wrong. In the end, it made sense to do them all at a 17'-radius bend.
Two of them together make a Gothic arch:

There was very little math involved in this. But a lot of it was just putting it into position and marking it.

The idea was to use the same pattern that stone arches are made with in cathedrals. I didn't have ladders high enough to do the full height of the thing, so I did the top part as it's own unit. This is 9' or 10' up in the air.

Here it is welded together. I also painted it while it was just the top section. But the problem was that this thing was 20' by 20', and it needed to levitate up about 7' so I could put the pillars in place.

My solution was to put up a mast -- or a boom. I took one of the round dies from the roll bender and used it as a pulley at the top. Then I put a hand-cranked worm-gear type winch at the base. The idea was going to be to find the center of the thing and lift it straight up. I also made a cradle to distribute the lifting force across as much of the assembly as possible so I didn't overstress it and break it.

It worked.

I got all the pillars welded and positioned under the roof before the sun went down.

Here you can see it all together. The support wires later came out.

And here it is covered with shade fabric.

 I'm just hoping that my figuring on the ram angle and drive arm relationship is good.

Thanks WAWatsonII, I am quite proud of the bender so far and can't wait to finish it and toss some tube in there! I'm very slow at fabbing but it's all hobby for me so I learn and build at my own pace. I think this stand is my 5th welding project so far? I think?
Metal1313, yep it's a JD2 M32. Sucker is beefy.
Not bad for a beginner? I move slow and burn in as best I can.
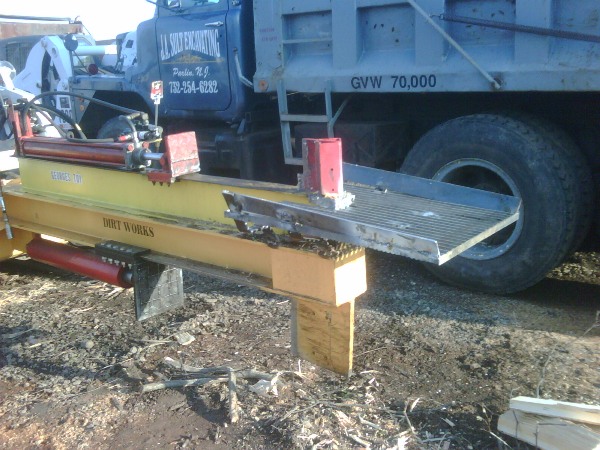
This is a little project that I worked on

The stand is fully adjustable width and length wise as well as height so it will be able to fit other cars in the future or can be sold if ever needed.
I am very happy with how it turned out!
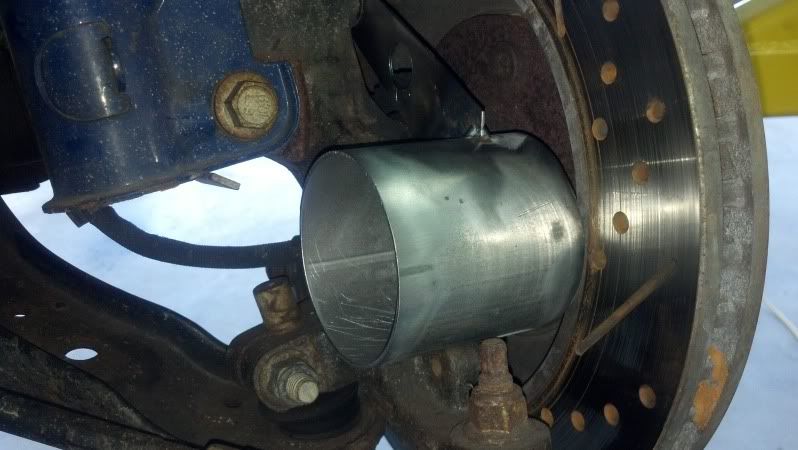
eventually it will be a wildlife camera box

PVC Potato gun (Plenty of people have seen these... easy to make)
Gotta get a sack of taters, and get the scope dialed in. Other that, she is ready!

That is cool. Is it tall enough at the cross bars to slide under with a creeper?
I suppose you could add an "arched" area to the front bar where the trans tunnel is? Maybe it doesn't need it?
Nice!
Actually I haven't checked that and I'm not sure that it would be high enough for that! It's primary purpose is for use during the body work phase of the build as there is a TON of bodywork that needs to be done as well as re-done (some really poor work from the past in some areas).
Definitely something to think about if/when I build another!
")