To avoid these ads, REGISTER NOW!

Show us your welding projects

ADSR

Well-known member
Joined
Jan 12, 2013
Messages
10,713
This was one of my first DIY projects. I am usually repairing something, not building something from scratch. This is not much, but I smile EVERY time I use it.

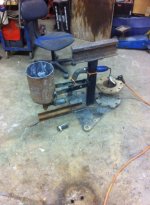
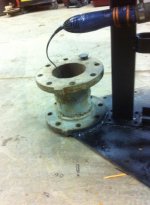
I bought a used floor standing drill press. The table moves up and down on a geared track. The handle/crank to move the table was missing.

CrankHandle.jpg


WeldedNuts.jpg


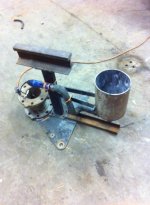
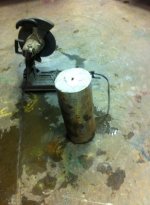
I made it with some scrap I had in the shop. I particularly like the sleeved bolt for a handle. I spins SOOOO smoothly.

Great work. Stealing this for my drill press.
 
To avoid these ads, REGISTER NOW!

MP&C

Well-known member
Joined
Oct 21, 2009
Messages
4,398
Location
Leonardtown, MD
I don't know that I would go that far, there are plenty here that could teach me a thing or two. It's a learning process daily for anyone in this field. Every new challenge opens up new methods.

I know my work is far from perfect, but I do try to use pictures to back up or clarify something when I offer suggestions to help someone out. For someone to criticize another man's work, you'd expect to see some pictures as backup, a point of reference to substantiate the comments. Well, the pictures, they are worth a thousand words. ;)
 
Last edited:

cdk

Member
Joined
Nov 25, 2013
Messages
9
Location
SA, TX
finished up the rack this weekend.
wiring was made simple w/ terminal board in the rack, and trailer wire junction box under the truck.


and a shot of the one my brother and i built for his work truck
 

Kevin54

MEMBER EMERITUS
Joined
Jan 12, 2005
Messages
29,341
Location
Urbana, Ohio
As far as the panel that Dave did, I think that's a beautiful job of welding.

Robert......what is a person supposed to do if they can't planish the area? The reason I ask is that when I go to put in the patch panels on the bed of my rusty POS Ram, there is no way to get a dollie in behind it to panish. So do I shoot for good penetration and then just grind, peen and use a filler?

Another thing I learned too from your pictures is to use rounded corners. I would have just scribed around my panels and welded them in with square corners. :bowdown:
 
Last edited:

MP&C

Well-known member
Joined
Oct 21, 2009
Messages
4,398
Location
Leonardtown, MD
Kevin, that may be answered when you make your initial cut into the quarter panel. If the inner is damaged as well, it would be a good opportunity to remove that as well, perform the exterior repairs, planish, etc, then plug/spot weld the new wheel well in.

For areas above a wheelwell, it helps to leave the patch panel as tall as possible to get any weld seam as far above such obstacles as possible. If none of these help the situation, then a "long arm" dolly may be used, or relegate the repair to more filler.. :spit:
 

gorilla

Well-known member
Joined
Dec 13, 2007
Messages
1,650
Robert, Whats your opinion about using silicon bronze rod to TIG weld patch panels? I've used it to patch unwanted trim holes with a sheet metal plug and it seemed to work well. The lower hear required seemed to reduce distortion.
After 40+ years in the metal working trade I know good work and good welding, your as good as it gets.
 

MP&C

Well-known member
Joined
Oct 21, 2009
Messages
4,398
Location
Leonardtown, MD
At the end of the day, it's still a brazing process that is relying on good wetting to the parent metal and to the repair part. It won't therefore have the structural integrity that a good penetrating weld provides or the inherent resistance to vibrations.
 

D-fens

Well-known member
Joined
Nov 9, 2013
Messages
109
E11ACC7B-4D39-48D8-8051-A328F093092F_zpsrn7t2qdf.jpg


Not an actual fab project, just trying to improve my aluminum TIG.

Working with a friend who is a certified AWS instructor, trying to get my 3G / 4G certs.
 

PCO6

Well-known member
Joined
Dec 25, 2008
Messages
4,573
Location
Newmarket, Ontario
I'm not sure if this qualifies as a welding job quite yet but it will eventually. I "tacked" together a stand for my spot welder yesterday. I wanted to make sure it works before I do the final welding. The linkage is nice and smooth - no rattles or any lag up or down in the foot pedal. I used a trampoline spring to return the jaws to the fully open position.

I just have to add the electrics to it – basically a relay and timer for consistent weld times. That will go into the box on the back at the bottom. The box and welder will be easily removable from the stand so I can take them to a work piece when needed. After that's done I'll disassemble it, complete the welds, finish the metal, paint it and put it back together.

View media item 37679
View media item 37680
 

adambro

New member
Joined
Feb 10, 2014
Messages
1
Location
stillwater ok
i have just decided that i would like to get into blacksmithing and while not wanting to spend much money in equipment (forge, anvil, hammers and tongs) when i am not sure if i really want to do it or not i went to the local junk yard and picked up a little bit of scrap iron (old acetylene bottle, railroad track, dual wheel tractor attachment, and some square tubing) i then came home and cut the acetylene bottle open then after fighting through all the filter inside i welded it to my stand then attached my railroad track and the tractor part for added weight and a holder for tools. it took alot of welding and grinding but it was worth it. i put some coal in the old bottle and fired it up and in little time i had all kinds of hooks built and a few knifes planed!
 

Attachments

  • forge.jpg
    forge.jpg
    88.2 KB · Views: 377
  • forge2.jpg
    forge2.jpg
    79.8 KB · Views: 312
  • forge5.jpg
    forge5.jpg
    74.5 KB · Views: 282
  • 1615008_10203194989661291_670104476_n.jpg
    1615008_10203194989661291_670104476_n.jpg
    75.2 KB · Views: 283
  • 1743408_10203192527559740_177327141_n.jpg
    1743408_10203192527559740_177327141_n.jpg
    93.7 KB · Views: 261

Mikefromcny

Well-known member
Joined
Apr 2, 2011
Messages
510
Location
Upstate NY
A bale spear, for my bobcat. Also double as a trailer mover. Purchased the spear, quick attach plate and 2" receiver. Built it to move my neighbors round bales.
 

Attachments

  • 2014-02-01_13.45.49.jpg
    2014-02-01_13.45.49.jpg
    135.4 KB · Views: 168
To avoid these ads, REGISTER NOW!

HoosierBuddy

Well-known member
Joined
May 9, 2006
Messages
2,918
Location
Southern Indiana
Hey guys,

This is a pretty basic cart I welded out of 1" tube. It's going to have a top and 2 other shelves. It will hold tooling for my milling machine, in particular a big rotary table that weighs close to 100 pounds.

Anyway...the trick part of the project isn't the fabrication. It's tricking the kid to paint it.

attachment.php


Today's Tom Sawyer...:lol_hitti

Phil
 

Attachments

  • millingcart.jpg
    millingcart.jpg
    69.2 KB · Views: 2,892
Last edited:

stitan06

Well-known member
Joined
Dec 31, 2012
Messages
154
Quick question I have acetylene tank only used twice I went to use it and the ****** that opens the tank snapped off I there any way to still use it or do I have to return a almost brand new tank

Sent from my GT-P5113 using Tapatalk
 

cdk

Member
Joined
Nov 25, 2013
Messages
9
Location
SA, TX
I love this project. Any chance on a more detailed photo on how you mount the rack to the tray?

since the 05+ tacomas have the bed rail attachment channels, i just used some 3/16'' t-slot nuts (unsure which i actually used 3/16 x 1/2 or 9/16?)
more info on that here:
http://www.tacomaworld.com/forum/2nd-gen-tacomas/114001-bed-rails-attachments.html
t-slot-nuts-th.jpg


here just shows how the rails are bolted through the side. i think i used 3/16" x 1-1/4'' bolts w/ flat and lock washers.
 

Nursepeter1973

Well-known member
Joined
Oct 26, 2013
Messages
153
Location
Western Australia
since the 05+ tacomas have the bed rail attachment channels, i just used some 3/16'' t-slot nuts (unsure which i actually used 3/16 x 1/2 or 9/16?)

here just shows how the rails are bolted through the side. i think i used 3/16" x 1-1/4'' bolts w/ flat and lock washers.
Thanks for that.. my truck doesn't have that unfortunately. Guess I'll use some Rivnuts or just some simple bolt & nuts to do it for me as I have a open channel along the side
 

Nursepeter1973

Well-known member
Joined
Oct 26, 2013
Messages
153
Location
Western Australia
My second project - Welding table

Sorry for the dodgy iphone photos

Sketchup Design


BenchTop
This was a free piece of 10mm (3/8") 1x1.6m (approx 3'x5') steel from the minesite I work at.. hence the three free form holes. This is the underside that I've cleared of slurry and rust with a wirecup


Base Frame
All tacked together.. amazingly was square corner to corner on the first measurement. The frame will be made out of 50x100mm (2x4") PFC Channel.


Bench Legs
Tacked together


Bench Crossbeam
Needed to utilise the ratchet straps to bring the legs in 5mm (1/4")


Crossbeam Tacked


I'll hopefully get the rest of the main welds done tonight. The next job is to drill 29mm holes for the 25mm bolts that will makeup an adjustable height castor attachments. I'm pretty happy with it at the moment as its only my second welding project
 

HoosierBuddy

Well-known member
Joined
May 9, 2006
Messages
2,918
Location
Southern Indiana
This is the final picture of the tool cart I built to hold milling tooling (mostly my rotary table which doesn't get used very much anymore).

The top is scrap cutoffs from 2X10's I ripped down. They're screwed and glued. I used a Kreg jig so the screws don't show...then lag bolted from underneath to mount the top.
 

Attachments

  • cart2.jpg
    cart2.jpg
    80.9 KB · Views: 156

PeteMoore

Well-known member
Joined
Jan 25, 2011
Messages
453
Location
N.Ireland
Currently mastering Robert's (MP&C) planishing techniques on a Mk1 Frogeye Sprite Dashboard that has seen 55 years of modification and bodged rework.
https://scontent-b-lhr.**.fbcdn.net/hphotos-ash3/t1/150334_10201180091255565_1967423144_n.jpg
 

joe49

Well-known member
Joined
Sep 25, 2009
Messages
1,883
Location
Tonica, Il
Here's the pic of the valve I was talking uploadfromtaptalk1392206185288.jpg

Sent from my SCH-I535 using Tapatalk

if you want to use the gas pull the packing nut use a plier or vice grip to open the valve and then replace the packing nut. No open flames it will be leaking gas till the nut is replaced.
 

stitan06

Well-known member
Joined
Dec 31, 2012
Messages
154
I had the nut off and wasnt sure what to do then so just pull straight up then put nut on and when done take nut off push back in ?

Sent from my GT-P5113 using Tapatalk
 

Fyrme

Well-known member
Joined
Nov 28, 2012
Messages
2,231
Location
Green country, Oklahoma
I don't know if I would call it a full blown "project" But I threw this together Saturday to hold a "tool" for making more welding projects later.
12471596865_ff7a9df623_c.jpg


But before committing, I added this.
12472095814_9cc8b6c00a_c.jpg

12471587535_8c618b0768_c.jpg

12471723753_06d13eba8a_c.jpg

12471560245_3cb43ce8fe_c.jpg

12471542525_0c3c7d978c_c.jpg

12471680613_0aac0b3984_c.jpg

12472027374_24743134e4_c.jpg

Then I threw on some more black paint and put it to work......
12471644963_846085b19a_c.jpg

12471456255_e399998f9b_c.jpg
 

toomanytoyzz

Well-known member
Joined
May 11, 2012
Messages
1,571
Location
Malvern, PA
I don't know if I would call it a full blown "project" But I threw this together Saturday to hold a "tool" for making more welding projects later.

Nice cart, but I would have welded it all around and a few inches higher like in my AWESOME drawing:rocker: to avoid the bottle from losing its ground.
 

Attachments

  • weldddddd.jpg
    weldddddd.jpg
    140.7 KB · Views: 296

Fyrme

Well-known member
Joined
Nov 28, 2012
Messages
2,231
Location
Green country, Oklahoma
If this welder was going to move around a lot, maybe. But at 830lbs, the cart was more to just get it from the trailer to the back wall of the shop. I've got a 25' torch and foot pedal that will do the moving around the shop. The bottle rack is just to have a place for the bottle to stay off the floor and with the welder.
 

ADSR

Well-known member
Joined
Jan 12, 2013
Messages
10,713
If this welder was going to move around a lot, maybe. But at 830lbs, the cart was more to just get it from the trailer to the back wall of the shop. I've got a 25' torch and foot pedal that will do the moving around the shop. The bottle rack is just to have a place for the bottle to stay off the floor and with the welder.

Bro, i love that welder. When the nukes go off, that thing will still work!:bowdown:
 
To avoid these ads, REGISTER NOW!
Top Bottom