To avoid these ads, REGISTER NOW!

Show us your welding projects

kyrbz

Well-known member
Joined
Jan 30, 2012
Messages
1,304
Location
midwest US
That's really nice...
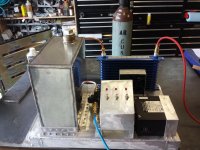
My mig holder on my welding table is starting to mark up my mig nozzle/handle so might be time to figure something better out

table1.jpg

I've always used u-bolts attached to my welding table below the work surface so that if I'm sliding big objects around that I'm working on they don't hit the torch.


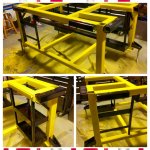
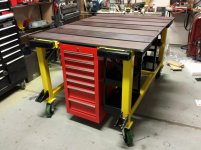
A few pics of a mobile motorcycle work table I'm working on. Still need to make tops and the various accessories that will bolt on/off during various stages of restoration.
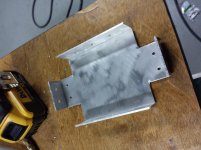
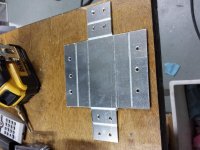
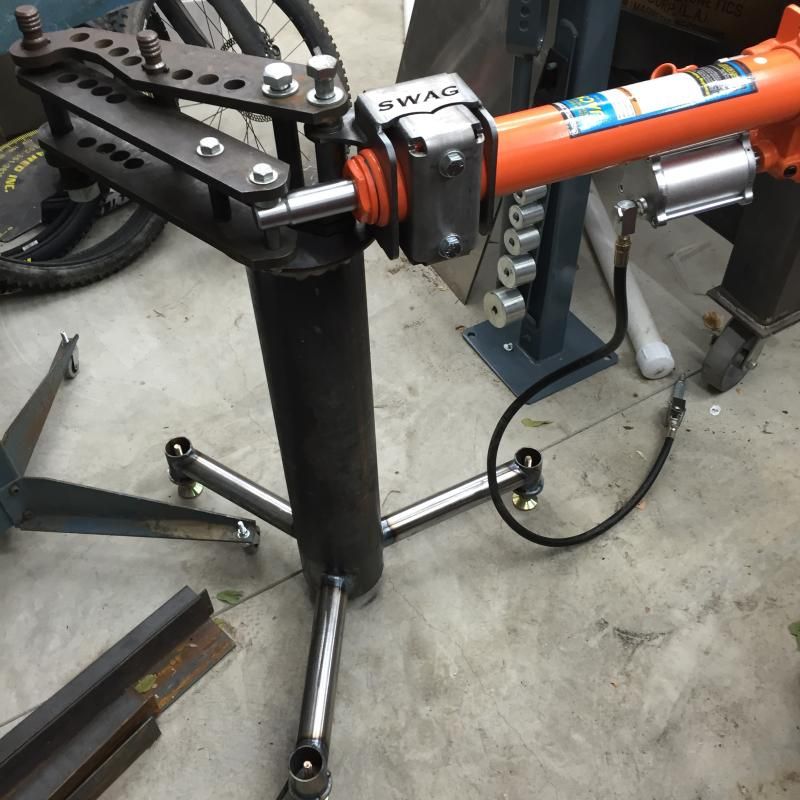
table2.jpg


table3.jpg


table4.jpg
 
To avoid these ads, REGISTER NOW!

Grinder Bill

Well-known member
Joined
Jan 11, 2011
Messages
217
Quick question why is some of the filler rod in the holder bent or in a "z" shape and some curved?
I'm trying to learn to TIG so never seen that before... Always looking to pick up a tip.
Thanks!

:) Nothing exotic... The z-shaped rod is the template I used to make the muffler support on the table, and the wavy wire is the ground from a piece of 14-2 electrical wire; I was tig welding copper and using it as filler.
 

Guster

Well-known member
Joined
Mar 11, 2012
Messages
1,543
Location
Auckland, New Zealand
Had this idea for a bottle opener. Chunky, clean and simple. With a few minutes spare in the workshop I decided to make one using some 1" stainless tubing and solid stock from the scraps bin.
15680314659_42b084c009.jpg

May have to make a few for stocking fillers.
 

alpinewhite

Well-known member
Joined
Aug 4, 2012
Messages
1,315
Location
Orange County, California, USA
Had this idea for a bottle opener. Chunky, clean and simple. With a few minutes spare in the workshop I decided to make one using some 1" stainless tubing and solid stock from the scraps bin.
15680314659_42b084c009.jpg

May have to make a few for stocking fillers.
Try selling this on ebay. You may have something viable here. Of course, as soon as people notice that you're successful, all the copycats will surface.
 

wagzilla

Well-known member
Joined
Dec 11, 2012
Messages
604
Location
Arizona
Need to ask you guys something. I have a tig welder Dynasty 200 DX . When do you switch to water cooled? Mine is getting hot never to the point that it turns off. Some times I weld a hour at a time.

thanks

James
 
Last edited:

kazlx

Well-known member
Joined
Oct 30, 2012
Messages
2,851
Location
Tustin, CA
When it gets uncomfortable for you and/or cooking air cooled torches. Won't really hurt the machine. I just like water cooler because the torches are smaller and more comfortable.
 

Lu-Max

Well-known member
Joined
Jan 8, 2014
Messages
745
^And I can wear a thin glove on my torch hand without it getting too hot to hold the torch. With the water cooler I could probably go glove-less but wouldn't due to the UV.
 

wagzilla

Well-known member
Joined
Dec 11, 2012
Messages
604
Location
Arizona
When it gets uncomfortable for you and/or cooking air cooled torches. Won't really hurt the machine. I just like water cooler because the torches are smaller and more comfortable.

Thanks guys for your input!! looks like about a grand for the upgrade and leather cover for the hose. Maybe in a few months:beer:
 

kazlx

Well-known member
Joined
Oct 30, 2012
Messages
2,851
Location
Tustin, CA
Thanks guys for your input!! looks like about a grand for the upgrade and leather cover for the hose. Maybe in a few months:beer:

You can find used Coolmate 3s for a couple hundred bucks. Just as good, if not better than the coolers they sell 'for' the Dynasty. That and your choice in torch and ready to go. Check out arc zone for torches. Don't forget you need all new parts, ie, cups, collets, gas lens, etc. They don't fit.
 

Robert Hall

Well-known member
Joined
Jan 17, 2011
Messages
414
Location
Utah
Or you could make one of your own!
 

Attachments

  • uploadfromtaptalk1417221422385.jpg
    uploadfromtaptalk1417221422385.jpg
    139 KB · Views: 393
  • uploadfromtaptalk1417221503910.jpg
    uploadfromtaptalk1417221503910.jpg
    143.2 KB · Views: 372

Robert Hall

Well-known member
Joined
Jan 17, 2011
Messages
414
Location
Utah
Ok, you asked for it.

Tank is stainless 304. 6" deep, 12" x12".

850 watt power supply. Completely over kill.

12 volt circulating pump with self attached heat sinks. 12v computer fan for keeping it cool.

6x12 radiator w/a 120cfm fan. Again, overkill, but it's what I had.

I used a saw to score the aluminum for the bendy pieces. You might get two bends out of the score but it's best to get it right the first time.

The three power switches are for the main, the fan, and the pump.

Here is a link to a vid ob the sound signature.


Attachments

  • 20140725_215551.jpg
    20140725_215551.jpg
    142.3 KB · Views: 164
  • 20140725_215211.jpg
    20140725_215211.jpg
    136.1 KB · Views: 154
  • 20140725_215048.jpg
    20140725_215048.jpg
    145.9 KB · Views: 165
  • 20140725_222709.jpg
    20140725_222709.jpg
    133.9 KB · Views: 172

Robert Hall

Well-known member
Joined
Jan 17, 2011
Messages
414
Location
Utah
Robert, that is great. One more project to add to my ever growing list!
Thanks!

It got moved up the list because of the weld table. The steel was so heavy I had to have the torch cooler to manage enough amperage to weld the table.

That's one of the reasons the table was delayed.

I have to say that torch cooler has worked extremely well and with the heat sinks on the pump has stayed cool even when it's 90 degrees in the garage. Now that it's cooler it has no problem to run constantly.
 

Robert Hall

Well-known member
Joined
Jan 17, 2011
Messages
414
Location
Utah
And paint is now done and drying.
 

Attachments

  • uploadfromtaptalk1417501048546.jpg
    uploadfromtaptalk1417501048546.jpg
    135.7 KB · Views: 352
To avoid these ads, REGISTER NOW!

Robert Hall

Well-known member
Joined
Jan 17, 2011
Messages
414
Location
Utah
While I'm ok with either of those, it will resemble the German flag more than anything when I set the red tool boxes in to it.

I have class tonight but by Wed I should have some decent images of the mostly finished project.

And @kazlx, nice stand. It's a good thing you don't live closer, I would be a good friend to you and your bender. :)
 

Robert Hall

Well-known member
Joined
Jan 17, 2011
Messages
414
Location
Utah
Done. ( almost )
 

Attachments

  • uploadfromtaptalk1417617967018.jpg
    uploadfromtaptalk1417617967018.jpg
    135.3 KB · Views: 452
  • uploadfromtaptalk1417617984841.jpg
    uploadfromtaptalk1417617984841.jpg
    141 KB · Views: 398

F-117HWK

Well-known member
Joined
Apr 17, 2012
Messages
283
Location
Virginia
Looks awesome.

How are you attaching the plates to the table?

Any consideration for putting holes in them to use clamps like THESE?
 

Robert Hall

Well-known member
Joined
Jan 17, 2011
Messages
414
Location
Utah
I will counterbore the holes for mounting 1/2 cap screws to the table as well as 5/8ths smooth and 7/8 threaded holes for setups.

Need to take a plate up to a friend with a mill for a template and pilot holes.
 

Robert Hall

Well-known member
Joined
Jan 17, 2011
Messages
414
Location
Utah
Thanks John. The tubes are setup so the receiver can slide through it's mate on the other end. That allows for long extensions and all sorts of bench tool holders.
 

Robert Hall

Well-known member
Joined
Jan 17, 2011
Messages
414
Location
Utah
Thanks guys,

Right now its about 1000#

84# per plate, 100# per toolchest (empty), about 300# on the table frame.
 

Seiler

Well-known member
Joined
Feb 8, 2013
Messages
81
Location
Colorado
I had a buddy contact me asking if I could help him narrow his Rockwell axle. I already did the front, and now he wants to do the rear. Building axles is something I want to do in the future, so I was really excited to take this project on.

He did all the cutting beforehand and he simply wanted me to weld the tube back together. Unfortunately, he started cutting on the wrong tube before he realized it.


DSC_4396
by The Color Orange, on Flickr

I know you can only see one side in that picture, but he cut 50% of the way through the tube. It took me awhile to come up with a method to weld what he had mistakenly cut away without warping the axle. I think I've finally found a solution.

First, I had to pickup an I-beam so I could fabricate a jig. I found it on craigslist and it was the only cheap candidate I could locate without buying a brand new 20' stick from a steel yard for serious coin.


IMG_2901
by The Color Orange, on Flickr

I made two supports using some square tube I had leftover from my table build (which is still in the works).


DSC_4347
by The Color Orange, on Flickr


DSC_4353
by The Color Orange, on Flickr

I then prepped the beam and welded the supports on using the last bit of square tube as an alignment bar.


DSC_4367
by The Color Orange, on Flickr


DSC_4375
by The Color Orange, on Flickr


DSC_4381
by The Color Orange, on Flickr


DSC_4386
by The Color Orange, on Flickr

Now the axle is situated on the supports and ready to burn in. I have two extremely heavy duty ratchet straps on both sides to apply downward pressure when I weld the openings which should keep it from warping.


DSC_4391
by The Color Orange, on Flickr


DSC_4394
by The Color Orange, on Flickr


IMG_2932
by The Color Orange, on Flickr

As of right now, that's how it sits. I should have some time next week to complete the actual welding portion. The other side (short side) is about halfway done. I forgot to take pictures of that but you can see the weld in a few images. I'll keep y'all posted.
 

MN4x4

Well-known member
Joined
Sep 5, 2010
Messages
1,443
Location
Minnesnowta
Hey, your table looks great! Mad skills!

:bowdown:

I read your weight estimate and was wondering how those casters are gonna handle that? I'm sure that you already dealt with that in your design phase, but I can't see them well enough to understand what you used.

Are they steel casters? If so, what brand and model? Thanks in advance for sharing!
 

Robert Hall

Well-known member
Joined
Jan 17, 2011
Messages
414
Location
Utah
Hey, your table looks great! Mad skills!

:bowdown:

I read your weight estimate and was wondering how those casters are gonna handle that? I'm sure that you already dealt with that in your design phase, but I can't see them well enough to understand what you used.

Are they steel casters? If so, what brand and model? Thanks in advance for sharing!

The casters are rated at 1100# each. The roll very well on a flat floor. I wouldn't try to push it down a Gravel Road :)

Yes, steel with a neoprene outer. I'm using the levelers to keep the wheels from flattening. That would happen if i left it for any period of time.

This is the page from whence i purchased said casters. ..

http://www.castercity.com/cm14.htm#Table - Casters

Thanks for the kind words. :)
 

t100

Well-known member
Joined
Sep 3, 2009
Messages
6,101
keep everything clean of oil and grind off the mill scale.

a lot times the dull grey color indicates excessive heat. dial down the amp and/or travel faster.
 
To avoid these ads, REGISTER NOW!
Top Bottom