To avoid these ads, REGISTER NOW!

Silver Saber Cabinet Install

alberto

Well-known member
Joined
May 28, 2007
Messages
756
I've picked up a lot of good advice and knowledge Garage Journal over the years, I thought I'd contribute the efforts associated with installing Saber cabinets in my garage. The title of this thread is an homage to Bdamico's "Blue Saber Cabinet Install / Review" thread (https://garagejournal.com/forum/showthread.php?t=169972), which is full of helpful advice which I intend to put to good use and advice others read if they are considering Saber Cabinets.

As a little background, I have been looking at cabinets for the garage for a long time, suffering of Paralysis by Analysis. I considered all of the usual cabinet suspects and then some (Moduline, Baldhead (from whom I obtained a price quote), Lista, New Age, Sonic, some Alibaba offerings, and a whole list of others.

The goal was to get significantly more storage and to create a small work and tool area, and add a sink to take advantage of pre-existing stubbed out water and sewer hookups in the garage. Oh, and accommodate a full size wine refrigerator. I would like to (eventually) also install a pressure washer with soft water system to be able to clean and wash cars in my driveway. But that's for a later time.

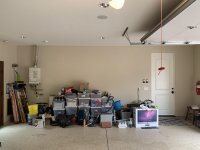
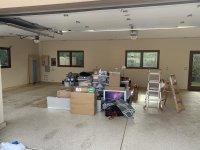
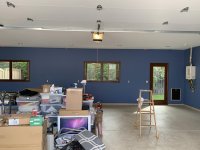
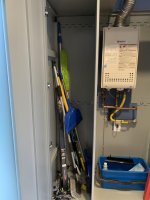
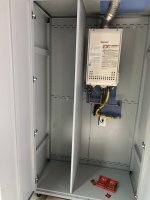
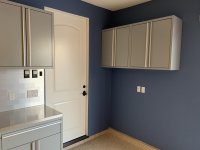
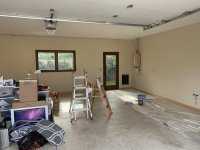
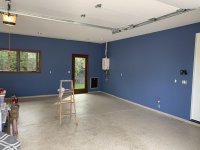
Here is the garage as it existed. Clearly too much accumulated stuff that need to be put away in an organized way. The pictures show the three walls that were going to receive cabinets. One the other walls there wasn't really any space to put additional cabinets and still park a car comfortably.
 

Attachments

  • IMG_3432-1.jpg
    IMG_3432-1.jpg
    139.2 KB · Views: 230
  • IMG_3433-1.jpg
    IMG_3433-1.jpg
    127.6 KB · Views: 205
  • IMG_3434.jpg
    IMG_3434.jpg
    62.6 KB · Views: 185
To avoid these ads, REGISTER NOW!
OP
A

alberto

Well-known member
Joined
May 28, 2007
Messages
756
I decided to paint the garage as part of the cabinet effort, so first that meant moving all of this stuff to the middle of the garage to access the walls. Essentially all of this stuff needs to fit into the cabinets.
 

Attachments

  • IMG_4044.jpg
    IMG_4044.jpg
    148.7 KB · Views: 176
  • IMG_4045.jpg
    IMG_4045.jpg
    149.3 KB · Views: 162
OP
A

alberto

Well-known member
Joined
May 28, 2007
Messages
756
Had some exterior paint from another project left over, which perhaps not so coincidently compliments some of the colors we have put inside the house and I thought would work very well with the Silver Saber cabinets that by this time I had ordered.
 

Attachments

  • IMG_4049.jpg
    IMG_4049.jpg
    145.8 KB · Views: 186
  • IMG_4050.jpg
    IMG_4050.jpg
    147.7 KB · Views: 193
OP
A

alberto

Well-known member
Joined
May 28, 2007
Messages
756
The Saber Cabinets that I ordered arrived today. Here is what a bit over 1 ton (2520 lbs) of cabinets looks like.
 

Attachments

  • IMG_4061.jpg
    IMG_4061.jpg
    148.4 KB · Views: 232
Last edited:
OP
A

alberto

Well-known member
Joined
May 28, 2007
Messages
756
In terms of general layout, I worked out the layout shown with Baldhead, when I thought I was going to go with their cabinets. Baldhead has so many options that it would have let me use virtually all of the wall space down to about an inch. While the Baldhead cabinets are world class cabinets, they are expensive, at around $88/linear inch installed for the layout shown. In return I would have gotten better cabinets, more storage space and an almost custom cabinet look.

Saber does not have anywhere near the amount of cabinet options that Baldhead has, and are not as heavy duty, but they are less expensive at around $20/linear inch for my order (does not include installation, if you have someone help you install them). Using Saber would mean somewhat lower storage efficiency (because some wall space would go unused) and having cabinets that are not quite as heavy duty as the Baldhead cabinets and clearly not custom look. Also, they require a lot more assembly.

At the end of the day, I could not get myself to buy the Baldhead units. The Saber allowed me to get good cabinets at something like 1/3 the price all in.

With the Saber cabinet, I was fortunately able to (mostly) maximize the amount of storage along the west wall (the compromise was having to drop the upper cabinets above the large lockers that Baldhead allowed).

On the other hand, the south wall required a bit more compromise. For one, I was not able to utilize all of the wall space between the two windows. Also if I used Saber cabinets under the right window as my work bench, I would lose additional storage capacity because Saber would cover less than 60 inches of the 73 inch wide space below the window. I also would not get as heavy a duty bench.

I started looking at 72 inch tool boxes to fit under the window. After looking at many options, I purchased a Viper Pro Series 72″ Workstation. It is not a normal tool box, but more of a bench (no wheels), which has tool box style pull out drawers for tools combined with cabinet doors for other storage. I thought it was a better fit for my use. I was never going to move a 72 inch tool box with wheels around in this garage and I don’t even have enough tools at home to fill a tool box that big.

To the right of the Viper cabinet, I will be installing a garage suitable wine storage unit.

That’s a long winded way of saying that I ended up with Saber cabinets. 5 of the large "locker" cabinets (the nominal 48 wide x 24 inch deep), one base 2 door cabinet, which I will convert to a sink cabinet, one base 2 door 1-drawer cabinet to house trash and recyclable bins, and four uppers. Two upper are for over the (converted) sink and trash base units on the west wall and two more for the short north wall next to the door leading into the house, underneath which I intend to install the pressure washer and spotless water softener I mentioned before.
 

Attachments

  • South Wall.jpg
    South Wall.jpg
    53.2 KB · Views: 214
  • West Wall.jpg
    West Wall.jpg
    60.1 KB · Views: 192
OP
A

alberto

Well-known member
Joined
May 28, 2007
Messages
756
There was some damage to the cardboard that was visible. Not sure it that will translate into damage to the cabinet themselves (or the the stainless top). We will see.

Started unpacking one of the large locker units. Each unit comes in three boxes, the bottom and upper part of the cabinet (shelves are also in this box), the sides and the doors. There's going to be a significant amount of waste generated.

A couple of the shelves had some damage but weirdly there did not seem to be any damage to the cardboard box they were in. Not a big deal as it was pretty minor damage. I think they can be installed in either direction so I'll just install the damaged side to the back.
 

Attachments

  • IMG_4076.jpg
    IMG_4076.jpg
    79.2 KB · Views: 145
  • IMG_4075.jpg
    IMG_4075.jpg
    104.1 KB · Views: 122
  • IMG_4067.jpg
    IMG_4067.jpg
    98.4 KB · Views: 124
  • IMG_4064.jpg
    IMG_4064.jpg
    46 KB · Views: 119
  • IMG_4063.jpg
    IMG_4063.jpg
    118.8 KB · Views: 122
Last edited:
OP
A

alberto

Well-known member
Joined
May 28, 2007
Messages
756
Hardware and instructions for one large locker. Everything I read said that the large lockers do not come with soft close hinges, so I bought a ton of soft close european hinges ahead of time. I outsmarted myself, however. When I checked out the hinges Saber supplied, the large cabinets hinges are self close! I'll have to return the hinges I bought, but I first want to see if Saber supplied soft close hinges for all of the cabinets.
 

Attachments

  • IMG_4068.jpg
    IMG_4068.jpg
    112.8 KB · Views: 127
  • IMG_4069.jpg
    IMG_4069.jpg
    67.9 KB · Views: 125
OP
A

alberto

Well-known member
Joined
May 28, 2007
Messages
756
Slowly making progress. I am converting the two door cabinet into a sink cabinet. Bought a sink, and cut out the top of the two door to fit. This cabinet and the one to the right of it will have a stainless steel top, so I will also have to cut it to final fit the sink.

I also taped out the stud locations to make it easier to screw the cabinets onto the wall once the backs are up. I am not sure why the wall color looks gray in this picture.

I also decided I would try the technique used by Bdamico, of adding a 1 x 10 pine board to the bottom of the shelf, which then get covered with the bottom cover for added rigidity. I am only using legs on the front on the large lockers because I was concerned that there could be too much of a lever effect if I only used the lag bolts to hold the cabinet up. These cabinets are huge and it would be easy to overload them.

I started by cutting and attaching the pine boards to the metal bottom and then attaching the front legs to the metal bottom and the pine boards. Then I leveled the bottoms, and put up the left rear sections of these two cabinets and attached them to the wall and to the bottom. I also attached the two cabinet to each other. At this point I did not put up the right rear sections because there are electrical outlets behind them and I needed to cut out for them.
 

Attachments

  • IMG_4082.jpg
    IMG_4082.jpg
    127.2 KB · Views: 154
  • IMG_4081.jpg
    IMG_4081.jpg
    150.1 KB · Views: 150
  • IMG_4083.jpg
    IMG_4083.jpg
    91.7 KB · Views: 148
  • IMG_4085.jpg
    IMG_4085.jpg
    75.4 KB · Views: 146
  • IMG_4084.jpg
    IMG_4084.jpg
    47.7 KB · Views: 151
  • IMG_4086.jpg
    IMG_4086.jpg
    69.8 KB · Views: 176
OP
A

alberto

Well-known member
Joined
May 28, 2007
Messages
756
As it turned out the outlet location was visible between the cut outs provided for attaching the backs to the wall, so it was relatively simple to locate the location of the outlets to do the cut outs. I then went ahead and assembled the left unit. Turns out the Rustoleum Gray primer is a pretty close (but not exact) color match for the Silver cabinets. Good enough to use to cover the raw edges left over from cut outs, but it may not be close enough if you have a ding or something that will be particularly visible.
 

Attachments

  • IMG_4094.jpg
    IMG_4094.jpg
    74.2 KB · Views: 165
  • IMG_4092.jpg
    IMG_4092.jpg
    58.2 KB · Views: 135
  • IMG_4090.jpg
    IMG_4090.jpg
    99.2 KB · Views: 119
  • IMG_4089.jpg
    IMG_4089.jpg
    87.2 KB · Views: 121
  • IMG_4088.jpg
    IMG_4088.jpg
    71.8 KB · Views: 163

wasfast

Well-known member
Joined
Apr 10, 2014
Messages
874
Location
San Diego CA
Did you purchase the adjustable feet/legs separately or did they come with the cabinets? I'm looking for these for a similar project.
 
OP
A

alberto

Well-known member
Joined
May 28, 2007
Messages
756
Did you purchase the adjustable feet/legs separately or did they come with the cabinets? I'm looking for these for a similar project.

At one time they were an additional cost, but they told me they now include them with the cabinet cost. However, they ship separately from the cabinets. In my case they held up progress because they came later than the cabinets and I could not start without them.
 

allinon72

Well-known member
Joined
Jul 5, 2010
Messages
3,305
Location
Indianapolis
At one time they were an additional cost, but they told me they now include them with the cabinet cost. However, they ship separately from the cabinets. In my case they held up progress because they came later than the cabinets and I could not start without them.

I ran into the same problem and found it to be VERY annoying for the legs to come separate, and in my case several days after, with no one communicating that fact.
 
OP
A

alberto

Well-known member
Joined
May 28, 2007
Messages
756
I ran into the same problem and found it to be VERY annoying for the legs to come separate, and in my case several days after, with no one communicating that fact.

The whole shipping experience from a timing perspective and communication from Saber was a let down. It's definitely one of their weak points.

The cabinets took an additional almost 2 weeks to ship/arrive from the time they initially said they would (easy to blame anything and everything on Covid now a days, they claimed shipping capacity is pretty hard to come by right now). They did not send an email stating that it had shipped. I found out because I emailed the sales person I had been dealing with at Saber. Then he sent the wrong tracking number. Fortunately the guys they used to ship them (YRC) are VERY responsive, and located my shipment and gave me all of the information.

Then I had to reach out again to Saber sales person to find out about the legs, who said they had been shipped 2 day air. 4 days later they showed up.

The good news is that every thing arrived (no missing parts, at least for the first 4 pieces, still have another 7 to go) and there was very little damage, as noted in my earlier post. I also noticed that they are not stingy with the assembly hardware for the large cabinets. There were an extra couple of bolts, nuts, etc. Not many, but enough to save you a home despot trip if you drop something on the floor and it goes into the garage blackhole.
 
OP
A

alberto

Well-known member
Joined
May 28, 2007
Messages
756
Fair amount of progress.

If you have a lot of the large cabinets, there is a LOT of assembly and it is a LOT of work. It certainly helps to have someone there to give you a hand, etc.

Saber gives you drywall screws and fender washers to install the cabinets. I do not know why they would do that, given that they seem to recommend installing the cabinets without the legs. Drywall screws are not intended to have a lot of shear strength.

In addition, you are unlikely to get more than two studs per cabinet for the small ones and 2 studs per side for the 48 inch cabinets (at least for 16 inches on center stud layout), so you want something made for the purpose of holding cabinets. My recommendation is to use proper lag screws or bolts. I like these Spax ones, 1/4" by 3 inches into the studs. You'll also need to buy fender washers, as the Saber supplied ones do allow the 1/4" Spax to fit through.

For the 48 inch cabinets they include nine drywall screws and fender washers, so presumably that is how many lags one should try to use when installing the large cabinets. I also used Loctite red on all of the bolts and nuts that are used to assemble the large cabinets.

I ended up putting legs on the front of the cabinets and none on the back. I was not comfortable hanging the big cabinets solely on the wall without any support to the front of the cabinet. These things are designed to hold a lot of weight, and I did not feel like putting all of that weight on the studs alone is a good idea.

The Viper cabinet came in. Well packaged in a wooden box on top of a pallet. The wine refrigerator also came in. Depending on how you look at it, the bad news or good news is that we had enough wine to completely fill it, with about 3 wine cradle slots left.

Here's a view of the almost completed south wall cabinetry and fridge.
 

Attachments

  • IMG_4119.jpg
    IMG_4119.jpg
    112.7 KB · Views: 191
  • IMG_4110.jpg
    IMG_4110.jpg
    150.1 KB · Views: 169
  • IMG_4107.jpg
    IMG_4107.jpg
    59.9 KB · Views: 163
  • IMG_4101.jpg
    IMG_4101.jpg
    133 KB · Views: 174
  • IMG_4100.jpg
    IMG_4100.jpg
    107.8 KB · Views: 166
  • IMG_4093.jpg
    IMG_4093.jpg
    45.2 KB · Views: 160
Last edited:
To avoid these ads, REGISTER NOW!
OP
A

alberto

Well-known member
Joined
May 28, 2007
Messages
756
Mostly finished, just doing final touches and a few details. On the west wall, there is a tankless water heater that I wanted to hide in the cabinet. I also wanted to not lose all of the storage space so I installed a partition to the left of the water heater, respecting the clearance specified on the water heater. One of the good things of having to put these large cabinets together was that it made it significantly easier to do the cut out for the water heater.

I took a one drawer and two door unit and converted it to hold the trash and recycle bins. In order to mount the pull out shelf as low as possible and still have it so it can be pulled out, I had to slightly modify the rails, but not a big deal. Found a recycle and a trash bin that fit perfectly in the cabinet. Works very well.
 

Attachments

  • IMG_4158.jpg
    IMG_4158.jpg
    108.3 KB · Views: 147
  • IMG_4129.jpg
    IMG_4129.jpg
    110.1 KB · Views: 136
  • IMG_4128-1.jpg
    IMG_4128-1.jpg
    85.9 KB · Views: 125
  • IMG_4120-1.jpg
    IMG_4120-1.jpg
    60.2 KB · Views: 137
  • IMG_4161.jpg
    IMG_4161.jpg
    71.1 KB · Views: 130
  • IMG_4141-1.jpg
    IMG_4141-1.jpg
    65.7 KB · Views: 126
  • IMG_4111-1.jpg
    IMG_4111-1.jpg
    73.1 KB · Views: 159
OP
A

alberto

Well-known member
Joined
May 28, 2007
Messages
756
I previously posted pics of the two door lower cabinet that I cut out to install a sink, but here it is installed in place.

Installed the upper cabinets so that I could get 24 inches of clearance between the sink and the uppers, giving a comfortable clearance for when washing things in the sink or working on the countertop. I put in some stainless steel tiles which I glued in addition to the adhesive backing they came with. I think it looks good with the stainless counter and sink, as well as with the stainless steel Viper cabinet on the south wall.

I bought two LED light fixtures and mocked them up to see how they will work. I mounted them with magnets so they would attach the upper cabinets without having to drill mounting holes into the cabinets. I'll deal with the visible cables later.

On the north wall I installed two upper cabinets. My intent for the area below is to create a movable detailing cart that would be parked under these uppers. These upper are intended to hold detailing supplies (product bottles, towels, etc.).

Next big thing might be the hardest, which is to fit all of the stuff that precipitated the cabinet installation effort, into the cabinets in an organized way. I hope it all fits!
 

Attachments

  • IMG_4163.jpg
    IMG_4163.jpg
    92 KB · Views: 176
  • IMG_4160.jpg
    IMG_4160.jpg
    83.7 KB · Views: 197
  • IMG_4159.jpg
    IMG_4159.jpg
    131.1 KB · Views: 210
  • IMG_4157.jpg
    IMG_4157.jpg
    49.3 KB · Views: 189
  • IMG_4137-1.jpg
    IMG_4137-1.jpg
    124.5 KB · Views: 173
  • IMG_4135-1.jpg
    IMG_4135-1.jpg
    94.9 KB · Views: 173
  • IMG_4133-1.jpg
    IMG_4133-1.jpg
    82.2 KB · Views: 229
OP
A

alberto

Well-known member
Joined
May 28, 2007
Messages
756
Pretty much done, but a few details and final cleaning. Overall a worthwhile project, assuming I can put all of my stuff in the cabinets, which I am still working on. Lots of hard work, specially if you have a lot of the large locker cabinets.
 

Attachments

  • IMG_4169.jpg
    IMG_4169.jpg
    146.2 KB · Views: 245
  • IMG_4045.jpg
    IMG_4045.jpg
    149.3 KB · Views: 202
  • IMG_4049.jpg
    IMG_4049.jpg
    145.8 KB · Views: 179

Jdlynch

Member
Joined
Nov 6, 2021
Messages
9
Thanks for posting your build thread. I’m also considering Saber, and am currently experiencing analysis paralysis myself. I keep thinking I should find a less expensive option. keep coming back to saber!
 
OP
A

alberto

Well-known member
Joined
May 28, 2007
Messages
756
Thanks for posting your build thread. I’m also considering Saber, and am currently experiencing analysis paralysis myself. I keep thinking I should find a less expensive option. keep coming back to saber!
I could not find anything that made more sense. Cabinets still look new, no issues so far.
 

rich_in_oregon

New member
Joined
Aug 14, 2022
Messages
4
I've got the same hard choice between Baldhead, Champion, and Saber. Shipping isn't an issue for me because it's free with Saber and I'm within a few hours of Champion and Baldhead.

I would like the more custom fitment with Champion and Baldhead but don't know if I want to spend that much for that privilege. If I go with Saber, I will make sure all my cabinets and lockers are 30" wide. I will stack the base cabinets on top of the 30" storage lockers which will be perfect for my 10 ft high ceilings.

I'm still trying to decide but don't feel hurried since prices are pretty high and will likely stay the same or fall. My garage is a mess with a bunch of smaller tool carts and lots of tools and supplies. It will take me time to figure out what I really need.
 

rich_in_oregon

New member
Joined
Aug 14, 2022
Messages
4
I could not find anything that made more sense. Cabinets still look new, no issues so far.
How are your storage lockers holding up? When you load them up with heavier items, are the lockers staying square with doors still aligned?

Great build!

Thanks!
 
OP
A

alberto

Well-known member
Joined
May 28, 2007
Messages
756
How are your storage lockers holding up? When you load them up with heavier items, are the lockers staying square with doors still aligned?

Great build!

Thanks!

Still look great, no issues whatsoever. Powder coat is still intact, even on the shelves where I store heavy items that get slid in and out. Not sure if it was the locktite I used (it certainly did not hurt), but I have not noticed any loose bolts, so still solid feel to the cabinets. Hinges all operate as they are supposed to, self closing still works.
 

rich_in_oregon

New member
Joined
Aug 14, 2022
Messages
4
Still look great, no issues whatsoever. Powder coat is still intact, even on the shelves where I store heavy items that get slid in and out. Not sure if it was the locktite I used (it certainly did not hurt), but I have not noticed any loose bolts, so still solid feel to the cabinets. Hinges all operate as they are supposed to, self closing still works.
Thanks for the feedback! I heard some folks complain about their New Age Pro storage cabinets bending and becoming out of square once they loaded up their storage cabinets. So glad the Saber storage cabinets are holding up to real world use!
 

scatkins

Active member
Joined
Aug 18, 2014
Messages
33
I loved saber cabinets. But the price has almost tripled since I did my first install about 6 years ago. Used to be able to get a garage journal discount, but I think the distributer was sold. The 48" cabinets were about $450 and now are $1300. I've found more reasonable alternatives.
 

rich_in_oregon

New member
Joined
Aug 14, 2022
Messages
4
I loved saber cabinets. But the price has almost tripled since I did my first install about 6 years ago. Used to be able to get a garage journal discount, but I think the distributer was sold. The 48" cabinets were about $450 and now are $1300. I've found more reasonable alternatives.
Please share your alternatives! Any brand in particular?
 

scatkins

Active member
Joined
Aug 18, 2014
Messages
33
Please share your alternatives! Any brand in particular?
I wish I did. I really like the way Saber mounted (to the wall on a ledge) so there was always a clear spot underneath. And they are built like tanks. I don't really care for NewAge and The Pro series is closest to Saber but they cost just as much so I just stuck with Saber.
 

kbuhagiar

Well-known member
Joined
Dec 27, 2005
Messages
1,736
Location
Escondido, CA
Hello @alberto

Old thread, I know...but I just discovered Saber and am strongly considering purchasing some of their cabinets.
Care to give a three-year progress report? Still happy with their product?

Thanks in advance.
 
OP
A

alberto

Well-known member
Joined
May 28, 2007
Messages
756
Hello @alberto

Old thread, I know...but I just discovered Saber and am strongly considering purchasing some of their cabinets.
Care to give a three-year progress report? Still happy with their product?

Thanks in advance.

Still going strong with no issues. Powder coat still looks unblemished. Nothing has sagged or gotten loose (use threadlocker on all of the screws!). Still happy with them, glad I got them.
 
To avoid these ads, REGISTER NOW!
Top Bottom