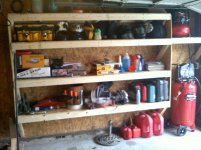
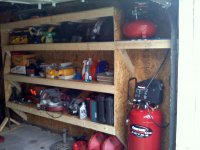
If your handy with some basic carpentry skill's. I would recommend building some on your own. I recently built some "Basic/Simple Shelves" a couple of weeks ago. They are simple to make and can hold a good amount of weight.
Shelves are 8' long x 16" deep and spaced aprox 18' apart and the first shelf is placed 16' of the floor to store items below it. I came up with a 16" spacing because this is what i can comfortably fit between my garage door's and the wall and the number work's nicely against a 4' wide piece of sheathing (No waste)
These cost me aprox $68.00 and now I have 32 lineal feet of shelving.
Materials that you will need
(2) 4x8 sheathing cut into 16 wide strips. I used OSB, you can use whatever that you want
(15) 2 x 4 x 8' long
(28) 2 x 4 joist hangers
(1) box of 4 inch decking or lag screws
(1) box of 3 inch drywall screws
(1) box of 1 1/2 drywall screws
Your basically going to do the the following to make one shelf or platform
1. Take 2 x 4's and mark 16" on centers (Should end up with 7 cross members)
2. Cut a 2x4 and cut into 13" lengths
3. Take the cross members and attach them to the 2 x 4's on the 16" centers, Making sure everything is square and straight utilizing the 3" screws
4. Attach the joist hangers to the platform/shelf using the 1 1/2 screws.
5. Locate the studs's in your wall and mark on 16" centers
6. Take your first shelf and place against the wall, locate the studs and pre drill for the lag screw.
7. Level the shelf and attach to wall on 16" centers using the 4" lag screws.
8. Determine your spacing for your shelves and repeat for the last 3, utilizing a straight edge to line up the ends.
9. Take a 2 x 4 x 20" long (approximately) and cut the end's at a 45* angle and attach to the end of each shelf so it's flush with the end's. Using the 4" screw's (Remember to predrill)
10. Take 4 of the 16" x 8' sheathing and screw it down to the shelves.
11. Take the last 2 16" x 8' and place them on the end's. Scribing the surface to the bottom 45* cross brace.
12. Attach the side's to the end's of the shelve's using the 1 1/2 screws.
Your done, essentially you have built a giant wall cabinet that it attached to the wall every 16" inches and every shelve is tied to each other with the plywood ends making it incredibly strong. I used screw's instead of nail's because it add's more strength than nails
Here's some pic's for better detail.
Shelves are 8' long x 16" deep and spaced aprox 18' apart and the first shelf is placed 16' of the floor to store items below it. I came up with a 16" spacing because this is what i can comfortably fit between my garage door's and the wall and the number work's nicely against a 4' wide piece of sheathing (No waste)
These cost me aprox $68.00 and now I have 32 lineal feet of shelving.
Materials that you will need
(2) 4x8 sheathing cut into 16 wide strips. I used OSB, you can use whatever that you want
(15) 2 x 4 x 8' long
(28) 2 x 4 joist hangers
(1) box of 4 inch decking or lag screws
(1) box of 3 inch drywall screws
(1) box of 1 1/2 drywall screws
Your basically going to do the the following to make one shelf or platform
1. Take 2 x 4's and mark 16" on centers (Should end up with 7 cross members)
2. Cut a 2x4 and cut into 13" lengths
3. Take the cross members and attach them to the 2 x 4's on the 16" centers, Making sure everything is square and straight utilizing the 3" screws
4. Attach the joist hangers to the platform/shelf using the 1 1/2 screws.
5. Locate the studs's in your wall and mark on 16" centers
6. Take your first shelf and place against the wall, locate the studs and pre drill for the lag screw.
7. Level the shelf and attach to wall on 16" centers using the 4" lag screws.
8. Determine your spacing for your shelves and repeat for the last 3, utilizing a straight edge to line up the ends.
9. Take a 2 x 4 x 20" long (approximately) and cut the end's at a 45* angle and attach to the end of each shelf so it's flush with the end's. Using the 4" screw's (Remember to predrill)
10. Take 4 of the 16" x 8' sheathing and screw it down to the shelves.
11. Take the last 2 16" x 8' and place them on the end's. Scribing the surface to the bottom 45* cross brace.
12. Attach the side's to the end's of the shelve's using the 1 1/2 screws.
Your done, essentially you have built a giant wall cabinet that it attached to the wall every 16" inches and every shelve is tied to each other with the plywood ends making it incredibly strong. I used screw's instead of nail's because it add's more strength than nails
Here's some pic's for better detail.