Innovate1
Well-known member
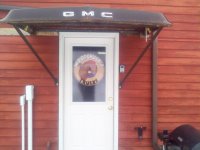
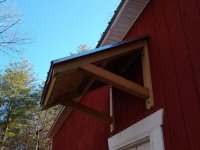
Wanted to put a small roof over the man door and wondering about doing it without posts to support the outer edge. Walls are 2x6 and thinking of about 3' of overhang and about 4 or 5 ft wide for a 3' door. Pitch on the main roof is 6/12 so something similar would seem to fit although I realize a steeper pitch would make it stronger.
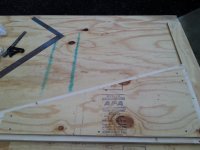
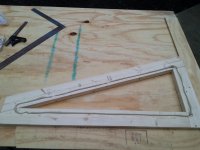
I don't really want braces going down and into the building - That's great structurally but any water would follow the braces into and possibly past the siding.
The critical joints appear to be the "porch" roof rafters to the building at the top where they are in tension. For a 3' wide roof the height at the building would be 18". Any downward pressure would result in twice that amount of tension at the top attachment.
Anyone done something like this?
If I do posts a lot of places want to put a round footing down below frost depth. How important is this vs. putting them on a floating slab?


")