To avoid these ads, REGISTER NOW!

SoCal Sawdust

bdbecker

ALLIANCE MEMBER
Joined
Nov 18, 2015
Messages
5,551
Location
Iowa
Yes, your point is well taken. I was referring to the amount I needed to adjust the fence forward or back to achieve "perfect square", NOT the difference in thickness of my fifth cut/4. If I look at the 5th cut/4... I am off by 0.00125" over 7.5" of cut. Given my depth of cut on the sled is only about 20" max, I would be off by ~0.003" over the full length of cut.

Gotcha.

Trying to chase down a fence adjustment of 0.005" would be very difficult - drill your pilot hole only a few degrees off of perpendicular and the screw could easily pull the fence too far one way or the other. I'd say you've got it about as close to perfect as is reasonably possible.
 
To avoid these ads, REGISTER NOW!

ebarker9

Well-known member
Joined
Oct 1, 2010
Messages
85
Another thing that can cause problems when you get to those types of tolerances is even very minor flexing or bowing of the fence. Particularly if you had to go through the procedure that many times it's something I'd look at very carefully.
 
OP
S

sfanale

Well-known member
Joined
Sep 13, 2013
Messages
203
Location
California
Gotcha.

Trying to chase down a fence adjustment of 0.005" would be very difficult - drill your pilot hole only a few degrees off of perpendicular and the screw could easily pull the fence too far one way or the other. I'd say you've got it about as close to perfect as is reasonably possible.

ha YUP. Hence the extra 45 cuts before I gave up!
 

Unruh

Well-known member
Joined
Aug 12, 2017
Messages
1,431
Location
Silverdale, Washington
Great thread! You do some amazing work. I just bought a new saw as well. I had a saw similar to your old one and with my new cabinet one I feel so much safer. The saw doesn’t rock or skid when I’m cutting large things.
 
OP
S

sfanale

Well-known member
Joined
Sep 13, 2013
Messages
203
Location
California
Great thread! You do some amazing work. I just bought a new saw as well. I had a saw similar to your old one and with my new cabinet one I feel so much safer. The saw doesn’t rock or skid when I’m cutting large things.


Thanks!

Yea the contractors saw was just too light. More than once, when I’d push stock through it, the base would slide or spin. Super lose a fingery.


Sent from my iPhone using Garage Journal
 

nicholam77

Well-known member
Joined
Dec 18, 2016
Messages
2,655
Location
Minneapolis, MN
Sure can! Here are all the parts I purchased on amazon to make it:


I only needed the home hub because I didn't have one already. Honestly, that one isn't great... I would spend the extra money on the Phillips Hue. I used the USB extension as a really simple way to put a 10' cord on it. Alternatively, you could solder in a power wire if you cut off the USB side of the zigbee and tap into the right USB lines (5v+ and GRD).

The extrusion is SUPER cheap, like under 1/16" thick and a bit fragile. They come in 1M lengths--I cut it down to about 24". You'll see when I post my video, how my attachment scheme might not be sufficient for the full 1M.

Wow, thanks! I have a Hue hub, was interested to find a compatible RGB light strip that doesn't cost $90 like the Hue one.

Your latest video on the new lamp turned out great. :thumbup:
 
OP
S

sfanale

Well-known member
Joined
Sep 13, 2013
Messages
203
Location
California
Wow, thanks! I have a Hue hub, was interested to find a compatible RGB light strip that doesn't cost $90 like the Hue one.


Your latest video on the new lamp turned out great. :thumbup:


In theory it should be compatable, but I used a generic hub. Commenters on amazon said it worked with their Hue, but be prepared to fiddle and possibly return it. To get it to work with my goober hub, I used another brand’s LED strip in their options cause this generic strip didn’t come up as a name by default.

Give it a try. Worst case... amazon returns for free!


Sent from my iPhone using Garage Journal
 
OP
S

sfanale

Well-known member
Joined
Sep 13, 2013
Messages
203
Location
California
Some how found a business selling 4x8’ Baltic birch ply, 3/4” for $40 per sheet! So my friend and I bought 15x sheets.

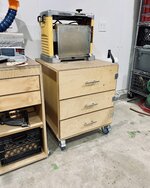
First projects of 2021 will be organizing and purging. I started by dumping my old tall craftsman cabinet and replacing it with this cheapy Husky rolling worktop:

cb9996702ff3bcddfc35140de15a1f8b.jpg

I’ve always been a snob for craftsman tools, but... Not so much anymore. Especially after Sears went under, I feel like there are better options. I decided to list all my craftsman hand tools and see what I can get for them. Not the most exhaustive set, but pretty complete for a garage mechanic:

76675a6d3acced6ae8e1882a279c520a.jpg

790c6e043a3044b4f8144a6d28b63639.jpg

f2961eced8a74c45be0f798d4df75e76.jpg

0d5e3b1d765cb4799af39f28a8c8ea72.jpg

0b719bec3fd296614e536c7a3c289816.jpg

2df687f05c909a49577a27ec6ccb7e84.jpg

09a928fb3653eccb73726a70cd296605.jpg

1fc4a2cc666e588a39530f3b2b3fa495.jpg

Anybody interested in something, let me know I’ll ship the tools.

With that off the list, I started organizing the New tool chest. Harbor freight to the rescue:

c95ae866c84094b28564d84f403360ca.jpg

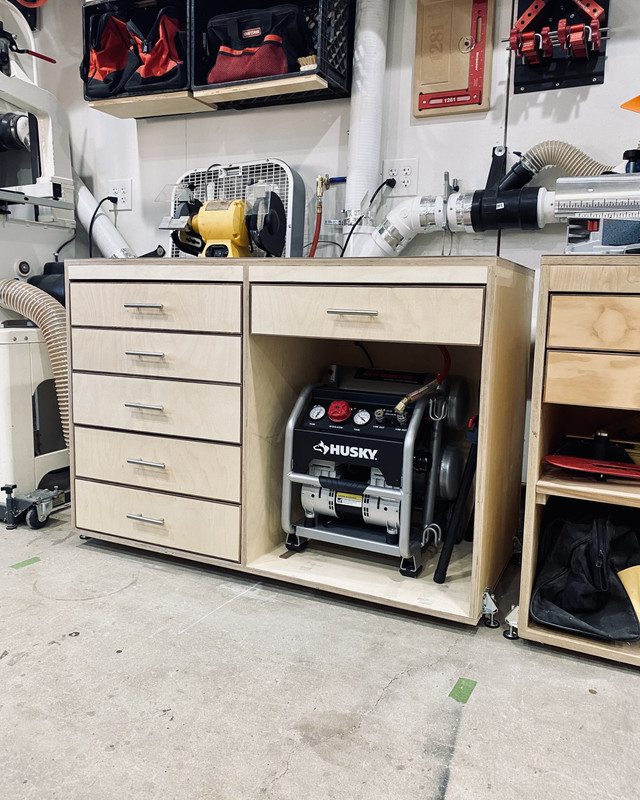
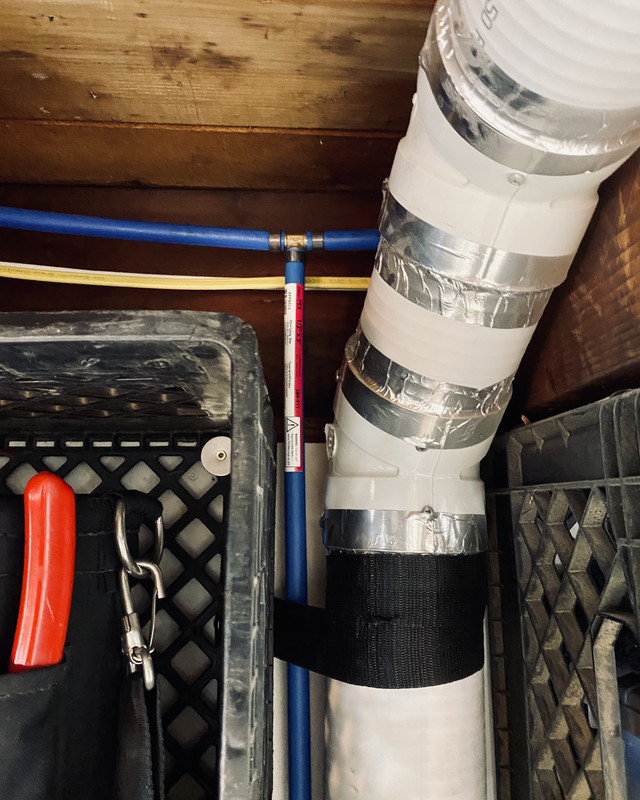
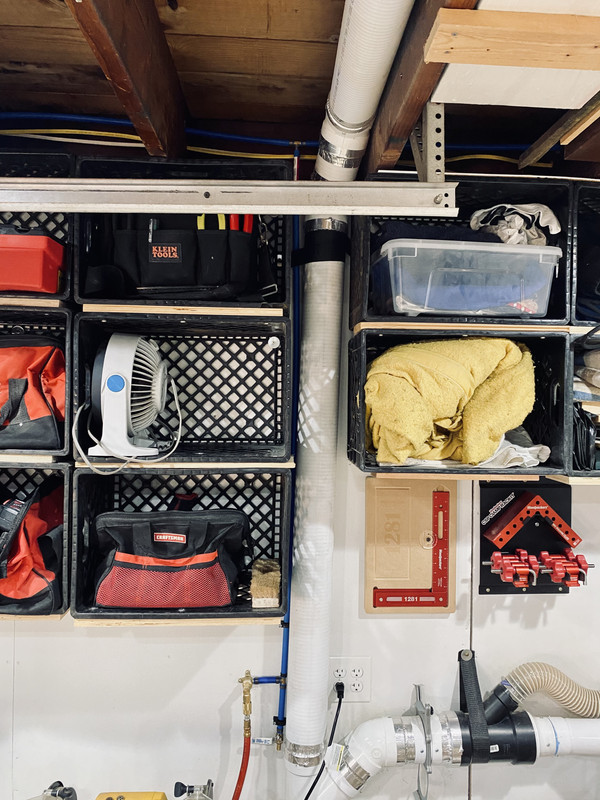
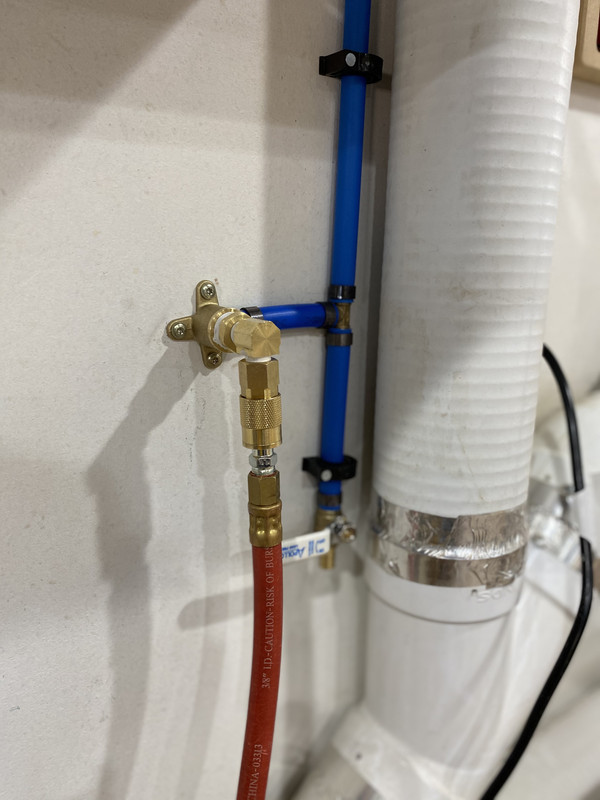
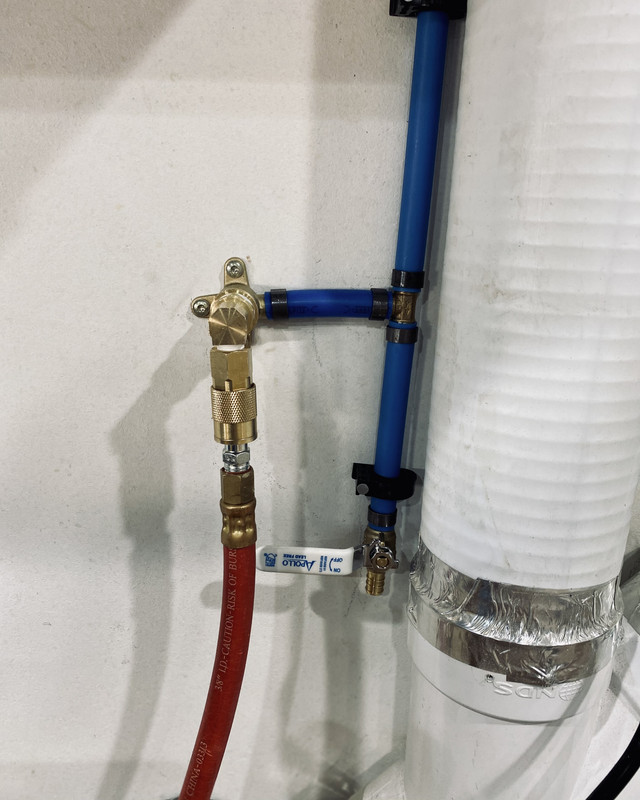
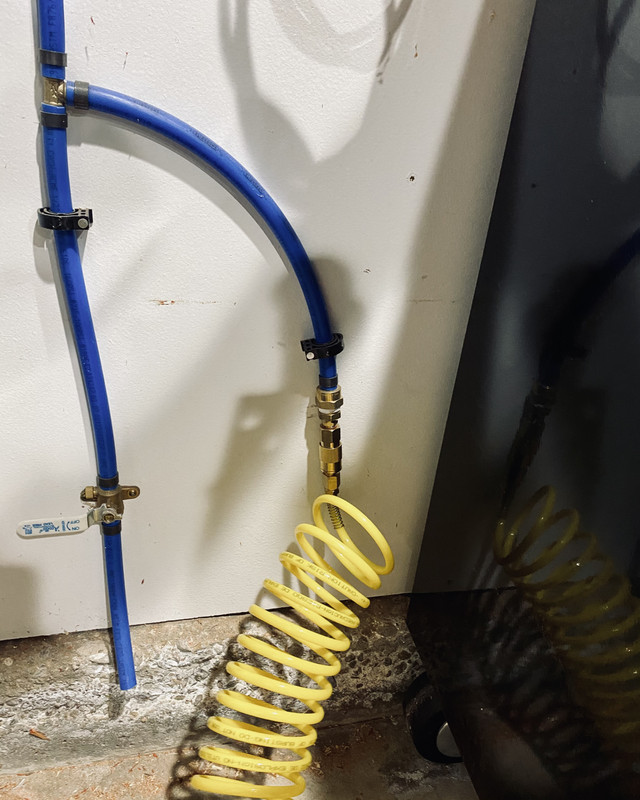
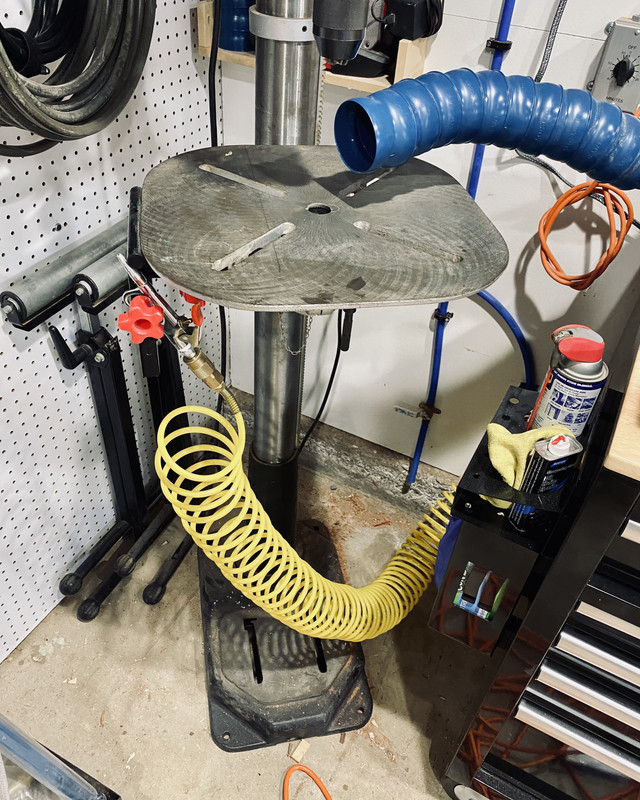
Finally, I put a sheet of that glorious Baltic birch to use and built a pair of cabinets above the work table. Also did a bit of shifting to push the drill press over to the corner and work around the existing ducting. I may change it up eventually, but for now, how it stands:

6928346a20710a85b30c262c98317e98.jpg

Pretty over built, but I’ll never have to work about overloading them. Just need to wrap up the two shelves and these are done. And of course... walnut edge banding on the doors:

73fa3eadae979cb91459bd16b75acadf.jpg

6b8e91c225d5d3c4abaa1f41d0b9e5f7.jpg

e3a6b84547f780bf663106029b8bd4bf.jpg

Next up is some under cabinet lights for these and then moving a few tools over. I don’t actually want the worktop for working, but to reorganize some tools and make room for miter-saw station improvements.


Sent from my iPhone using Garage Journal
 

Attachments

  • 6928346a20710a85b30c262c98317e98.jpg
    6928346a20710a85b30c262c98317e98.jpg
    112.2 KB · Views: 1
  • cb9996702ff3bcddfc35140de15a1f8b.jpg
    cb9996702ff3bcddfc35140de15a1f8b.jpg
    154.7 KB · Views: 1
  • 76675a6d3acced6ae8e1882a279c520a.jpg
    76675a6d3acced6ae8e1882a279c520a.jpg
    119.2 KB · Views: 0
  • 790c6e043a3044b4f8144a6d28b63639.jpg
    790c6e043a3044b4f8144a6d28b63639.jpg
    143.5 KB · Views: 0
  • f2961eced8a74c45be0f798d4df75e76.jpg
    f2961eced8a74c45be0f798d4df75e76.jpg
    138.9 KB · Views: 0
  • 0d5e3b1d765cb4799af39f28a8c8ea72.jpg
    0d5e3b1d765cb4799af39f28a8c8ea72.jpg
    161.4 KB · Views: 0
  • 0b719bec3fd296614e536c7a3c289816.jpg
    0b719bec3fd296614e536c7a3c289816.jpg
    135.8 KB · Views: 0
  • 2df687f05c909a49577a27ec6ccb7e84.jpg
    2df687f05c909a49577a27ec6ccb7e84.jpg
    148.5 KB · Views: 0
  • 09a928fb3653eccb73726a70cd296605.jpg
    09a928fb3653eccb73726a70cd296605.jpg
    140.8 KB · Views: 0
  • 1fc4a2cc666e588a39530f3b2b3fa495.jpg
    1fc4a2cc666e588a39530f3b2b3fa495.jpg
    136.3 KB · Views: 0
  • e3a6b84547f780bf663106029b8bd4bf.jpg
    e3a6b84547f780bf663106029b8bd4bf.jpg
    62.8 KB · Views: 0
  • 6b8e91c225d5d3c4abaa1f41d0b9e5f7.jpg
    6b8e91c225d5d3c4abaa1f41d0b9e5f7.jpg
    100.7 KB · Views: 0
  • 73fa3eadae979cb91459bd16b75acadf.jpg
    73fa3eadae979cb91459bd16b75acadf.jpg
    59.1 KB · Views: 0
  • c95ae866c84094b28564d84f403360ca.jpg
    c95ae866c84094b28564d84f403360ca.jpg
    118.6 KB · Views: 0
Last edited:

nicholam77

Well-known member
Joined
Dec 18, 2016
Messages
2,655
Location
Minneapolis, MN
The cabinets look awesome! I like the walnut edging detail. I have a couple Gladiator brand cabinets above my Craftsman bench. They are useful, but in retrospect not the prettiest. I'd like to replace them one day with something like the ones you just made. Any more shop updates to share?
 
OP
S

sfanale

Well-known member
Joined
Sep 13, 2013
Messages
203
Location
California
The cabinets look awesome! I like the walnut edging detail. I have a couple Gladiator brand cabinets above my Craftsman bench. They are useful, but in retrospect not the prettiest. I'd like to replace them one day with something like the ones you just made. Any more shop updates to share?


Yea I was actually just starting to write one up. For some reason I only sporadically see the photo upload button in the GJ app. About 75% of the times I try, I can’t upload photos... not sure what controls that???


Sent from my iPhone using Garage Journal
 
Last edited:
OP
S

sfanale

Well-known member
Joined
Sep 13, 2013
Messages
203
Location
California
Shifting my focus across the room to the other side where I want to build out my miter station. I’m building a cabinet to match the miter cart, but 4’x2’ with mostly drawers and a spot to house an air compressor or other large items. I’ve finished the carcass and put two coats of poly on it:

ba87bec3c002af147367ed61416268ec.jpg

Then with the exact dimensions established, I started making drawers:

75fa501c849a09317aaf7763c47b5ca4.jpg

bf5547bfca6c13e3643338f58ab85194.jpg

3/4” sides and 1/2” bottom in a full dato, so super strong. Next step is to mount the drawer slides which I hope to get to this week. Then I have to make the drawer fronts, which is kind of a pain in the *** because I want to keep the walnut edge banding and that process takes forever!


Sent from my iPhone using Garage Journal
 

Attachments

  • ba87bec3c002af147367ed61416268ec.jpg
    ba87bec3c002af147367ed61416268ec.jpg
    99.2 KB · Views: 0
  • 75fa501c849a09317aaf7763c47b5ca4.jpg
    75fa501c849a09317aaf7763c47b5ca4.jpg
    122.5 KB · Views: 0
  • bf5547bfca6c13e3643338f58ab85194.jpg
    bf5547bfca6c13e3643338f58ab85194.jpg
    90.4 KB · Views: 0
OP
S

sfanale

Well-known member
Joined
Sep 13, 2013
Messages
203
Location
California
Got around to installing most of the drawers today. I managed to somehow fit them too tight on the left side and needed to shave down the sides of some with my jointer... that was a headache:

6b4dfc8d55fdf48ecd73fffa1952bd42.jpg

You can see that middle one was my first pass and I had the jointer set too deep, went right through the entire face ply of the Baltic birch. Eventually, I got the left bank done:

9c9cacf48e7847d9acf0c157a24eae60.jpg

Next the right hand drawer and 6x drawer faces.


Sent from my iPhone using Garage Journal
 

Attachments

  • 6b4dfc8d55fdf48ecd73fffa1952bd42.jpg
    6b4dfc8d55fdf48ecd73fffa1952bd42.jpg
    182.5 KB · Views: 0
  • 9c9cacf48e7847d9acf0c157a24eae60.jpg
    9c9cacf48e7847d9acf0c157a24eae60.jpg
    203.4 KB · Views: 0
Last edited:

bdbecker

ALLIANCE MEMBER
Joined
Nov 18, 2015
Messages
5,551
Location
Iowa
Did you grain match the drawer faces that you are going to cover up? Typical GJ project...

Nice work!
 
OP
S

sfanale

Well-known member
Joined
Sep 13, 2013
Messages
203
Location
California
Did you grain match the drawer faces that you are going to cover up? Typical GJ project...

Nice work!


HA! No, I think the grain just looks a bit like it accidentally. In fact, I realize its definitely not grain matched because I just cut long strips off a full sheet, then as I chopped those strips up into drawers, I pretty much randomized the order.

I think I will match up the drawer faces though. Can't let anyone show me up now...


Sent from my iPhone using Garage Journal
 
Last edited:

nicholam77

Well-known member
Joined
Dec 18, 2016
Messages
2,655
Location
Minneapolis, MN
Not sure about GJ photo hosting, I know there is like a 1000 image limit or something. I moved 3rd party (postimg.cc) a long time ago.

That was quick work on the drawers! I've done it a few times and it's tedious/repetitive but feels good when all installed. Getting just the right fit with side mount slides is tricky.

What poly product do you use on your shop furniture? I like how it doesn't look too yellow-y.

The walnut edging on the drawer fronts will be worth it. I love how the cabinet doors turned out. Kind of reminds me of some of the Wood Whisperer's shop furniture.
 
OP
S

sfanale

Well-known member
Joined
Sep 13, 2013
Messages
203
Location
California
Not sure about GJ photo hosting, I know there is like a 1000 image limit or something. I moved 3rd party (postimg.cc) a long time ago.

That was quick work on the drawers! I've done it a few times and it's tedious/repetitive but feels good when all installed. Getting just the right fit with side mount slides is tricky.

What poly product do you use on your shop furniture? I like how it doesn't look too yellow-y.

The walnut edging on the drawer fronts will be worth it. I love how the cabinet doors turned out. Kind of reminds me of some of the Wood Whisperer's shop furniture.

Hmmm I figured it was perhaps something like that. I do like using the iPhone app because then I don't have to use the 3rd party for photos--I can directly upload photos form my phone IN APP...when the feature is there of course... Makes sense there might be a total daily site upload limit and I am just catching it at the wrong time.

For the finish I just use water based poly. Honestly, I am pretty sloppy about it on the shop furniture, I don't even sand between coats (GASP)! Typically, I use whatever is left in my cabinet, but recently I was out, so I purchased a jar of this from HD: Varathane Clear Satin. I use a foam or nap roller or brush or whatever I happen to have. My goal is just to get SOMETHING on there so its not raw wood.

AND YES on the Wood Whisperer. I have been watching his videos since he first started on YouTube and it was a real departure from what I was so used to seeing... the old guys in the shop apron talking about the "proper" way to do things. Marc is so much more pragmatic and a realist. Spend the effort where it counts. Also, he always advocated for practicing your actual furniture techniques on shop furniture, so that's why I edge band everything. Figure if I do enough drawers, shelfs, and drawers, I will have the technique down to a science!
 
To avoid these ads, REGISTER NOW!

nicholam77

Well-known member
Joined
Dec 18, 2016
Messages
2,655
Location
Minneapolis, MN
Thanks for the reply. I have tried the Varathane, it is extremely clear. Maybe I will use that to finish out some shop stuff.

Mind sharing your technique on the edge banding? Do you pin nail it or just tape/clamps? Cut it to size first or flush up after? Just curious.
 
OP
S

sfanale

Well-known member
Joined
Sep 13, 2013
Messages
203
Location
California
Thanks for the reply. I have tried the Varathane, it is extremely clear. Maybe I will use that to finish out some shop stuff.

Mind sharing your technique on the edge banding? Do you pin nail it or just tape/clamps? Cut it to size first or flush up after? Just curious.


Funny you should ask! I was trying to post the last few days, but the button to upload has been missing. It’s back so I’ll do it now.


Sent from my iPhone using Garage Journal
 
OP
S

sfanale

Well-known member
Joined
Sep 13, 2013
Messages
203
Location
California
Started edge banding the drawer faces.

e93198c5708f7dff0f73b218d3c249a2.jpg

I start with whatever scraps I have around and try to find a piece where the face grain is tall enough to cut out 1” wide parts. That is to say, if I had a 3/4” s4s board of walnut @ 6” wide, I rip it into 6x ~1” strips, then turn those onto the 3/4” edge to resaw 3/16” thick strips for edging. That leaves the best looking surface. Definetly rip it wider than the material to be banded because its a nightmare to get it perfect. Its very easy to flush it up after and will save you so much headache. I aim between 1/16-1/8" overhang on BOTH sides just to make it easy on myself.

Then usually run a bead of glue down the plywood edge, and tape the banding down making sure to apply enough pressure to force the glue to squeeze out. I’m pretty liberal with glue here to ensure it adheres well. I started with tape for this batch, but got tired of ripping tape pieces, so I switched to my pin nailer about halfway through. For real furniture, I would not use the pin nailer because the pin holes are ultimately visible. Tape really works perfectly, however, for shop furniture, my impatience got to me!

You can see I did the long edges first, but I should have done the short sides first. That way when I glue down the long faces, the overlap covers the end grain. The most common angle someone would see this trim is with the drawer open, top down, so that order of operations would give the best view in my opinion. Regardless, once I glue one edge down and let it dry, I use a little pull saw to cut the overhang flush, then a hand plane to level the edge to the drawer face BEFORE gluing the other side on. Since I am using a plane to flush it to the face, trimming the first set of edges down before stops the plane from hitting that perpendicular edge and tearing/chipping it out.

I think I am going to attempt to use my spiral flush cutting router bit on this set, but still flush one side up before gluing the next.


Sent from my iPhone using Garage Journal
 

Attachments

  • e93198c5708f7dff0f73b218d3c249a2.jpg
    e93198c5708f7dff0f73b218d3c249a2.jpg
    184.7 KB · Views: 0
Last edited:
OP
S

sfanale

Well-known member
Joined
Sep 13, 2013
Messages
203
Location
California
Continued the edge banding last night and while waiting for the glue to dry, this happened:

d6c1473d0cbb3f8ef763ee880cbe79d0.jpg

I cut the flip top cart in half! Over the last years, I realized the design just wasn’t functional for me. The side opening drawers were the biggest design flaw, I can’t understand what I was thinking there??? The cart was also so heavy, I rarely moved it, though I had to every time I wanted to access a drawer.

Basically this is a much more functional setup for me.

2ed5bfe866e4b5f1acf366051a3b0093.jpg

21f2e47a640740d96c6ae65dfddf6e46.jpg

4164cf7785fbfd6c5e3ddb934ff1d3fc.jpg


Sent from my iPhone using Garage Journal
 

Attachments

  • d6c1473d0cbb3f8ef763ee880cbe79d0.jpg
    d6c1473d0cbb3f8ef763ee880cbe79d0.jpg
    215.2 KB · Views: 0
  • 2ed5bfe866e4b5f1acf366051a3b0093.jpg
    2ed5bfe866e4b5f1acf366051a3b0093.jpg
    200.8 KB · Views: 0
  • 21f2e47a640740d96c6ae65dfddf6e46.jpg
    21f2e47a640740d96c6ae65dfddf6e46.jpg
    187.6 KB · Views: 0
  • 4164cf7785fbfd6c5e3ddb934ff1d3fc.jpg
    4164cf7785fbfd6c5e3ddb934ff1d3fc.jpg
    246.6 KB · Views: 0
Last edited:
OP
S

sfanale

Well-known member
Joined
Sep 13, 2013
Messages
203
Location
California
Finished the drawers faces and mounted up with handles:


42b35a5ee770b467ba04ac8aa0f09bc2.jpg


dfa0750b7efe42c01ed47be02d2288dd.jpg


c0eb73868011079895f1190f77614c9d.jpg


some lessons learned from this build:

  • Overall, I built everything too tight. The drawers were about 1/16" too wide for the carcass, so I had to shave them down to get the slides to glide properly.
  • I also only left myself 1/4" clearance between drawer boxes top to bottom. I figured that was enough because I was aiming for 1/8" gaps on the faces, but in the end all my compounded errors were enough to make this a problem.
  • The pin nailer is SOOO much easier for edge banding shop furniture, but the pins do show, so wouldn't use it for real furniture
  • on that same note, my fancy Whiteside spiral router bit was perfect for flush trimming all the edge banding. Much faster than sneaking up with a block plane and sanding. THe router got it nearly perfectly flush in one pass, then I just face sanded as usual and it was DONE. I was worried about chipping and tear out, but no such issues this time.


Sent from my iPhone using Garage Journal
 

Attachments

  • dfa0750b7efe42c01ed47be02d2288dd.jpg
    dfa0750b7efe42c01ed47be02d2288dd.jpg
    236.6 KB · Views: 0
  • 42b35a5ee770b467ba04ac8aa0f09bc2.jpg
    42b35a5ee770b467ba04ac8aa0f09bc2.jpg
    269.7 KB · Views: 0
  • c0eb73868011079895f1190f77614c9d.jpg
    c0eb73868011079895f1190f77614c9d.jpg
    229.9 KB · Views: 0
Last edited:

nicholam77

Well-known member
Joined
Dec 18, 2016
Messages
2,655
Location
Minneapolis, MN
Beautiful! That's my kind of shop furniture right there. The edge banding looks great and I like that contrasted with the exposed ply.

For some reason my Freud flush trim likes to make occasional scuff marks if I set the bearing too high on the piece. It's a nice way to even out surfaces though, maybe I'll look into the Whiteside bit.

In the past when using side mount slides I think I've taken the width of the cabinet interior, subtracted the width of the slides (x2), and then subtracted 1/16" to get the drawer width. That leaves ~1/32" play on each side so they don't fit super tight. I've had decent luck with that formula.

In any case it turned out awesome!
 
OP
S

sfanale

Well-known member
Joined
Sep 13, 2013
Messages
203
Location
California
Beautiful! That's my kind of shop furniture right there. The edge banding looks great and I like that contrasted with the exposed ply.


For some reason my Freud flush trim likes to make occasional scuff marks if I set the bearing too high on the piece. It's a nice way to even out surfaces though, maybe I'll look into the Whiteside bit.


In the past when using side mount slides I think I've taken the width of the cabinet interior, subtracted the width of the slides (x2), and then subtracted 1/16" to get the drawer width. That leaves ~1/32" play on each side so they don't fit super tight. I've had decent luck with that formula.


In any case it turned out awesome!


I think you’ve got the ticket right there. I cut them exactly the width minus slides and probably missed a hair over... Definitely something to practice.


FYI, I was using this whiteside bit: https://www.amazon.com/gp/product/B0012JGBX8/?tag=atomicindus08-20


Massive overkill for edge banding, but I already had it from a previous template routing experiment and it is fantastic. Its downcut, so not ideal for router table application since it has a tendency to push material UP away from the table surface (super scary!), but since the edge banding is so thin, I didn't have any issues. The positive of downcut in this application is ZERO tear out on the eventual drawer edges.
 
Last edited:

Trapps

ALLIANCE MEMBER
Joined
Feb 10, 2017
Messages
1,997
Location
The Detroit Zoo
Cabinet turned out great! I love the contrasting edge banding. :beer:

I have recently been learning the same carcass to drawer width lesson. I arrived there differently but the end result was the same; drawers are just a smidge too wide...
 
OP
S

sfanale

Well-known member
Joined
Sep 13, 2013
Messages
203
Location
California
Cabinet turned out great! I love the contrasting edge banding. :beer:

I have recently been learning the same carcass to drawer width lesson. I arrived there differently but the end result was the same; drawers are just a smidge too wide...

thanks! Yea, not a mistake I plan to make twice!
 
OP
S

sfanale

Well-known member
Joined
Sep 13, 2013
Messages
203
Location
California
Near final update on this. I purposely designed the right cavity of the cabinet to house this new Husky silent air compressor. I went back and forth on California Air Tools vs this Husky. I am sure the Cal Air Tools is higher quality overall, but at more than twice the cost... I was struggling to justify it. Couple that with a $200 gift card to HD, the decision was made for me:


Punched a hole through the back of the cavity to let the hose and power through to the wall behind it. I used more PEX to connect to my already existing air lines with a tee:


Then I came down the wall behind the existing dust collection duct:


Then, using a collection of brass fittings from HD, I built out a little quick connect and vent/drain port for the drop:


You can just notice it in the first picture, but I used a brass street fitting to make a 90 before the quick connector and keep the hose connection low profile at the front of the compressor. The final step was to reverse the old connection on the other side of the garage and change it to a quick connect as well:


and with that... the air system was up and running again. I am really impressed with the Husky silent compressor, its well... very quiet. About the same as the Cal Air Tools for half the price. Weights about twice as much, but in my application, that wont hurt me-- I expect it to live in this cabinet about 99% of the time. Huge upgrade over the old 6gal Porter Cable Pancake compressor I have had for years. Sold that for $60 on CL, so more than covered additional fittings and parts I needed to get the Husky connected in its new home.


I may also build a door to cover the compressor area. I barely use air in the shop now, so wont hurt to have it closed up, no heat built up issues. All and all, fun project and one step closer to the miter saw station layout I am chasing.
 
Last edited:
OP
S

sfanale

Well-known member
Joined
Sep 13, 2013
Messages
203
Location
California
moving right onto my next project, another going away present... this time for our institute director. Going to essentially be an endgrain cutting board, but CNC milled with our company logo and some wording. Just got the blank glued up today:

https://postimages.org/

Now I do some rough sanding and turn it over to the machining group for some carving fun!
 

nicholam77

Well-known member
Joined
Dec 18, 2016
Messages
2,655
Location
Minneapolis, MN
The cabinet and air setup are looking sweet!

I have a small California Air Tools compressor that is very quiet and perfect for indoor use. It is leaking though... gotta track that down one of these days. I'm sure the Husky will be great.
 
OP
S

sfanale

Well-known member
Joined
Sep 13, 2013
Messages
203
Location
California
Busy working and finishing this little project. As usual, something that was a small idea turned into a big affair. We recently got a big boy 5x10' CNC at work and this was the perfect project to put that to use. The walnut blank in the last post went to the shop and turned into this:


Then I milled and glued another end grain board but with maple:


That also went to the shop for carving to fit as the inlay into the center logo. I was so excited to try gluing it in, I neglected to take a photo before it was in the clamps:


I also filled the exterior lettering with black epoxy. Once the glue was dry I used a little home made router sled and shaved the extra maple down to the surface of the walnut revealing the contrasting logo. This was just a little bit of sanding, you can still see most of the machining marks:


After SOOOOOO many more hours of sanding endgrain, this was the result:


I can't share the full finished product yet...but soon. It came out amazing and really bolstered my desire for a little shop CNC machine.
 
OP
S

sfanale

Well-known member
Joined
Sep 13, 2013
Messages
203
Location
California
here is the final product of the CNC cutting board:


I also made some small coasters--CNCed as well. However, these were machined to fit a custom made piece of aluminum. After being anodized, we lasered images into the inserts:


and the whole family together:

 
OP
S

sfanale

Well-known member
Joined
Sep 13, 2013
Messages
203
Location
California
Immediately after this last gift, someone else announced their retirement, so I was sent back to the drawing board. The team decided to purchase some hand made Margareta glasses and I built a custom box to house them. Started on paper of course:

IMG-0008.jpg

I decided to try antoher new to me technique and use the Glowforge to laser etch a logo into a glass insert for the lid:

IMG-0014.jpg

The box was super basic construction, just mitered corners with splines, but the custom glass top came out pretty unique:

IMG-0017.jpg

Then, I sliced the box to release the lid and made some plywood inserts to hold the glasses:

IMG-0022.jpg

I flocked the entire interior with red to give a soft finish to the overall box and it came out pretty cool looking:

2021-05-10-026-1.jpg

2021-05-10-047.jpg

2021-05-10-048.jpg

2021-05-10-049.jpg

2021-05-10-050.jpg

2021-05-10-056.jpg

I usually like to put in a padded or fabric bottom to boxes like this, but given I knew the insert shapes were going to be more complex, I wanted to try flocking. Generally speaking, I hated the process of applying it and I think the overall box would have looked nicer if I only used it on the glass holders themselves. It came out with a bit too much RED EVERYWHERE for me... but the recipient loved it, so... no harm. I flocked the full interior and the holders separately, so its continuous everywhere and the holder just lie on top. Then I only screwed them in through the bottom so he can take them out in the future if he decides he just wants a nice box.
 

nicholam77

Well-known member
Joined
Dec 18, 2016
Messages
2,655
Location
Minneapolis, MN
Somehow this last post went under the radar for me. The box looks great — I like the simple splined miters look.

Is the glow forge yours or is that at your company?

I always enjoy your projects, anything new to share? 😁
 

kwyjibo

Well-known member
Joined
Apr 8, 2008
Messages
738
Hey, I've been away from the site for a while and I'm just catching up now.
Those are real nice retirement gifts! RNA-themes coasters!!! Do you work for the Salk? or did they contract with you?
 
To avoid these ads, REGISTER NOW!
Top Bottom