hey guy's im looking for some imput on some soldering equipment, i might have brought this up before or looked at some other threads but recomend me a soldering iron. i would like something that is just a nice iron, not a full station, as i find the cords to the iron's on the stations just arent long enough, if im stupid and i can just buy longer cords from the station to the iron let me know, hakko was the main brand i remeber being recommended......................................................... in the equipment part of this i would like to know some recommendations on solder, whats good whats not, maybe some different size's on the solder, i was lent some really thin stuff from a guy i work with soldering like 18 guage wire and it works amazing! also if you guy's have any recommendations on flux or flux remover let me know. ive got a "big" wiring project comming up and would like to get my soldering game going! THANKS!!!!

You are using an out of date browser. It may not display this or other websites correctly.
You should upgrade or use an alternative browser.
You should upgrade or use an alternative browser.
soldering recommendations
- Thread starter 92integra
- Start date
mires
Well-known member
Budget?
jayfrank5074
Well-known member
- Joined
- Dec 1, 2013
- Messages
- 100
Love my hakko and Kester solder
KSB
Well-known member
If you are working on 18 -24 gauge wire I suggest an iron, I have a Weller WP35 and it is my go to soldering iron.
16 gauge and smaller I tend to grab my Lenk heavy duty gun (mainly for speed).
I also have a Weller WP25 for circuit board work but I rarely have a need for this anymore.
Personally I like the Weller products, I have also used the butane Portasol unit (colleague at work has one) and it works well when you have a quick job to do.
For solder I recommend Kester. I always use the thin stuff, I would have to get the diameter I use from my toolbox tomorrow.
MFolks
Well-known member
This is what I've posted on several motorcycle forums:
Repairing crumbled switch and light bulb socket soldering.
Some of the older Kawasaki's, and possibly the other brands of motorcycles may be experiancing crumbled or failed switch and light bulb factory soldering jobs. Here's a repair procedure:
When repairing soldered wires on motorcycle switches or light bulbs sockets, have the following on hand:
1. A 25 Watt soldering iron or one that the wattage can be adjusted.
2. Rosin core solder.
3. Rosin flux or soldering paste (Never use solder or soldering paste designed for plumbing work, as it contains an acid that will corrode the electrical joint, ruining it).
4. 91% rubbing Alcohol, or 70%. The lower percentage will clean up flux residue, but not as good as the higher percentage stuff. Acetone will also remove soldered flux residue, but it’s flamable(easy to ignite).
5. A cut down ½” paint brush, or acid brush for scrubbing the repaired solder joint.
6. Clean rags or paper towels.
7. A damp sponge to keep the soldering iron tip clean.
8. Some “Solder Wick” a braided bare copper wire designed to collect heated excess solder, aiding in joint preperation, available at electronic supply stores.
9. Some wooden toothpicks.
10. Small Hemostats or clip on heatsinks.
A. Before soldering, “Tin” the soldering iron tip by plugging it in or turning the iron on, allowing it to get to operating temperature(2-3 minutes).
B. Unroll about 3” of solder from the roll of rosin core solder & then using a clean rag or paper towel moistened with Alcohol, wipe the unrolled solder, removing the finger print oils that will create a poor solder joint.
C. Apply a small amount of solder to the now heated soldering iron tip, wiping the excess off with the wet sponge or rag, keeping a thin layer of solder on the soldering iron.
D. The soldering iron is now ready for use, but before applying the heated tip to a wire, wipe the tip on the damp sponge or rag, this removes any oxidized solder and makes for a much better connection.
E. If the joint to be repaired is grey in color or appears “Crumbled”, apply some rosin soldering paste or flux to the joint with a small toothpick of screwdriver, and then apply the soldering iron tip for a few seconds.
G. The fluxed joint should clean up, allowing for a better connection. If no luck, use the solder wick to remove all traces of the old solder by apply in it between the soldering iron tip and the bad joint.
H. Hemostats and clip on heatsinks will be used to prevent the wire insulation from burning, overheating & pulling away from the connection.
I. Apply a small amount of flux to the joint to be repaired & then a very short duration of heated soldering iron tip & solder(like a few seconds or so).
J. Clean off the repaired joint with the brush & rubbing Alcohol, the newly repaired joint should appear clean and bright, almost as if it were polished, with no voids or holes.
This comes from my years at General Dynamics/Convair (1983-1993)
When I built, wired and assembled test equipment and electrical cables for the Tomahawk and later the Advanced Cruise missile.
The company had a week long soldering school, instructing you how to hand solder to Mil-Specs.
slip knot
Well-known member
Very informative, MFolks
thebreeze2012
Well-known member
I bought a wall lenk soldering iron from menards, it was something like 12 bucks and works great for the few times I've used it, it's made in USA also.
wild cowboy
Banned
Hakko or Weller iron, Kester solder, and here is my main recommendation (the secret to great soldering) - Radio Shack Catalog # 64-022

also available from CAIG, the OEM manufacturer that supplies Radio Shack

also available from CAIG, the OEM manufacturer that supplies Radio Shack
Last edited:
wild cowboy
Banned
D. The soldering iron is now ready for use, but before applying the heated tip to a wire, wipe the tip on the damp sponge or rag, this removes any oxidized solder and makes for a much better connection.
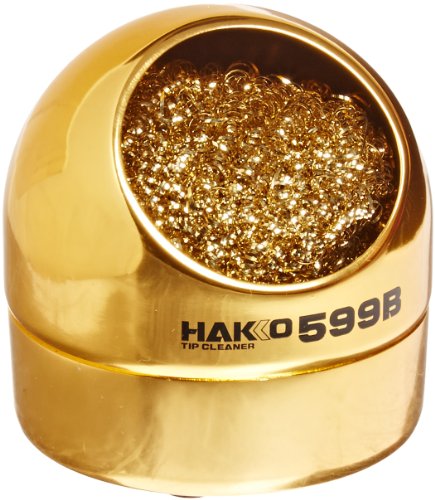
wet sponge is not good for tip life, get one of those Hakko things that look like this:
wild cowboy
Banned
higher watts is always better - notice I did not say higher temperature!
wild cowboy
Banned
for the same money, I will take Japanese-made Hakko over USA-made Weller
but it is not a big difference, so the price could pretty quickly cause me to choose Weller, so kind of depends on the deal I find at the time.
but it is not a big difference, so the price could pretty quickly cause me to choose Weller, so kind of depends on the deal I find at the time.
That long list of ideas is excellent.
I use various brands of soldering stations. For a regular iron I have been happy for about 50 years with Weller 25w pencil-types for smaller wires, and two sized of Weller guns. There are obviously other brands. I have a fancier gun too but it works no better.
For an inexpensive version of the Hakko cleaner, get a pad of bronze wool and stuff it into a metal electrical box.
For solder I have various diameters and types, often Kester 44, and DeoxIT liquid flux. I have always found it a bother to maneuver heavy rolls around while working, so I made a holder. If you are really watching the budget, there is plenty of solder at flea markets.
Steinmetz
Well-known member
higher watts is always better - notice I did not say higher temperature!
Agree, Van Cleef.
Steinmetz
Well-known member
i really dont care at this point i would just like everyone on here to rattle off the first good thing that comes to mind.
American Beauty, or Hexacon. OK if used, since they last forever.
castellscl
Member
- Joined
- Feb 5, 2012
- Messages
- 13
I agree with MFolks on everything.
I'm a certified 2M repair technician (patterned after the National Aeronautics and Space Administration (NASA) high-reliability soldering studies and have few differences other than the administrative chain of command) in the USMC for 15 yrs now. This course was just a little longer that MFolks'.....
One thing I would HIGHLY recommend is to get a variable temp soldering iron with an assortment of tips. We've always used Weller brands.
As far as the sponge being bad for the tip life, this is the first I've heard of that. Not keeping the tip "tinned" and overheating will shorten the life like nothing else though.
If you really aren't going to be doing anything "crazy" all the time, but still want a versatile iron, then something like the Weller WLC100 40-Watt Soldering Station wouldn't be bad to start with.
Last edited:
SASORacing
Well-known member
Blue poi t butane cordless gun! So nice.
Steinmetz
Well-known member
This is what I've posted on several motorcycle forums:
Repairing crumbled switch and light bulb socket soldering.
Some of the older Kawasaki's, and possibly the other brands of motorcycles may be experiancing crumbled or failed switch and light bulb factory soldering jobs. Here's a repair procedure:
When repairing soldered wires on motorcycle switches or light bulbs sockets, have the following on hand:
1. A 25 Watt soldering iron or one that the wattage can be adjusted.
2. Rosin core solder.
3. Rosin flux or soldering paste (Never use solder or soldering paste designed for plumbing work, as it contains an acid that will corrode the electrical joint, ruining it).
4. 91% rubbing Alcohol, or 70%. The lower percentage will clean up flux residue, but not as good as the higher percentage stuff. Acetone will also remove soldered flux residue, but it’s flamable(easy to ignite).
5. A cut down ½” paint brush, or acid brush for scrubbing the repaired solder joint.
6. Clean rags or paper towels.
7. A damp sponge to keep the soldering iron tip clean.
8. Some “Solder Wick” a braided bare copper wire designed to collect heated excess solder, aiding in joint preperation, available at electronic supply stores.
9. Some wooden toothpicks.
10. Small Hemostats or clip on heatsinks.
A. Before soldering, “Tin” the soldering iron tip by plugging it in or turning the iron on, allowing it to get to operating temperature(2-3 minutes).
B. Unroll about 3” of solder from the roll of rosin core solder & then using a clean rag or paper towel moistened with Alcohol, wipe the unrolled solder, removing the finger print oils that will create a poor solder joint.
C. Apply a small amount of solder to the now heated soldering iron tip, wiping the excess off with the wet sponge or rag, keeping a thin layer of solder on the soldering iron.
D. The soldering iron is now ready for use, but before applying the heated tip to a wire, wipe the tip on the damp sponge or rag, this removes any oxidized solder and makes for a much better connection.
E. If the joint to be repaired is grey in color or appears “Crumbled”, apply some rosin soldering paste or flux to the joint with a small toothpick of screwdriver, and then apply the soldering iron tip for a few seconds.
G. The fluxed joint should clean up, allowing for a better connection. If no luck, use the solder wick to remove all traces of the old solder by apply in it between the soldering iron tip and the bad joint.
H. Hemostats and clip on heatsinks will be used to prevent the wire insulation from burning, overheating & pulling away from the connection.
I. Apply a small amount of flux to the joint to be repaired & then a very short duration of heated soldering iron tip & solder(like a few seconds or so).
J. Clean off the repaired joint with the brush & rubbing Alcohol, the newly repaired joint should appear clean and bright, almost as if it were polished, with no voids or holes.
This comes from my years at General Dynamics/Convair (1983-1993)
When I built, wired and assembled test equipment and electrical cables for the Tomahawk and later the Advanced Cruise missile.
The company had a week long soldering school, instructing you how to hand solder to Mil-Specs.
This is OK for repairing a joint, but making a successful joint, as well as other considerations, as detailed in the old NASA-STD-8739.3 document, entails much more.