To avoid these ads, REGISTER NOW!

Between 485 & 705 SQ/FT Spacep0d's Garage

Workspaces between 485 and 705 squarefeet.

Spacep0d

Well-known member
Joined
Mar 23, 2021
Messages
127
Location
Riverside County
Hi Everyone,

I've created this thread to showcase the progress of my garage as I transform it into the dream garage. It's going to be sleek and modern, though I adore the retro garages some of you have. I'm kinda going for the Tesla showroom look with some other planned features;

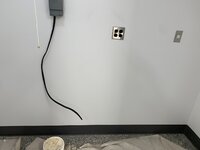
1. I'll be painting the unfinished cement below the existing painted area, and covering some walls that are still white too.

2. I need to finish the Racedeck flooring but I have to move the boxes on the other side. I have a 13" guillotine chopper for clean edges and I'll be using a circular saw for the larger 18" Charred Oak tiles.

3. I'll be adding some pictures from NASA and SpaceX and a Tesla logo somewhere.

4. Possible red accent wall or section.

Ideas welcome. Here's the start!

ERVyj5m.jpg
DhiM1s0.jpg

Thanks for everyone so far who's answered my many questions! Also a big thanks to Racedeck for great customer service and a fantastic product!
 
To avoid these ads, REGISTER NOW!
OP
S

Spacep0d

Well-known member
Joined
Mar 23, 2021
Messages
127
Location
Riverside County
I tried my hand at creating partial pieces (edging) for the back of the garage. It's pretty easy as long as I remember to measure twice and cut once. The L-Square and guillotine shear really helped. I'm a big believer in 'the right tool for the job'. I'll use a circular saw with fine-toothed blade for the 18" Charred Oak tiles later. I don't own a table saw nor do I see myself needing one, though a neighbor with construction experience may help with this too.

More pics;

03_Edging_Back.png04_Tools.png
 
Last edited:
OP
S

Spacep0d

Well-known member
Joined
Mar 23, 2021
Messages
127
Location
Riverside County
Moved a whole bay of containers and boxes by myself and got the 18" Charred Oak started. This will be a working bay with some storage and it'll be the bulk of my cabinetry as well. I don't plan on parking any vehicles here and we only have one vehicle at the moment so there will be plenty of room. The Charred Oak RaceDeck tiling is *slightly* higher than the CircleTrac flooring and RaceDeck informed me of this before my purchase. Unless you're a professional shuffler you won't even feel it. I might still tape over the seam with something but it probably won't be an issue.

I did break down and order a 20" guillotine shear from Amazon to cut the larger 18" Charred Oak. It's only $247 (let me know if you want a link) and I can sell my smaller shear locally when I'm done with it. I really want clean edges and I've seen how much mess is created with circular saws and jigsaws. I still have a jigsaw for more complex edge pieces, along with a contour gauge on order. I'll show that later. This is the third bay but you can see where it meets the graphite-colored CircleTrac.

Another thing I noticed is that the Charred Oak tiles fit together with very little pressure. You don't need to step on them or use a soft mallet. Just tap 'em firmly with your hands/fist and they fit together beautifully. I'm a little tempted to cover the entire garage with this, to be perfectly honest.

05_Charred_Oak_Racedeck.jpg
 
Last edited:

buddha2364

Well-known member
Joined
Sep 29, 2019
Messages
57
Location
Missouri
Curious, any ideas for the footings around the perimeter of your garage? I'm thinking I may Polyurea mine with no flake, with RaceDeck every where else.
 
OP
S

Spacep0d

Well-known member
Joined
Mar 23, 2021
Messages
127
Location
Riverside County
Curious, any ideas for the footings around the perimeter of your garage? I'm thinking I may Polyurea mine with no flake, with RaceDeck every where else.

Probably just paint for now, as I'm trying to avoid the fumes and cure time of polyurea. I have a consultation this week so I'll ask about that.
 
OP
S

Spacep0d

Well-known member
Joined
Mar 23, 2021
Messages
127
Location
Riverside County
Cabinets installed! More pics later once I get things cleaned up. The cabinets are graphite, with SS-style handles in Satin Nickel, black work surface. Floating install. I need to do some touch-up paint as they removed one of the overhead storage racks to install this. I should have removed the rack before work started to make it easier to reach those areas.

Notice near the water heater block how I covered my holes around the tiles with rubber couplings. Nice little hack, because cutting semi-circles in 4 different Racedeck tiles was challenging and the hole isn't perfect.

I also had copper drain pipes removed from the water heater which would have complicated the cabinet install, and the plumbers installed a gas shutoff valve in lieu of the pipes. All up to code and legal. They also noticed some corrosion on a valve so we replaced that too.

Electricians added new power for the garage fridge arriving in a bit. I'm wondering if the box will push the fridge too far forward but we'll see. I could have a flush mount done later if the mood strikes.
07B_Cabinets.jpg
07_Cabinets.jpg
 
Last edited:
OP
S

Spacep0d

Well-known member
Joined
Mar 23, 2021
Messages
127
Location
Riverside County
Metal pegboard installed (Wall Control brand) with new outlet coming through. I need to clean up the white cable from the new lights, which are bright and blind me at the bench—so I'm installing a deflector when it arrives. Tools are up with 'Peggits' stabilizers in peg holes. Magnet strip on the right holds metal rulers and combination tool. I have space for another Ryobi tool which may replace the blade spares.
08A_Pegboard.jpg

Fridge is in too! This is where I store extra cooking meat for Instant Pot meals I make.
08B_Fridge.jpg
Can't forget the ever-important drinks! This is hardly stocked yet. I'll be adding more water, Gatorade, etc.
08C_Fridge_Open.jpg
 
Last edited:
OP
S

Spacep0d

Well-known member
Joined
Mar 23, 2021
Messages
127
Location
Riverside County
Some updates;

Workbench updates! I installed lights with blackout cable wrap (still needs to be tacked to wall) and a light deflector which is an item intended to block side light bleed from window blinds. It's reversible (black on one side, white on other) and magnetic, so I can take it off anytime without issue. Also added a nice adjustable-height stool, a tall trash can (behind it) and a rag hamper on the right. Magnet on the right holds my measuring devices and combo level.
09A_Pegboard_Light_Stool.jpg
I asked you all here at Garage Journal how best to install this Tesla lettering, and you came through big time! I went with the signmaker's approach, but all of you had great ideas. The sign cost me $110 and is from the same file the eBay seller used to create the thin metal lettering. Backing tape is already applied. Although the sign cost me a little, I didn't have to buy a projector or spend more money on tools, but I did splurge $89 for that 6' level holding the sign down. I had this done by UPrinting on the web and they did a fantastic job. The sign saved me a little drama because the bottom of the S is longer than the top (makes sense). The line below the letters is a 'level line' so I can level it on the wall.
09B_Tesla_Printed_Logo.jpg
09C_Logo_Level_Line.jpg

With the sign, I'll cut out a portion of each letter from the poster so I can chalk in edge registration marks. Then I'll just place the letters and stick 'em down. This is the cutting mat I use to cut down cardboard but it'll be handy for the sign as well. This is a little makeshift cutting desk I made out of a mixer and rack combo (for music production).
09D_Cutting_Mat.jpg

This weekend I'll have my Tesla lettering up! Thanks again for all of your help so far with this whole project.
 
To avoid these ads, REGISTER NOW!

NickH

Well-known member
Joined
Nov 18, 2015
Messages
283
Location
Southern Maine
Wow man, great build! I love everything about it, the color choices, the floor, the cabinets, everything! Even though personally, I'm a rustic-style guy, I love the way this one is turning out. I can't wait to see the finished product!
 
OP
S

Spacep0d

Well-known member
Joined
Mar 23, 2021
Messages
127
Location
Riverside County
Wow man, great build! I love everything about it, the color choices, the floor, the cabinets, everything! Even though personally, I'm a rustic-style guy, I love the way this one is turning out. I can't wait to see the finished product!

Thanks Nick! I absolutely adore rustic and old....like Don's 'Big Party Garage' which I've seen personally and find absolutely amazing. It's like going back in time. Thank you though, I'm an artist by profession and I cannot express how satisfying it is to finally be able to customize a garage like this. I'm trying to keep it clean and minimalist, like a Tesla showroom with my own spin on it.

Next steps will be painting the side door red, painting the cement footings in black (after primer) and the rest of the white walls in black (where the big garage doors are). I may do the ceiling in black too. I want to create little LED 'stars' in the ceiling with some kind of safe and low-wattage light.....both for effect and as an alternate 'mood' lighting idea.

Thanks for looking!
 
OP
S

Spacep0d

Well-known member
Joined
Mar 23, 2021
Messages
127
Location
Riverside County
Details;

The L-Square is hanging on the magnet strip next to my pegboard. I added a little clear cushion so I don't have metal on metal contact. It's the little things!

12_OCD_Square.jpg

If you have ugly cables on your wall or they're in the wrong color, just wrap them with audio 'snakes' used to wrap and organize cables. Often you'll find these for musicians looking to clean up their cable mess and in different diameters. Wrap one or more cables, cut to fit, and because it's a wrap and not just a tube there's no need to unplug anything. The wrap very tightly holds its shape and sticks to itself nicely. Got these from Amazon. The hook and loop cable ties come from a roll so you can cut-to-length. Way easier for large or small cables. I threw a black outlet plate on there too. May change outlets later to black but not a priority now.

12_Cable_Wrap.jpg
These are 3M Cable Clips with their own adhesive backing. This cord since we moved in was just swinging out wide, ready to hook an arm or leg. Got it stuck to the wall now. The wall has some marks on it I need to spot-clean.
12_Cable_Management.jpg

Got the ladders hung up. The trash can holds my overflow cardboard from boxes and other recyclables. If I run out of room in my main recycle can, it goes in there. Nothing wet or stinky goes in there. The Garden Shears will probably find a better home, but there they are for now. The old computer case needs to go, along with lots of other stuff in the garage from the move that needs to be given away, sold, organized, etc. The white outlet and cover will probably change at some point, maybe to grey to reduce its visibility even if it's not a perfect color match.

12_Ladders_Sorted.jpg
 
OP
S

Spacep0d

Well-known member
Joined
Mar 23, 2021
Messages
127
Location
Riverside County
Latest picture set! Still got some bins that need to be sorted further for keep, give, sell. I aim to reduce that down to nothing or close to it. I also need room for a 3D printer with professional venting.13B_Workbench_Cabinets.jpg13A_WorkBench_Charred_Oak_Floor.jpg
13C_Cabinets_Table.jpg
13D_Fridge_Open.jpg
13E_Tesla_Logo_Wall_Wide.jpg
 
Last edited:

Augus7us

Well-known member
Joined
Jan 14, 2017
Messages
1,190
Location
Central Ohio
Looks good! I like the mish mash of colors.

For the base trim/molding, look up vinyl cove. I used that in parts of my shop and it was easy to install and looks great.
 
OP
S

Spacep0d

Well-known member
Joined
Mar 23, 2021
Messages
127
Location
Riverside County
Looks good! I like the mish mash of colors.

For the base trim/molding, look up vinyl cove. I used that in parts of my shop and it was easy to install and looks great.
Thanks. Great tip about the base trim. I'll check it out. With the mishmash of colors, do you mean the two different flooring types with the red door? :D If I were doing this again I'd probably go with all 'Charred Oak' flooring, but I like it.
Also, I think I may have too many greys happening here too, like the wall in front of the car is a different gray from the floor.

I've debated just painting that wall black to reduce the differences.

Another goal is a 'starry night' ceiling—black with little LEDs all over.
 
Last edited:

Augus7us

Well-known member
Joined
Jan 14, 2017
Messages
1,190
Location
Central Ohio
Thanks. Great tip about the base trim. I'll check it out. With the mishmash of colors, do you mean the two different flooring types with the red door? :D If I were doing this again I'd probably go with all 'Charred Oak' flooring, but I like it.
Also, I think I may have too many greys happening here too, like the wall in front of the car is a different gray from the floor.

I've debated just painting that wall black to reduce the differences.

Another goal is a 'starry night' ceiling—black with little LEDs all over.
Yeah I was referring to the various wall colors and bright red door. I personally hate the all white look and appreciate something unique.

Funny enough I was looking at putting a star ceiling in my basement man cave. My shop is getting white ceiling panels. The only white in the shop lol.
Augus7us, how do you affix the molding? I see from the comments that there's no adhesive on the strips. I imagine you have to slather on some glue of a sort? I'm also wondering if the base is too uneven for something like this too.
I bought a gallon of adhesive. It may have been meant for carpet tiles. I’ll try to remember to take a look next time I go down in the basement. I used a plastic putty “knife” with serated edge.

They also make a caulk you can use with a larger spreader tip. If I did it again I’d probably use that for convenience.
 

Augus7us

Well-known member
Joined
Jan 14, 2017
Messages
1,190
Location
Central Ohio
Another note. I used 6” cove and ordered it from a vinyl place online because the big box guys only had 4”. I also ordered as a roll as opposed to 4’ strips. I think it looks better.
 

Attachments

  • DD4CB750-2660-4A6A-A0FB-28C6439328EF.jpeg
    DD4CB750-2660-4A6A-A0FB-28C6439328EF.jpeg
    108.8 KB · Views: 16
OP
S

Spacep0d

Well-known member
Joined
Mar 23, 2021
Messages
127
Location
Riverside County
Another note. I used 6” cove and ordered it from a vinyl place online because the big box guys only had 4”. I also ordered as a roll as opposed to 4’ strips. I think it looks better.
Nice! Is it pretty flexible in order to conform to the profile of the concrete? That's my biggest concern there. Thanks!
 
To avoid these ads, REGISTER NOW!
Top Bottom