To avoid these ads, REGISTER NOW!

Speed Cove Installation w/ Full Flake Broadcast

benwah

Well-known member
Joined
May 21, 2014
Messages
980
Location
Crested Butte, Colorado
Hey guys, I just wanted to quickly share a project I am working on and I don't believe it has been discussed here yet..

Speed Cove!

I did a quick search and didn't find any discussions about this so I'm gonna start one and share how I like to install it with some tips to make it look real good-like.

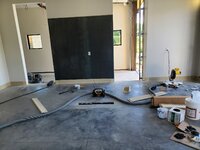
So this is a 3 door, 1080 SF installation Including a Sprinter bay with 160 Linear Foot of Cove Base.

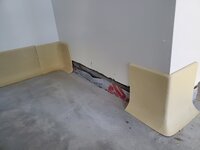
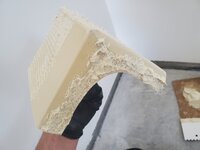
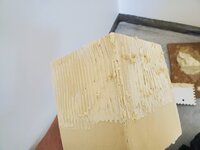
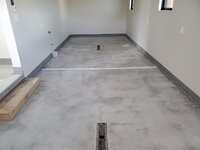
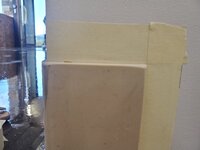
I started off by grinding the perimeter to promote adhesion for the cove adhesive. Next, using Henry 440 Cove Adhesive, a 4" trowel with 1/8" notches, and a cardboard hawk, I installed all of the corner pieces first by applying the adhesive to the backs and bottoms. 12 inside corners and 9 outside corners. It is much easier IMO to install the corners first rather than having to try and trim them to fit later in the process. It is real important to keep a rag soaked in water with you to clean up the adhesive as you go, piece by piece.

You must press the pieces of cove to the wall and floor, then in addition press around the perimeter of the piece to squeeze any excess adhesive out. This will help seal it to the wall and floor.. If you do not clean up the adhesive immediately it will dry uneven and look like ****. Also, it turns a very ugly yellow/brown and re-painting walls isn't cool, man.

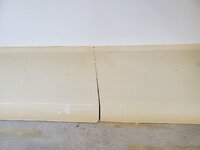
After all of the corners were installed I moved on to the 4' straight pieces. Using my 12" miter saw and a 44 tooth Diablo blade I squared them up by removing 1/16" or so from each end. From the factory they are not square at all and the manufacturer recommends this. Next I just went to slapping them up the same way until each wall wall full except for a small area where I had to make a custom cut. When making cuts for pieces to fit, I suggest taking your measurement then burning 1/8".

As you can see, the drywall was not brought down near the concrete. It is 2.5" high and that makes it a real ***** to line the cove up evenly on the floor. But I did the best I could with what I had.

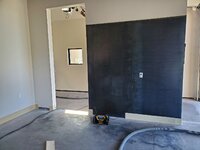
This customer also had 3 walls with cold-blued steel panels attached to them. To prep out these panels I snapped a line across with blue chalk at the height of the cove base. I used an orbital sander with 80 grit paper to create a profile for adhesion.
 

Attachments

  • 20220708_125943.jpg
    20220708_125943.jpg
    402.1 KB · Views: 72
  • 20220708_103454.jpg
    20220708_103454.jpg
    193.6 KB · Views: 54
  • 20220708_081420.jpg
    20220708_081420.jpg
    226.8 KB · Views: 51
  • 20220708_081406.jpg
    20220708_081406.jpg
    116.3 KB · Views: 50
  • 20220708_081257.jpg
    20220708_081257.jpg
    237.8 KB · Views: 58
  • 20220708_081358.jpg
    20220708_081358.jpg
    151 KB · Views: 57
  • 20220708_081332.jpg
    20220708_081332.jpg
    218.8 KB · Views: 56
  • 20220708_130151.jpg
    20220708_130151.jpg
    224 KB · Views: 53
  • 20220708_130051.jpg
    20220708_130051.jpg
    139.1 KB · Views: 53
  • 20220708_130048.jpg
    20220708_130048.jpg
    155.7 KB · Views: 56
Last edited:
To avoid these ads, REGISTER NOW!
OP
B

benwah

Well-known member
Joined
May 21, 2014
Messages
980
Location
Crested Butte, Colorado
After getting all of the cove glued up the next step is to caulk it all in.

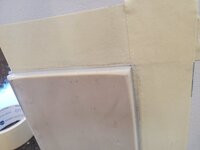
Using 2" IPG tape, I masked off the cove about 1mm above it and around it for a caulk line. This will give us a nice crisp line after we flake the base. I also caulked in ALL of the joints between the cove base and anywhere it meets door casings. I just used my finger to smooth out the caulk, no special tricks here. The smoother you have it, the better the cove will look. We want everything to transition smoothly.

I used gray DAP Alex Flex for this.

I let the caulk dry overnight and came in the next day to flake it out. I guess I didn't take any pictures of this part, but it is very straightforward. I mixed my 100% solids epoxy and Light Gray pigment then used a chip brush to apply a solid coat with no, or very little sagging. If you apply too much epoxy on a vertical surface it will just run down since it doesn't dry immediately.

To broadcast the flake I grab a big handful then toss it into the cove. Once the cove has about 50% coverage , I like to throw 2 or 3 large handfuls of flake on the floor then use an upward sweeping motion to embed the flake into the cove. Gives me complete coverage without having to do a second broadcast which is important because it is all hands and knees.

Also I am using Torginol Hybrid Stone Flake FB-4105 "Slate" for this. It has about 8 different colors in it and 3 different flake sizes, 1/16", 1/8", and 1/4". Seems to cover pretty well.

After I completed everything I pulled the tape while the epoxy was still wet.
 

Attachments

  • 20220712_092048.jpg
    20220712_092048.jpg
    251.1 KB · Views: 56
  • 20220708_113555.jpg
    20220708_113555.jpg
    157.4 KB · Views: 50
  • 20220708_102115.jpg
    20220708_102115.jpg
    234.9 KB · Views: 51
  • 20220708_081304.jpg
    20220708_081304.jpg
    182.2 KB · Views: 52
  • 20220708_081257.jpg
    20220708_081257.jpg
    237.8 KB · Views: 49
  • 20220712_112106.jpg
    20220712_112106.jpg
    308.3 KB · Views: 51
  • 20220712_112108.jpg
    20220712_112108.jpg
    331.3 KB · Views: 56
  • 20220708_102107.jpg
    20220708_102107.jpg
    254.8 KB · Views: 57
  • 20220712_1123399999.jpg
    20220712_1123399999.jpg
    338.7 KB · Views: 60
OP
B

benwah

Well-known member
Joined
May 21, 2014
Messages
980
Location
Crested Butte, Colorado
Just more pics of the process.

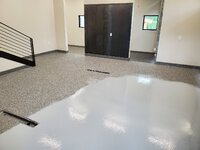
After the epoxy cured I scraped the cove to remove any excess fleck and smooth it out a bit.

I then applied 2 coats of 85% solids Polyaspartic to grout it in.
 

Attachments

  • 20220712_113908.jpg
    20220712_113908.jpg
    249.8 KB · Views: 62
  • 20220712_152542.jpg
    20220712_152542.jpg
    279.1 KB · Views: 54
  • 20220712_112419.jpg
    20220712_112419.jpg
    227.5 KB · Views: 50
  • 20220712_113809.jpg
    20220712_113809.jpg
    371.2 KB · Views: 47
  • 20220712_113843.jpg
    20220712_113843.jpg
    233.8 KB · Views: 48
  • 20220712_152535.jpg
    20220712_152535.jpg
    291.2 KB · Views: 52
  • 20220712_152558.jpg
    20220712_152558.jpg
    176.8 KB · Views: 55

Jayman17

Well-known member
Joined
Feb 6, 2017
Messages
3,820
Location
Seattle, Wa
Before I realized you were going to apply epoxy and flakes I was thinking that cove didn’t look so great. Seeing the completed base I now see where you were going with this.
The finished cove looks great imo. :thumbup:

Jay
 
OP
B

benwah

Well-known member
Joined
May 21, 2014
Messages
980
Location
Crested Butte, Colorado
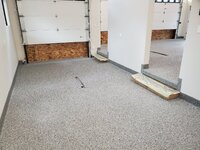
After I top coated the base and primed the floor I was looking at it and not feeling great about 2 spots where there are stairs to the Sprinter bay. Because the drywall wasn't brought down, it looked like ****. So I custom fit a few pieces to give a nice transition around the stairs and flaked it in.
 

Attachments

  • 20220714_121620.jpg
    20220714_121620.jpg
    343.9 KB · Views: 53
  • 20220714_085938.jpg
    20220714_085938.jpg
    353.7 KB · Views: 45
  • 20220714_081026.jpg
    20220714_081026.jpg
    245.5 KB · Views: 44
  • 20220714_080716.jpg
    20220714_080716.jpg
    172.9 KB · Views: 43
  • 20220714_080621.jpg
    20220714_080621.jpg
    212.4 KB · Views: 48
  • 20220714_080611.jpg
    20220714_080611.jpg
    344.9 KB · Views: 50
  • 20220714_080601.jpg
    20220714_080601.jpg
    282.5 KB · Views: 54
OP
B

benwah

Well-known member
Joined
May 21, 2014
Messages
980
Location
Crested Butte, Colorado
After ALLLLL of that BS I was finally able to lay out my body coat and broadcast until refusal :rocker:
 

Attachments

  • 20220714_154526.jpg
    20220714_154526.jpg
    530.1 KB · Views: 51
  • 20220714_154515.jpg
    20220714_154515.jpg
    563 KB · Views: 51
  • 20220714_154507.jpg
    20220714_154507.jpg
    595.7 KB · Views: 53
  • 20220714_153637.jpg
    20220714_153637.jpg
    357.6 KB · Views: 56
  • 20220714_154455.jpg
    20220714_154455.jpg
    561.6 KB · Views: 57
  • 20220714_154439.jpg
    20220714_154439.jpg
    511 KB · Views: 60
  • 20220714_140416.jpg
    20220714_140416.jpg
    179.4 KB · Views: 60
  • 20220714_155823.jpg
    20220714_155823.jpg
    424.2 KB · Views: 68
OP
B

benwah

Well-known member
Joined
May 21, 2014
Messages
980
Location
Crested Butte, Colorado
Before I realized you were going to apply epoxy and flakes I was thinking that cove didn’t look so great. Seeing the completed base I now see where you were going with this.
The finished cove looks great imo. :thumbup:

Jay
Thanks Jay! I agree, it came out pretty stellar. There was one area in the bay where I applied the epoxy too thick and it ran down a bit, but I scraped it smooth then just did another small broadcast to fix it. Other than that didn't have too many issues overall :beer:
 
To avoid these ads, REGISTER NOW!

Armorpoxy

Well-known member
Joined
Aug 18, 2013
Messages
3,735
Location
NJ
Nice install. We carry this as a specialty item but most customers find it very expensive and for residential use often overkill. It's most commonly used we find in projects that require coves (commercial kitchens, etc).
 
OP
B

benwah

Well-known member
Joined
May 21, 2014
Messages
980
Location
Crested Butte, Colorado
Nice install. We carry this as a specialty item but most customers find it very expensive and for residential use often overkill. It's most commonly used we find in projects that require coves (commercial kitchens, etc).

Thansk for the kind words Armorpoxy!

Yes it is expensive to install, but it made total sense for this customer and money was not a concern.
The walls with the blued metal panels are for bike racks and ski racks. A bike wash station will be installed over the floor in one of the areas. In addition, he will be washing his vehicles in the garage for years to come! Plus we get 200"+ of snow per year, so why not right?! 🤣

I love doing something different, and this was a fun project!
 

Sumboodie

Well-known member
Joined
Mar 20, 2021
Messages
10,771
Location
AK
I had no idea they made corners.

I had it in my old garage to help keep the drywall from getting wet. It came on a 25 or 50ft roll and that was it.

Expensive? Was maybe $40 a roll if I remember, wasn't too bad. Not sure if I'll do it in my new place. May just use 1/2" 4" boards.
 

Armorpoxy

Well-known member
Joined
Aug 18, 2013
Messages
3,735
Location
NJ
Hi, Speed Cove is a rigid pvc product that gets installed like molding and needs carpentry tools and adhesive to install, it's not the vinyl cove which is fairly inexpensive.
 

Sumboodie

Well-known member
Joined
Mar 20, 2021
Messages
10,771
Location
AK
Hi, Speed Cove is a rigid pvc product that gets installed like molding and needs carpentry tools and adhesive to install, it's not the vinyl cove which is fairly inexpensive.
Gotcha.

Yeah I looked it up... $440 for 48ft... Holy smokes!!

I'd have easily $3,000 in baseboards hahaha, yeah....
 
To avoid these ads, REGISTER NOW!
Top Bottom