To avoid these ads, REGISTER NOW!

Speed Fetish Garage.

orange02ss

Well-known member
Joined
Oct 6, 2009
Messages
210
Location
Guam/Houston
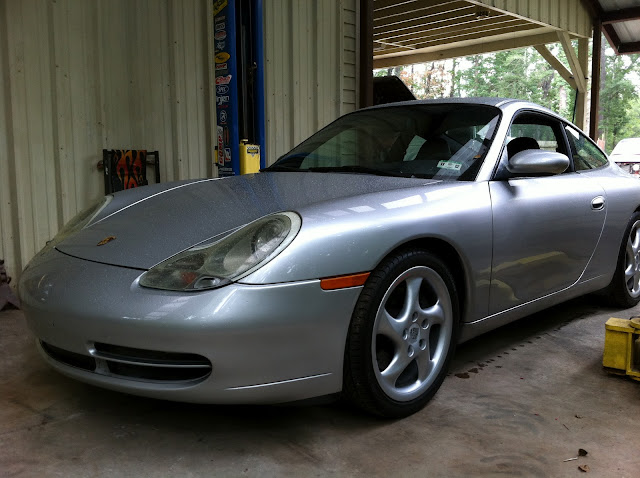
Been on the forum for awhile and I am finally getting around to making a thread on my shop. I am going to start out with the latest addition I am making to it, then ill go back and show you around the rest.

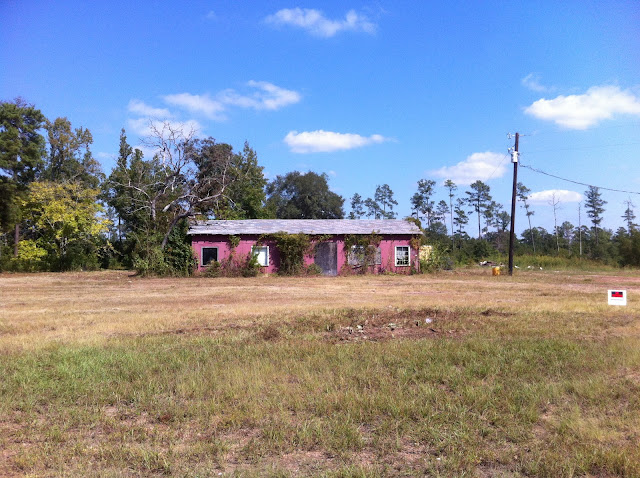
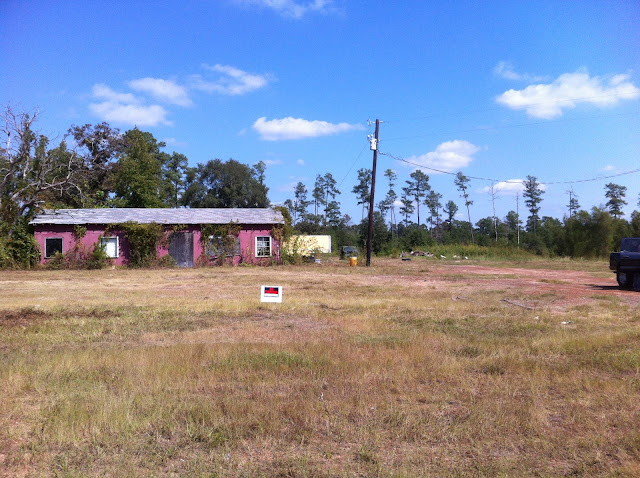
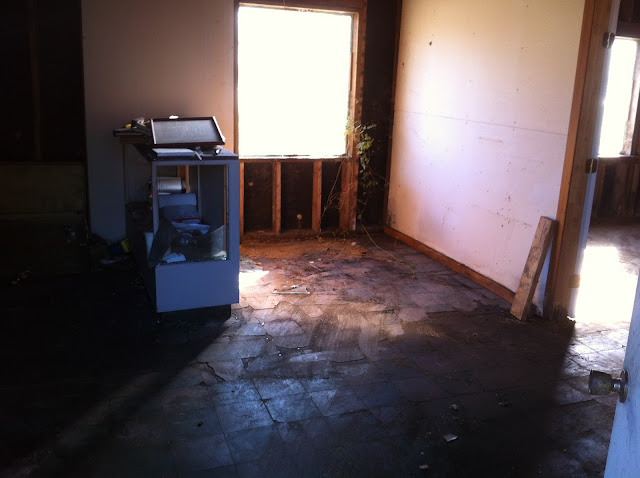
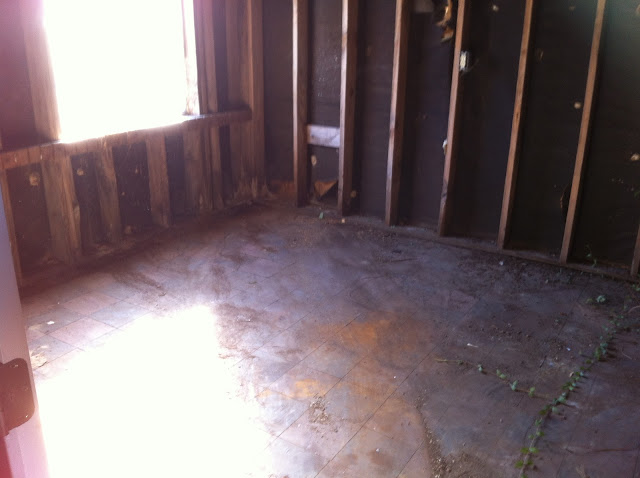
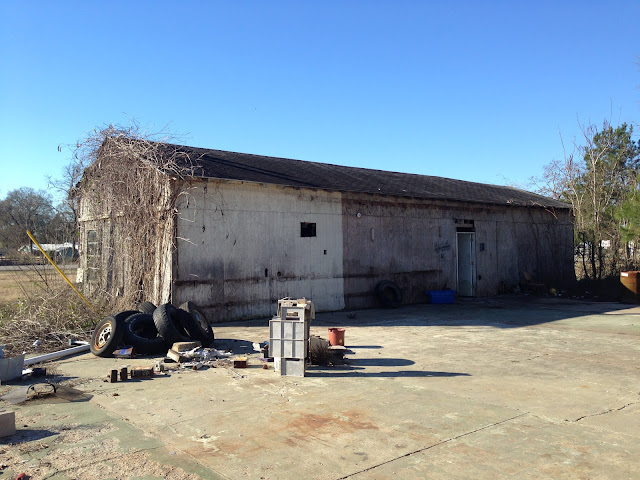
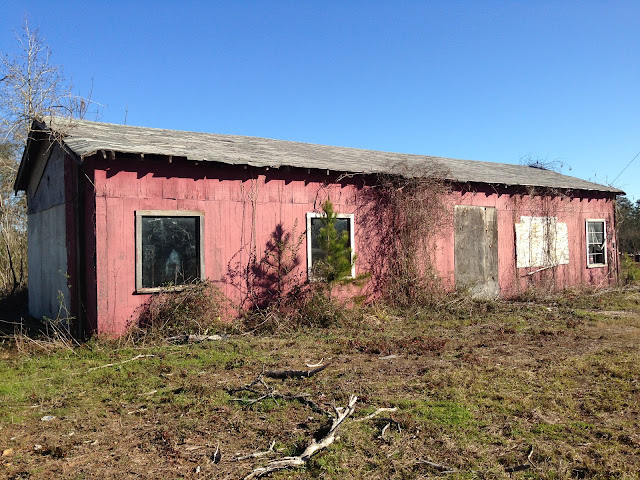
I bought the place in 2006. The property is 4 acres and the main shop is 60X50. There is also a smaller shop that we use for body work, not too sure the dimensions on that but its about 1200sqf. Ill get the dimensions later, that shop is going to be expanded in the future also.

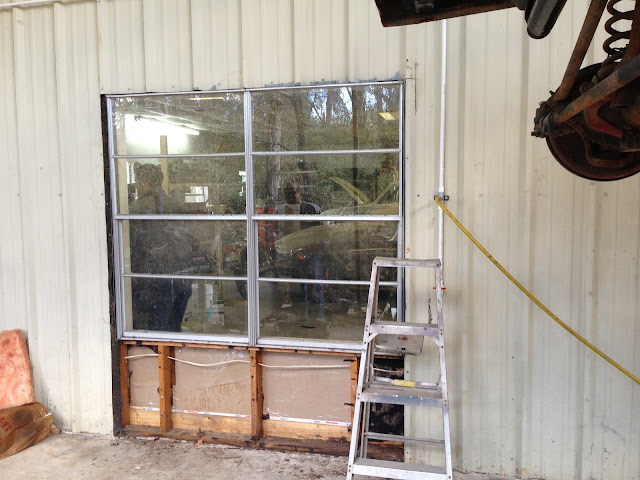
When I purchased the place, I could not fit the 2 post lift inside the shop as it has a drop ceiling (shop is fully heated and air conditioned), I decided to pour a slab on the side of the building and expand it. I poured a 50x14 slab in 2006 but never got around to building the cover for it. I do allot of dirty work on the lift and didn't want it fully enclosed, just a cover for the elements. Its allot easier to be able to blow it out and water blast the area when its open.

The last 2 weeks I have been on vacation so I finally decided to purchase the materials and build the extension. I decided on metal instead of wood as I figured it would be easier for me to do.

On to some pics!

I decided to cut some 8x8 .25' plates out for base plates and bolt them down to the concrete slab. I had preplanned this when I poured the slab. I cant think of the term right now but it is thicker (12') around the perimeter and it has re-bar throughout.

IMG_3587.jpg


After getting the base plates bolted down, I cut 4x4 steel to meet up with the current building. I matched the angles on top to the current roof and welded the 4x4 post to the base plates. I then used 8' C channel on top to match the roof line.

IMG_3593.jpg


Up to this point took a 13 hour day! It was allot more difficult than I thought it would be. I didn't factor in having to weld 20' foot up! I also didn't realize how hard it would be to handle the 40' beam. I had to rethink how we were going to do the opposite side as we used the existing building to maneuver it into place.
 
Last edited:
To avoid these ads, REGISTER NOW!
OP
O

orange02ss

Well-known member
Joined
Oct 6, 2009
Messages
210
Location
Guam/Houston
Started on the opposite side the next day.

Main post is up on the other side.
IMG_3613.jpg


40' 8" C channel beam!

IMG_3614.jpg


I had borrowed a homemade crane from a friend that I figured we could maneuver the beam into place with. We got it on top of the main post and I tied it to keep it in place so it wouldn't move when we picked up the rear onto the other post.

IMG_3615.jpg


IMG_3618.jpg


We had laid the beam down flat instead of vertical where all its strength is at. When we started to lift it, it gave and folded in three! It was allot of hard work just to get it up there so we were pretty bummed about it. We pulled it out and I straitened it out and welded in some braces. We decided that we needed to be able to lift it completely on top and set it in place vertical. We also needed to get the purlings in to add strength to it.

I welded a 10' 2x4 steel pipe to the bucket of the tractors front loader and we were able to lift it high enough in 3 stages. Once up with the purlings in, it was strong but we worked well into the night as we couldn't take the weight of it until everything was set. I did get to see allot of fireflies for the first time though!

IMG_3627.jpg
 
OP
O

orange02ss

Well-known member
Joined
Oct 6, 2009
Messages
210
Location
Guam/Houston
With the lift, everything was allot easier and things moved faster. We got all the purlings up on the back side of the extension and a couple sheets of roofing also.

IMG_3641.jpg


IMG_3645.jpg
 
OP
O

orange02ss

Well-known member
Joined
Oct 6, 2009
Messages
210
Location
Guam/Houston
I took several days off for some training I had to do up in Dallas but got back to work yesterday. I got the rest of the roofing on the back side done with the exception of one, which I was shorted and didn't catch. I am using opaque panels in the middle to let light in. Its so much easier with the scissor lift!

IMG_3657.jpg


IMG_3658.jpg
 

Thruxton

Well-known member
Joined
Dec 30, 2010
Messages
767
Location
Virginia
That's an interesting project- looks like very stout construction. How did you fasten the roofing panels?
 
OP
O

orange02ss

Well-known member
Joined
Oct 6, 2009
Messages
210
Location
Guam/Houston
The roofing panels are secured with self tapping screws. The screws have rubber gaskets to seal it from leaking.
 
Last edited:
OP
O

orange02ss

Well-known member
Joined
Oct 6, 2009
Messages
210
Location
Guam/Houston
That was the latest addition to the shop.

I have been searching for all my old pics to try and start from when I bought the place. I found these pictures of the shop right before I bought it. The owner at the time was in the process of cleaning it out for the sale. He built taxi cabs for Liberty taxi in Houston for Years, and rebuilt cars for sale also.

This is a picture of the front of the property.
newshop1.jpg


House on the property.
shop%2520158.jpg


The house and smaller garage.
shop%2520159.jpg


Front of the shop.
shop%2520161.jpg
 
Last edited:
OP
O

orange02ss

Well-known member
Joined
Oct 6, 2009
Messages
210
Location
Guam/Houston
This is the interior of the smaller garage, it was used mostly as a body/paint shop. There is a full bathroom with shower in the back.
shop%2520162.jpg


office in the main shop.
shop%2520164.jpg


back right corner of the main shop.
shop%2520165.jpg


back left corner of the main shop, had this frame machine set up there.
shop%2520166.jpg
 
Last edited:
OP
O

orange02ss

Well-known member
Joined
Oct 6, 2009
Messages
210
Location
Guam/Houston
I was trying to get the pics in order but I just picked this up today. Spent the whole day disassembling it. Started with four of us and ended with seven, still took 8 hrs! Its a semi down draft booth, pretty expensive booth when new. Got a great deal on it. Now i just need another building to put it in, its huge! 15'Wx25'Lx12'H.

IMG_3695.JPG


IMG_3696.jpg
 
Last edited:
OP
O

orange02ss

Well-known member
Joined
Oct 6, 2009
Messages
210
Location
Guam/Houston
As I was dropping the first trailer load of stuff off and picking up another trailer I noticed this!

IMG_3704.JPG


IMG_3705.JPG


The base of the branch is about 8", just missed the shop!
 
OP
O

orange02ss

Well-known member
Joined
Oct 6, 2009
Messages
210
Location
Guam/Houston
After disassembling it, we managed to fit it into one stall. Really didnt think it would, I was guessing on two stalls at least!

IMG_3708.JPG
 

cbailey

Member
Joined
Jun 27, 2011
Messages
10
Is that a HOSS or red? I thought HO was like a 98 99 color only.. got any info on the cars?
 
OP
O

orange02ss

Well-known member
Joined
Oct 6, 2009
Messages
210
Location
Guam/Houston
Is that a HOSS or red? I thought HO was like a 98 99 color only.. got any info on the cars?

Not sure what you mean on the first part but the cars...

66 mustang
95 Nissan skyline R33
82 911 turbo between them
77 Scout on the side

Only one I have left is the scout.
 
OP
O

orange02ss

Well-known member
Joined
Oct 6, 2009
Messages
210
Location
Guam/Houston
Back to the shop some. I built some new shelves in 2007 for the office. You can see the layout when I first bought the place in the earlier pictures. I repainted the office and built some adjustable bookshelves that frame in the window. I used 3/4 MDF for the bookshelves and just painted everything to match. I routed out the sides to accept the adjustable shelving tracks.

The color is ok, but I think its gonna get changed soon. I also want to change out the wood paneling on the lower walls.

img182.jpg


img183.jpg
 
To avoid these ads, REGISTER NOW!

BUGTHUG

Well-known member
Joined
Nov 12, 2010
Messages
2,960
Location
Kansas
Nice shop. The skylights are nice, I hope you don't have problems with the material later down the road. I had to change all of mine out after a couple years, the sun and some hell just beat it to start leaking, had to replace with metal. Good job.
 
OP
O

orange02ss

Well-known member
Joined
Oct 6, 2009
Messages
210
Location
Guam/Houston
I'd imagine having that lift outside makes it nice some days, enjoying being semi-outside while wrenching.

It has been really enjoyable working on the outside lift with the roof cover. I have a really large fan that I usually roll over and turn on and its just nice and cool. When it gets really hot, I can roll the mid rise lift inside and turn on the air conditioner, but its pretty rare.

BUGTHUG
Nice shop. The skylights are nice, I hope you don't have problems with the material later down the road. I had to change all of mine out after a couple years, the sun and some hell just beat it to start leaking, had to replace with metal. Good job.

I did think about that when I was installing them because they are pretty flimsy. I just figured they would need to be replaced every couple years. They do let allot of light in.
 
OP
O

orange02ss

Well-known member
Joined
Oct 6, 2009
Messages
210
Location
Guam/Houston
I haven't done much with the shop lately as we have been getting some work done on cars. I did replace the front light with a new light from barn lights. I replaced the outdoor flood light about 3 times in the last 2 years. It was a piece of junk, Brinks brand light with a sensor for dark. They just keep getting cheaper and cheaper. Finally bought this one and installed a sensor from home depot, works great! Ill get some pics of it on the shop soon.

EjJcwTlb4z8cmIKNi1qq-vVbAmhWVm6J2awOqhaE7C6WdP0ANFKH2iVmw1EUFb05CQEc0yiENSHHNVfQNEZ2ie0ixhM3oB2vxq9SQfixwAHqMlsSFRPQ3maOnvAUssyUVfqH4lytEcu6sZeeuDfLk6IXEqqV-KFKrjI4HoIHSG3H


I also have gotten sick of my craftsman roll cart. There just isn't enough room in it, I also don't like the fact that I load up the top and cant get to anything underneath it.
images


I found this on Craigslist so I picked it up today (KRSC416), lots more room! Ill get some pics when I get it loaded up. I like the fact that the top slides so I can get to items underneath and still use the top.

IMG_4175.jpg

IMG_4174.JPG
 
Last edited:
OP
O

orange02ss

Well-known member
Joined
Oct 6, 2009
Messages
210
Location
Guam/Houston
I haven't posted anything in a little while. I finally got a chance to install a door to make access to the lift area easier. Install was easier than I thought it would be. I still need to trim out the opening.


IMG_4394.jpg


IMG_4395.jpg


IMG_4397.jpg


IMG_4398.jpg


IMG_4399.jpg


IMG_4400.jpg
 
OP
O

orange02ss

Well-known member
Joined
Oct 6, 2009
Messages
210
Location
Guam/Houston
I started work on another shop that we are gonna use for a business. I have had this property for about 5 years, but am just now getting around to doing something with it. Its 3 acres on a main road with 300' of frontage. There is a run down building on the property 53'X19', along with a 60'x60' concrete slab behind it.

The property was a mess when it was purchased. There was allot of junk laying around. The building itself was horrible looking! Thieves stole the wiring out of it and anything else they could. It had a leaking roof, busted out windows and missing doors, so it had serious weather damage. It also had about a foot of trash covering the whole floor.

We started cleaning up the property a couple months ago. The grass had grown up over 6' tall. It took a full day just to mow the place with a Kubota tractor and brush hog. Spent another day cleaning up the junk around the property and two rooms out of the building.

I forgot to take some pics before we started mowing. This is after we finished. This picture is taken from the road looking at the front of the building.
IMG_4470.JPG

IMG_4469.JPG

IMG_4468.JPG


This is taken in the back of the property.
IMG_4464.jpg

IMG_4465.jpg

IMG_4466.jpg
 
OP
O

orange02ss

Well-known member
Joined
Oct 6, 2009
Messages
210
Location
Guam/Houston
The tree on the left side of the building needed to come down, it was dead and some branches had broken through the roof. I figured 10 minutes with the chainsaw and it would be done. I was wrong! That tree was tuff! It ate three saw blades and we still couldn't cut through it. I ended up yanking it out of the ground after many, many attempts with the tractor.

IMG_4625.jpg


Of course I forgot to get a picture before we started but this is midway through the clean up of two of the rooms.

IMG_4627.jpg


Its kind of hard to make out but you can see the tractor bucket in the doorway, 15 loads!

IMG_4633.jpg


IMG_4634.jpg


All of this was done a couple months back in preparation of fixing the building.
 
OP
O

orange02ss

Well-known member
Joined
Oct 6, 2009
Messages
210
Location
Guam/Houston
The main structure of the building was actually in pretty good shape. It was built with 2x6 walls and roof structure.

IMG_4322.JPG


I decided to just put a new steel roof and steel siding. I also wanted to make sure that the building was insulated, since we were going to be working in it. Houston summers are horrible and it would be useless if not insulated.

Since we are going to use it as an auto shop, we needed to add some bay doors, and I wanted to build a waiting room/office. I also needed to tear out all the existing rooms in the building and everything else, down to the studs!
 
OP
O

orange02ss

Well-known member
Joined
Oct 6, 2009
Messages
210
Location
Guam/Houston
I figured up the materials and ordered everything a couple weeks ago so we would have everything before we start. We started on Fri the 15th. Here are some pics before we did anything that day.

Rear of the building, you can see the 60X60 concrete pad in the picture.
IMG_4324.JPG


Front of the building.
IMG_4325.JPG


IMG_4326.JPG
 
To avoid these ads, REGISTER NOW!
Top Bottom