To avoid these ads, REGISTER NOW!

Spuds 33 x 72 recycled shop build

Spud1985

Well-known member
Joined
Nov 30, 2017
Messages
48
Location
Monroe, Ga
Finally getting started on my dream shop. A little background to get things started. I have had 3 previous shops over the years.
First was a 40 x 80 old cement block flat roofed shop. It had been sitting vacant for 10 plus years and the owner, a friend of mine, was nice enough to let a buddy and I use it for side work. It was miserably cold in the winter, hot in the summer, and we had to keep tarps over our equipment because the roof leaked so bad. We endured it for a couple years and then decided even free rent was too much.
Second was a 50 x 80 shop in an industrial complex. Nice metal building, sheet rocked walls, 20 ft ceilings, 2 big roll up doors. I ran a full time auto repair shop at this location for about 2 years. Loved the shop, great location, tons of business and rent was affordable. The shop turned into my life and the business side of it wasn't for me. So I went back to work for someone and moved my equipment again.
This time it was a downsize. I had a 40 x 30 shop at home that was with the house when I bought it. Decent carport style metal building that was very full once I moved all my equipment home. Did some side work at home for a couple years and then we sold the house. Time to move my stuff again.
Our new house has a 2 car garage and also a full basement. Daily drivers get the garage and I get the basement. I have made do the past 3 years without a shop. Doing side work outside, I truly am a shade tree mechanic now. Over the past 3 years we have also completely remodeled the inside of the house, rebuilt the front porch and cleared a lot of trees. My dad and I have done the majority of work ourselves and it has been a lot of fun. I am finally winding down on the house and it is time to start on the shop. I have been collecting materials the past 3 years and the majority of the shop will be built with material that has been used previously and is being saved from the scrap pile or the dump.
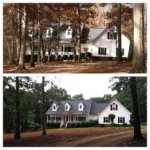
I will post some material pics and current pics of the building site soon. Until then I will post a few before and after pics of the work we have done to the house over the past 3 years.
 
To avoid these ads, REGISTER NOW!

1/2 Cup

Member Emeritus
Joined
Apr 28, 2012
Messages
19,283
Location
Shepparton. Victoria. Australia
Spud1985, looking forward to following your progress.

Its amazing just how much time you can spend remodelling and maintaining your home.

All the best with your shop, 3 years is a long time..

Regards
 
OP
S

Spud1985

Well-known member
Joined
Nov 30, 2017
Messages
48
Location
Monroe, Ga
Spud1985, looking forward to following your progress.

Its amazing just how much time you can spend remodelling and maintaining your home.

All the best with your shop, 3 years is a long time..

Regards

Thanks 1/2 Cup, yes 3 years is forever without a shop. My basement is overflowing now.
 
OP
S

Spud1985

Well-known member
Joined
Nov 30, 2017
Messages
48
Location
Monroe, Ga
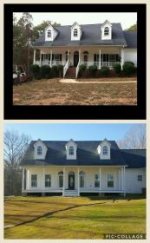
Front of house when we bought it and after trees removed
 

Attachments

  • image.jpg
    image.jpg
    20.9 KB · Views: 101
OP
S

Spud1985

Well-known member
Joined
Nov 30, 2017
Messages
48
Location
Monroe, Ga
Masonry front porch torn off due to poor footings, rebuilt with wood, 6 foot retaining wall built and 160 tons of fill brought in to level grade across front.
 

Attachments

  • image.jpg
    image.jpg
    12 KB · Views: 81
OP
S

Spud1985

Well-known member
Joined
Nov 30, 2017
Messages
48
Location
Monroe, Ga
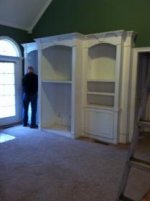
Built in entertainment center that was in foyer area by front door.
 

Attachments

  • image.jpg
    image.jpg
    7.6 KB · Views: 30
OP
S

Spud1985

Well-known member
Joined
Nov 30, 2017
Messages
48
Location
Monroe, Ga
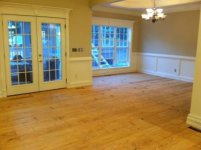
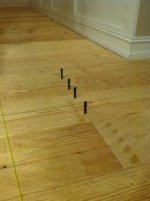
Face nailed with cut nails, wife pre drilled the holes, I drove all the nails. 100 lbs of nails.
 

Attachments

  • image.jpg
    image.jpg
    8.4 KB · Views: 104
OP
S

Spud1985

Well-known member
Joined
Nov 30, 2017
Messages
48
Location
Monroe, Ga
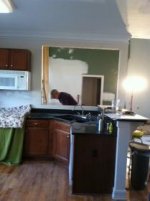
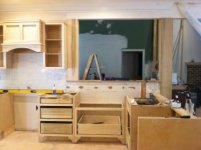
Kitchen before and after. Gutted completely, built new cabinets, opened up wall from kitchen looking into living area.
 

Attachments

  • image.jpg
    image.jpg
    14.5 KB · Views: 49
OP
S

Spud1985

Well-known member
Joined
Nov 30, 2017
Messages
48
Location
Monroe, Ga
Wife says cutting a hole in the wall was one of her best valentines gifts ever.
 

Attachments

  • image.jpg
    image.jpg
    8 KB · Views: 89
OP
S

Spud1985

Well-known member
Joined
Nov 30, 2017
Messages
48
Location
Monroe, Ga
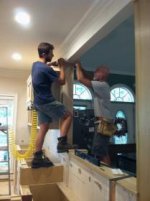
My dad and I doing some trim work. He gets around great for 60 and can out work a lot of 30 year olds.
 

Attachments

  • image.jpg
    image.jpg
    10.6 KB · Views: 62
OP
S

Spud1985

Well-known member
Joined
Nov 30, 2017
Messages
48
Location
Monroe, Ga
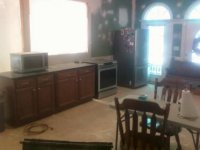
Our temporary kitchen in the living room. My wife is a trooper, I had home cooked meals most nights and dishes were done in the bathtub. She worked like that for 3 months.
 

Attachments

  • image.jpg
    image.jpg
    12.5 KB · Views: 20
OP
S

Spud1985

Well-known member
Joined
Nov 30, 2017
Messages
48
Location
Monroe, Ga
Finished. We went from 22 sq ft of usable counter space to 38. Just from a layout change.
 

Attachments

  • image.jpg
    image.jpg
    13.6 KB · Views: 34
To avoid these ads, REGISTER NOW!
OP
S

Spud1985

Well-known member
Joined
Nov 30, 2017
Messages
48
Location
Monroe, Ga
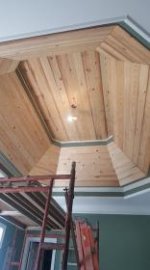
We also redid bedrooms, bathrooms, and turned a powder room into a pantry. This is a tray ceiling in the master bedroom. Done in 4 inch tongue and groove pine. We lived on plywood and sucked sawdust for 3 years but it was worth every minute. My wife has her dream house now.
 

Attachments

  • image.jpg
    image.jpg
    8.5 KB · Views: 61
OP
S

Spud1985

Well-known member
Joined
Nov 30, 2017
Messages
48
Location
Monroe, Ga
We finished the remodel just in time for this little stinker to arrive in August. Grace Anne is the biggest blessing we could ever get.
 

Attachments

  • image.jpg
    image.jpg
    18.5 KB · Views: 35
OP
S

Spud1985

Well-known member
Joined
Nov 30, 2017
Messages
48
Location
Monroe, Ga
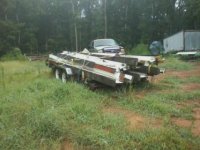
Since this is a recycled shop here are a couple of the main recycled components.
The main structure of the shop is being built out of pallet racking that was headed to the scrap yard. They have to take it out of the warehouse if it has to many dents in it from pallets, forklifts, etc. It is all in amazing shape with only what I call cosmetic damage. Each 9 foot long 15 foot tall section can easily handle 20,000 lbs so I think it will hold my roof no problem. The roof trusses I am using were ordered wrong for a building and bought for basically scrap value.
 

Attachments

  • image.jpg
    image.jpg
    19.8 KB · Views: 51
OP
S

Spud1985

Well-known member
Joined
Nov 30, 2017
Messages
48
Location
Monroe, Ga
These beams I scored from a building my friend was hired to take down for the city. He called me because he didn't have a way to cut them all apart and needed my help. When I got there I was talking to him about the building and he was complaining about having to take all the metal roof off because it had asbestos shingles under it and the city had a company coming in to deal with that. I asked how much he wanted for the metal, he said " you can have all ya want to take off. So 4 evenings after work I was over there taking metal off. I ended up with over 7000 sq ft of nice 29 gauge galvanized with light surface rust in spots. I am not using it on my roof but it will be the siding on the outside and ceiling and walls on the inside.
I traded a little truck repair work to get the beams. 10 beams 20 ft long. 12 inch web, 8 inch flanges, 1/2 inch thick. Plus I got some random posts too.
 
OP
S

Spud1985

Well-known member
Joined
Nov 30, 2017
Messages
48
Location
Monroe, Ga
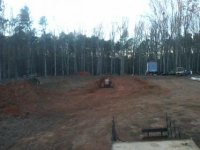
Finally getting started on slab prep. Took a week of of work and started digging. I had eyeballed the grade and figured I had about 2 and a half feet of slope I was going to have to deal with. Once I established my corners and shot the grade with a laser I realized my eyeballs were off. Ended up with over 5 feet of cut in the deepest part. I chose to cut it all down to virgin dirt instead of cutting on one side and using it to fill the other and raise the grade. I don't want to take any chances on things settling and want to prevent slab cracks as much as I can.

Build site after moving my sawmill and scraping all the weeds off.
 

Attachments

  • image.jpg
    image.jpg
    20.3 KB · Views: 32
OP
S

Spud1985

Well-known member
Joined
Nov 30, 2017
Messages
48
Location
Monroe, Ga
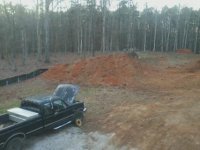
End of day 1. Got a slow start and hit some rock. Nothing solid like granite, more like sandstone and shale. Using a Takeuchi tl8 skid steer. Around lunch time a buddy stopped by to see how progress was coming, he then brought me his homemade stump bucket to try in this hard Georgia clay. A stump bucket is basically a narrow bucket. Rather than being 5 ft wide it is only 1 ft wide so all of the machines force is concentrated on 1 point. Boy what a game changer that bucket was. I used it to basically plow and rip the ground up, then I used the wide bucket to clean it all up. Overall production doubled with the use of the stump bucket.
 

Attachments

  • image.jpg
    image.jpg
    17.2 KB · Views: 32
OP
S

Spud1985

Well-known member
Joined
Nov 30, 2017
Messages
48
Location
Monroe, Ga
Got a little slack on pics the next few days. Day 2 was finishing rough grading. My flat spot I cut out ended up being about 70 feet wide and 150 feet long. I'm up to my eyeballs in dirt.
Day 3 was fine tuning my grade, setting up strings and digging footings. The stump bucket worked perfect for the footings because I needed 12 inch wide 12 inch deep footings.
Day 4 was a very good day, very productive. Up until now it has been me and my dad working on it. My buddy Richard came to help on day 4. We were able to get the main form boards set and get started bracing. I was also able to get the gravel put down and a thin base vapor barrier covering it all up.
 

1/2 Cup

Member Emeritus
Joined
Apr 28, 2012
Messages
19,283
Location
Shepparton. Victoria. Australia
Spud1985,

I have to say congratulations on the arrival of your daughter Grace Anne, enjoy those precious moments..

That's a great start on your build and its good to see you have help at hand, it makes things that much easier. :thumbup:

Regards
 
OP
S

Spud1985

Well-known member
Joined
Nov 30, 2017
Messages
48
Location
Monroe, Ga
Thank y'all very much. Grace is absolutely the coolest thing I have ever had. Never imagined how much happiness a baby could bring.
I am a little ocd on somethings and so is my dad so everything is turning out beautifully with the slab work.
Day 5 was more form work. Lots of bracing and driving stakes in the ground. We might have went a little overkill but I would rather be safe than have a blow out and a crooked slab. We also installed the 15 mil vapor barrier over the main section of the slab
End of day 5
 
OP
S

Spud1985

Well-known member
Joined
Nov 30, 2017
Messages
48
Location
Monroe, Ga
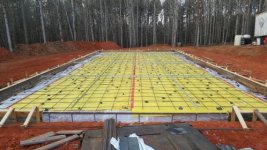
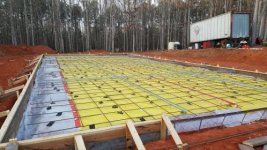
Day 6 was an early day. At the supply house at 6 am to get rebar chairs and tie wire. We installed #4 rebar in an 18 inch grid over the entire slab. Lots of bending and tying.
Day 7 was another bent over day. We installed screed key to divide the slab. It serves multiple purposes. Give the finishers something to run their screed board across, eliminating the chances of major mountains or lakes out in the middle. It also serves as expansion joints so I won't have to cut the slab after the pour.
 
OP
S

Spud1985

Well-known member
Joined
Nov 30, 2017
Messages
48
Location
Monroe, Ga
A friend of a friend is doing the actual pouring and finishing of the slab for me. Not something I want to try to learn. Concrete mistakes get expensive real quick. His cash price was $1600 for labor which I didn't think was bad at all. He was very impressed by our form work. He said it is one of the best looking form and rebar jobs he has seen in a while. I have a little title more prep work to do this weekend and then we are ready for cement. He is wanting a 50 degree day and is bringing his best finishers because he says I have the makings of a perfect slab.
Slab specs ended up like this. 33 feet wide, 72 feet deep. Thickness ranges from 5.5 to 6.5 inches. Perimeter footing averages 14 inches deep. By my calculations I will need 63 yards for the slab. I am going to order 7 trucks for 70 yards total. The extra will be used to pour a pad in front of the main front door.
 
To avoid these ads, REGISTER NOW!
Top Bottom