To avoid these ads, REGISTER NOW!

Steel storage racks

Snip

Well-known member
Joined
Jan 9, 2011
Messages
446
Location
Crossville, Tennessee
Question for those of you that have built ( or bought) your own steel storage racks, how far have you used for spacing the uprights? What are you allowing for overhang past the last upright? Most of my material comes in 20' lengths, some 24, but always wind up with "shorts" after a project that I would like to store on it. Tired of having stuff stored all over the shop. Rack will be single sided cantilevered style up against the wall. TIA.
 
To avoid these ads, REGISTER NOW!

Duker

Well-known member
Joined
Sep 25, 2010
Messages
10,888
Location
Livingston, TX
This style has worked pretty well for my shop. I buy 24' lengths and cut them into 12' or 10/14' lengths which covers most of the projects I make. It works fine for 4' and longer stock. Anything shorter I have stacked in some bins. The back side of the rack I use for Grinder storage as my saw and cutting tables are on the other side of it. The rack sort of acts a separation of my auto bay where my lift is located.
IMG_6366.jpeg


IMG_3778.jpegIMG_3262.jpegIMG_3278.jpeg with everything
 

TurnipTruck

Well-known member
Joined
Aug 28, 2005
Messages
1,631
Location
Southcentral Alaska
The orange racks on the wall are on 4’ centers, the homemade rack on the floor is on 5’ centers. Anything longer than 16’ starts to intrude into the side door (left of view).
IMG_2817.jpeg


Outside, I have cantilever racking on 6’ centers.
IMG_3835.jpeg
20’+ lengths and oddball stuff that won’t blow away are just a snow shovel away, on top of the garden connex:
IMG_3747.jpeg

four to nine foot drops live outside on this roofed bunk:
IMG_4115.jpeg

two foot or less go under the weld table.
 
Last edited:

NUTTSGT

Super Moderator
Staff member
Joined
Sep 14, 2009
Messages
51,660
Location
Northern Central Ohio
I took down the steel rack I had on the I-beam but left up the side for the aluminum stock

I used 2' centers but I also used some expand metal as a front and bottom to keep anything shorter from possibly falling through.

Just wanted to offer that information as you could incorporate it on one end for any shorts or drops.
 
OP
S

Snip

Well-known member
Joined
Jan 9, 2011
Messages
446
Location
Crossville, Tennessee
Thank you to all for your details and pictures, gave me some ideas and inspirations. I have enough 3.5 3/16" square tube to build 4 separate posts with a forward foot. 8'tall with a 18" foot, 2x2-3/16 for the shelves/ pins. I think I am going to set them up with different spacing between them. I don't know why doing different spacing never occurred to me, just me being **** about symmetrical i guess? Maybe something like 4, 5 and 6' centers? Still would work with minimum overhang on 20', 24' should still be ok. Most of the time I pick up steel as i am starting a project so storing 24 footers would by not to often, well unless I find a great deal,lol. I like the idea of the expanded metal shelf for shorter drops.
 
To avoid these ads, REGISTER NOW!

slodat

ALLIANCE MEMBER
Joined
Feb 6, 2010
Messages
3,682
Location
Central-ish, WA
I hung mine from the wall to conserve floor space. I don’t, and won’t store lots of thick or heavy steel. All thin wall and not a lot of it. Worked out perfect for my needs.

IMG_2672.jpeg
 
OP
S

Snip

Well-known member
Joined
Jan 9, 2011
Messages
446
Location
Crossville, Tennessee
Nice looking rack. Usually when I say that i get hit, lol

I like the Ellis saw, mine is not that nice and shiny. Is the infeed table a Ellis item or something you built?
 

slodat

ALLIANCE MEMBER
Joined
Feb 6, 2010
Messages
3,682
Location
Central-ish, WA
Nice looking rack. Usually when I say that i get hit, lol

I like the Ellis saw, mine is not that nice and shiny. Is the infeed table an Ellis item or something you built?
The infeed is the Ellis item. I’m really happy with the infeed. I added this tray a while back. Really nice addition.

IMG_3235.jpeg

IMG_3234.jpeg

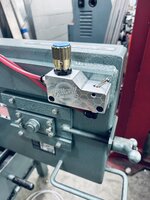
And I recently added the Biltwell Iron Company hydraulic mod. It’s a stop toggle valve. It’s not cheap, but I’m very happy with it!

IMG_4590.jpeg

IMG_4587.jpeg

It replaces the original needle valve. Puts the control out front, and the toggle valve starts/stops the down feed. You don’t have to change the needle valve to move the saw.

I also made my own blade air blast. The Ellis air blast setup is $300. Mine was under a hundred.

IMG_2558.jpeg

IMG_2555.jpeg

I cut a lot of material with this saw. Some days it runs all day. These mods have made it a much more usable saw.
 
OP
S

Snip

Well-known member
Joined
Jan 9, 2011
Messages
446
Location
Crossville, Tennessee
Nice updates, thank you for sharing them. I have seen the biltwell unit just recently, nice unit. Might do something similar with mine. I also have a vertical gravity feed bandsaw, Workamatic made by Dake, that could benefit from valve relocation. My Ellis is an old 1000 model, still uses a "leather " type blade wiper instead of a wire brush
 

Mike65

Well-known member
Joined
Mar 7, 2007
Messages
3,260
Location
Horse Pasture, Va.
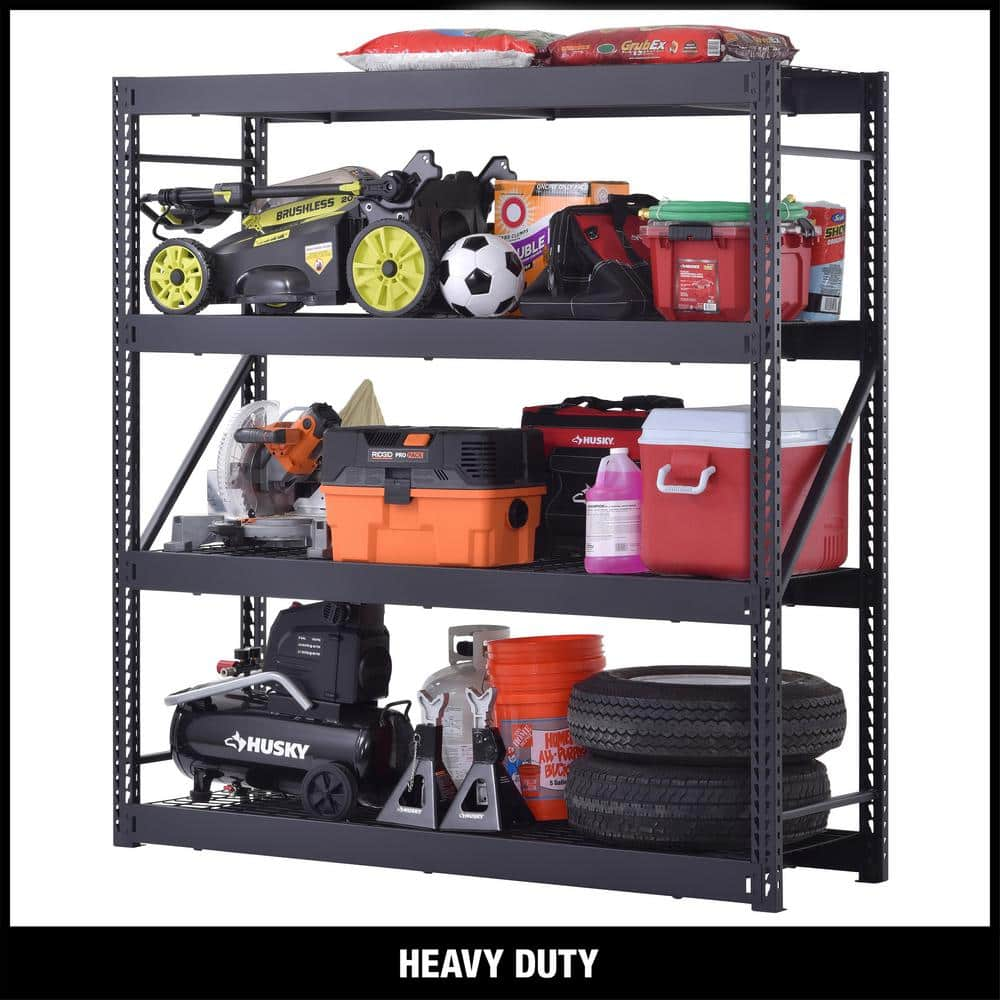
I just use the "off the shelf" type from Home Depot or Lowes that have the interlocking shelf beams into the uprights. I just replaced the pressed board shelfs with 1/2" plywood. I have 4 of them in my Shop/garage & 1 in our basement. They are like this style.

 
To avoid these ads, REGISTER NOW!
Top Bottom