To avoid these ads, REGISTER NOW!

Stepped into the porcelain deep end

wesalexleft

Well-known member
Joined
Apr 13, 2011
Messages
146
Location
Memphis, TN
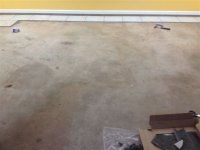
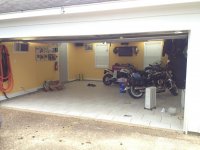
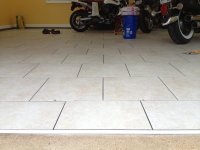
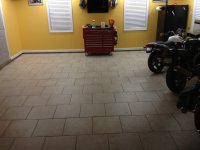
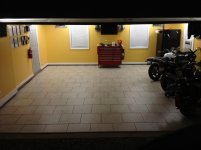
I've started putting down porcelain this past weekend as it was the first good weekend of the year for weather. 18" X 18" non rectified porcelain tile, USA, PEI IV with Flexbond thinset. It's taking much longer than i had anticipated however. I've done tiling before, but the added steps to ensure a very strong bond in the garage are greatly adding to the time. I'd guess I'm averaging about 15 minutes per tile by the time I burn in the thinset, spread more thinset with the notched trowel, and then backbutter the tiles before placement. After placement, bedding it in with motion and a rubber mallet before moving on to the next tile.
Yesterday the temps were in the low 70's during the day, and the high 50's at night. I've gotten about 20% of the tile down as of now. I wanted to finish it up next weekend, but now temps are forcast next weekend with highs around 50 and low in the mid 30's. With a heater in the garage, should I be okay with these temps? I don't want lose bond strength, but I do want go get this finished too.

Here are a few pictures.

thanks,
 

Attachments

  • tileslabsmall.JPG
    tileslabsmall.JPG
    95.8 KB · Views: 497
  • tile slab 2small.JPG
    tile slab 2small.JPG
    113.2 KB · Views: 532
  • tile1small.JPG
    tile1small.JPG
    105.8 KB · Views: 970
To avoid these ads, REGISTER NOW!

Dakota00

Well-known member
Joined
Mar 9, 2008
Messages
1,078
Location
Woodbridge, Ontario
As long as the temps in the garage do not drop below freezing when the thinset is drying you'll be fine. How warm does it get with the heater?
 

slickgt1

Well-known member
Joined
Oct 11, 2010
Messages
1,674
Looks great, you will get faster as you keep going. Skip the little pieces for now. You should get them later one shot. They take up a lot of time.

You will be fine at these temps, just be careful by the main door, if it hits below freezing. That is the spot that will freeze first. Only thing that will happen is the water in the thinset will freeze, and lift, and set your tile in a strange position. Not a big deal. Break it out, and insert new. It won't effect the field tile. I did this without a heater, and had only 2 tiles, by the side (outside door) door freeze up. It hit high 20's that night.
 
OP
W

wesalexleft

Well-known member
Joined
Apr 13, 2011
Messages
146
Location
Memphis, TN
I think we're past the freezing temps for the year in Memphis, TN. The 10 day forcast shows some lows around 37-40 at the lowest. I can keep the air temp in the garage in the mid 60's with no problem. I don't have an infrared to check the slab, but I was thinking that the heater would have little effect on slab temps. My worry is the Flexbond instructions say to maintain temps above 50 for the slab, air, and tile. Air and tile are no problem, but the slab may drop below 50. I know the curing process slows with cooler temps, but I didn't want to lose bond strength.
 

duneslider

Well-known member
Joined
Jan 20, 2013
Messages
2,247
Location
Riverton, Utah
If you keep the temp in the garage in the mid 40's and up you should be okay. If you use warm (not hot) water instead of cold water to mix your thinset that will help too. Freezing will be a bad thing but cooler temps will just slow the cure time down.

Don't rush yourself either. You will be happier taking longer to do the job and have it look good than rush and wish you would have taken more time. Everyone thinks that large tile will go quicker but it really takes longer to do right.

Have fun!
 
OP
W

wesalexleft

Well-known member
Joined
Apr 13, 2011
Messages
146
Location
Memphis, TN
My progress is very slow going as I tend to be a perfectionist when it comes to the steps. For example, back buttering the tiles. I'm very careful to get 100 percent coverage on the back of each tile, every corner and every depression. then when I burn in, same thing as I go over it to be SURE it's all covered, and when putting thinset down with the trowel, I'm careful to be sure I'm getting even coverage. If I see a "skip" from the notch, I go back and fill it in with a margin trowel, to be sure coverage is complete. then it continues from there. It seems the more I do, the more particular I seem to get. I'll be happy in the long run if the tiles are stuck solid though.
 

blacksporty

Well-known member
Joined
Oct 24, 2011
Messages
1,248
Location
So Cal
Is back buttering even required? I just did my kitchen in porclin, over concrete and just used a notched trowel to spead mortar on the floor and then just set the tiles.
 

RAYJAY

Well-known member
Joined
May 29, 2006
Messages
2,638
Location
UNION DALE PA
wow a little OCD there.... i put a lot of tile down and never backed buttered a one , except one in a corner it is thin set mortar..... also did you water test your floor for to make sure the thin set will stick ?? and yes i have not been in a holiday inn express, but have installed a ton of porcelain ( my whole lower level and stairs in our house .... )


Application of Product
Installation must conform to ANSI A108.5. Use a properly-sized notch
trowel to ensure proper coverage under tiles. Using the flat side of the
trowel, apply a skim coat of mortar to the surface. With the notch side
of the trowel held at a 45° angle, apply additional mortar to the
surface, combing in one direction. Press the tile firmly into place in a
perpendicular motion across ridges, moving back and forth. The
perpendicular motion flattens ridges and closes valleys, allowing
maximum coverage. With some tile, back-buttering is advisable. Adjust
the tile promptly and beat it in with a beating block and rubber mallet.
For thicker applications, use a medium bed mortar; periodically pull up
a tile and check the back to ensure proper adhesive coverage. If the
material has skinned over (not sticky to the touch), recomb with the
notch trowel; if too dry, remove and replace the dry material with
fresh material.
 

Zeke

Well-known member
Joined
Aug 13, 2009
Messages
17,176
Location
Long Beach CA, the sewer by the sea.
15 minutes a tile is slow, but if that's what it takes, that's what it takes.
I do believe in back buttering and so do several tile setters I know who don't like the hollow sound on floors.

Not to mention what would happen with a jack.
 

duneslider

Well-known member
Joined
Jan 20, 2013
Messages
2,247
Location
Riverton, Utah
Do what you want in your own house but my paying customers get a pro quality job and that includes back buttering. I'm not one of those 1-2buck a foot installers either.

You will be happy you took your time and did a good job. If it really is taking 15min a tile you might be overly OCD, or just really slow :D
 

slickgt1

Well-known member
Joined
Oct 11, 2010
Messages
1,674
I agree. Back butter. This is not your kitchen, and even if it was, and you are doing it for yourself, back butter. A huge Cast Iron Wok falling 4' is not something to snicker at. Hit the hollow spot just right, and you have a tile to replace.

Back buttering for garage is a must. If you want to be able to do, what I do in my garage on those tiles, without protecting tiles, then you are on the right path. It will be worth it in the end.

For those that still don't know how strong tile is in a garage, feel free to click links in my signature. Try 5000lb SUV on one jack, with nothing under jack.
 
OP
W

wesalexleft

Well-known member
Joined
Apr 13, 2011
Messages
146
Location
Memphis, TN
I'm still moving slowly, but taking my time with plenty of distractions along the way. I hope to be finished and ready to grout by the end of next weekend. Should be over halfway by the end of tomorrow. Then a few hours a night through next week.
 
OP
W

wesalexleft

Well-known member
Joined
Apr 13, 2011
Messages
146
Location
Memphis, TN
Well, it's still slow going, but I had a mini-breakthrough when I accidentally mixed my thinset with just a little too much water. As it turns out, I was mixing it a little too dry. I was trying too hard to stick to the receipe on the bag, and even going a little more wet than that, but it was still too dry. Not by much, but making it much more difficult to bed the tiles, especially towards the end of the mix. After adding a touch more water than intended, it still held a ridge just fine, but was much easier to work with, especially in bedding in the tile, and leveling. I'm about 65% done with laying tile and I think it will be complete next weekend if the weather cooperates. I need a rain free three of four days though, and that's asking a lot right now. I want to put the last two rows by the garage door down, and will have many cuts to make, but don't want a rain coming up to wash them out. My drive is level with the garage slab. I'm actually hoping that the tile will help create enough of a lip to stop water intrusion. Attached are pics of water seepage under the door and of the tile progress so far...
 

Attachments

  • water under door.JPG
    water under door.JPG
    144.6 KB · Views: 428
  • tile progress3.jpg
    tile progress3.jpg
    138.2 KB · Views: 794

Dakota00

Well-known member
Joined
Mar 9, 2008
Messages
1,078
Location
Woodbridge, Ontario
^^ Looks good so far. Quick question did you check (before you started laying) to see how big the tile pieces will be at the opening of the garage door?
 
To avoid these ads, REGISTER NOW!

crosscut

Member
Joined
Mar 12, 2013
Messages
12
Location
MD
Wow, it's shaping up nicely. I like the staggered pattern you selected. The wall color matches well also.

How will you finish the tile at the garage entry? Bullnose? Your installation is making it more difficult for me to decide what flooring to install.

Keep up the great work!
 
OP
W

wesalexleft

Well-known member
Joined
Apr 13, 2011
Messages
146
Location
Memphis, TN
As far as layout, yep I measured it out and I'll have about 2/3rds of a tile on my last course. I wanted the cut tiles at the entrance because I plan on covering them with at least the Shulter edge protector, and possibley their alumimum ramp. I haven't 100% decided yet. I then plan to Vulcum the edge protector, or follow up with a threshold. Thanks for the compliment on the pattern. It's just a regular running bond, or "brick" pattern. I've used it in my house throughout on 16" square tile and I like it because it disguises a few ills and looks completely different from one viewing angle and the 90 degree alternate. I've done the kitchen, hall, dining room and bathroom all connected in my house, and with this pattern, all lined up, worked out between doors, etc very well.
 
OP
W

wesalexleft

Well-known member
Joined
Apr 13, 2011
Messages
146
Location
Memphis, TN
I thought I'd ask opinions on finishing up the tile. I have all tile down except for the last two rows of tile that I hope to put those down this weekend. The problem is, it's spring and there's always a chance of rain. Right now, there is a 40%-50% chance of showers on Saturday and Sunday. When it rains, I get some water under the overhead door due to the fact that the slab is at grade with the driveway. It will normally creep in about 1' to 2' depending on how hard it rains. Attached is a picture of water amounts coming in before tile was started as well as a current picture of tile progress. I want to finish this weekend, and I'm going to try some plastic sheeting to try and keep water away from the garage as I lay the tile, but if water gets in, do you think it will affect the bond of the Flexbond modified thinset on the last row? If you can picture the last row being put down, and then a small amount of water coming into the garage up to the tile and to the newly laid thinset layer. My hope is that after all the tile is down and cured, that the 1/4" -3/8" lip created by the tile will stop the water intrusion.
 

Attachments

  • water under door.JPG
    water under door.JPG
    144.6 KB · Views: 134
  • tile progress5.jpg
    tile progress5.jpg
    132.4 KB · Views: 228
OP
W

wesalexleft

Well-known member
Joined
Apr 13, 2011
Messages
146
Location
Memphis, TN
Here it is from another angle. So if Saturday morning I start tiling the last rows, and then Saturday afternoon, the rains come and water seeps in under the door, do you think it would harm the bond of the thinset? My worry is that if you can't retemper thinset by adding more water, then water seeping into freshly laid thinset wouldn't be good either. My opposite theory is that if concrete cures better if kept wet, then wouldn't thinset be stronger? Two sides of the same problem.
 

Attachments

  • tile last rows.jpg
    tile last rows.jpg
    130.2 KB · Views: 355

Angelfire

Well-known member
Joined
Mar 22, 2012
Messages
1,367
Location
New Mexico and Ireland
Here in the desert, I wet the concrete with a sponge or bottle sprayer before grout or thinset. Otherwise it dries out too fast. Not sure at what point there would be too much water that it would be detrimental however.
 

Dakota00

Well-known member
Joined
Mar 9, 2008
Messages
1,078
Location
Woodbridge, Ontario
Here it is from another angle. So if Saturday morning I start tiling the last rows, and then Saturday afternoon, the rains come and water seeps in under the door, do you think it would harm the bond of the thinset? My worry is that if you can't retemper thinset by adding more water, then water seeping into freshly laid thinset wouldn't be good either. My opposite theory is that if concrete cures better if kept wet, then wouldn't thinset be stronger? Two sides of the same problem.

You'll be fine!! If the tiles are set with 100% coverage, water will not seep underneath the tiles.
 
OP
W

wesalexleft

Well-known member
Joined
Apr 13, 2011
Messages
146
Location
Memphis, TN
Here's another mini-update. All the tile is finally down. I plan to begin grouting this evening and hope to be finished by Thursday evening. All-in-all, I'm very pleased. The tile could have had a little more level in a few spots, but considering what I had to start with, this should be MUCH better in the long run. I did use the Schulter Reno U (aluminum) at the entrance edge. This was the only cut tile running the width of the garage as the first row at the innermost wall was started with a full row. The edge should protect and soften the lip for rolling things into and out of the garage
 

Attachments

  • Tile angle view small.JPG
    Tile angle view small.JPG
    73.5 KB · Views: 382
  • tile finished small.JPG
    tile finished small.JPG
    96.4 KB · Views: 403
  • shulter reno U small.JPG
    shulter reno U small.JPG
    79.6 KB · Views: 538
Last edited:
OP
W

wesalexleft

Well-known member
Joined
Apr 13, 2011
Messages
146
Location
Memphis, TN
The floor is done and here are a few final pics. I do plan on painting the stub wall concrete white to match the baseboards as well as possibly glue some PVC quarter round down along the stub wall to cover the expansion gap between the tile and wall. Lastly, I need to pour/make a small step by the man door. Other than that, it's done. I will say it was an absolute pleasure to sweep/vacuum the tile compared to the concrete. Here's hoping I did a good job bedding the tile and won't have any cracked tiles for a while although I do have plenty of spares.
 

Attachments

  • garage floor finished.jpg
    garage floor finished.jpg
    128.9 KB · Views: 335
  • garage tile finished.jpg
    garage tile finished.jpg
    127.4 KB · Views: 326
  • garage panorama.jpg
    garage panorama.jpg
    118.7 KB · Views: 369

SapesOfIndia

Well-known member
Joined
Feb 9, 2013
Messages
130
Location
Atlanta, GA
The floor is done and here are a few final pics. I do plan on painting the stub wall concrete white to match the baseboards as well as possibly glue some PVC quarter round down along the stub wall to cover the expansion gap between the tile and wall. Lastly, I need to pour/make a small step by the man door. Other than that, it's done. I will say it was an absolute pleasure to sweep/vacuum the tile compared to the concrete. Here's hoping I did a good job bedding the tile and won't have any cracked tiles for a while although I do have plenty of spares.

Looks Awesome!!
You should be very proud of yourself.
 

OJ Bartley

Well-known member
Joined
May 18, 2009
Messages
605
Location
Toronto, ON
Great job! It looks really good, and I think the extra time you took has definitely paid off.

Any chance you can give us some more info on the ramp? That's exactly what I want to do, but I'm still not exactly sure how to go about doing it. Do you have any closeup or "in progress" pics? Did you look at the "Reno Ramp" at all instead of the "Reno-U"? Does it seem nice and solid, enough to hold up to driving over? Aluminum vs stainless?(sorry, lots of questions, but this isn't covered in much detail anywhere that I've found yet. Thanks!)
 
OP
W

wesalexleft

Well-known member
Joined
Apr 13, 2011
Messages
146
Location
Memphis, TN
I used the Reno-U ramp. It's carried by both Home Depot and Lowes here which was my main reason for going with it along with price. The Reno Ramp was going to be very pricey for my 18' opening which would have required 3 sections. I don't have exact numbers, but I think the Ramp was around $70.00 per section where the "U" was about $15.00 and I needed 3 sections.The Reno-U is MUCH less expensive. It's almost a 40 degree bevel with about 1/2" in length leading away from the tile. It's pretty solid when laid against the concrete, but if you wanted to take the time and fill the underside of the ramp with morter or grout, I would imagine would make it as solid as anyone needed. Sorry, no "in progress" pics, as it was the last row to put down and by then I was just ready to get it done. Basically, there is a cutwork tab edge to the ramp that goes underneath the last row of tile. the thinset will go though the cutouts on the ramp locking it in place. I've already rolled my loaded HF 13 drawer over it two times and it didnt budge or dent.

P.S. I'd like to thank everyone for helping and commenting along the way, but especially Dakota00, slickgt1, duneslider, and ZEKE for pushing me past my analysis-to-paralysis issues during the project! Last night was my first "mess" on the tile and it was a cinch to clean. I'd tracked in water, mud, and some antifreeze spills. Came right up.
 

OJ Bartley

Well-known member
Joined
May 18, 2009
Messages
605
Location
Toronto, ON
Thanks guys. I've been looking at both of those, and other transitions. the Reno Ramp just looks so perfect, but at that much of a cost increase I don't blame you ar all for going with the more readily available Reno-U. It still gives you an awesome looking finished edge.
 
To avoid these ads, REGISTER NOW!
Top Bottom