To avoid these ads, REGISTER NOW!

Steve Bryant's Blackhawk Jack Thread

To avoid these ads, REGISTER NOW!
OP
S

Steve Bryant

Active member
Joined
May 18, 2010
Messages
30
Location
Wichita, KS
Steve,

I think I have a ram plunger packing nut for you, haven't seen it yet but should have my mitts on it next week.....I'll let you know

I looked over my two S-4's and I'm missing one power unit and one handle assy.....:headscrat
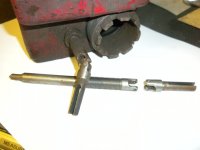
........I do have one complete S-4 rebuilt that has one side of the handle busted off and missing, so that's something I'll have to scrouge up....

The remaining S-4 power unit is ???????? and the handle assy ???????......:mad:.......hopefully it's just tucked in some corner and not chucked out with the scrap metal........

Willy-C

This would be great! Also, I'll give you a call this week to discuss my rebuild strategy. Thanks for your help.

Steve
 
OP
S

Steve Bryant

Active member
Joined
May 18, 2010
Messages
30
Location
Wichita, KS
All,
I have just now spent some time catching up on the posts of the past week. I want to thank you all for your information. This is a goldmine for me!

Once I have the hydraulic portions of the jack working properly, I have another issue to be dealt with. That is the fact that the casters have a very short pivot axel that goes into the cast iron lugs on the sides of the jack. Each side of the jack including the caster lug is a one piece casting. Over the years, the loads on the casters have "wallered out" the cast iorn bores as well as worn the pivot axels and the casters can touch the sides of the jack body. I'll take some pictures of this and post them. My initial thought is to bore the caster lug holes to an oversize diameter and install a bronze or cast iron bushing. Alternately, if I could find someone who would fill the eroded out areas in with cast iron welding rod, the lugs could then be rebored to the proper size. In any case, I'll also need to do something on the pivot rods/axels.

Thanks again,

Steve
 

Willy-C

Well-known member
Joined
May 16, 2011
Messages
46
Location
Hooksett, NH
Welding would be a good option if you can find someone with a bridgeport to bore out afterwards.....

Here's a pic of the ram plunger packing nut I found for you....PM me with your address and I'll get it out in the mail...
 

Attachments

  • Springtime 069.jpg
    Springtime 069.jpg
    31.9 KB · Views: 55

Willy-C

Well-known member
Joined
May 16, 2011
Messages
46
Location
Hooksett, NH
No spare parts for ol' Bully-boy, then? :(

Bull, What parts do you need.....

I have two parts here but I don't know if the owner of the parts wants to part with them......

I could measure them if you need to copy/machine

BTW, I found the S-4 power unit that was lost......:rocker:
 

Attachments

  • Springtime 068.JPG
    Springtime 068.JPG
    111.2 KB · Views: 78
OP
S

Steve Bryant

Active member
Joined
May 18, 2010
Messages
30
Location
Wichita, KS
Welding would be a good option if you can find someone with a bridgeport to bore out afterwards.....

Here's a pic of the ram plunger packing nut I found for you....PM me with your address and I'll get it out in the mail...

Willy-C

You da man! I've sent you a PM with my address, etc. Also, I've reviewed your detailed rebuild instructions a couple of times.

Thanks again,

Steve
 

Bull

Super Moderator
Joined
Dec 12, 2005
Messages
16,189
Location
MA
Bull, What parts do you need.....

I have two parts here but I don't know if the owner of the parts wants to part with them......

I could measure them if you need to copy/machine

BTW, I found the S-4 power unit that was lost......:rocker:

The shorter of those two pieces I am missing, for sure. There are some other pieces that I am missing, too. I will have to take a close-up photo of my exploded parts diagram and show you what I am missing.

Here is a link to the thread on my jack:

http://garagejournal.com/forum/showthread.php?t=84859&page=3&highlight=bull's+jack

In my eagerness to talk to you, I have really been impolite about hijacking Steve's thread here, about his jack, and he's too nice of a guy to tell me to buzz off.

I just posted pics tonight of my handle top, after removing it. Someone cut the linkage rods inside of it. :(
 
OP
S

Steve Bryant

Active member
Joined
May 18, 2010
Messages
30
Location
Wichita, KS
Willy-C,
I can't believe the speed of the USPS. I got the nut today by lunchtime and it fits just right! This is great!!!

Thanks so much,

Steve
 
OP
S

Steve Bryant

Active member
Joined
May 18, 2010
Messages
30
Location
Wichita, KS
I want to show you good folks a progress report. First I'm going to show some special homemade tools that I've made for this project thus far.


The first thing that I'll talk about are the two wooden devices that are clamping accessories to be able to clamp the pistons and rods that need to be sanded and polished to improve the surface finish to an acceptable level, get rid of rust, etc.

The device on the left is a clamping device to hold the ram or load piston and pump piston in a shop vice without marring the surface of the pistons. The clamping force is distributed at ninety degree intervals to try to maintain concentricity.


The device that is third from the left is also to hold pistons and shafts for polishing.


I'll do a few more posts in the next day or two as I have the pictures ready, I just have to organize things a bit more. Note, if you click on the icon once, you'll get a larger picture. However, If you click on the larger picture and select the Full Screen option, you'll get an even larger picture yet.
 
Last edited:

Bull

Super Moderator
Joined
Dec 12, 2005
Messages
16,189
Location
MA
Guys like you impress the heck out of me, Steve. Great job on those specialized tools.
 

Willy-C

Well-known member
Joined
May 16, 2011
Messages
46
Location
Hooksett, NH
Steve,

Here's pics of some of the whip sanders used in our day-to-day work......(one is almost 7' long)

3/8" dia turned down on one side (1/4") to accept die grinder....the opposite side cut a slit for paper.....

They allow you to reach in and polish out bores not easily done with conventional hones
 

Attachments

  • codderman 025.JPG
    codderman 025.JPG
    109.2 KB · Views: 73
  • codderman 026.JPG
    codderman 026.JPG
    137.9 KB · Views: 70
OP
S

Steve Bryant

Active member
Joined
May 18, 2010
Messages
30
Location
Wichita, KS
Thanks Willy-C for the pictures and thanks so much for your wonderful idea!

For my version of your whip sander (device shown on the far right side of the first picture), I just took a "tootsie roll" sander arbor for my die grinder and split the end with a hacksaw. I also found that the sanding/honing action is better by offsetting the distribution of the crocus cloth to one side since a half and half distribution causes the back side of one half to partially shield the grit side of the other half.


Willy-C

Well-known member
Joined
May 16, 2011
Messages
46
Location
Hooksett, NH
I don't know if you can see it or not but you can play around with different ways of attaching the sandpaper....the 2" wide didn't seem to have the rpms to be effective

in one pic you can see the 1" paper is folded lengthwise to do skinny grooves.....and you can also double up (fold in half) then mount in tool in the center......amazingly as you said it self centers and does a fine job (even on ID threads too).......you can experiment with grits but 180 seems to be right for what w do......

Our main objective is to clean up enough to tell if it needs real honing......And it's quick.......since using this method we have not used the spring-type brake hones.....No need to....
 
OP
S

Steve Bryant

Active member
Joined
May 18, 2010
Messages
30
Location
Wichita, KS
The second tool from the left is an inner compression nut spanner adapter that I made after Hiball brought up the points he did about using a tool like a punch, etc.

I stuck the inner nut in my pocket and went to a nearby Ace Hardware and started looking around for a cylindrical object with the correct wall thickness, length, diameter, etc to make a simple adapter. I found an end cap for a 2" plastic plumbing drain line that was almost perfect. Then I bought a pair of 1/8" drill bits to act as spanner pins of the correct diameter. My plan was to use this in conjunction with my existing adjustable spanner with .250" pins.


Here's the end result.


Here's what I did to get there. First I planned to have 1/2" of the pins embeded into the plastic with just shy of 1/4" protruding into the nut. So I scored lines on each drill bit at 3/4" to make a clean break. The bit was stuck in the vice at the break line and I just gave them a gentle tap with the hammer to break them off. Then I did a preliminary smoothing on the grinder.


Then I set up my drill press (Shop Smith) to drill the holes 1/2" deep. and drilled one hole and drove in the drill bit pin. Next, I marked he 180 degree point on the nut with a pencil and inserted the adapter into the nut with just the one pin so that the adapter would be properly clocked or registered to the nut. Now I transferred the 180 degree pencil mark over to my plastic adapter with the trusty #2 lead pencil and proceeded to drill the second 1/8" diameter half inch deep and drove the second pin in that hole. I also drilled two 1/4" holes in the top part of the cap to accomodate the spanner pins. Now, the 1/8 inch hole centers were about 1/32 of an inch too close together so I heated up the sides of the adapter a bit with my heat gun and put a little gentle pressure on the cylinder to make it oval/eliptical in shape and get the hole centers exactly right. Then I put a little pressure on the adapter with a light weight woodworking bar clamp so the adapter would hold the desired distortion until it cooled off completely (about 20 minutes). I don't know yet, but I believe that this will work like a champ.

I also made a special spanner wrench for the inner nut of the pump piston. I forgot to take a picture of this but I'll plan to do so in the future. Also, I'm kind of a nut about making special tools/jigs/fixtures because I've worked for the past 35 years for an aircraft manufacturer. Also, in a lot of woodworking and cabinetry projects, I've made and used a number of fixtures to ensure precision, repeatability and the like.
 

Elroy

Banned
Joined
Oct 15, 2005
Messages
3,467
Location
kentucky
Looks like you discovered drill bits have soft shanks. Why not simply cut them off cleanly with a die grinder or a dremal ? You could probably cut one with a fine tooth hack saw. :headscrat

Regardless, looks like you're on your merry way to a happy rebuild. :thumbup:
 
OP
S

Steve Bryant

Active member
Joined
May 18, 2010
Messages
30
Location
Wichita, KS
Elroy,
I believe that a fine-toothed hacksaw is the best method as it weakens the metal the least. I just grabbed the needle file and hamer because I was in a hurry and I had the tools at hand immediately (my hacksaw and die grinder were in the garage and I was in the basement near my table saw.
 
Last edited:
OP
S

Steve Bryant

Active member
Joined
May 18, 2010
Messages
30
Location
Wichita, KS
I just wanted to report that I've had a temporary work stoppage due to a couple of things. One was an unfortunate encounter with a weed eater string that was spinning away. It whacked my right hand on the back side in about thirty places. Well, that's all healed up, but I came down with shingles over the last several days (second time in 8 years ... a real bummer). This time we caught it much earlier and the doctor started me on an anti-viral, a pain killer for nerve endings and some prednisone (steroid) to reduce inflammation. I'm already feeling a little better, but shingles is a bad deal (adult recurrence of chickenpox with terrible shooting pain). There is a vaccine that you can take to prevent it, but there is some question as to whether or not it's a 100% prevention. Once I'm better, I do plan to take the shot, BTW. I'd advise this vaccine for any of you who are over 60 who have had chickenpox and for anyone who's never had chicken pox.

Now as to the progress that I've made in the last several weeks. I do have the complete hydraulic power unit reassembled and I've cleaned and straightened the threads on all of the fasteners. Cleaned rust off all shafts, too. Next, I'll temporally reassemble the jack and check the operation, any leak down issues, etc., using my 3/4 Ton, 4X4 Yukon XL as a test load. If all is good, I'll take the jack to my local jack repair place and have them load test it and be sure that the overload relief is set at a reasonable point. I figure that 10,000 pounds is reasonable to protect the jack structurally and give some reserve for the future in case the overload setting decays a bit over the years.
 
To avoid these ads, REGISTER NOW!

Willy-C

Well-known member
Joined
May 16, 2011
Messages
46
Location
Hooksett, NH
Steve, Speedy recovery to you....Hope all is just temporary....

I wouldn't go to 10,000# on that overload......in a perfect world 10% over would be pushing it.....especially if the saddle bracket is worn....

I'd put it to 8,000# (OEM) with the lift arm raised up 6-10" .....if anything I'd drop it down 10% just cuz it's an oldie......

Best of Luck,

Bill
 

Hiball

Well-known member
Joined
Apr 30, 2009
Messages
14,027
Location
Missery
Steve, Speedy recovery to you....Hope all is just temporary....

I wouldn't go to 10,000# on that overload......in a perfect world 10% over would be pushing it.....especially if the saddle bracket is worn....

I'd put it to 8,000# (OEM) with the lift arm raised up 6-10" .....if anything I'd drop it down 10% just cuz it's an oldie......

Best of Luck,

Bill

I agree 100%, Your gonna be hard pressed finding a hydraulic shop that will set a Overload above the Jacks Rating.
 

Willy-C

Well-known member
Joined
May 16, 2011
Messages
46
Location
Hooksett, NH
Hiball, do you set them with the lift arm up a little too..??

I used to use 6" as a giude.....of course they will lift up more as the leverage changes higher.....

WC
 
OP
S

Steve Bryant

Active member
Joined
May 18, 2010
Messages
30
Location
Wichita, KS
Thanks guys for the input. My brain is too much into the world of aircraft certification. I'll probably derate the overload setting to 7,000 pounds at 6" of lift on the saddle. That's more than adequate for anything that I'll ever lift and I absolutely don't want to be dangerous about anything.

On the health front, I am feeling better. I believe that I got started on the anti-viral in time. When I had shingles in 2003, I was being a typical stoic (AKA stupid) guy, and I didn't complain or go to the doctor until it was far too late. We were on a vacation trip associated with our thirtieth wedding anniversary, and I kept quiet about the pain I was feeling because I didn't want to spoil anything (not smart). This time I've done better and confessed my situation far earlier and good is coming out of it.

Thanks again on the advice!!!
 
OP
S

Steve Bryant

Active member
Joined
May 18, 2010
Messages
30
Location
Wichita, KS
I have excellent news. The jack works just fine!!!! :bowdown: :beer:

There have been some recent difficulties in getting it to work. After getting everything reassembled, the ram would lift slowly, but it would not hold pressure and when I pumped the handle there was a big swirling of fluid in the reservoir. I put my clean fingers down in the fluid and verified that the release valve was leaking badly. I removed the hydraulic power unit from the jack frame and drained the fluid. Then I looked at the needle valve and the valve seat with an LED flashlight. The seat appeared to have a crack or flaw at the six o'clock position.

I took the power unit to my friends at Repairman Jack here in Wichita. They first tried to re-grind the needle valve seat, but determined that the seat truly had a pretty deep crack that could not be ground out. So then they called me and asked if I wanted them to try to grind a ball seat and use a ball plus grind the nose of the needle to a flat surface. They brought up that if the release handle were backed out too far, the ball could fall out into the reservoir. I said yes, give that a try. They did and it works great!!!

This afternoon, I took my frame down and we verified that the jack held pressure with no leak down at a lifting force of 8,000 pounds. Then we re-set the pressure relief valve for 7,000 pounds. I still have work to do to the frame and rear casters a bit more before I will be satisfied with the mechanical soundness of the jack. I plan to use it for several projects this fall and then disassemble the frame once again and get it sand blasted. Then I will prime and paint the jack (either late this fall or next spring).

I'll take some more pictures soon and show the jack reassembled in its present condition. Then, I'll add some more pictures and documentation as I do the paint work.

I owe a big thanks to all the folks at Repairman Jack here in Wichita ... especially Andy Nold who helped me disassemble parts of the jack initially and reground the seat and set the pressure relief valve.

Steve
 
Last edited:
OP
S

Steve Bryant

Active member
Joined
May 18, 2010
Messages
30
Location
Wichita, KS
OK, here's a picture of the jack in actual use.

RebuiltS-4LiftingK2500YukonXL-FirstLiftSinceRebuild.jpg


I'll be chronicling more of this restoration in coming months. I want to do a little work on the rear casters and then simply use the jack for a few months before working on the cosmetic stuff.

Thanks for everyone's help and support to date!

Steve
 
Last edited:

FuelRoadster

Member
Joined
Aug 19, 2011
Messages
5
Location
Lakewood Calif(Long Beach)
I'm new to the Garage Journal and I'm looking for advice on a BH--SJ2--1-1/2 Ton Floor Jack.
Ive had it for about 17 yrs & has served me well until recentley.
I'm assuming it's bypassing internally as theres no oil leaking on the ground,but it wont hold anything up without slowly coming down(I always use jackstands)
I see there's a kit available for 70 bucks at www.blackhawkparts.com.
(#67401X).
Ive been a general auto technician since day one(retired now) so my question is this something I can handle,or,is it better left to a specialist like a car/truck radiator?
(A little history on this jack,,,I had a neighbor back in '95 that was going thru some bad depression from losing his Father.I looked over at his house 1 day & he had the jack out by the curb with his full trash cans.I went over & talked to him about it & he said "take it" along with a box of other tools including a nice old tach/dwell meter & Crafstman dial-back timing lite.With general maintenence/lubrication,the jack worked perfect for my jobs at home until now)
Thanks for your time & help.
 
OP
S

Steve Bryant

Active member
Joined
May 18, 2010
Messages
30
Location
Wichita, KS
FuelRoadster,
I bought my rebuild kit in 2004 or 2005 from www.blackhawkparts.com and I can say that they are great people to deal with. Their kit contained well-made parts, was complete and they have been very courteous to give me council and advice long after the sale.

However, that being said, I bought this kit long before I knew anything about www.garagejournal.com or one of its fine members, Hiball, who is a railroad engineer by profession and a great jack rebuilder who sells kits too. If I were doing this project now, I'd buy the kit from Hiball (you'll see his posts on this and other threads).

If you want a project and are willing to do some research on learning what part of the jack does what, I'm confident that you could get your jack to work well in time. Again, knowing what I know now, I just might send the hydraulic unit of my jack directly to Hiball and focus on other aspects of the jack restoration. However, I was already into dissembly, etc. before I knew of Hiball and I did enjoy the process.

Why don't you send Hiball a PM and talk with him about your options. You can't go wrong to investigate this a bit. The good folks here at GJ will try to be helpful to you along the way regardless of your choice.

All my best,

Steve
 

Griff93

Well-known member
Joined
Jul 25, 2009
Messages
1,121
Location
Huntsville, AL
You guys are inspiring me to get to work on going through my S-4. I'm going to try my hand at making some control rods at some point. Both Bull and I need one.
 

FuelRoadster

Member
Joined
Aug 19, 2011
Messages
5
Location
Lakewood Calif(Long Beach)
Hey thanks Steve! I've PMd with Hiball & I'm going to get a kit from him,,,prob next week.
Thanks for your input too,and I think Im going to freshen up the cosmetics on the SJ2 while it's apart as well.
The handle has a few burn marks on it from launching bottle rockets from time to time!
Thanks again.
tc
 

semis57

Member
Joined
Jan 18, 2012
Messages
7
Boy am I ever glad to have found this thread. Here is the situation. My late dad had an S4 in his garage, which none of us boys had room or a use for- plus it leaked like crazy. Despite that it was still very special to us, so when we sold the farm we kept the jack. Recently we donated it to a transportation museum which also has a restoration shop where we hoped the jack could be restored and used.

Unfortunately upon tearing the jack apart, it was discovered the lifting arm was broken and repaired at one time. Since it's cast and hard to repair reliably the museum will not restore it to put it into service.

I am hoping to find another lift arm perhaps out of a jack that is laying around for parts, or one that has other issues like a missing cylinder or something.

It would mean a lot to me and my family if this thing could be repaired, brought back into service and used in the restoration shop. If you knew my dad then there is no more perfect place for that jack.

After reading this thread I'm hoping someone can help me locate a lifting arm? Are there many differences between the S4's built over the years, or will any S4 lifting arm fit?

Thanks and I look forward to your replies!
 
OP
S

Steve Bryant

Active member
Joined
May 18, 2010
Messages
30
Location
Wichita, KS
semis57,
I hope that you can find the parts you need. I suspect that some of the folks who have posted on this thread may have the lifting arm that you need. Somewhere in North America, there must be a few S-4 jacks that could be parted out.

Good luck to you. Also, if you want to write me an email or call me I'm open to that. Just send me a PM.

All my best,

Steve
 

jxxxoxxxe

Well-known member
Joined
Feb 15, 2007
Messages
265
I'm jealous...I've really been wanting to find an old S4 to restore. There's one for sale about 20 miles from me, but its missing the raised BlackHawk lettering cover plate. The guy says he never had it. If I could find one of those first, I'd see about possibly getting the jack...

I searched a lot of BlackHawk threads a couple weeks ago, and never found a place to buy old parts like that...
 

Hiball

Well-known member
Joined
Apr 30, 2009
Messages
14,027
Location
Missery
I'm jealous...I've really been wanting to find an old S4 to restore. There's one for sale about 20 miles from me, but its missing the raised BlackHawk lettering cover plate. The guy says he never had it. If I could find one of those first, I'd see about possibly getting the jack...

I searched a lot of BlackHawk threads a couple weeks ago, and never found a place to buy old parts like that...

I Have Tons of Old Hydraulic Hard Parts and Know for a Fact that i have a s4 Coverplate.
 
To avoid these ads, REGISTER NOW!
Top Bottom