To avoid these ads, REGISTER NOW!

Stooge's longer term car projects

OP
S

Stooge

Well-known member
Joined
Mar 24, 2013
Messages
3,533
Location
South Shore, MA
A whole lot of stuff that doesnt really look like much! Rear is pretty much done, all of the cables are lines are in and eveythings been tidied up and secured to be pretty fail safe if something fails. I think all thats left is needing a new driver side parking brake cable. Also, Hoping to get the bed back on this week so i can drill for the bed bolts and bushings. brakes lines are done and the fuel line is complete now. Did it in 4 (sort of) sections of aluminum line and managed to snake through the frame stiffeners in the crossmember. The last section was sort of a mickey mouse solution, as i wanted a filter right infront of the mechanical pump, but the inlet fitting is facing right into the frame and close to the crossmember brace. Flared the end of the tubing coming out of the stiffener to act as a hose clamp barb for some rubber line into a u bend to go into the pump. Not the prettiest but seemed to be the least constricting flow path that i could fit.


Clamps for stainless braided trans cooler lines are on order


There have been these old valve covers sitting on top of a cabinet in the garage and i had always thought of going with finned covers, it just never occured to me to try them out. I may need some a bit taller to allow for some rocker clearance, or if i use these maybe use a valve cover spacer, and i would go with black instead of red. Also planning on using one of the mid-late 50s oldsmobile air cleaners, although im expecting to have to screw around with it to clear the hei and also maybe the height since theres not too much hood clearance

Not too sure of their age, they are pretty beefy cast aluminum and cleaned uo well. Along with the breathers and oil fill, theres a pcv grommet space that it looks like someone drilled


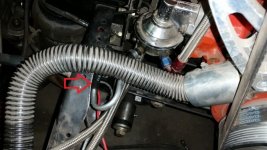
obviously the wiring will be tidied up and i'll use an ignition wire loom/seperators to pretty it up


And an example of the air cleaner im referring to, will stay black and the red area on the fins will be painted black to match, but am also considering painting them to match the dash color im going with


I wish i painted the engine black last time it was out
 
To avoid these ads, REGISTER NOW!
OP
S

Stooge

Well-known member
Joined
Mar 24, 2013
Messages
3,533
Location
South Shore, MA
And a little GTO work this morning that i didnt think would have to be done because stupid me thought the sheet metal that was there would be usable.
Doesnt look as bad in the picture, but theres alot of rot, brazing and bondo all in there


Old folder template


Slightly oversized new piece


Sacrificial HF chisel tip hammer to help make the new piece


Needs some trimming around top edge and some more hammer and dolly work before it gets burned in, looks a little better in person, this phone really highlights all of th dings!
 
Last edited:
OP
S

Stooge

Well-known member
Joined
Mar 24, 2013
Messages
3,533
Location
South Shore, MA
a few little things I've been working on the last few days
Pulled the front end apart for paint and to touch up a few spots on the frame to make it a little tidier looking
Hopefully apart for the last time


Some etching primer and a few coats of tractor implement paint


unfortunately I forgot to include the upper control arm cross shafts, i really didn't want to clean the gun out for just those 2 small things and i was out of black rattle can, so i went at them with a few varying coarses of sandpaper and scotch brite and did a few coats with some rattle can clear coat. not sure how it will hold up, but i like the contrast of the metal on black, although it has a little more brilliance in person


I bought a new grille piece and had to re-use the stainless center grille moldings but it had the messed up and faded old color matched stickers from the factory. Used some paint stripper and scraped it all off with razor blades, and used some white 3m vinyl tape in its place. I have no idea how long that will last but it looks alright for now. Anything involving stickers or glues im usually pretty awful with, i think i don't have the patience or coordination. Theres a bunch of trim clips i need to buy, new grille and bezels didnt come with any threaded inserts and i neglected to buy them, along with some hardware i need.


And with the new plastic grille and new headlight bezels because mine were cracked in a few spots and getting chalky, and new ones were only $15, if that.


The new bumper, brackets and grille stuff were delivered this week. To my surprise with the battery being moved to the rear of the frame, i didnt screw myself almost at all and was able to use all of the brackets with the exception of one frame bolt, and i might even be able to use it depending on how the final battery will be sized. Bumper and brackets came from Classic Industries and the license plate bracket came from Classic Parts a year or 2 ago and all fit nicely together, just need to find some screws for the license plate light housing

im sure i will regret putting this on without the bed the first time i smash my shin against a corner of it.


decided to try and make some new exhaust hangers to replace the off the shelf hook ones that didnt really work well for my application.
I had a general idea of what i wanted, would have been a nice job for a waterjet or laser, so i used a 4.5" grinder


Used the exhaust grommets i bought and since it was only 1/8 steel, i figured i would use a 1/2" dimple die to give it a little more rigidity.


Pretty happy with it, seems to work exactly how i wanted ,were nice and easy to make, and most importantly cheap. I think the clamps were $3 or $4 and i used 2 grommets out of a bag of 6, which were maybe $10
 
Last edited:

dlcwent

Member Emeritus
Joined
Feb 24, 2014
Messages
8,427
Location
coastal maine
Looking great Stooge. Keep count of the shin smashes over the next few weeks. I'm sure you'll be experiencing a few.

The tape job looks professional. So you are better than you think. And I've had good luck with it holding up and hopefully you'll have the same.
 

jimgood

Well-known member
Joined
Aug 4, 2014
Messages
2,394
Location
Marshall, VA
Stooge, nice work. Did you forget a hose clamp here?

attachment.php
 

Attachments

  • Untitled.jpg
    Untitled.jpg
    61.1 KB · Views: 710
OP
S

Stooge

Well-known member
Joined
Mar 24, 2013
Messages
3,533
Location
South Shore, MA
hah, I must have had it in and out half a dozen times so who knows what happened there! there's one in there now though, hidden behind that radiator hose with the hardline to a short piece of rubber fuel line, to the fuel filter, to more rubber line, to that 180* piece. a little crowded but I wanted to make it easy to replace the fuel filter when needed, and i can snake my hands in from underneath without much trouble.
I even bought some shiny line seperators/ clamps for the stainless braided trans cooler lines!
 
Last edited:
OP
S

Stooge

Well-known member
Joined
Mar 24, 2013
Messages
3,533
Location
South Shore, MA
Did a few things today that i had been avoiding and figured they would be sort of quick and easy things but were just frustrating. First was replacing the damaged driver side rear parking brake cable, wasnt too bad but just had to take the dr side drum apart and getting irritated with the 30yr old retaining clips on the cable. Moved the brackets to the inside of the frame and fially had a use for this bolt ive been holding on to, just sort of a cable guide with a few locknuts to bolt to a hole in the frame


Next was replacing the new speedometer i bought with the same one after im guessing i aired the truck out on it without having it secured to anything. Also installed the vss inline speedometer sensor for the B&M torque converter lockup controller and ran the wires for trans plug.....which took about half an hr to snake my big stupid hands around the trans with a not so spacious trans tunnel


an impulse buy from Bowler transmissions since ive been worried about grenading the 700r4 or having poor shifts due to the tv cable adjustments. Found a self adjusting cable end bracket and cable from Bowler, googled it for half an hour and read people having good luck with it and improving shifts and ordered it. Was a little spendy but i figure its cheap compared to a trans rebuild, of which ive had several lately in other cars. Came with a few different mini brackets that bolt to the carb base bracket, with one to accept the lokar throttle cable.

Again, my trans tunnel meant i was swapping the cables and trying to clip the hook from the transmssion , replace the grommet and bolt the clamp in completely blind so it probably took alot longer than it hould have, also had to drop my passenger side exhaust.


Supposedly just have to press the throttle to wot a few times and it self adjusts/tensions. Return spring arent in yet in this picture

threw the bed back on the truck so i could mark off where the bed floor bolt holes would need to be drilled as well as where to cut a hole in the gas tank for the new filler neck, i even got fancy and put down painters tape AND masking tape over it to make it easier to mark as well as not scratch up the under bits too much. Also had a chance to test out the body bushings im going to use for bed mounts. Underside of the bed floor needs to be cleaned up and patched so its not perfectly aligned yet but its workable.


And got to see it on the ground with the rear bumper on for the first time...still need to order the taillight patch panels for the surrounding section.


Also working on a plan to keep the shaved front cowl vents but still allow some air flow in through the kick panel vents, so i started finishing the shaved cowl.panel that i started a few years ago


driver side stake pocket/holes and i was lazy enough that i can say i didnt measure or mark anything. Eyed out a section of a piece of scrap.


Last edited:
OP
S

Stooge

Well-known member
Joined
Mar 24, 2013
Messages
3,533
Location
South Shore, MA
I was planning on working on something else yesterday but realized i forgot my floor jack at the house, so it was back to sanding, and was tired of looking at all of the different colored primers. Just did the driver side today, few spots to go back over before moving to the passenger side


After the first coat. primer gun was starting to act up a bit, ( notice the bottom half of the stripey door) and i ended up throwing it in the trash afterwards.


And after unmasking it and a light first pass. Few areas i need to go over but theyre alot easier to see without the 3 or 4 colored primers


OP
S

Stooge

Well-known member
Joined
Mar 24, 2013
Messages
3,533
Location
South Shore, MA
not much to see, mostly just trying to get the bodywork done while its together before I basically have to pull it apart again to finish up the inner fenders and firewall along with repairing the bed floor and locating on the gas tank where to cut the new fuel filler neck hole, but I need to align the bed before that. basically just a lot of 1 and 2 day projects and not enough free time to do them in.

got the rest of the body, (sans the inside of the bed) in primer to highlight what still needed work. also thinking of finding a stock hood on craigslist or something, the modified one isn't really doing it for me. i'll probably put it off to the side incase I change my mind, I could finish it and throw it on. it might be wishful thinking, but I'd like to get the back of the cab, the rest of the firewall, the inner fenders/ tubs and the door jams painted when I have it all apart again, so im going to have to make a decision on paint a possibly interim/ possibly staying paint job, leaning towards some flavor of artic white so if I do want to full base/ clear job, it wont take as much work later on. the people who make that Hot Rod Flatz appear to also have a line of gloss, but I haven't really heard much about them, as well as the Restoration Shop line that TCP Global sells that seems to have good reviews for what it is, some paint to get it on the road and start enjoying it without having to be too paranoid about damaging the paint. I am going full base, flake, candy clear on the dash and center console though! :thumbup:

20160814_121850_zpsnavws8z5.jpg


lower tier devilbiss primer gun I had finally **** the bed

20160814_121606_zpswhz11yaf.jpg


so I splurged a bit and bought a sharpe fx3000 1.8 for primer and flake

20160819_171509_zps8p5hnhgi.jpg


and a tekna prolite for paint and clear. probably a little overkill but I think painting is something I'd like to pursue a bit more and didn't want something that would handicap me too much or be something I outgrew too fast

20160815_160345_zpsluzcziv3.jpg


first project with the flake gun, just some practice panel for masking and to see how it sprayed. sprayed nice but the flake carrier I was using didn't get along with the cheap single stage I had sprayed the panel with and caused some wrinkles and peeling, but that's what practice is for I suppose. was originally a black take off panel from a robotic automation table that a buddy at work builds and I moonlight over there wiring on occasion, he savess all of the panels and gives them to me for my various sheet metal projects.

20160819_195535_zpsf0i93bat.jpg


went for a ride in a buddy's 67 gto yesterday at lunch, built 488, kaufman heads, tremec 6 speed, corvette brakes, adjust front suspension, etc. a really fun car! enough motivation to finally warranty my starter when I got home and throw a new battery in the truck to hear it run. started easier than it has ever, although I've never bought a new battery for it and I think the starter must have always had an issue with it.

20160822_123729_zpsdozr650z.jpg


and wanted to try an agm battery since supposedly they are better at holding a charge while not being used and it was about the same price
20160811_170725_zpsu6t2jbrk.jpg


I was really aiming for a test drive in September, but im guessing it wont be until October unless I take a week off sometime and just work on it.

I haven't touched the 66 gto, the owner dumped like $30k into his daughters house and is tapped out. I liked working on it but its giving me more free time, I just wish he would pull it out of there so I could work on some other projects that people have been asking me to work on.
 
Last edited:

BBChevro

Well-known member
Joined
Jan 24, 2014
Messages
2,235
Location
Brisbane, Qld., Australia
Hey Stooge, I just caught up on the thread - I've obviously missed a few updates (like a couple of month's worth).

You might have to suggest to your customers that they start paying for storage - it would be bad enough with one lame duck taking up prescious work space, let alone two.

At least It gives you a chance to work on the truck.
 
OP
S

Stooge

Well-known member
Joined
Mar 24, 2013
Messages
3,533
Location
South Shore, MA
fortunately he is paying storage month to month, but having that boat of a car collect dust is taking up a lot of valuable real estate. I had words with him a few weeks ago, that it seemed like he was selling himself as a body guy and would do some sanding on the truck's hood and fenders and wanted to do some sort of trade in work. sounded promising from all of his stories, and unbeknownst to me and before we worked anything out, he started on a fender that was probably 90% done, sanded it back down to bare metal on portions and left some filler, and proceeded to make marks all over both the remaining filler and metal in thick, black sharpie, the kind that loves to bleed through everything....on a truck that is getting painted white. he ended up calling me while I was frustrated working on another car outside in the summer heat, and it came out and told him i would be handling the body work and to not touch my stuff if he's going to be doing **** like that. (im no pro, but if something on my car is going to look bad, I'd rather it be my fault!)

fixing that fender was kind of a good thing, as it sparked working on the rest of the bodywork a little more seriously. im taking the gto off the jackstands soon so it can be rolled in and out, and can gain some space for painting and pulling the bed on an off, maybe a quick project for someone else here and there. just need to make sure everything is put back together as i think he was doing something with the trans and motor mounts and i don't want any surprises
 
Last edited:
OP
S

Stooge

Well-known member
Joined
Mar 24, 2013
Messages
3,533
Location
South Shore, MA
I cant see what you posted, just shows an X instead of a picture. If it was referring to the fuel line? The flare is there to basically act as a barb for the clamp to stop against without being able to be pulled off.
 
OP
S

Stooge

Well-known member
Joined
Mar 24, 2013
Messages
3,533
Location
South Shore, MA
Wanted to get some little projects done that i had been putting off and also didnt feel like working too hard this morning

Bought some tube clamps off of ebay for the front soft brake lines, didnt look right just hanging frm the frame to the caliper. They fit the porterbuilt tubular arms, but the hole for the brake line had to be opened up considerably, (im assuming these werent meant for hardline on some sort of atv or motorcycle), and i also chamfered both sides with a conical die grinder bit to alleviate any potential sharp edges/being pinched that might occur.


Now i just need to figure out how to remove the stock clips without damaging the line


Next was unplanned until the other day when i was playing with the starter and accidentally sparked from the stainless braided trans cooler lines, and also wanted to space it away from the header a bit. I had bought some nice billet specialties line seperators but they didnt have anything to secure them to. Drilled out the threaded side and found a longer 6-32 bolt. That along with a double sided female thread standoff and a bracket i had in my random hardware box and ended up with this


And finally started on the shaved cowl air passage. Basically just a rectangular hole cut to the outside of the pinch seem on the lower firewall into the tunnel from the shaved cowl to the kickpanel. Spent some time finding an air filter that would fit and found a k&n one for some sort of british/euro only honda motorcycle, i think it was $50 so i only bought one to test it before i bought the other one. The body of it is a stiffer plastic unlike the usual pliable silicone found on air filters and i had to cut off 2 of the tabs that were on the longer side, but overall alot less work than i was anticipating since i didnt end up having to build up an edge to compensate for the curve.

Used 10-32 rivnuts,still need to clean the opening up a bit and might find some tubing to use as a grommet


I might add some sort of bent panel to the side of the pinch seem to direct air to the filter and deflect debris kicked from the tires. Theoretically the filters are weatherproof and this wont be drivie in inclement weather so im not too worried about it. Im not sre how much air flow will be making it to kickpanel but better than nothing with it being copletely closed keeping the cowl shaved


xtremek

Well-known member
Joined
Apr 13, 2012
Messages
11,603
Location
St. Johns, Mi
I can tell you from personal experience that K&N's hold up pretty decent when totally submerged in water/mud, though they do need to be cleaned after said submersion. I like that, it's a neat little trick.
 

Chateau Slate 66

Well-known member
Joined
Nov 4, 2008
Messages
408
Location
Twin Cites, MN
A Bobcat Toolcat uses pretty much the same thing for inlet air to the cab. It's even in roughly the same position. They have a slightly raised metal cover that goes over the filter with horizontal louvers.
 
To avoid these ads, REGISTER NOW!
OP
S

Stooge

Well-known member
Joined
Mar 24, 2013
Messages
3,533
Location
South Shore, MA
I can tell you from personal experience that K&N's hold up pretty decent when totally submerged in water/mud, though they do need to be cleaned after said submersion. I like that, it's a neat little trick.

I think i still have a few cans of the cleaner and oil from when ive used the k&n cone intakes, luckily ive never had one submerged in mid yet!

hqdefault.jpg


Similar to this, only made in metal.

I like it! When i was planning this out i had been thinking of the flap vents that are found of modern car doors and was thinking of using an aluminum/stainless mesh filter like a grease filter or that is found in electronic enclosures. Probably would have been a little more robust but probably wouldnt have provided much filtering. I dont have a louver punch, but i think i could make a skin to fit over the filter and cut out some half inch round horizontal slotsto still allow for air flow and keep the big rocks out of it
 
OP
S

Stooge

Well-known member
Joined
Mar 24, 2013
Messages
3,533
Location
South Shore, MA
some less than interesting updates
The new Cadillac/ oldsmobile I bought air cleaner will have to be modified a bit to fit around the HEI and with the new throttle bracket for the special trans cable, i have to remove the throttle bracket to get the cover on. Also gave the flange of the brake booster a few whacks to gain a little clearance. I bought some valve cover spacers off ebay since i was convinced i needed them to clear the rockers, but upon closer inspection, i dont, so i guess those will go in the parts cabinet. The red on the covers will be painted probably black and probably flaked with rootbeer metalflake and might do some sort of scalloping on the air cleaner also with the rootbeer flake over black and maybe outlined with a pin stripe.


Looks better in person, but the camera really picks up how dusty everything is.....if this engine ever gets pulled out while i own it, its getting painted black and its getting the shiny version of these headers


Also figured out i cant use the ignition wire loom brackets that usually would hang off of the valve covers since the side breathers get in the way, so add that to the list of things to do over again.

Now the bigger milestone, Lets paint a firewall with an engine in place! Way to plan ahead!

Upol high build and first time priming with the sharpe fx3000 with a 1.8 tip. Took a minute to find a good pressure and adjustments but i like it! Nice to use, and seemed to work better than i was expecting of getting the whole firewall above the bell housing primed.


Got some color/white on everything after sanding everything to about 320 and going over it with red scotchbright pads. Few spots i couldve have spent a little more time on prettying up but overall im happy with it for a firewall/engine compartment on a driver. I finally got to use the Tekna/Devilbiss prolite and i'm a little bit in love with it! A real joy to use and came out better than i was expecting!
This was with the TE20 air cap, 1.3 tip, 24-25 psi using restoration shop arctic white from TCP global .i only bought a quart set up and was able to put 2 coats on just barely.


i had been planning on flaking only the under the hood pieces with a white/ "blow" metalflake, and I actually did. unfortunately, when I did a test panel spray out with, it worked fine and looked really cool so I went and started to do the driver side tub and it started to wrinkle after a few minutes. i'll have to sand that back down and paint it again but without the flake/ flake carrier, but atleast I had let it flash before moving onto the other pieces or I would've had to re-do a lot more than just an inner fender. im not sure what the difference between the test panel and the fender was other than a different primer or maybe it was sprayed on a little heavier on the fender. a little irritated that it cant be put back together right away and im all out of that white paint but I realized I was missing some of the pieces for the core support bushings so I would have needed to pull it apart again anyways. i'll buy a gallon of it the paint this time so i'll have enough to finish the body of the truck when it comes time to do it. I also think the Shoreline beige paint is coming in today for the lower half of the dash color so I can start doing the prep on the dash and console this week.

Also am going to start back up on the gto this week as he started paying me again.

im really happy with how the washer fluid cover came out. I never actually shaved my firewall, just kind of deleted a few things a t different times. I probably should have just gone back over everything but that will be for a different time.

20160919_195430_zpszgl63p74.jpg


20160919_195853_zpsmtj3pp91.jpg


you can see the drive side tub wrinkled pretty much everywhere :mad:

20160919_195841_zpswy5hz7ao.jpg
 
OP
S

Stooge

Well-known member
Joined
Mar 24, 2013
Messages
3,533
Location
South Shore, MA
Got the fender resprayed and had a little extra paint in the cup so i ended up doing a quick spray on the outside to give myself something to look at. The outside will end up getting repainted when i do the doors and cab since theres a spot or 2 i couldnt have spent some more time on. The drivers side fender will come back off for some undercoat or just rattle can black then can be put on permanently. Also ill probably wrap the hood release cable with white electrical tape since painting it didnt seem to work too well before chipping off


OP
S

Stooge

Well-known member
Joined
Mar 24, 2013
Messages
3,533
Location
South Shore, MA
ive been a big sinusy, sneezy, mucusy mess this last week so I haven't done much on the truck since sanding is the last thing I felt like doing when I cant breath, so its been a bit of gto work since he's back to paying. driver side sail/ B panel is basically buttoned up, although I need some more roloc surface finishing discs to pretty it up for body work, which will be minimal since its pretty close and will also be covered with a vinyl top.

so a little start to finish since this car skips around a lot in this thread

20150404_133810_zpsg4cw1ksm.jpg


Last edited:
OP
S

Stooge

Well-known member
Joined
Mar 24, 2013
Messages
3,533
Location
South Shore, MA


20160331_181822_zpsarbhyd41.jpg


20160331_184845_zpsdvq0if3e.jpg


the fluorescent light bulb/ tubes above that rear of the gto burnt out so the last few pictures look kind of ****** from either the camera flash and the drop light. keep forgetting to figure out what the bulbs are so I can find some replacements.
 
OP
S

Stooge

Well-known member
Joined
Mar 24, 2013
Messages
3,533
Location
South Shore, MA
Well its been awhile, now where were we! I wish I could say that I had been working on stuff this whole time, but I'd be lying. life gets in the way and sometimes you need to take a break from stuff. Bought a new interim air compressor a few weeks back to get back to working on the cars and get my mind on something else.

started back up on the gto since he started paying for some work again. I had finished the driver's side sail panel/ upper quarter a few months back, but still had to work to do on the passenger side. This side was slightly worse off to start with and subsequently was harder to make a duplicate of so finishing it off is taking a bit longer. mostly it was getting the end point correct to match the stock trim, where the roof line meets the trunk at a small point.

IMG_20170330_195429_707_zpsnup9evrt.jpg


there has been some ongoing adjustments that have to be made to the aftermarket rear deck panel, its a nice gauge piece but it seems as if the stamping of it was too shallow and slightly undersized in a few dimensions and does not exactly line up flush with the trunk. with the way it seats in a V groove at the rear windshield and the other end seats in the weather stripping channel, theres not a whole lot of play for where I could position it, but I think its just about right now.

20170401_192849_zpschb5ftol.jpg


I think part of the issue of it not lining up was due to the trunk never fitting correctly. when the car came in, the gap from the tail panel was great, but tightened up the closer it got to the front of the trunk and was slightly touching it, so it was not fully closing and seating as far down as it should have. I made an experiment slice at the corner of the weather channel to see if I could push it out a bit, that didn't work. so I took a chance and used a thicker cutting wheel and made a straight line cut from where the gap tightened to the front edge/ corner and pulled it back to close the new space created by the cutting wheel. the dykem and the paint that was still left behind make a shadow that looks a little off, but its nice and straight and passes the paint mixing stick gap test I was aiming for/ arbitrarily made up :lol:

20170402_135731_zps9fvsjtpb.jpg


And not to ignore the truck TOO much, I'm just about done getting the center console and dash ready for primer and paint. I had primed it awhile back, but made a few little changes and fixed a few things I wasn't completely happy with, and while I didn't completely start over with the body work of it, it was pretty close to starting over. the plan right now is to get a few coats of high build primer on during the week, a sealer primer by Friday and get the basecoat on Saturday, followed by flake, candy and clear soon afterwards. my shop has heat but its still been fairly cool out, so i'm hoping the weather cooperates and is above freezing this next week

Screenshot_2017-03-21-07-29-13-1_zpsymb4kayp.png
 
Last edited:
OP
S

Stooge

Well-known member
Joined
Mar 24, 2013
Messages
3,533
Location
South Shore, MA
A little later, (about a year) than anticipated, but the dash is finally seeing some color. I didnt have enough time this weekend to finish it, but i got the first color on, shoreline beige, few little spots i could be happier about so i might respray it later on in the week, and i'll start the heavy flaked root beer color that the upper dash portion and the seat divider will be.

U-pol high build primer and sealer


And had to throw some of the dash bits in just to see


The dividing line trim, clock and speedometer bezel havent been finished yet and are still bare aluminum and steel


Also did a little surgery on the driver side of the gto to get the gaps sorted and the trunk lid to sit correctly


OP
S

Stooge

Well-known member
Joined
Mar 24, 2013
Messages
3,533
Location
South Shore, MA
Tried my hand at chrome vinyl wrapping on some of the dividing line trim and the bottom of the speedometer bezel. Never did any type of vinyl wrapping before and its definitely not as easy as they make it look on the youtube videos! I wouldnt call it a complete failure but i definitely **** at it


OP
S

Stooge

Well-known member
Joined
Mar 24, 2013
Messages
3,533
Location
South Shore, MA
Finally finished painting these damn things! Changed my mind a few times and finally just made a choice and stuck with it the other day. The lower half of the dash is a shoreline beige base/ clear, and the upper portion of the dash is house of kolor shimrin solar gold basecoat, topped with a mix of monochromatic brown, gold and micro rootbeer metal flake from paint huffer metalflake and house of kolor intercoat and house of kolor clear top coat. Im no paainter and this is my "fanciest paint" so far, a few little flaws here and there, but for the most part, i couldnt be happier with the outcome


Im not sure if this will work, but a link to my instagram with a video of it to see it sparkle
https://www.instagram.com/p/BTzTlAqD2rQ/
 

Strouty

Well-known member
Joined
Mar 21, 2010
Messages
38,212
Location
Southern Maine
Looking really good! The goat's previous hack job reminds me of my first car, someone took another cars floor pans and put them in with huge overlaps, riveted them, then on the underside they used bondo to fill the gaps. It was bad. Of course I did not realize this until later on, I was relatively new to cars.
 

xtremek

Well-known member
Joined
Apr 13, 2012
Messages
11,603
Location
St. Johns, Mi
I love the colors. They're not for me, but I love them. I can't wait to see them on the rest of the truck. :drool:
 
OP
S

Stooge

Well-known member
Joined
Mar 24, 2013
Messages
3,533
Location
South Shore, MA
Looking really good! The goat's previous hack job reminds me of my first car, someone took another cars floor pans and put them in with huge overlaps, riveted them, then on the underside they used bondo to fill the gaps. It was bad. Of course I did not realize this until later on, I was relatively new to cars.

Thanks! I never really imagined that I would be working on the gto for this long, but every time I go to start something on it, I discover some other hidden garbage of rivets, brazing, plumbers epoxy or a lot of bondo. really adds a lot of time and makes it harder to fit up whatevers replacing it when you don't see where exactly the metal starts

I love the colors. They're not for me, but I love them. I can't wait to see them on the rest of the truck. :drool:

Up until I actually unmasked it sunday, I still wasn't sure if I messed it up bad with the color combination, and in person, its alittle more orange, but seems to shift quite a bit to a copper or brown from the 3 different colored flakes and the basecoat I used. probably wouldn't be the color choice for a lot of other things, but for the late 40's/ early 50's style I was going after, I think it really works.....plus I already had the basecoat paint and was originally going to use a rootbeer candy I also already had so that's what I was planning on using, but changed my mind at the last minute and tried to replicate the color with some new style flake a company recently released.

I'm pretty nervous about putting the dash in, its always been a fairly clumsy process from how big the dash is and that its going in a single cab truck :evil:
 
OP
S

Stooge

Well-known member
Joined
Mar 24, 2013
Messages
3,533
Location
South Shore, MA
Feel free to skip over those pesky words, I don't think I've read through it yet but 14 pages of what im guessing is just me talking myself in and out of things is too damn much!
 

xtremek

Well-known member
Joined
Apr 13, 2012
Messages
11,603
Location
St. Johns, Mi
Don't cut yourself short. I've read all 14 pages and they're a pretty good read. Not a Pulitzer, but enough good info and entertainment to make it worthwhile.
 

BBChevro

Well-known member
Joined
Jan 24, 2014
Messages
2,235
Location
Brisbane, Qld., Australia
Hey Stooge the dash paint combo looks great (I've had to play catch-up with your thread again :eek:). :thumbup:

The ½" thick bondo (on the GTO) reminds me of a '64 Chevy I had - the paint & bodywork looked good and straight except for a hairline crack on one door.
When I investigated the crack (by "investigated", I mean "poked at it with a screw-driver" :lol:) - I caught a roughly one-foot diameter chunk of bondo that was about an inch thick in the middle. :scared:

As usual, your work is inspirational. :bowdown:
 

dlcwent

Member Emeritus
Joined
Feb 24, 2014
Messages
8,427
Location
coastal maine
Wow Stooge, I'm very impressed (not because I didn't know how good you are)

The dash and console look awesome. Excellent job. Love the paint.
 
OP
S

Stooge

Well-known member
Joined
Mar 24, 2013
Messages
3,533
Location
South Shore, MA
Thanks fellas!

Don't cut yourself short. I've read all 14 pages and they're a pretty good read. Not a Pulitzer, but enough good info and entertainment to make it worthwhile.

I actually took the plunge the other night and skimmed through all of it! :lol_hitti a little rambling here and there, but I was mostly surprised by how many things I had forgotten about! .....but not surprised how indecisive I am :dunno:

Hey Stooge the dash paint combo looks great (I've had to play catch-up with your thread again :eek:). :thumbup:

The ½" thick bondo (on the GTO) reminds me of a '64 Chevy I had - the paint & bodywork looked good and straight except for a hairline crack on one door.
When I investigated the crack (by "investigated", I mean "poked at it with a screw-driver" :lol:) - I caught a roughly one-foot diameter chunk of bondo that was about an inch thick in the middle. :scared:

As usual, your work is inspirational. :bowdown:


Don't worry, there wasn't too much to catch up on, took a little winter hiatus. The gto's been such an unexpected problem child the whole way through and as much as I appreciate how much I've learned on it and the being given the chance to work on it, I wont be sad when im done with it! the owner has said there is a a spot on one of the lower quarters with a good bit of bondo, but doesn't seem interested in sorting it out now as its held up fine, but I guess we'll see when he starts doing the body work to get it ready for paint if its going to have to be metal repaired. Right now its, fixing the gap between the stock trunk and the aftermarket rear deck panel that's a little undersized, finishing the rear windshield frame and cleaning up all of the weld seems, then tackling a front cowl panel that sits right infront of the windshield. its been repaired before with brazing and silicone so I have a feeling its going to be a pain, but im atleast in the home stretch of it. theres a few small spots on the floors that need repairs and he's trying to skip them and do them next year or something, but im trying to convince him to just get it all over with now.

I know you've been following along this thread for a few years now, and I really appreciate the compliments and sentiments, really means a lot! :thumbup:


Wow Stooge, I'm very impressed (not because I didn't know how good you are)

The dash and console look awesome. Excellent job. Love the paint.

Well I will say im pretty surprised by how it came out! im pretty hard and critical on myself, but this is something that i'm really trying to let myself be happy with, especially considering the environment it was done in and that this was my first time really doing something like this. Really seemed like an endless project for awhile there. For not having a really clear idea of what I wanted the final product to look like, it came out exactly how I wanted it to :lol:

Dash turned out awesome!

Thanks Robert! im constantly impressed by the level of work you turn out and it really means a lot to me, coming from someone of your talent and skill.

And because everyone likes pictures, a few forgotten to post seat divider pictures, showing the door actuator buttons, led gear display, cupholders, accuair air suspension controller tray and little storage compartment below everything. the rectangular hole behind the remote tray will hold the Bluetooth stereo controller. I'm hoping to get the dash and console in place this weekend so i can do the rest of the test fitting. i will also be putting a small weather stripping/ gasket around the edges of the dash to give it a little cleaner look. the color of it all shifts quite a bit from the multiple colors and sizes of flake used, and is pretty hard to capture in a phone picture.


To avoid these ads, REGISTER NOW!
Top Bottom