"The wall" update
I continued the wall project by shopping some tools. I bought a new blade for my track saw. I have heard a lot of good about these Freud blades so I took one for test. Works great and cuts clean for a ripping blade.

I had some left over oak flooring, I try to use materials I have in stock as much as possible. So I made the drawers from those floorboards, covered the tool wall with it too.
I made same style "socket channel" as I have in my workbench. I think four sockets will do for this small workbench

I've been hunting a used Tormek sharpening machine so here's a good place for it if I find one.


Made a small shelf here for stains but ended up using it as a project hand plane shelf.
I made the bottom drawer so it sits on floor with rollers. This is a drawer for my Dewalt 717xps miter saw. It's a monster and hard to store so I dedicated a drawer for it. It would have required some heavy duty sliders so I went with rollers. It's also easy to pull under the bench all the way so lifting it up is a bit more ergonomic. I made the fronts from the same oak flooring. Covered the edges with melamine.


I managed to squeeze a saw blade storage on the same drawer. Did the measurements according the biggest blade I had, Then discovered that the Dewalt blades are 8mm smaller then the other brands. So had to do some fixing for three of the slots. I washed all my blades from lignin so they are ready to go when needed.


Top drawer was a bit of a tetris game, I fitted there my planer, router, track saw and all my nailguns and hey! space for some extra stuff too
And yes, I bought a new router for smaller accurate stuff. I picked up a Makita RP0900J for 135€. Haven't even test it yet but feels nice and compact compared to my old 2400watt wood-eater


I stored my nailers upright so I had to make dedicated slot for each one. That was a bit of a headscratch but now they sit nice and fits like a glove.
Then it was time to do some tool holders. I made a saw holder, bit/drill holder and two chisel/file holders.
First I made a wooden jig for my drill press so the wood stays clean. I clued thicker plywood from 12mm ply I had. Bit/drill holders have three layers and others have two.
Then I drilled a lot of holes and saw slots for tools. I made 20mm and 25mm holes for chisels and files. The handle size seems to be different in all of them


After sanding and gluing all together it was time for couple coats of finish. I tried to place the tool holders so that I have some room to expanse if needed. I have some old chisels to fix so its good to have some empty space.


I still have to do a mallet rack when the chisel rack starts to fill up. I thought I did a lot of extra holes for the bit holder but man, they fill up fast
I've been saving a brand new Milwaukee bit set for woodworking only. They tend to collect a lot of oil and crease when working with metal and motors.


I had a piece of leftover stacked ply so I made a holder for the hole punch set too.
So "the wall" is finished and I especially like the woodworking tool worship section. The wood smells great too
Rest of the multi function wall project is finished too, Here's my info wall.

I have rescued a couple of these white boards from the trash. These used to have a class door and they are used in an apartment buildings as an info boards.
After the class is gone there's some pretty funny notes in these boards
So they have to be replaced. The frame is glued together so the whole board has to be replaced.
These have a metal plate on the back so they work as a magnetic board too.
Nice thing to have some quick sketching and for bad memory.
Also made a coat rack to keep my different "uniforms" and stuff.


That was a big but nice project to do. It's always great feeling to take a step forward to get the shop organized a bit more.
I think now it's time for a new project. Maybe I continue my lathe restoration. We will see. Thanks for reading, these posts tend to be always tooo long
Have great day everyone


 Great minds think alike.
 All these Indian logos are cool from my perspective. Like Indian motorcycles, Pontiac etc. I understand if there's a controversy about Redskins or so.. But memorabilia? If this offends anyone I can switch to Texaco
 . Well done!
 RIP Kurt!


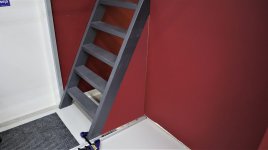
 Most would just roll their shop vac under the stairs and call it good.