To avoid these ads, REGISTER NOW!

testify's One Car Garage Remodel

testify

Member
Joined
Feb 9, 2014
Messages
15
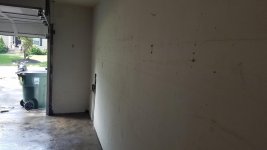
I'm remodeling my attached one car garage. I had my house on the market for the last year, and it di dnt sell, so I've decided to stay and make the best of it.

And we all know making the best of anything starts with an awesome garage!

Its tight and I want to do a few extensive car projects in here, so I plan to maximize floor space by installing a Proslat Slatwall for the household stuff.

To start, plans are:

Epoxy the Concrete
Paint the walls
Paint the wood platform
Install Proslat 4'x8'
New cheap toolbox
Tire shelves
Throw out as much junk as possible
Organize


FGLQWrV.jpg
 

Attachments

  • 20170517_151019.jpg
    20170517_151019.jpg
    143.4 KB · Views: 200
  • 20170518_150624.jpg
    20170518_150624.jpg
    150.5 KB · Views: 199
Last edited:
To avoid these ads, REGISTER NOW!

Bessy

Well-known member
Joined
Dec 18, 2012
Messages
1,008
Location
Ontario, Canada
Any chance the "household stuff" could be relocated to a small shed to make some more room? I always look forward to these single car builds, they are definitely the most interesting in terms of ingenuity!

Cheers!
 
OP
T

testify

Member
Joined
Feb 9, 2014
Messages
15
I started by removing all the junk from the garage and putting it in various rooms of the house. What a total mess.

Once that was done, I spent an hour really cleaning the floor with a broom and compressed air.

Removing the shelving was interesting. Every single screw and nail holding every single shelf in that garage was only through the drywall, not the studs. Needless to say yanking everything down took minutes.

After that, I washed the floor with some Rustoleum concrete cleaner etcher. My cement had some stains, so it was bubbling like a witch's cauldron.

While that was drying, I spent some time patching and painting the bulk of the walls, but did not finish as I wanted to move to the floor. I didn't get too crazy about making them perfect. There were a few areas of the drywall that needed attention due to holes or needing retaping.
 

Attachments

  • 20170827_153835.jpg
    20170827_153835.jpg
    147.8 KB · Views: 118
  • 20170827_153844.jpg
    20170827_153844.jpg
    147.9 KB · Views: 114
  • 20170822_144624.jpg
    20170822_144624.jpg
    147.2 KB · Views: 144
  • 20170822_144620.jpg
    20170822_144620.jpg
    145.4 KB · Views: 122
  • 20170825_132317.jpg
    20170825_132317.jpg
    97.5 KB · Views: 136
Last edited:
OP
T

testify

Member
Joined
Feb 9, 2014
Messages
15
Any chance the "household stuff" could be relocated to a small shed to make some more room? I always look forward to these single car builds, they are definitely the most interesting in terms of ingenuity!

Cheers!

Not immediately, but definitely in the future. My brother is moving back in here with me, and he paints houses, so he needs a place to put his stuff, and there is no way he's keeping his nasty painting **** in here.
 
OP
T

testify

Member
Joined
Feb 9, 2014
Messages
15
I decided to use Behr products since they were reasonably priced and easy to access at my local Home Depot, and because it allows me to know that all products will be compatible.

I started with their concrete primer, which is a very watery mixture, sort of purple in color, and is VERY sticky. I rolled it on with a 3/8" nap roller, but it didn't seem like the best method.

After that had time to dry, I put down the first coat of Behr Concrete Epoxy in Slate Gray. It rolled on very easy. I am really impressed by how easy this stuff is to work with.
 

Attachments

  • 20170827_145744.jpg
    20170827_145744.jpg
    144.3 KB · Views: 118
OP
T

testify

Member
Joined
Feb 9, 2014
Messages
15
The next morning I applied an extra thick second coat of epoxy and added some gray flakes.

I was pleased with the results, despite running out of flakes in the final 2×2 section.

If I could do it over again, I would use a shaker for the flakes, maybe a parmesan cheese type bottle or something to keep things more even. I just tossed them with my hand, and you can get a pretty even coverage that way, but went you drop too many in one spot accidentally, and you will, you'll be wishing for more control.

Pictures are with and without the flash on the camera
 

Attachments

  • 20170828_101439.jpg
    20170828_101439.jpg
    161.5 KB · Views: 102
  • 20170828_101428.jpg
    20170828_101428.jpg
    155.9 KB · Views: 89
  • 20170828_101425.jpg
    20170828_101425.jpg
    157.1 KB · Views: 78

bczygan

Well-known member
Joined
Nov 4, 2009
Messages
22,002
Location
DETROIT! Arsenal of Scrappers
Nice clean slate!

What are the uses going to be?

Don't store anything.

Everything should be tools to do tasks with.

Everything else goes elsewhere.

What's your location?

Bill
 
OP
T

testify

Member
Joined
Feb 9, 2014
Messages
15
My use will be almost exclusively car work.

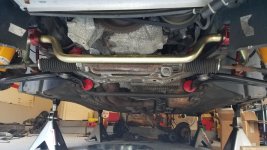
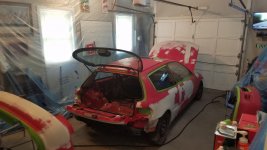
I will share my car projects with you gu6s as I do them. First up is an extensive rebuild of my 96 BMW 328i. I'm going to rework the suspension and give it a new paint job. I've owned the car 19 years and the paint is getting a little tired.


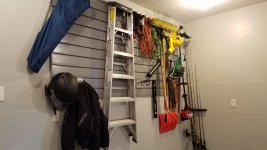
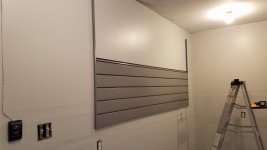
I got the Proslat up today. It's really easy to work with. I had considered going with an 8x8 section, but the 4x8 seems like more than enough.
 

Attachments

  • 20170906_112810.jpg
    20170906_112810.jpg
    148.6 KB · Views: 121
  • 20170906_104522.jpg
    20170906_104522.jpg
    141.1 KB · Views: 111
  • 20170906_100745.jpg
    20170906_100745.jpg
    136.4 KB · Views: 105
  • 20170906_092329.jpg
    20170906_092329.jpg
    140.7 KB · Views: 109
OP
T

testify

Member
Joined
Feb 9, 2014
Messages
15
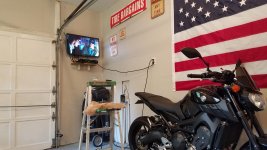
Old Glory is watching over my garage!
 

Attachments

  • 20170906_115700.jpg
    20170906_115700.jpg
    139.3 KB · Views: 51
To avoid these ads, REGISTER NOW!

CombatNinja

Well-known member
Joined
Aug 24, 2013
Messages
1,456
What is that wooden "stage" looking thing at the back of your garage? It looks like it is some weird solution to the problem of adding stairs in front of the door. Did you consider removing that, it looks like it eats up precious floor space.
 

-Brent-

Well-known member
Joined
Dec 23, 2009
Messages
4,709
Location
Utah
That slat wall looks nice. I was wondering how they were mounted. What's your opinion of it, so far?

What's curious to me is why would they put the electric meter inside the garage?
 
OP
T

testify

Member
Joined
Feb 9, 2014
Messages
15
What is that wooden "stage" looking thing at the back of your garage? It looks like it is some weird solution to the problem of adding stairs in front of the door. Did you consider removing that, it looks like it eats up precious floor space.

Your guess is as good as mine. It was there when I moved in 20 years ago. I had assumed it was for a washer and dryer or something, although there are no water connections there, so in hindsight, that's probably not it. I had a big freezer there for a while.

I've definitely considered removing it, and it definitely eats up a ton of floor space. I was even considering just removing the section where it steps down a few inches and leaving the section that is in front of the door. Just t9 get a little extra room length wise for the cars. Luckily I'm hooked on lighter is faster philosophy, so all my cars are pretty small.

In the end I just decided to leave it to make the job quick and easy. It would have required installing new drywall where it was removed, etc.

That slat wall looks nice. I was wondering how they were mounted. What's your opinion of it, so far?

What's curious to me is why would they put the electric meter inside the garage?

I like the Slatwall a lot so far. I don't think it's ideal for a lot of tool, regular pegboard is still more versatile for that, but for the household stuff it's great. Definitely very strong.

Your guess is as good as mine with the meter. I'm considering it a blessing though because I want to install a 240v electric heater in that corner shortly, so that should make the job super easy.
 
OP
T

testify

Member
Joined
Feb 9, 2014
Messages
15
I bought thus TV on sale for $99 today. With the wall mount and tax I was out of there for under $130. Not bad!

I'm not sure what I'm going to do for a shelf for the cable box. The one that's there is just something I quickly zipped together with scrap.

I'm planning to add a Hunsky 46" 9 drawer next to the compressor, and a 12 outlet power strip bolted to the wall behind it. That should clean up the mess of wires and keep outlets available.
 

Attachments

  • 20170907_152952.jpg
    20170907_152952.jpg
    146.5 KB · Views: 91
OP
T

testify

Member
Joined
Feb 9, 2014
Messages
15
The 46" Husky toolbox I ordered arrived today.

Unfortunately it was dented (from the inside), and the key only unlocks half of the drawers. I could probably mess with it and get it open and working, but I'm not going to. I'm just going to return it and think about getting something else.

So, yeah, stay away from the Husky toolboxes.
 
OP
T

testify

Member
Joined
Feb 9, 2014
Messages
15
Thanks for the kind words everyone.

I returned the Husky toolbox that was defective and got a functioning one. I weighed my options since these things are really cheaply built, but I really wanted black, I really like the wood top, the optional pegboard, and you just can't beat the price.

I think I'm done in here for now.

Time to start building cars!

And I have started cleaning out my basement in order to give it a matching treatment, so there will surely be more to come.
 

Attachments

  • 20170912_173748.jpg
    20170912_173748.jpg
    149.7 KB · Views: 56
OP
T

testify

Member
Joined
Feb 9, 2014
Messages
15
Finished my first car project in my new garage.

Nice little refresh on the BMW!
 

Attachments

  • 20171006_135441.jpg
    20171006_135441.jpg
    148.6 KB · Views: 64
  • 20171017_130649.jpg
    20171017_130649.jpg
    150.9 KB · Views: 62
  • 20170929_142544.jpg
    20170929_142544.jpg
    149.9 KB · Views: 65
To avoid these ads, REGISTER NOW!
Top Bottom